Guest Post by Kim of Pepo Park
Using water soluble paper and melt and pour soap, you can dress up plain bath bombs to indicate scent or to personalize them for the recipient. These bath bombs have been personalized with robots for some young boys. Check out a basic bath bomb recipe from the Teach Soap Web site. There are several others on the site that will also work for this project.
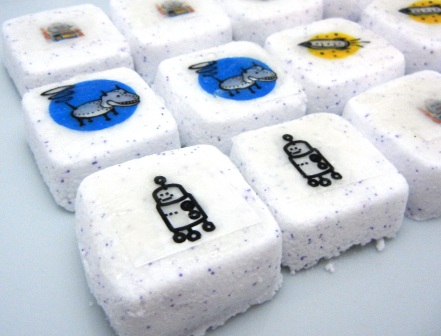
Ingredients
1 part Citric Acid
2 Parts Baking Soda
Witch Hazel in spray bottle
Small paint brush
Optional: Labomb Colorants (specifically designed for bath bombs) and Jojoba Beads.
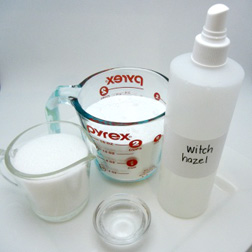
Making the bath bombs
1. Measure the citric acid and baking soda. For this recipe, I’m using: 1 c. citric acid, 2 c. baking soda. Add them to a bowl that’s large enough to give you some room to work. Next, mix the citric acid and baking soda together really well. If you don’t mix the ingredients together really well, the bath bombs will be grainy.
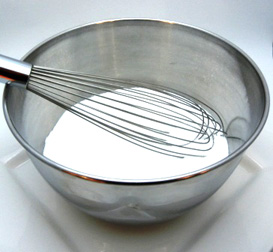
2. Add the color, if desired. Since the paper is white and bath bombs are white, adding color will help the cut-out stand out. If you want the image to be the focus rather than the paper it’s on, don’t color the bath bombs. I added 1/2 tsp. of jojoba beads to subtly indicate the fragrance. To color bath bombs, dry pigments or colors designed for bath bombs work best. Start with 1/8 tsp. — you don’t need much to get a nice color. Blend the color into the mixture.
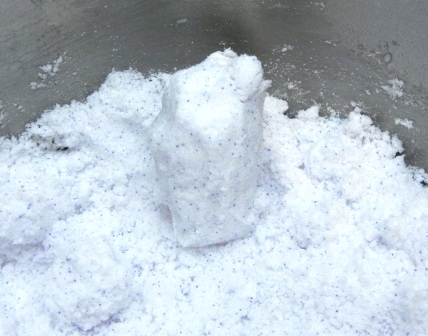
3. Add the fragrance. The amount you add will depend on what smells good to you. I added: 1 tbsp. of lavender essential oil. Mix it in.
4. While stirring with one hand, lightly spritz the mixture with the witch hazel. If you spray too much in one area, you’ll see the fizz reaction that also happens when the bath bomb hits water.
5. Every few spritzes, take a handful of the mixture and squish it. Once it sticks together, it’s time to put it into the mold.
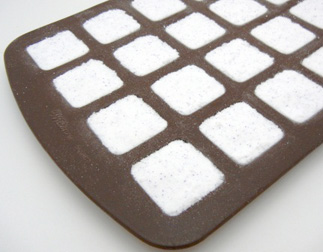
6. Pack the mixture into the molds quickly. I used a silicone bite-sized brownie mold. The more dense the bath bomb, the more durable it will be.
7. Remove the bombs from the mold when they feel crusty and leave them to air dry for several hours. While they dry, prep your images.
Preparing your images
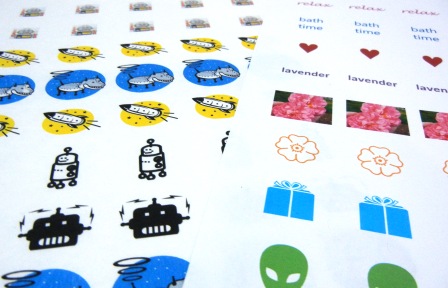
This batch for two young boys, so I’ve chosen robots and space ships. I found clip art in Microsoft Word, placed the images into a document and printed them out on Bramble Berry’s water soluble paper using my laser or inkjet printer. If you don’t have a printer, take your image file and your water soluble paper to the local copy shop. Once you have a print out, cut the images into a size that will fit nicely onto your bath bombs.
Adhering your images
1. Melt a small amount of clear melt and pour soap. 1–2 oz. clear melt and pour soap base.
2. Brush some melted soap onto the flat surface of your bath bomb. This gives the image something to stick to.
3. Place your image on the soap.
4. Brush over your image with more melted soap.
Want to see more fun bath bomb projects? Check out Mondo Bath Bombs OR Bath Bomb Cupcakes on Soap Queen TV!

Thanks for the info on adding clip art etc to bath bombs. So cute!!!
Hi Lori!
Aren’t they just the cutest? If you get a chance to make these, we’d love to see how they turn out for you. You can share any pictures that you get on Bramble Berry’s Facebook page. 🙂
Happy Bath Bomb Making!
-Becky with Bramble Berry
https://www.facebook.com/BrambleBerry
They are so cute. Thanks for sharing!
Cheers!
Cody Wellard
Hi, thanks for sharing, I would like to contribute another tips on How To Making Your Own Cold Process Bubble Bath Base. Check out here:
http://bubblebathsecrets.com/making-your-own-cold-process-bubble-bath-base/
Enjoy,
Bubble Bath Secrets
GREAT POST AM!!!!
Thanks for sharing. I have a question: if a can not find witch hazel, what should I use instead?
Thanks in advance!!!
Claudia E
Monterrey, Mexico
All the credit goes to Kim from Pepe Park. We must thank her for a fabulous guest post =)
Witch hazel is idea for making bath bombs, but if you don’t have any, try adding a little bit of olive or sweet almond oil to give it the moisture that it needs to stick together.
Courtney from Bramble Berry
Yes Courtney, you´re right, my mistake. Sorry. Again:
THANKS KIM FOR THIS BEAUTIFUL POST!!!!
And thank you Courtney for the response :D.
Hugs.
Claudia
Wow! Anne Marie 🙂 I’m a new soap maker…just made a cold process soap a couple days ago that turned out terrific!! This idea is just amazing…AND cute! Thanks,
Michelle
Congrats on your first batch of cold process soap! Woohoo!
Courtney from Bramble Berry
Thanks Courtney!! Super excited…it turned out quite creamy and even!!
What a cute idea, Kim! Thanks for sharing!