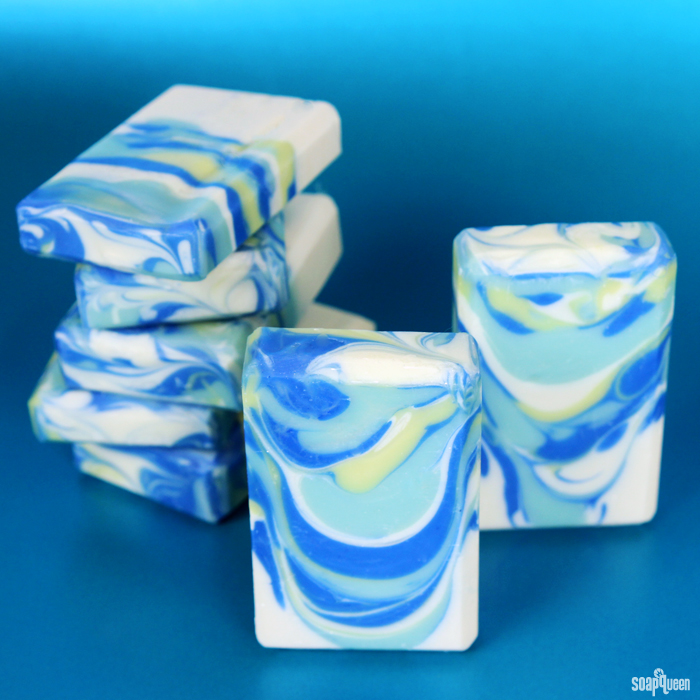
The Pacific Northwest experiences its fair share of rainfall. While the abundant precipitation can limit outdoor activities, it keeps the air fresh and the landscape lush. This Blue Rain Drop Swirl Cold Process is inspired by the current rainy season. The drop swirl technique gives the illusion of water and the crisp Ocean Rain Fragrance Oil smells like fresh rainfall.
This project uses the new Tall Narrow Wood Loaf Mold. This sturdy mold produces tall bars of soap which allows for a dramatic swirl effect. Before using this mold, don’t forget to line it! Lining a mold can be a little tricky at first, but is easy once you get the hang of it. This blog post shows you how to line any mold, step by step.
What You’ll Need:
39 oz. Swirl Recipe Quick Mix
5.4 oz. Sodium Hydroxide Lye
12.9 oz. Distilled Water
Ocean Rain Fragrance Oil
Titanium Dioxide
Fizzy Lemonade Colorant
Neon Blue Raspberry Colorant
Ultramarine Blue Oxide
Tall Narrow Wood Loaf Mold
Optional: Easy Pour and Measuring Containers (4)
 Click here to add everything you need for this project to your Bramble Berry shopping cart! Don’t want to use a swirl mix and want to create your own recipe? Make sure you have at least 60% liquid oils in the recipe to ensure you have enough time to get that swirl to really work well. Tips for creating your own recipe here.
If you’ve never made Cold Process soap before, stop here! I highly recommend checking out our FREE four part SoapQueen.tv series on Cold Process Soapmaking, especially the episode on lye safety. And if you’d rather do some reading, Bramble Berry carries a wide range of books on the topic, including my newest book, Soap Crafting. You can also checkout the digital downloads for that instant gratification factor.
SAFETY FIRST: Suit up for safe handling practices! That means goggles, gloves and long sleeves. Make sure kids, pets, and other distractions and tripping hazards are out of the house or don’t have access to your soaping space. Always soap in a well-ventilated area.
COLOR PREP: To ensure that the Titanium Dioxide blends smoothly into the soap batter, we recommend micronizing it before dispersing it in oil. Please note this is an optional tip but it does help with the titanium dioxide clumping in the soap =) To micronize colorant, simply use a coffee grinder to blend the colorant to break up any clumps of color and prevent streaks of white from showing in the final soap. We like to use a coffee grinder that has a removable, stainless steel mixing area for easy cleaning. Then, disperse 2 teaspoons of the colorant into 2 tablespoon of sunflower or sweet almond oil (or any other liquid oil). Finally, disperse 1 teaspoon Fizzy Lemonade Colorant, Ultramarine Blue Oxide and Neon Blue Raspberry Colorant into 1 tablespoon of light liquid oil. Use a mini mixer to get the clumps of color worked out smoothly.
ONE: Slowly and carefully add the lye to the water and gently stir until the lye has fully dissolved and the liquid is clear. Set aside to cool.
TWO: Fully melt the Swirl Recipe Quick Mix and pour into a large bowl that holds at least 58 oz. Once the lye water and the oils have cooled to 130 degrees or below (and are ideally within 10 degrees of each other), add the lye water to the oils and stick blend until thin trace. If you’d like a harder bar of soap that releases faster from the mold, you can add sodium lactate to the cooled lye water. Use 1 teaspoon of sodium lactate per pound of oils in the recipe. For this recipe, you’d add about 3 tsp. sodium lactate.
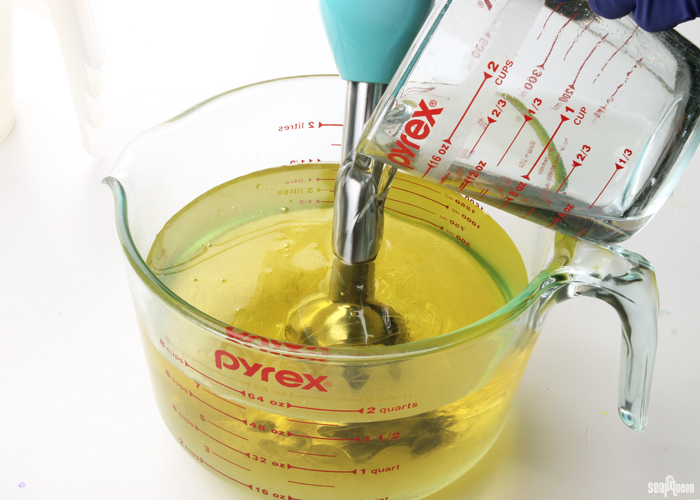
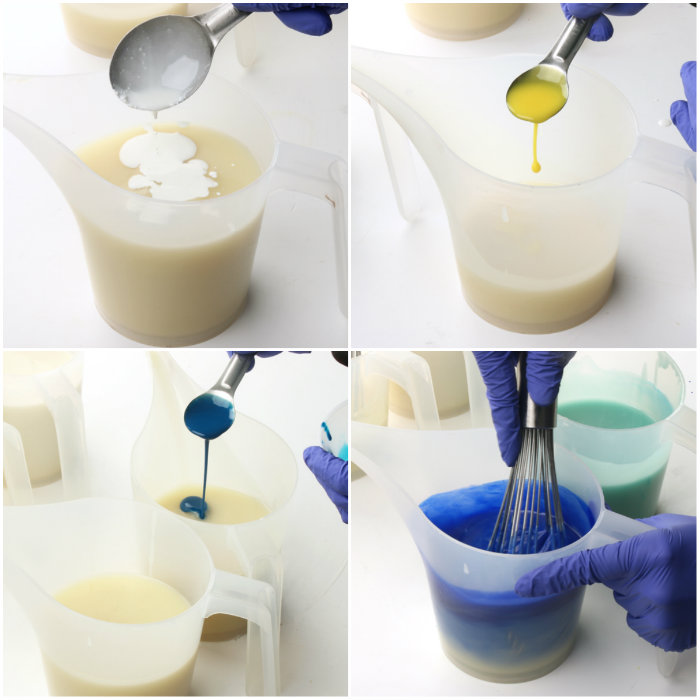
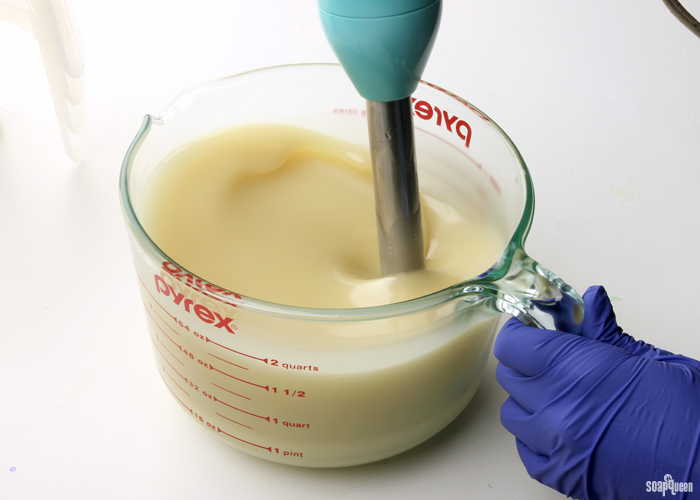 TWO: Once you’ve reached a thin trace, split the batter into two containers of about 500 mL, one container of 600 mL and one small container of about 200 mL. To these containers, whisk in the dispersed colorants using the amounts below.
- Container A (600 mL): All dispersed Titanium Dioxide
- Container B (500 mL): All dispersed Ultramarine Blue Pigment
- Container C (500 mL): 1 tsp. Neon Blue Raspberry Colorant
- Container D (200 mL): 2 tsp. Fizzy Lemonade Colorant
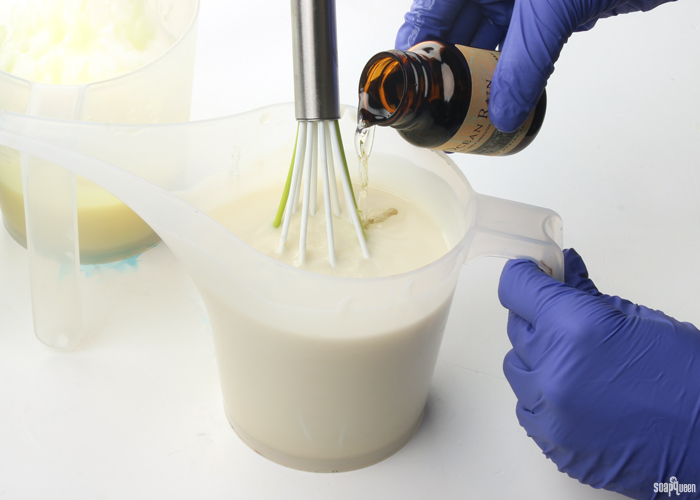
 THREE: To the four containers, add the 2 ounces of Ocean Rain Fragrance Oil proportionally. It’s okay to eyeball it! Use a whisk to fully blend in the fragrance oil.
 FOUR: Pour about half of the white soap into the mold. Firmly tap the mold on the counter to release any bubbles.
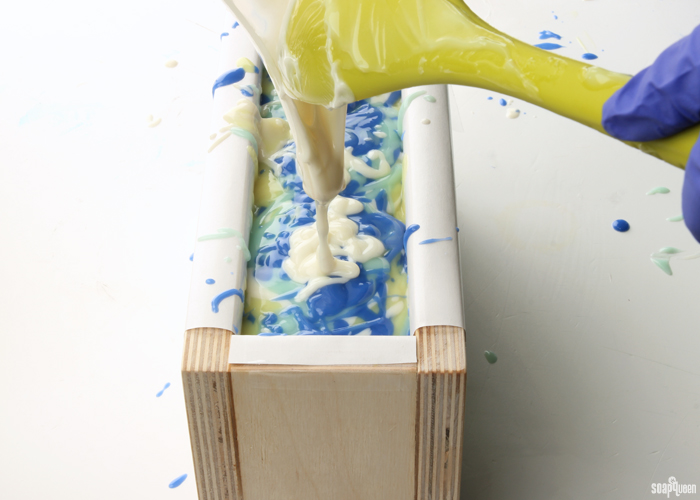
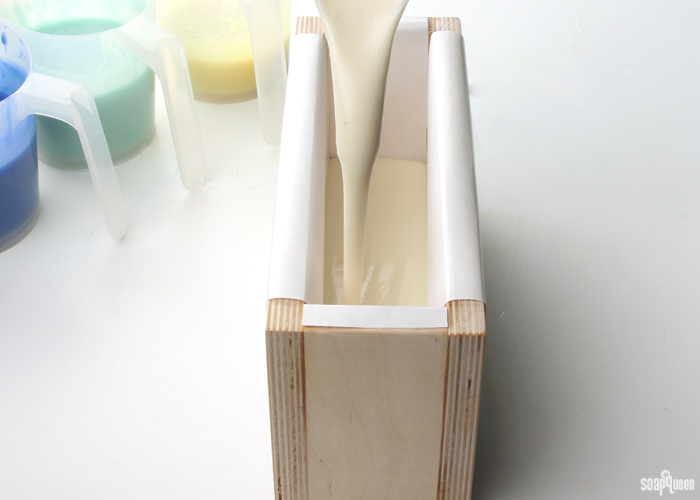 FIVE: Pour the dark blue soap into the center of the mold. Pour from about 10 inches above the mold; this helps the blue soap to drop to the bottom of the white soap, rather than sitting on top and creating layers.
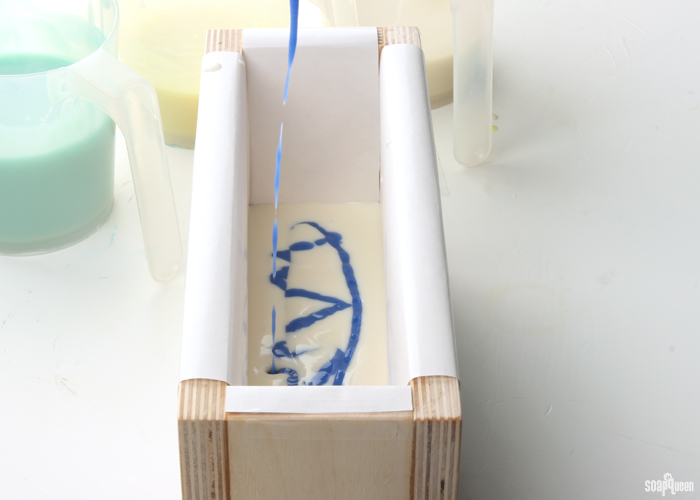 SIX: Continue pouring the soap from above the mold, using the light blue, yellow, white and dark blue soap. Pour enough of each color to ensure you can pour all colors at least three times. Save a small amount of the white soap for the top. Continue to pour from various heights to help the colors reach various depths. Don’t worry about being too precise when you are dropping in the colors. As you pour, the soap will begin to thicken. Don’t worry! Just keep pouring from high above the mold to ensure you don’t end up with layers. If it gets too thick, give it a quick whisk to help loosen up the batter.
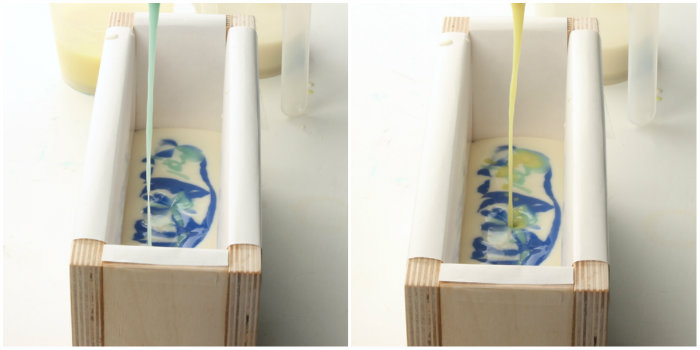
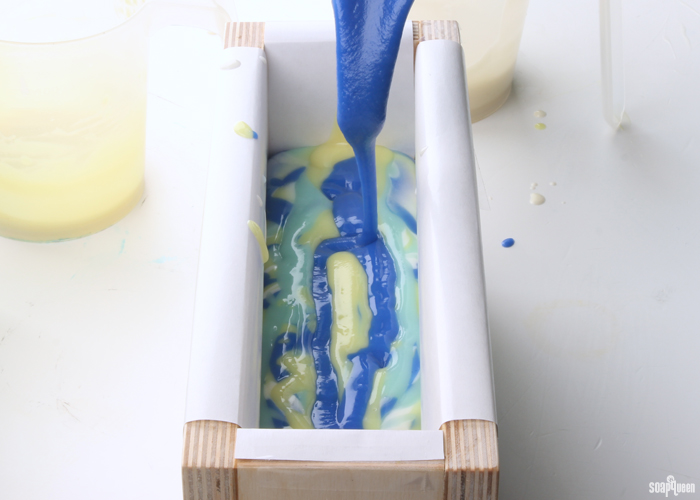 SEVEN: Once you have poured all the soap into the mold, pour the small amount of the saved white soap on top. Tap the mold firmly on the counter to release any bubbles.
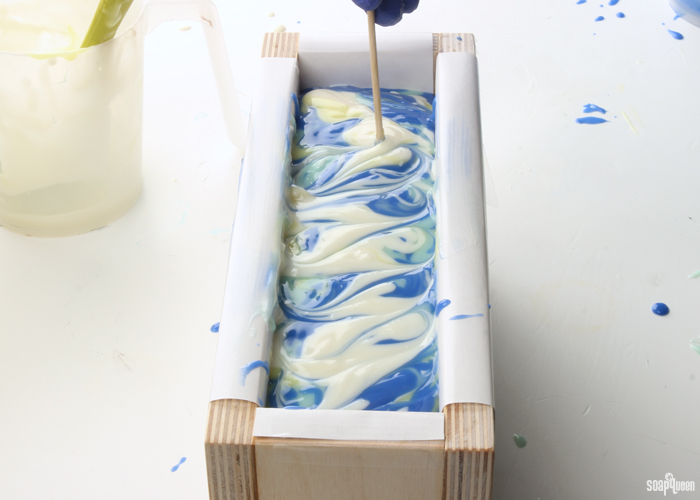
 EIGHT: Insert a chopstick or dowel into the very top of the soap, and swirl in a S-shaped curve width-wise down the mold. Spray the top with 99% isopropyl alcohol, and place the lid on to help insulate. Allow the soap to sit with the lid on for at least 24 hours to insulate the soap and make the colors pop. You can read more about that in the Jazzed About Gel Phase post. Allow to sit in the mold for 48-72 hours. To remove, slide the bottom of the mold out and allow the soap to drop out. Remove the liner, cut and enjoy!
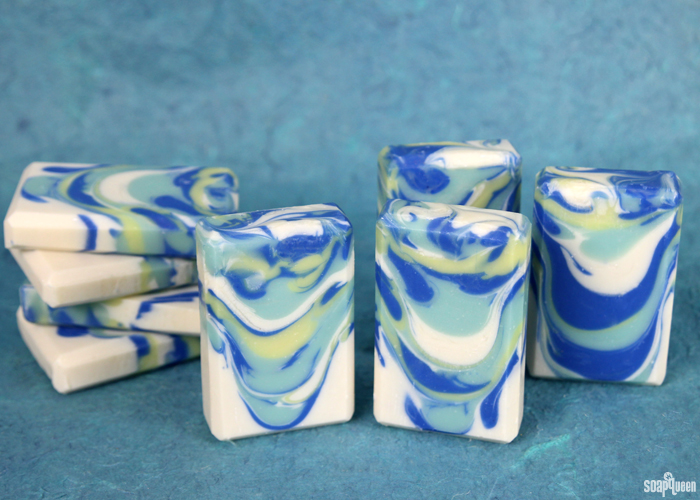
What are your favorite rainy day activities? I love curling up with a good book, and of course…making soap!
- 39 oz. Swirl Recipe Quick Mix
- 5.4 oz. Sodium Hydroxide Lye
- 12.9 oz. Distilled Water
- Ocean Rain Fragrance Oil
- Titanium Dioxide
- Fizzy Lemonade Colorant
- Neon Blue Raspberry Colorant
- Ultramarine Blue Oxide
- Tall Narrow Wood Loaf Mold
- Optional: Easy Pour and Measuring Containers (4)
- Slowly and carefully add the lye to the water and gently stir until the lye has fully dissolved and the liquid is clear. Set aside to cool.
- Fully melt the Swirl Recipe Quick Mix and pour into a large bowl that holds at least 58 oz. Once the lye water and the oils have cooled to 130 degrees or below (and are ideally within 10 degrees of each other), add the lye water to the oils and stick blend until thin trace. If you’d like a harder bar of soap that releases faster from the mold, you can add Sodium Lactate to the cooled lye water. Use 1 teaspoon of Sodium Lactate per pound of oils in the recipe. For this recipe, you’d add about 3 tsp. Sodium Lactate.
- Once you’ve reached a thin trace, split the batter into two containers of about 500 mL, one container of 600 mL and one small container of about 200 mL. To these containers, whisk in the dispersed colorants using the amounts below.
Container A (600 mL): All dispersed Titanium Dioxide
Container B (500 mL): All dispersed Ultramarine Blue Pigment
Container C (500 mL): 1 tsp. Neon Blue Raspberry Colorant
Container D (200 mL): 2 tsp. Fizzy Lemonade Colorant - To the four containers, add the two ounces of Ocean Rain Fragrance Oil proportionally. It’s okay to eyeball it! Use a whisk to fully blend in the fragrance oil.
- Pour about half of the white soap into the mold. Firmly tap the mold on the counter to release any bubbles.
- Continue pouring the soap from above the mold, using the light blue, yellow, white and dark blue soap. Pour enough of each color to ensure you can pour all colors at least three times. Save a small amount of the white soap for the top. Continue to pour from various heights to help the colors reach various depths. Don’t worry about being too precise when you are dropping in the colors. As you pour, the soap will begin to thicken. Don’t worry! Just keep pouring from high above the mold to ensure you don’t end up with layers.
- Once you have poured all the soap into the mold, pour the small amount of the saved white soap on top. Tap the mold firmly on the counter to release any bubbles.
- Insert a chopstick or dowel into the very top of the soap, and swirl in a S-shaped curve width-wise down the mold. Spray the top with 99% isopropyl alcohol, and place the lid on to help insulate. Allow the soap to sit with the lid on for at least 24 hours. Allow to sit in the mold for 48-72 hours. To remove, slide the bottom of the mold out and allow the soap to drop out. Remove the liner, cut and enjoy!


I’m new to soaping, actually never made it before. This may be a crazy question but where are the “goat milk” recipes? Do you just do the milk in place of the water? Thanks!
Hi Marissa!
That is correct! Many soapers like to add goat milk because it makes the soap feel creamy and silky. Those recipes can have 100% goat milk in place of water, a mixture of water and goat milk, or goat milk powder. 🙂
We used goat milk in the Goat Milk and Oatmeal Cold Process Soap: http://www.soapqueen.com/bath-and-body-tutorials/cold-process-soap/goat-milk-oatmeal-cold-process-soap-tutorial/
And this video talks more about working with goat milk in soap: http://www.soapqueen.com/bath-and-body-tutorials/cold-process-soap/goat-milk-soap-tutorial-on-soap-queen-tv/
This post is helpful as well: http://www.soapqueen.com/bath-and-body-tutorials/tips-and-tricks/how-to-add-lye-to-milk-for-cold-process-soap/
Also, we have a Goat Milk Melt and Pour Base and a Goat Milk Rebatch! It’s a pretty popular soaping ingredient. 🙂
Goat Milk Melt and Pour: https://www.brambleberry.com/SFIC-Goat-Milk-Melt-And-Pour-P3184.aspx
Goat Milk Rebatch: https://www.brambleberry.com/Grated-Rebatch-Soap-Base-Goat-Milk-P4605.aspx
-Kelsey with Bramble Berry
Just wondering is it possible to incorporate melt and pour veins in cold process soap. I have seen some soapers recently who have used a small amount of melt and pour directly in their cold process pours. But does this usually work? I want to try using a clear melt and pour with silver mica sparingly through a cold process soap, but I assume it isn’t that simple :)? Thanks Amanda
Hi Amanda!
You can definitely use melt and pour in your cold process soap! We have used it for embeds, as seen in this Queen of Hearts Cold Process Soap: http://www.soapqueen.com/bath-and-body-tutorials/cold-process-soap/queen-hearts-cold-process/
We have also swirled melt and pour into cold process soap, as seen in the CP + MP = Magma Soap Tutorial: http://www.soapqueen.com/bath-and-body-tutorials/cold-process-soap/cp-mp-magma-soap/
The trick is to use our LCP (like cold process) bases. They have less glycerin, meaning they have little to no sweating. Also, you’ll want to store your soap at room temperature (or in the freezer or fridge) after it’s in the mold. That way it won’t get too hot and melt the soap inside.
LCP bases: https://www.brambleberry.com/Search.aspx?k=lcp
Have fun and let us know how it goes!
-Kelsey with Bramble Berry
I made this soap about 2 hours ago and notice that the center is discoloring- but the sides are still nice. Is this a normal saponification process or is something else going on? This is my first attempt at a cold process soap. Please help!
Hi Kathy!
I’m wondering if your soap is going through gel phase. During gel phase, the soap gets very hot and gelatinous. It doesn’t affect the final bars though, it’s just an aesthetic thing. It can actually make the colors in your soap a little brighter! Some soapers actually prefer it. 🙂
You can learn more about gel phase in the Jazzed About Gel Phase post: http://www.soapqueen.com/bath-and-body-tutorials/tips-and-tricks/gel-phase/
-Kelsey with Bramble Berry
Thanks Kelsey, The soap looks fine now!
That’s awesome! Glad to hear that. 🙂
-Kelsey with Bramble Berry
I’m new to soap making and have made about ten batches of CP watching your fabulous tutorials! I tried to make the Blue Rain Drop Swirl today and it got thick so fast that it was hard to pour. I’m wondering if I went past thin trace so by the time I had divided it up, added the colorants, it was already super thick. I’d love some feedback as I don’t have anyone locally to help me. Thanks!
Hi Ellen!
So glad you like the tutorials! With this recipe, Ocean Rain Fragrance Oil can accelerate a bit.
To help slow this down, take 1 oz. (basically equal amounts of fragrance oil to fixed oil) liquid oil out of your recipe and heat it up to 100 degrees. Then, add your fragrance into this oil. This simply dilutes the fragrance oil’s initial acceleration. You can also add the oil/fragrance mixture earlier than usual. Rather than adding the fragrance at a thick trace, you can add it at the first sign of thin trace. Always hand stir the fragrance/oil mixture in with a fork/ladle and never, ever use a hand blender for problem oils. Lastly, raise your temperatures to about 110 to 115 degrees. This will help to keep your mixture more liquid than at a lower temperature.
That should give you a bit more time to work with the recipe. 🙂
Also, stick blending the recipe until it’s just incorporated will give you a bit more time as well. With this recipe, it takes about 30-60 seconds of stick blending and manual stirring for a thin trace. Read more in the All About the Trace post: http://www.soapqueen.com/bath-and-body-tutorials/tips-and-tricks/trace/
-Kelsey with Bramble Berry
This soap is beautiful. Can’t wait to try the recipe.
Hi Virginia!
So glad you like the soap! Enjoy making it – the swirls are a lot of fun. 🙂
-Kelsey with Bramble Berry
Lovely soap 🙂
How do you avoid td crackle/glycerin rivers
I seem to get them all the time
Do you gel or is it to do with how much td you use?
Many thanks
Hi Lin!
Glycerin rivers typically form when the soap gets very hot. This is especially the case when you’re using Titanium Dioxide. To avoid glycerin rivers, you can soap at lower temperatures, around 100F for your oils and lye. Popping your soap in the freezer after it’s in the mold will help as well. 🙂
You can read more tips in the River Runs Deep: Explanation of Glycerin Rivers post: http://www.soapqueen.com/bath-and-body-tutorials/tips-and-tricks/river-runs-deep-explanation-glycerin-rivers/
-Kelsey with Bramble Berry
Is the only difference between the tiger stripe swirl and the drop swirl the height at which the soap is poured (and more randomness as to placement of the colors)?
Pretty much, Vicki. You still want the soap to be thin, and you vary the height and location of the pour for Drop swirls. In tiger stripes you try to get the pour in a line along the middle of the mold and it’s nice if the soap is very fluid, though I’ve found it still works if it’s only a little thicker.
Hi Vicki!
Margaret is correct (thanks Margaret)! The drop swirl has more random pours from higher up. That helps the soap break through the layers and create the fun design inside. 🙂
-Kelsey with Bramble Berry