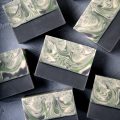
This beautiful Butterfly Swirl is inspired by the nonpareil paper marbling of old (not sure what a nonpareil pattern looks like? Check out the beautiful handmade paper that inspired this tutorial for a good example!). Four different tones create dynamic complex and rich patterns both on top of the soap and within the bars themselves. It is the perfect recipe for giving these new swirl tools a whirl.

What You’ll Need:
24 oz. Canola Oil
16 oz. Coconut Oil
4 oz. Hemp Seed Oil (refined)
4 oz. Mango Butter
20 oz. Palm Oil
12 oz. Rice Bran Oil
10.9 oz. Sodium Hydroxide
26.4 oz. Distilled Water
3.8 oz. Lychee Red Tea
1.2 oz. Peppermint Essential Oil, 2nd Distill
Titanium Dioxide
Aqua Pearl Mica
Activated Charcoal Powder
Fired Up Fuchsia Pigment
Ultramarine Violet Oxide
18 Bar Birchwood Mold
Liner for 18 Bar Mold
Comb Swirl Tool
Click here to add everything you need for this project to your Bramble Berry shopping cart!
If you’ve never made Cold Process soap before, stop here! I highly recommend checking out our FREE four part SoapQueen.tv series on Cold Process Soapmaking, especially the episode on lye safety. And if you’d rather do some reading, Bramble Berry carries a wide range of books on the topic, including my newest book, Soap Crafting. You can also checkout the digital downloads for that instant gratification factor.
SAFETY FIRST: Suit up for safe handling practices! That means goggles, gloves and long sleeves. Make sure kids, pets, and other distractions and tripping hazards are out of the house or don’t have access to your soaping space. Always soap in a well-ventilated area.
COLOR PREP: Disperse 1 teaspoon of Aqua Pearl, Activated Charcoal, Fired Up Fuchsia and Ultramarine Violet into 1 tablespoon of liquid oil (we like Sweet Almond or Sunflower oils). Disperse two teaspoons of Titanium Dioxide in 2 tablespoons of liquid oil. Prepping your colors in the beginning will allow you to work quickly and give you more time to work with your soap. Use the mini mixer to get all those clumps worked out smoothly.
FRAGRANCE BLEND: In a glass container, combine the Lychee Red Tea Fragrance Oil and the Peppermint 2nd Distilled Essential Oil. Give the mixture a good stir and then set it aside.
ONE: Slowly and carefully add the lye to the water, and stir until clear. Set aside to cool. If you’d like a harder bar of soap that lasts longer in the shower, you can add Sodium Lactate to the cooled lye water. Use 1 teaspoon of Sodium Lactate per pound of oils in the recipe.
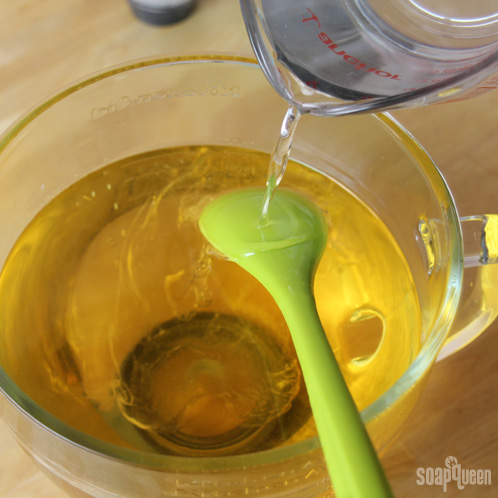
TWO: Melt and combine the Canola, Coconut, Hempseed, Mango, Palm and Rice Bran oils in a large glass container. Once the lye water and the oils have cooled to 130 degrees or below (and are ideally within 10 degrees of each other), add the lye water to the oils and stick blend until thin trace.
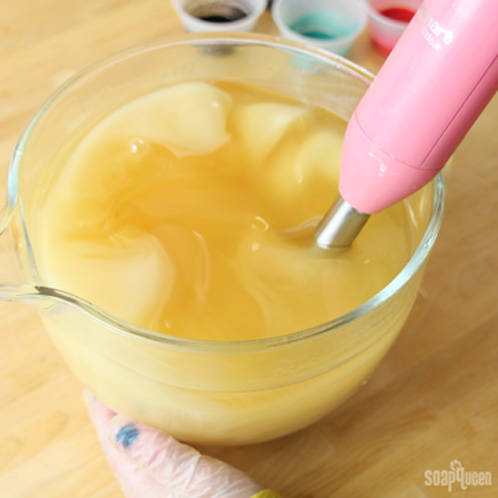
THREE: Equally split the batter into 5 containers. Then use a wire whisk or spatula to stir in one colorant per container at the following rate:
• ½ teaspoon dispersed Titanium Dioxide and 1 teaspoon dispersed Aqua Pearl
• ½ teaspoon dispersed Activated Charcoal and 1 teaspoon Titanium Dioxide
• 1½ teaspoon dispersed Titanium Dioxide
• 1½ teaspoon dispersed Fired Up Fuschia and 1 teaspoon dispersed Titanium Dioxide
• 2 teaspoons dispersed Ultramarine Violet

FOUR: Once you’ve fully incorporated the colorant, split the fragrance blend between the five containers and mix with a whisk or spoon.
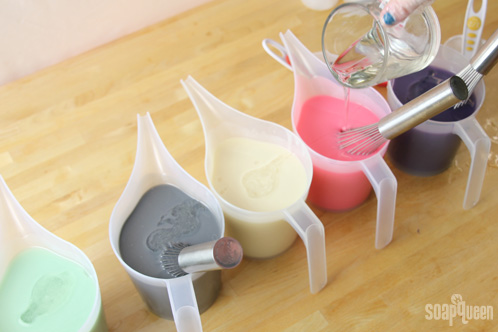
FIVE: Once the fragrance has been fully incorporated, pour each color into its own condiment bottle. Fill each bottle about halfway (6 oz.) full.

SIX: Beginning in the bottom left-hand corner of the mold, pour about half of the remaining color in your mixing containers in a diagonal zigzag motion. Repeat this pattern with each color, layering one color on top of another and keeping the same order.
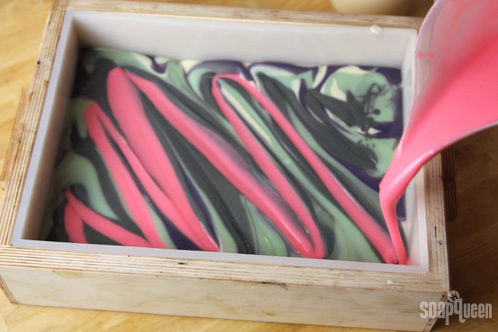
SEVEN: When you have used about half the soap in all five containers, change your pour pattern. Begin at the far left hand corner and pour the soap in the same diagonal zigzag pattern across the mold to the near right hand corner. Repeat this process until all the soap in the containers is gone.
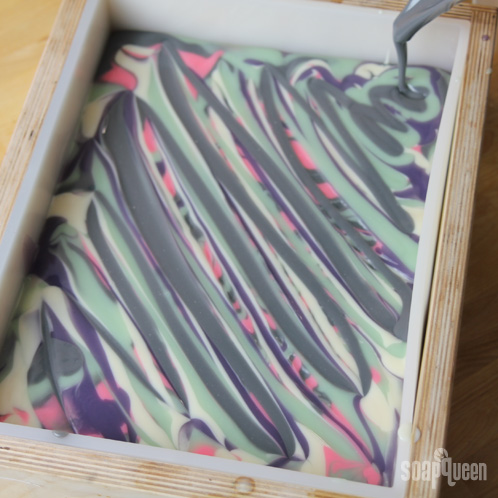
EIGHT: Insert a chopstick or dowel into the soap beginning in the near left hand corner. Drag the tool in a diagonal zigzag pattern to the far right hand corner.
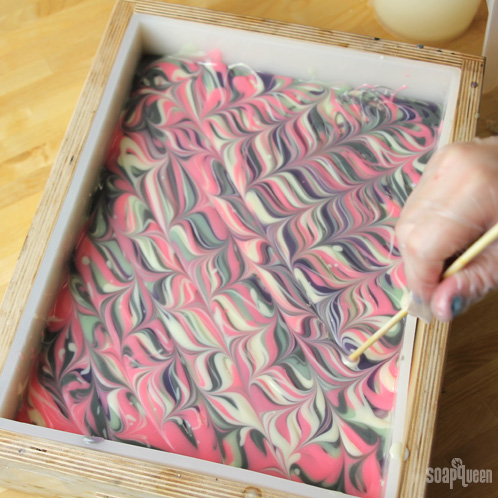
NINE: Using the condiment bottles, squirt each color vertically across the mold. Repeat this pattern layering colors on top of each other in the same order until you have about 2 oz. of soap in the bottles.
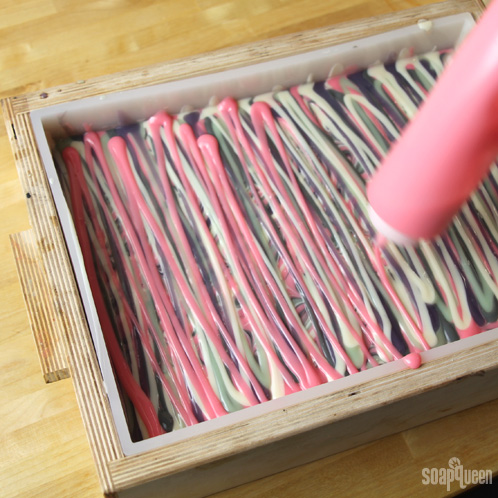
TEN: When you have about 2 oz. left in your bottles, start making your lines more purposeful. Carefully lay down lines of thick color, working your way from one end of the mold to the other. Space your color lines about an inch apart.
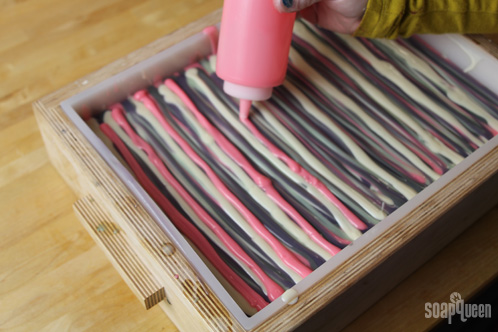
TEN: Using a chopstick or dowel again, start in the far left-hand corner and make a diagonal zig-zag across the mold to the lower left-hand corner. And then, back again.
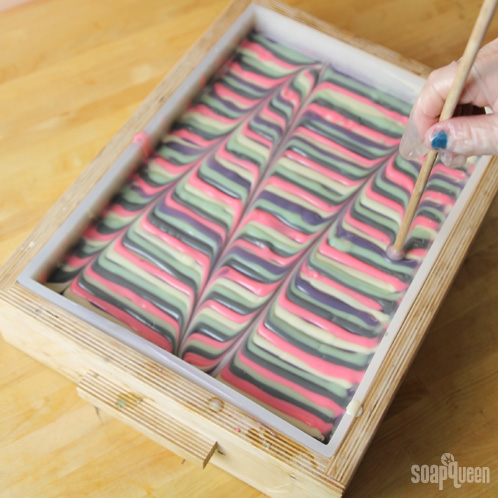
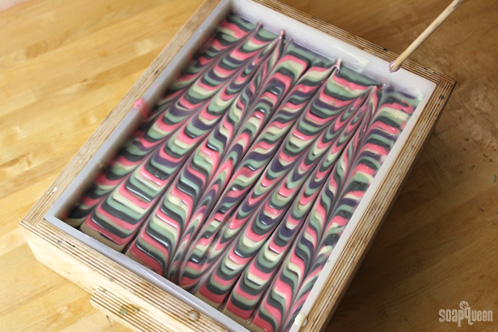
ELEVEN: Drag the Comb Swirl Tool in a slow and smooth motion from the top of the mold to the bottom. Lift it straight up out of the soap, and the design is done!
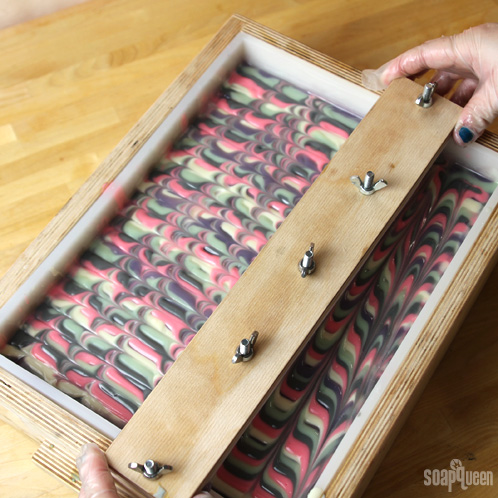
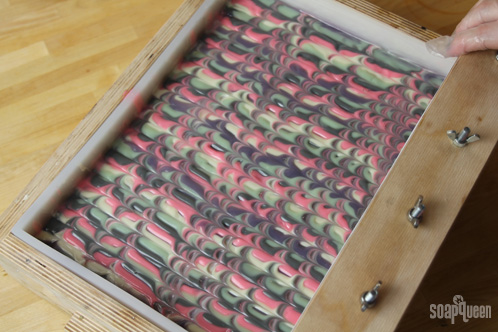
Spray the entire top with 91 or 99% Isopropyl Alcohol to reduce soda ash. Cover and insulate for 24 hours and unmold after 3-4 days, and allow to cure for 4-6 weeks.


Wow, nice. This design in layered soap is beautiful. I’m sure it took a little time to achieve this but its worth it if you want this type of swirl . Great job.
This soap is beautiful. I’m a little confused about the pouring pattern. Could you explain that in greater detail? Thanks…Peg
Hi Peggy!
In order to achieve this pattern, mix the colorants as shown and place into pouring containers/squirt bottles. Once this is done, take the mixing containers and starting from the lower corner, pour about half the color in a diagonal pattern. Once your colors are half gone, do the same thing in the opposite direction.
Take you chopsticks and drag it diagonally in the same direction you just poured. Then, take the squirt bottles and make lines vertically in your mold. Once your color is almost done, make more precise lines.
Using a chopstick again, start in the far left-hand corner and make a diagonal zig-zag across the mold to the lower left-hand corner. And then, back again. Using the Comb Swirl tool, pull from the top to the bottom of the mold.
I hope that helps! If you have a more specific question about a certain step, let me know!
-Amanda with Bramble Berry
Hi becky i would like to ask you for the different supplies for making different soap products for a soap project in school where we have to make an actual advertisement and sell it to people in school. the audience we were targeting is teen girl so do you have any recipes of soap targeting teen girls or items that teen girsl like? If you do thats great. Thanks for the support!
Hi Mikaela!
If you are looking for some fun teen-type soap and bath & body recipes, here are some that I would suggest checking out:
Sparkle Power Bath Bomb Tutorial: http://www.soapqueen.com/bath-and-body-tutorials/bath-fizzies/sparkle-power-bath-bomb-tutorial/
Domino Lip Balm: http://www.soapqueen.com/bath-and-body-tutorials/lip-products/domino-lip-balm/
How to Frost the Perfect Bath Fizzy Cupcake: http://www.soapqueen.com/bath-and-body-tutorials/bath-fizzies/how-to-frost-the-perfect-bath-fizzy-cupcake-video/
Violet Glitter Gradient (Tutorial): http://www.soapqueen.com/bath-and-body-tutorials/melt-and-pour-soap/violet-glitter-gradient-tutorial/
Perfect Party Favors: A Melt & Pour Tutorial: http://www.soapqueen.com/bath-and-body-tutorials/melt-and-pour-soap/perfect-party-favors-a-melt-pour-tutorial/
3D Psychedelic Double Pour Swirl: http://www.soapqueen.com/bath-and-body-tutorials/melt-and-pour-soap/3d-psychedelic-double-pour-swirl/
Coconut Oil & Pink Salt Scrub: http://www.soapqueen.com/bath-and-body-tutorials/soaks-and-scrubs/coconut-oil-pink-salt-scrub/
I hope this helps! Let us know how your soapy creations turn out. =)
-Becky with Bramble BErry
t’s fantastic, I love this technique, I love these soft colors. Thanks for sharing
Hi Mónica!
We are so glad you like this technique as much as we do. If you get a chance to try it out, let us know how it turns out for you.
Happy Soaping!
-Becky with Bramble Berry
Lovely! I love getting inspiration from handmade paper, it’s so beautiful and the color combinations are a great color help. One question, where did you get those great pouring containers with the long spout? They would be wonderful to have for filling bottles and pouring into molds!
Hi Leilani!
Isn’t it the greatest? You can find inspiration for soaping in almost anything! You can actually find those pouring containers with the long spouts on Bramble Berry’s website here:
Easy Pour Mixing and Measuring Container: https://www.brambleberry.com/Easy-Pour-Mixing-and-Measuring-Container-P5428.aspx
I hope that this helps! If you get to try out this project be sure to let us know how it turns out. =)
Happy Soaping!
-Becky with Bramble Berry
I have ordered the kit to make the shampoo and conditioner and would like to know how much conditioner I can make with the kit? Are the directions included in the kit?
Hi Sally!
Like most of our Soap Queen kits, the directions are not going to be included in the box unless specified on the website. If you would like to learn more about how to make your own shampoo and conditioner, you can check out the Soap Queen TV episode that goes with that kit. You can find it here:
Tangle Free Soap Queen TV!: http://www.soapqueen.com/bath-and-body-tutorials/tips-and-tricks/tangle-free-soap-queen-tv-2/
With this kit, you will be able to make at least 10 ounces of shampoo and at least 16 ounces of conditioner with leftover ingredients. I hope that this helps! =)
-Becky with Bramble Berry
Wow! That is beautiful! I love how the design is layered into the soap! I have done some swirling, but I’m itching to master this type of complicated swirl!! I have the 9 bar birch wood mold and just wondering if you’re going to make a silicone liner for it? Lining is a pain!! Also want to thank you for doing soaps that are not only gorgeous, but good quality. I just looked at ingredients in soaps and shampoo bars at “SMUSH” no wonder people are twittering about rashes and itchy scalp!!!
Hi Dawnia!
You will just love making this type of swirl and we are here to help you out. We don’t currently have a silicone liner for the 9-bar Birchwood Mold, but I will pass that idea onto our Product Development Team. =)
Happy Soaping!
-Becky with Bramble Berry
Freezer paper can be used for lining molds 🙂