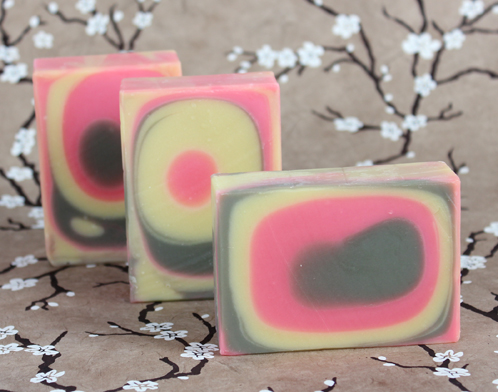
Spring has officially sprung here in Bellingham! Birds are chirping, the sun is shining (for whole hours at a time!) and the plants around the office are perking up. What better way to celebrate the start of spring with this uniquely abstract floral soap? Scented with our super popular Cherry Blossom fragrance oil (on sale this month!), they are made using the faux funnel technique, but with a twist: a vertical mold!
1.5 oz Castor Oil
10.0 oz Coconut Oil
33.5 oz Olive Oil
5.0 oz Palm Oil
6.7 oz Sodium Hydroxide Lye
16.5 oz Distilled Water
3.0 oz Cherry Blossom Fragrance Oil
3 teaspoons Super Pearly White mica
⅛ teaspoon Activated Charcoal
¾ teaspoon Electric Bubble Gum colorant
2 teaspoons Sweet Almond Oil
Get everything you need with the click of a button!
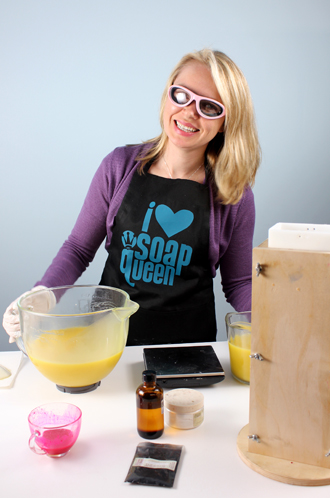
First time making CP? If you have never made cold process soap before, I strongly suggest getting a couple of basic recipes under your belt before diving in, as this is an advanced technique that requires you to move quickly. Check out Soap Queen TV on Cold Process if you want to get started with cold process. It’s a 4 part series that will take you through the basics (and be sure to watch the episode on Lye Safety). Bramble Berry also has some helpful reading tools for you bookworms out there.
Color Prep: Disperse 3/4 teaspoon Electric Bubble Gum colorant in 2 teaspoons Sweet Almond oil using your mini mixer to really get them mixed together well. Saturate your powdered colorant in the oil a bit before turning on the mixer so you don’t create a messy colorant cloud!
Mold Prep (optional): Line the vertical mold with freezer paper, shiny side up. I didn’t line the mold for this project but you certainly can. The dividers fit pretty snug so lining is not completely necessary.
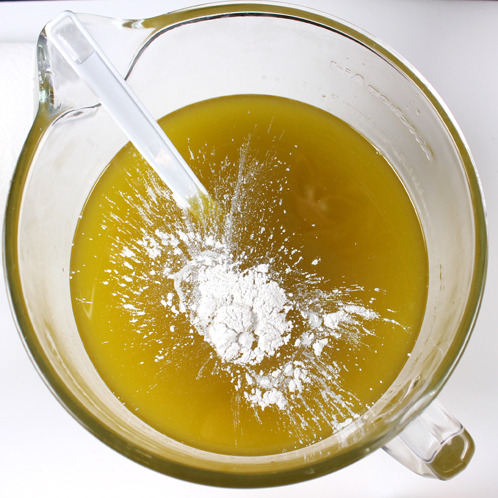
FIVE: Split your batch into 3 equal parts. No need for precision here; you can totally eyeball it.
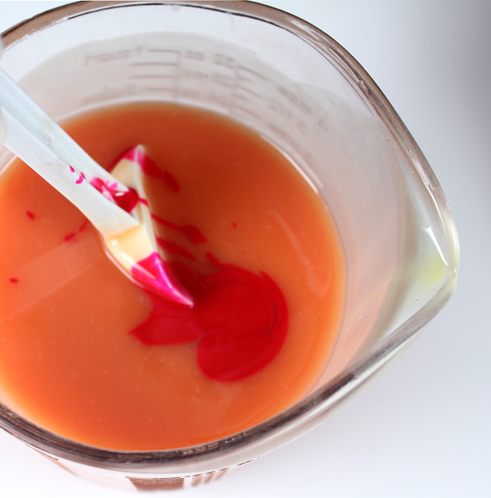
SIX: Color each of your split batches; one with the remaining Super Pearly White, one with 2 teaspoons of dispersed Electric Bubble Gum, and one with 1/8 teaspoon Activated Charcoal. Switch to a whisk for this part, you want the soap to be at about medium trace!
SEVEN: Add 1 ounce of Cherry Blossom fragrance to each of your split batches. You’ll want to use a whisk for this step as well, and again try not to let the soap go past a medium trace.
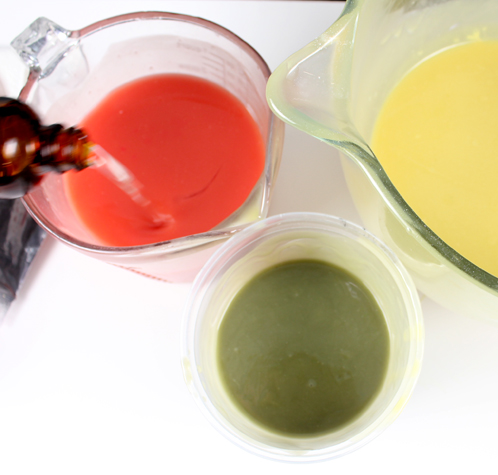
EIGHT: Decide on a color order you like and line up your containers. Starting with your first color, pour a little bit into the mold, then try to hit the center of that soap with your second color, and again with the third.
TIP: In order to get a uniform pour, I counted to three while pouring each color. But you can also try varying the amount of soap you pour each time for a totally different look.
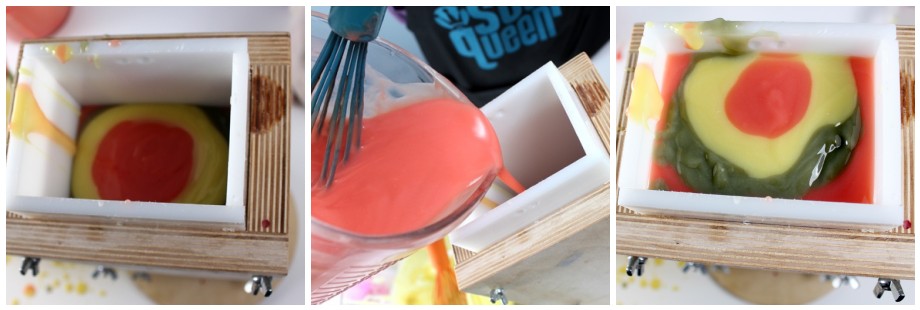
NINE: Repeat step eight alternating your pours until the mold is full. As you can see, this part can get a little messy!
TEN: Let soap sit in mold for 3-4 days before unmolding.
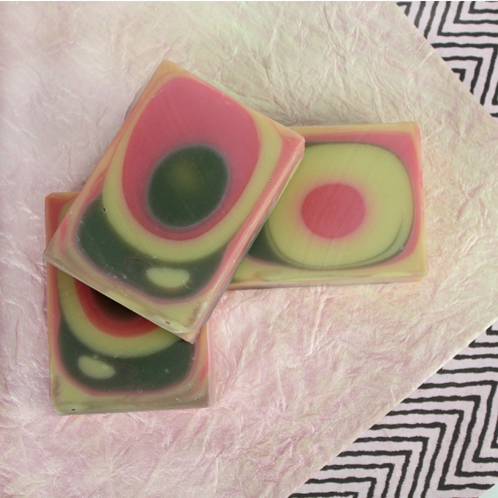
ELEVEN: Unmold soap and cut. Check out the cool looking effect. I’m excited about how trendy it looks (color blocking anyone?) Allow to cure for 4-6 weeks and enjoy!



I was wondering if I don’t have this fragrance can I use another one instead????
Here’s the photo of the soap using your method – take a look at the 3 soaps at the back
http://www.soapmakingforum.com/viewtopic.php?f=16&t=32427
Those look incredible Jane! =) You can also share any of your soapy creations with us on our FB page, we’d love to see them!
https://www.facebook.com/BrambleBerry
~Becky with Bramble Berry
Anne-Marie, thanks so much for this tutorial. I live in England and tried this using a milk carton. I thought it didn’t work as when I was pouring it (had to pour it from a height due to the height of the milk carton) the soap when poured went underneath to near the bottom. It was only when I had filled up the milk carton to halfway that the soap stayed on the surface so I could see what patterns I was creating. Anyway, it came out absolutely fantastic, especially using your crinkle cutter. Thanks again.
wow cool i love it very pretty
From the minute I unmolded my log, I fell in love with this soap. I had already loved the look of funnel pour soap in a standard log mold, but I personally think this style is even better. I can’t wait to try it with other scents and colors. I’m thinking your Fresh Bamboo scent, with charcoal, white, and crome green colors. Can’t wait to try it, I’m addicted to all the vertical mold can do.
Oh I am SO pleased to read this. I LOVE love love the look too. It is so unique and different. The vertical mold gives so many awesome options that are unique and different. Post your cool soaps to our FB page =) I want to see them – facebook.com/brambleberry
these soaps are beautiful . my neighbor & i are just starting to make soap,,, after talking about trying it for about two years. finally 3 small batches last week,,, what fun.
Isn’t it a blast? I love making soap and how fun and creative it is. You should share pictures of your soap on our Facebook page, we’d love to see them! https://www.facebook.com/pages/Bramble-Berry/100412115503
-Becky with Bramble Berry
My story is the same, Susan. I made M&P soaps for a couple years, but wanted to swirl and do some of the techniques specific to CP. I’m cautious, but learned there’s no reason to FEAR using lye as long as you wear protective gear and follow instructions. The tutorials here are such motivators and I’ve always relied on Brambleberry products for M&P and now CP. Be sure to share your soaps online – it’s fun to see how creative everyone is, expecially when you’re just starting out. ~Suzy
Thank you so much for your kind words Suzy! We are so happy to hear that we have helped you out so much!
-Becky with Bramble Berry
I JUST ordered my vertical mold and cannot wait to try this! 🙂 How do you line this type of mold? Thank!
Thank you for your order Michelle! There is an incredible blog post that shows you how to line *any* mold.
http://www.soapqueen.com/bath-and-body-tutorials/cold-process-soap/how-to-line-any-mold/
-Becky with Bramble Berry
I don’t actually line mine – sure, it leaks just a tinch but not enough to bug me enough to line it! =)
Would it work to put the soap batter into those hair color/condiment bottles? Easier to squirt into the molds? Hmmmm…
You can but it creates a very different look since the squirt bottles make very small little plops – still adorable and cute but a different look. =)
Hi – Just curious – whenever you show a new soap technique like this, are the soaps just freshly cut in the picture? Is this how they look before curing? Thanks!!!
It totally depends on the tutorial! For this particular project, these soaps had been curing for about a week before we took the pictures!
-Becky with Bramble Berry
I love the way those soaps look!!! I have got to get a vertical mold…so cool! 🙂
Also loving the look of these bars! I already loved my vertical mold, but now here’s another reason! 🙂
Ruth, I ordered a BB vertical mold and am going to use it for the first time this weekend. Have you found that yours leaked at all? If so, how did you go about lining it? Thanks in advance for any advise !!
Suzy
I’m not Ruth but just popping in to say I don’t line mine – it leaks just a tinch but it’s not a big deal to me AND since I really hate lining molds (who doesn’t?), I’m happy to have a little leakage in exchange for no lining.
Thanks, Anne-Marie! I don’t mind a little leakage either, but it’s nice to know so I’m not caught off guard. I’ll just place the mold on a paper lined baking sheet rather than lining it. I’m attempting this gorgeous soap today and can’t wait to see how it turns out. The waiting has to be the hardest part. ~Suzy
Update : Okay, I get it now. The leakage is inside the wooden mold and on the outside of the plastic liner pieces. If you follow this tutorial, don’t rush the unmolding process. I waited 48 hours and truly thinks a minimum of 72 hours or more is needed. The bottom third is very soft. I’m wondering if all soap made in the vertical mold requires 3-4 days setting time? Also, I recommend halving the amount of electric bubble gum colorant. You can always add, but you can’t subtract! My pink is more of a hot pink and not a light cherry blossom. Same with the fragrance, it’s very strong at 1 ounce per color. I’m going to give it a day or two to dry before I cut it. I can’t wait to see what I have !!!
Great tutorial, Anne-Marie! I’ll have to put the vertical mold on my wish list. Love how the soaps turned out – they’re so pretty!
This is so pretty!
I, too, hope to add a vertical mold to my mold collection.
Lovely and beautiful. Can’t wait to make these soaps.
Looking at this tutorial and the faux swirl tutorial, neither one mentions when to incorporate the fragrance oil.
Each of the recipes for these two techniques are different and I’m curious when the fragrances are added to each of the recipes?
Love the look of this vertical soap. My vertical mold does leak so I do used lining paper when using it.
Thank you for the imagination of a modern cherry soap!
For this soap, it says to incorporate the fragrance oil in step 7.
In this tutorial, fragrance is added in step seven; in the previous faux funnel tutorial, it’s added in step five. 🙂
Just in time for spring! I really love the pink colour this time, it has inspired me to make my own spring soap this week! Thank you, Anne-Marie!
– Maggie
Soo lovely! Wish I had a vertical mold 🙂
Really nice, can’t wait to try this one.
Beautiful! Love the color combination you chose.
Very very cool! Love the look of the soap…imagine a green, dark purple and orange-a true peacock soap!
I have really been wanting to purchase this vertical mold for quite some time. Doing cp, is it hard to unmold soap when it is not lined? Is there a method to doing this? I would really like to know more about this mold. I can’t picture how you would line it either. LOL Please let me know it is on my to buy list.
By the way I LOVE the pattern to created! ♥
I unmold it like this:
Get the bottom (small) little piece off. Slide it off.
Slide off both larger pieces of plastic – literally, push down and slide. When it starts to slide off, ‘twirl’ the sides and circle them off.
Do the same with the smaller sides. I’d say this is a minimum of a 10 minute process.
It’s worth it to get beautiful bars of soap!
What a cool design.
I love this! Can’t wait to try it….beautiful 🙂