Today we’re launching our latest mold (drum roll), the Heavy Duty Column mold! To celebrate it’s debut, I’ve got a fun and fabulous tutorial that is a twist on the Faux Funnel Pour technique. This is a great recipe for an alternative to Olive Oil, for those late night soaping adventures where you realize you’re just short of an ingredient and it’s too late to hit up the store (anyone else been there? anyone?). Using contrasting colors in unexpected hues and a bright and fresh fragrance oil blend, I’m hoping you like this recipe as much as I do.

10.5 oz Coconut Oil
10.5 oz Palm Oil
7 oz Rice Bran Oil
7 oz Sesame Oil
5 oz Sodium Hydroxide (Lye)
11.6 oz Distilled Water
0.5 teaspoons Aqua Pearl Mica
1 teaspoon Tangerine Wow! Pigment
1 teaspoon Titanium Dioxide
2 tablespoons Sweet Almond Oil (or any liquid oil)
1.1 oz. Pineapple Cilantro Fragrance Oil
1.3 oz. Basil Essential Oil
Heavy Duty Column Mold with End Cap and Liner
Buy everything you need for this project with the click of a button!
MOLD PREP: Stick the End Cap on the base of the Heavy Duty Column mold. Curl up the Heavy Duty Column Mold Liner and slide into the mold. Run your finger along the seam to ensure it’s perfectly lined up (and so the seam won’t show up on your soap!).
COLORANT PREP: Disperse the Titanium Dioxide and Tangerine Wow! colors in the Sweet Almond oil at a rate of 1 teaspoon pigment to 1 tablespoon oil. A Mini-Mixer is a great tool for quickly mixing the pigment and oil, but be sure to saturate the powder pigment in the oil a bit before turning on the mixer or you might get a messy POOF! of pigment.
FRAGRANCE PREP: Combine the Pineapple Cilantro Fragrance Oil and Basil Essential Oil.
If you have never made cold process soap before, I strongly suggest getting a couple of basic recipes under your belt before diving in. This is an advanced recipe and should not be attempted without first doing some basic recipes. Check out Soap Queen TV on Cold Process if you want to get started with cold process. It’s a 4 part series that will take you through the basics (and be sure to watch the episode on Lye Safety). And for all of you bookworms out there, Bramble Berry also has some helpful reading on cold process soap making or a Beginner’s Kit for $36 here.
ONE: With your gloves and goggles on, small children and pets safely out of the area and working in a well-ventilated room (no breathing in lye fumes – or wear a mask), slowly and carefully add the lye to the water. Stir the mixture until all of the lye is dissolved, and set aside to cool.
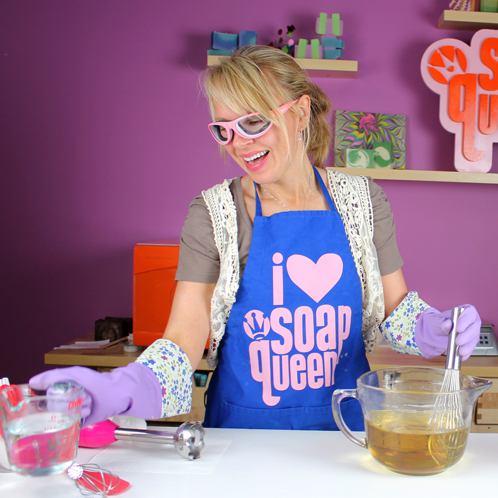
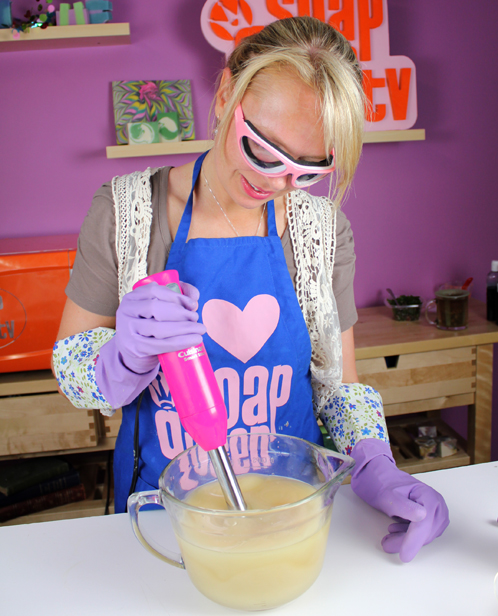
TWO: Melt and combine Coconut and Palm oils. Add Rice Bran and Sesame oils. When the lye water has cooled to 120 degrees or below, slowly add the lye water to the oils. Pulse the mixture with a stick blender until light trace is reached.
THREE: Split the soap batter into three equal parts, about 2 cups each. Color each of the parts as follows:
- 1.5 teaspoons of dispersed Titanium Dioxide Pigment
- 1.5 teaspoons dispersed Tangerine Wow! Pigment
- 0.5 teaspoons Aqua Pearl Mica
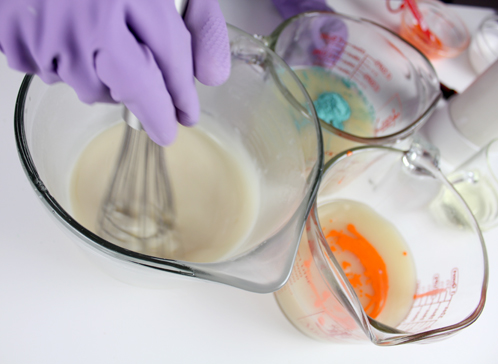
TIP: Mixing the colors with a whisk can help to not accelerate trace, but can’t always mix the micas in fully (resulting in spotty color). If you use a stick blender with the mica, be sure that your other two colors have a similar thickness/trace before moving on to the next step.
FOUR: Add .8 ounces of the Pineapple Cilantro and Basil fragrance blend to each of the colored soap batches. Mix in using a whisk.
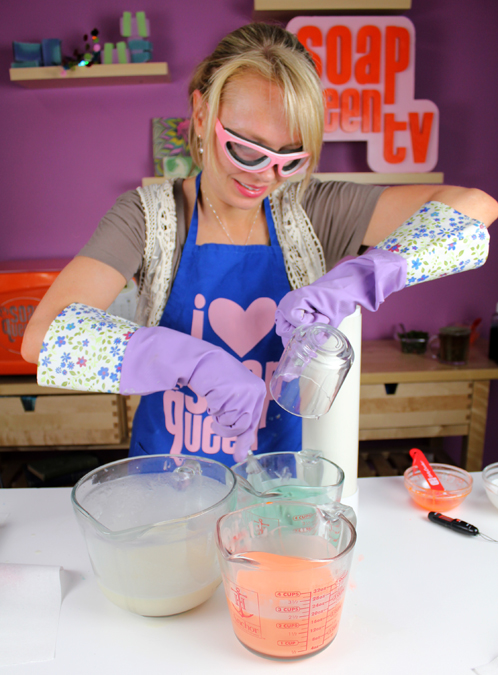
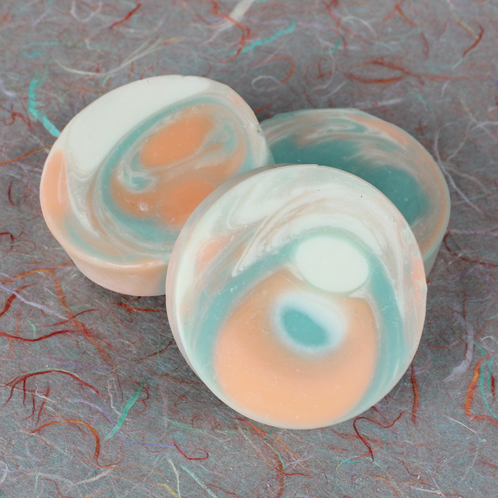
FIVE: This technique is reminiscent of the Faux Funnel Pour, except on a much taller scale. Decide on a color order. Pour the first color into the mold, aiming for the center. If you’d like, count to three each color to ensure an even pour. Repeat with the second and third colors, aiming for the center and counting to three. Repeat the entire cycle until the mold is full.
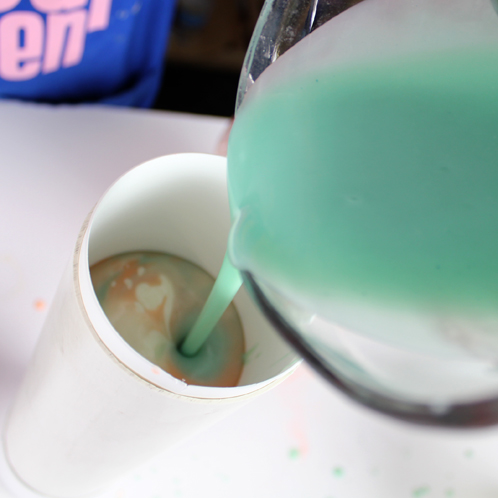
TIP: Keep an eye on the soap waiting to be poured, and stir with a whisk if it appears to be going grainy.
SIX: Allow the soap to sit in the mold for 1-3 days.
SEVEN: Unmold the soap, cut and allow to cure for 4-6 weeks. Enjoy!
Tips for unmolding the Heavy Duty Column Mold:
- Twist off the main part of the mold, away from the end cap, instead of just screwing off the end cap. The soap should stay in the liner and end cap.
- If you are using a softer recipe, add Sodium Lactate to the lye water.
- To avoid tearing the soap, just pull up one of the corners of the liners to see if the soap is ready to come out. Don’t unmold yet if the soap tears.
- If the soap tears, stick the mold in the freezer for an hour or two and try again. If it keeps tearing, wait a few more days, toss the soap in the freezer and try again.



Would the melt and pour recipe for the faux swirl cubes work in this column mold? Would love to see how that would turn out!
I just used my column mold for the first time,and the soap came out very easily,I did fresh mango scented and I used a combo of Micas and pigments. Weird thing is I expected my green mica to morph into lime green like it usually does but instead it turned steel grey. It’s a beautiful sparkly steel gray that begs to be paired with white and pink,but it’s a little odd with my yellow and orange. Cp soaping never ceases to suprise me. Thanks for the great tutorial!
Hi Jodi!
Your design is so much fun, the colors definitely remind me of fall. Thank you so much for sharing your soaps with us and thank you for your kudos. =)
-Becky with Bramble Berry
CAN I SUBSTITUTE ANOTHER OIL FOR SESAME OIL?
Hi Jan!
With this recipe, you can substitute another fixed oil for the Sesame Oil like Olive Oil or Sweet Almond Oil. But, be sure to run it through the lye calculator again to make sure you get the correct lye water amounts. I hope that this helps! Let us know if we can answer any other questions for you. 🙂
Lye Calculator:
Happy Soaping!
-Becky with Bramble Berry
Olive Oil: https://www.brambleberry.com/Olive-Oil-Pure-P5246.aspx
Sweet Almond Oil: https://www.brambleberry.com/Sweet-Almond-Oil-P3205.aspx
Just got this mold…made a 48 oz batch….it overflowed…confused me since its supposed to be a 49 oz mold. I hadn’t done a water test…took the capacity measurement from the webpage.
2 things….it leaked. I noticed my end caps aren’t like the ones in the tutorial…would not hold water…only the weight of the soap kept it from being worse. I fixed the issue by putting a plastic bag and 2 coffee filters the end and pressing it firmly. So I can use it with confidence now…but can I order an end cap of the original design? That would be awesome.
At this point I did a water test, since it could actually hold water at that point…..it says 49 oz…it holds 41.65 oz. So next time I’ll make a 40 oz batch no problem, but maybe adjust the webpageto reflect the 9 oz difference.
It came right out the mold and unrolled…no seam up the center…love it!
Hi Lakaya!
Thanks for letting us know your feedback on the heavy-duty column mold! If your end caps aren’t working, we’d love for you to contact customer service so they can assist in getting a replacement. Email info(at)brambleberry(dot)com and they’ll take care of you!
Regarding the capacity, are you measuring by weight or by volume? The recipe listed above yields just about 50 oz by weight – and fit perfectly into this mold for us. The weight of water is a bit different than the weight of the soap, and we definitely want to make sure we get your mold working for you!
Thanks again for the great feedback! We look forward to seeing the projects you make with this mold – be sure to stop by Bramble Berry’s Facebook page and share any fun soapy photos you get with us. =)
Happy Soaping!
Becky with Bramble Berry
https://www.facebook.com/BrambleBerry
I have used something like this before. How do you keep the soap from sometimes climbing up the outside of the liner? Also have you had problems getting the soap out of the endcap?
Good morning, Michael!
To keep the soap from ‘climbing’ up, we actually don’t fill this mold all the way up. We’ve found that pouring it just a inch or so before the top can really save on a lot of cleanup and mess. So far, we’ve never encountered any problems getting the soap out of the endcap and with the silicone liner, unmolding is a snap for this mold.
Heavy Duty Column Mold: https://www.brambleberry.com/Heavy-Duty-Column-Mold-P5401.aspx
-Becky with Bramble Berry
Just got this mold and used it for the first time on Saturday. I was worried about soap sticking to the liner, but as soon as I took it out of the column, the liner started to peel away. This mold makes such a pretty design (it makes swirls easy) and I like the variety of having a round soap. I love the tangerine and aqua color together. Thanks! I will be using this mold often.
Good morning, Shelia!
We are so happy to hear that the liner works so well for you. I know that I was so pumped to get it in because it makes soaping so much easier then having to line the mold. If you have any pictures, be sure to share a few with us on Bramble Berry’s Facebook page:
https://www.facebook.com/BrambleBerry
Happy Soaping!
-Becky with Bramble Berry
can i use thi mold to make round m&p soap
Good morning, Joyce!
You can absolutely use this mold for both cold process and melt and pour soaping. 🙂
-Becky with Bramble Berry
Heavy Duty Column Mold: https://www.brambleberry.com/Heavy-Duty-Column-Mold-P5401.aspx
Hi!
These soaps are beautiful, and i love how uniform they look!
Ive been looking for a mold like this one, but none of them have easy removal. Ive used pringles cans, pvc pipes, etc.
If this works, id love to buy 10 of them!
Is this mold easy to remove the soap from?
Do i need to purchase several liners?
Thanks so much!
The liners can be used with a variety of pipe sizes but are cut specifically for the ones that Bramble Berry sells (https://www.brambleberry.com/Heavy-Duty-Column-Mold-P5401.aspx and https://www.brambleberry.com/Mold-Liner-for-Heavy-Duty-Column-Mold-P5402.aspx)
I would purchase more than one liner to fit into the mold because sometimes, depending on the recipe, the soap does not want to gently and easily peel off. The harder recipes (or the ones with wax) definitely slide out and push and peel out easier than the more soft recipes.
Could this technique work with melt & pour? I haven’t graduated to cp yet. Just made my first soap today and would love to try this (already bought the column mold!) as soon as I can.
I just love this soap!
If m&p won’t work how about if I use a small milk carton?
Hi Michele!
We’ve never found this type of technique to work very well with melt and pour soap because of how the soap sets up. But, you can try out a similar idea called Faux Swirl in your melt and pour soap. 🙂
Faux Swirl Melt and Pour Cubes: http://www.soapqueen.com/bath-and-body-tutorials/melt-and-pour-soap/faux-swirl-melt-and-pour-cubes/
-Becky with Bramble Berry
Just got this mold and liner, and of course had to make use of it ASAP : )
Put it in the freezer the next day and liner peeled right off the soap- looks great.
Fun fact for you- the column of soap fits perfectly into your multi bar cutter!
Hi Kathy!
We are so happy to hear that the column mold and multi-bar cutter worked so well for you! If you have pictures, we’d love to see them (you can share them with us on Bramble Berry’s Facebook page).
https://www.facebook.com/BrambleBerry
-Becky with Bramble Berry
Once again Soap Queen and Brambleberry impressed and awed me. What a fun project.
Can the liner be used in a PVC mold that has a diameter of 2-2.5 inches. It would be great and easier to line than butcher’s paper for embeds in CP soap.
Hi Heidi!
Unfortunately, the Heavy Duty Column Mold is a bit bigger then mold you are wanting to use. But, this mold works great just by itself!
https://www.brambleberry.com/Heavy-Duty-Column-Mold-P5401.aspx
-Becky with Bramble Berry
That is the coolest thing ever! Easy, and love how it turned out! Great idea.
Gorgeous! 2 questions – After you disperse the Titanium Dioxide and Tangerine Wow in the Almond oil, do you only measure out 1.5 tsp from the 1 Tbsp of dispersed mixture? And the Aqua Pearl does not need to be pre-mixed?
If I choose not to color this, how much of the almond oil would I use, Just 1 Tbsp?
Thanks!
Hi Dawnia!
The Aqua Pearl doesn’t need to be pre-mixed because it is a mica and most micas easily integrate into the soap. Dioxides and pigments have a harder time mixing in, so we like dispersing them in an oil beforehand.
When you are adding your colorants for this recipe, you only need to add in the 1.5 teaspoons of colorant (Titanium Dioxide or Tangerine Wow!) to your soap, but if you wanted to, you could totally add the whole tablespoon.
And, if you chose not to color this soap, you wouldn’t have to add the Almond Oil unless you wanted to (and then you’d only add in the 1 tablespoon)!
I hope this helps. 🙂
-Becky with Bramble Berry
The soap turned out gorgeous! The faux funnel pour is really nice. I like the look of round soaps, but never wanted to mess around with PVC pipes. It’s great that this mold has a liner. I’ll have to pick this mold up the next time I place an order!
You are going to love this liner, it is so easy to use. You’ll have to share with us how it works for you! 🙂
-Becky with Bramble Berry
I love the colors you used. They are soooo pretty together!
Love the look of that soap….My mind is thinking of all kinds of things to do with that mold. Hopefully, I be able to afford new molds soon:)
I love it when these tutorials spawn new super soapy ideas in my mind! We can’t wait to hear all about your creations. 🙂
-Becky with Bramble Berry
Love the way this bar looks. The one in the front reminds me of a peacock feather, love the colors you used.