This fun, multi-step project was a hit when it went out with the Bramble Berry newsletter (not a subscriber? Sign up on the right hand side of the Bramble Berry Homepage). Just in case you aren’t a subscriber, I wouldn’t want you to miss out on the fun. This project definitely evokes a warm fall color palette with matching scents, but I can see this translated to any time of year by changing up the colors and fragrances.

Phase 1 Recipe:
6.0 oz. Palm Oil
20.0 oz. Pure Olive Oil
8.0 oz. Coconut Oil
1.2 oz. Castor Oil
4.8 oz. Rice Bran Oil
5.5 oz. Sodium Hydroxide (lye)
13.2 oz. Distilled Water
3 teaspoons Titanium Dioxide
3 tablespoons Sweet Almond Oil (or another liquid oil)
3 tablespoons Paprika
2.7 oz. Pumpkin Spice Fragrance Oil
Click here to add everything you need for both phases of this project to your Bramble Berry cart!
COLOR PREP: Using a mini-mixer, disperse the 3 teaspoons of Titanium Dioxide in 3 tablespoons of Sweet Almond Oil. Push the powdered colorant into the oil to saturate it a bit before turning on the mini-mixer, or you’ll get a messy cloud of powder color!
MOLD PREP: Attach the end cap of the Heavy Duty Column mold to the main body of the mold. Gently bend the mold liner into a round shape and insert into the main part of the mold until it reaches the end cap. Run your finger over the seam to snap into place.
SAFETY PREP: Suit up for safe handling practices! Goggles, gloves, and long sleeves are your soap making uniform. Be sure that kids and pets are out of the house or unable to access your soaping space, and always soap in a well-ventilated area.
If you have never made cold process soap before, I highly recommend you get a couple of basic recipes under your belt. Check out this (free!) 4-part series on cold process soap making, especially the episode on lye safety. Bramble Berry carries quite a few books on the topic as well, including this downloadable e-book on making cold process soap.
ONE: Slowly and carefully add the lye to the water and stir until clear, taking care to avoid breathing any fumes. Set aside to cool.
TWO: Melt and combine Palm and Coconut Oil. Add Olive Oil, Castor Oil and Rice Bran Oil.
THREE: When the lye water has cooled to 130 degrees or below (and is within 10 degrees of the oils), add the lye water to the oils and mix with a stick blender until a light trace is achieved.
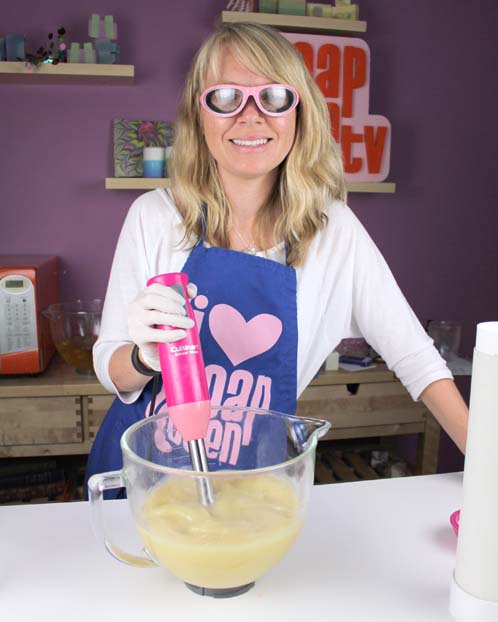
FOUR: Pour 1 1/2 cups of the soap batter into a separate container, and 1/2 cup of the soap batter into a third container. To the 1 1/2 cup sized portion, add 2 tablespoons of Paprika. To the 1/2 cup sized portion, add 1 tablespoon dispersed Titanium Dioxide. To the remaining soap, add 1 tablespoon of dispersed Titanium Dioxide and 2 tablespoons of Paprika. Mix all of the colorants in well. TIP: Mixing the colors from lightest to darkest allows you to use the same tools throughout and leaves you with less dishes to clean in the end!
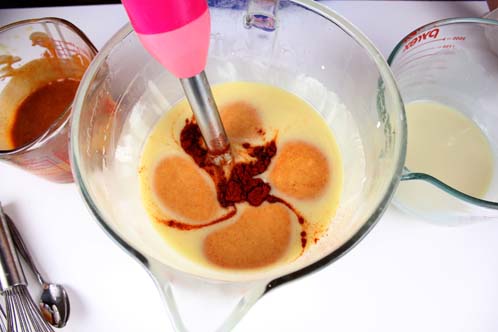
FIVE: Add 2.7 ounces of Pumpkin Spice Fragrance Oil to the largest of the portions of soap.
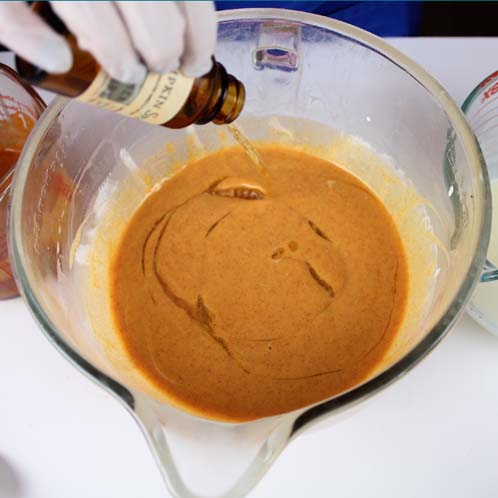
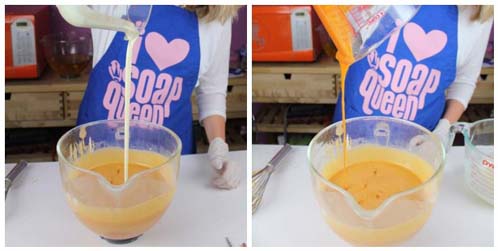
SIX: To create an in the pot swirl, start with the smaller, darker orange colored soap and from a high vantage point, pour into the larger, lighter orange colored soap at several entry points. Repeat with the white colored soap. Using a spatula, spoon or chopstick, gently stir the soap with 1 or 2 rotations around the bowl. Resist the temptation and don’t stir much more than that; we want to swirl, not mix!
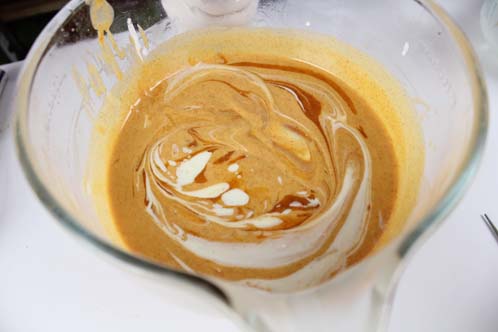
SEVEN: Pour the soap into the Heavy Duty Column mold. Allow to sit for 1-2 days, unmold and proceed to Phase 2. Don’t cut the soap yet!
Phase 2 Recipe:
Note: I miscalculated the size of this batch when I made the soap originally. We have since adjusted the size to fit correctly, but the pictures are from the first batch so it might look a little big.
3.5 oz. Palm Oil
11.5 oz. Pure Olive Oil
4.6 oz. Coconut Oil
0.7 oz. Castor Oil
2.8 oz. Rice Bran Oil
3.1 oz. Sodium Hydroxide (lye)
7.6 oz. Distilled Water
1 1/2 teaspoons Activated Charcoal
Rest of the Dispersed Titanium Dioxide from Phase 1
1.8 oz. Crisp Pear Fragrance Oil
Click here to add everything you need for both phases of this project to your Bramble Berry cart!
SAFETY PREP: Suit up for safe handling practices! Goggles, gloves, and long sleeves are your soap making uniform. Be sure that kids and pets are out of the house or unable to access your soaping space, and always soap in a well-ventilated area. COVER YOUR WORKING AREA (this phase overflowed my mold when I did it!)
ONE: Slowly and carefully add the lye to the water and stir until clear, taking care to avoid breathing any fumes. Set aside to cool.
TWO: Melt and combine Palm and Coconut Oil. Add Olive Oil, Castor Oil and Rice Bran Oil.
THREE: When the lye water has cooled to 130 degrees or below (and is within 10 degrees of the oils), add the lye water to the oils and mix with a stick blender until a light trace is achieved.
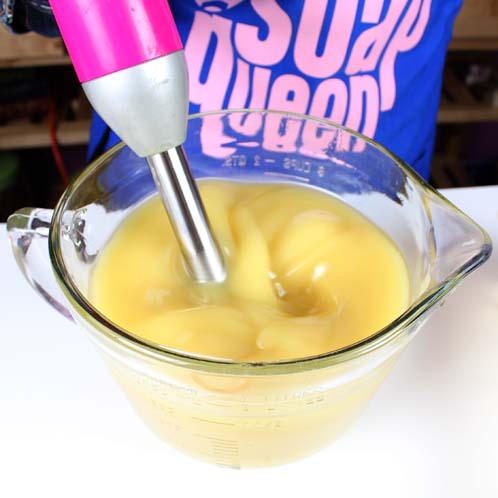
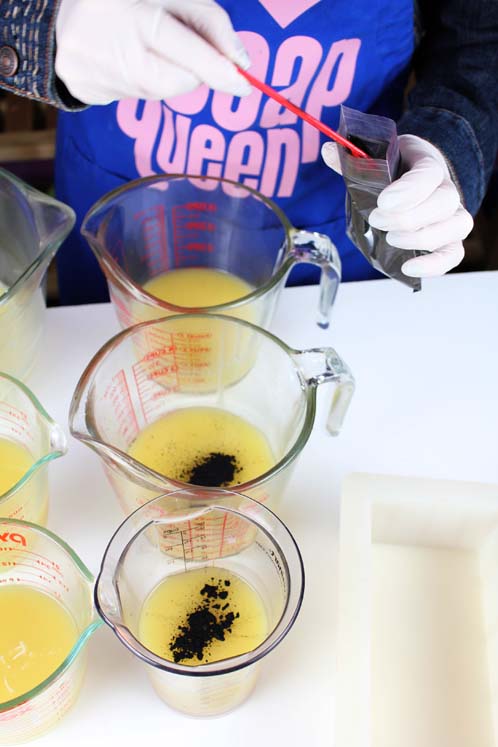
FOUR: Split the soap into six equal batches. To three of the batches, add 1 teaspoon
dispersed Titanium Dioxide. To the other three batches, add 1/2 teaspoon Activated Charcoal. Using a whisk, mix the colorants well into each batch of soap.
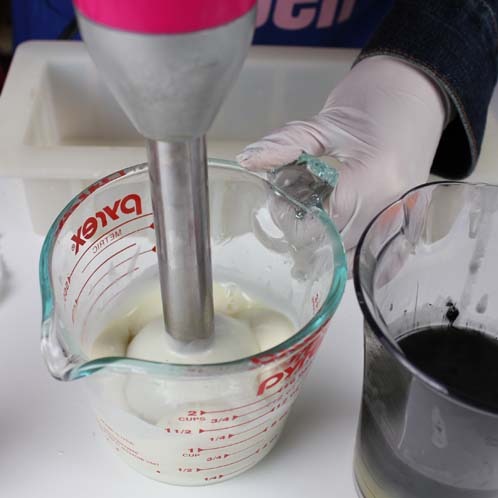
FIVE: To one of the batches of white soap, add .3 ounces of Crisp Anjou Pear Fragrance Oil and mix with a stick blender until a thick trace is achieved. Pour soap into the mold and tamp the mold on the tabletop to ensure an even layer and get rid of any air bubbles. Next, add .3 ounces of Crisp Anjou Pear Fragrance oil to one of the batches of black colored soap and stick blend until a thick trace is achieved. Carefully pour the soap into the mold over a spatula to ensure that the black soap does not break through the white soap. Repeat, alternating color layers until all of the soap is poured. The key is to not stick blend the individual mini-batches until you’re ready to pour. They’ll sit and wait for you patiently if you’ve started a nice thin trace.
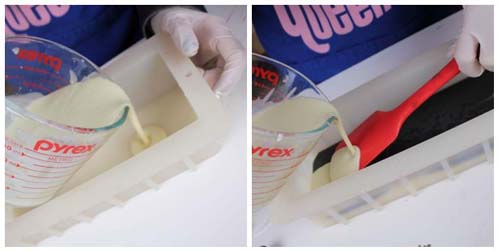
SIX: Is your work area covered up? If not, stop and put some newspaper down or cardboard just in case the soap overflows. Grab your uncut Pumpkin Spice soap loaf and (carefully!) set on top of your black and white layered soap. You may have to trim a bit off of the end of the soap in order for it to fit. Gently press the round orange soap into the black and white layered soap until the black and white soap displaces to the top of the loaf mold.
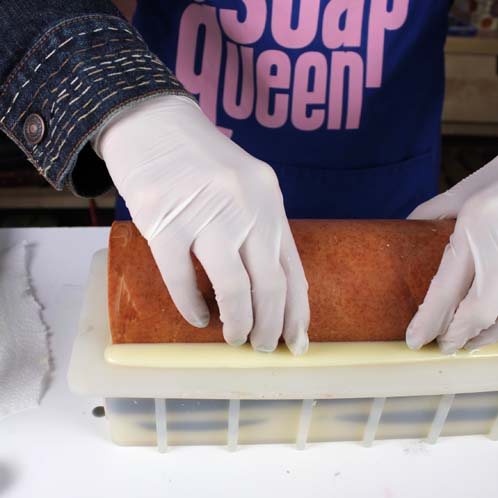
SEVEN: Let the soap sit in the mold for 2-3 days. Unmold, cut and allow to cure for 4-6 weeks. Enjoy!
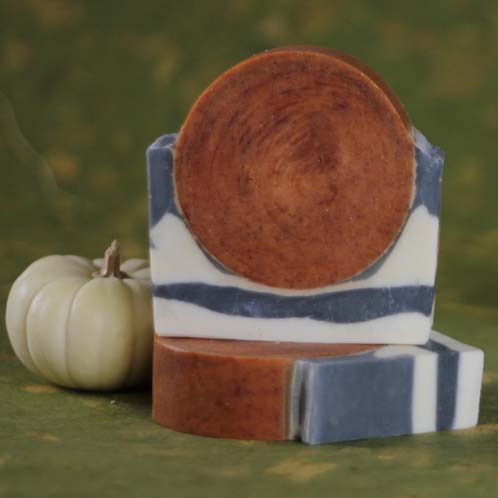
Want to hold this very soap in your hands? It’s now available in the SoapQueenLab Etsy Shop! Click here for the listing.

Please do a video on this one! We need to see this in ACTION!
Hello!
Thanks for your suggestion! 🙂
-Kelsey with Bramble Berry
If I wanted to use pumpkin purée in this, what are the benefits of gelling vs. not gelling? Will white soap with a non-discoloring fragrance oil discolor with the pumpkin purée if it gels, or will the pumpkin purée discolor white soap no matter what?
Hi Gina!
Pumpkin puree will discolor the soap an orange color no matter what fragrance you use. If you’d like, you can use that puree in one half of the soap and do a swirl so only half turns orange. 🙂
-Kelsey with Bramble Berry
Pumpkin Puree Cold Process Soap: http://www.soapqueen.com/bath-and-body-tutorials/cold-process-soap/pumpkin-puree-cold-process-soap-2/
Wow, so beautiful and inspiring! I am still new to soap making in general, (just have a few batches under my belt) but this is a goal to work towards. Thank you!
You can totally do it, Cathey. And we are here to help you out! And, if you have any questions, feel free to ask. We’d also love to see pictures of your soap. You can share them with us on Bramble Berry’s Facebook page.
https://www.facebook.com/BrambleBerry
Happy Soaping!
-Becky with Bramble Berry
I will do that, thank you!
Does this soap have to be insulated or will it set without being wrapped up?
Hi Hailey!
We do suggest having this soap insulated (as you do with any other cold process recipe), but not doing so isn’t going to stop it from being setup. We like going through gel phase because it makes the colors in our soap much more vibrant and deep. I hope this helps! Let me know if you have any other questions. =)
-Becky with Bramble Berry
I have to admit, I gasped a little when I first saw it! Inspired 🙂
We love how this soap turned out, it fit perfectly to what we imagined it to be! And, if you are interested, we almost always put up our Soap Queen blog projects in the Etsy store with full printed instructions for our tactile learners. In fact, we have already put up bars of the pumpkin pear soap for sale in the Soap Queen etsy shop. :
Harvest Moon Pumpkin Pear Cold Process Soap: http://www.etsy.com/listing/116539415/harvest-moon-pumpkin-pear-cold-process
-Becky with Bramble Berry
I am trying to fathom what pumpkin and pear would smell like together, it ain’t pretty….separately, yes, but together, I don’t know…
At first that is what I thought but I absolutely adore the fragrance blend of the Pumpkin Spice and Crisp Pear. They make a great fall fragrance and I just keep smelling the soap! 🙂
-Becky with Bramble Berry
P.S. If you want too see how the fragrances blended together, you can purchase a bar of it from the Soap Queen etsy shop here: http://www.etsy.com/listing/116539415/harvest-moon-pumpkin-pear-cold-process
What a great tutorial! When I first saw the main photo, it looked like pepperoni in a rolling pin holder. Mine is marble and it looks just like that 🙂 On second look, of course, it’s a harvest moon!
Anne-Marie thanks so much for your projects! You are such an inspiration for new things to try and a wealth of information! Marilyn