This is a great alternative to column pour and funnel techniques. This pour creates a unique and fun swirl in your soap with no two bars exactly the same. Plus, bonus points for getting to soap with a buddy since this technique works best with four pouring hands.

If you have never made cold process soap before, I strongly suggest getting a couple of basic recipes under your belt before diving in, as this is an advanced technique that requires you to move quickly. Check out Soap Queen TV on Cold Process if you want to get started with cold process. It’s a 4 part series that will take you through the basics (and be sure to watch the episode on Lye Safety). Bramble Berry also has some helpful reading tools for you bookworms out there.
Recipe
4.62 oz Sweet Almond Oil
13.20 oz Coconut Oil
28.38 oz Olive Oil
13.20 oz Palm Oil
6.60 oz Palm Kernel Flakes
9.462 oz Lye
21.78 oz Water
5 oz Orange Grove Fragrance Oil
1.5 oz Sweet Almond Oil (for mixing colorants)
.25 tsp. Activated Charcoal
.25 tsp. Tangerine Wow! Neon Pigment
.25 tsp. Titanium Dioxide
.25 tsp. Yellow Mica
.5 oz Diluted Canary LabColor
A buddy to help pour
![]() Buy everything you need in the click of a button, (pouring buddy not included).
Buy everything you need in the click of a button, (pouring buddy not included).
Mold Prep: Line your 5 pound Wood Log Mold with freezer paper (shiny side up).
Color Prep: Mix each pigment (Activated Charcoal, Tangerine Wow!, and Titanium Dioxide) in .5 ounces of Sweet Almond oil using your mini mixer to get rid of any clumps. For our yellow color, we used a blend of Yellow Mica and Canary LabColor.
ONE: Suit up! Put on your gloves, goggles and long sleeve shirt! Carefully combine your water and lye and mix well. Always remember to add the lye to the water and not the other way around. Stir until mixture becomes clear and make sure you are in a well ventilated area.
TWO: While the lye water cools, melt and combine the palm Oil, Coconut Oil, Palm Kernel Flakes, Sweet Almond Oil and Olive Oil. Give the oils a quick pulse with the stick blender.
THREE: Slowly add the lye water to your oil mixture. Blend with a stick blender until you reach a light trace.
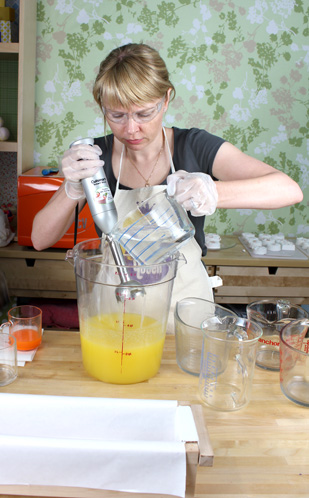
FOUR: Here’s where you need to hustle a bit and it’s nice to have a pouring buddy on-deck. Separate your soap batter into four equal amounts (you can just eyeball it) making sure to use containers with handles and pour spouts. Add pre-blended colorant to each separated batch. Mix each colorant with a stick blender.
TIP: Mix your colorants from lightest to darkest so you can use your stick blender without cleaning it between colors. Saves you time and dishes. Woohoo!
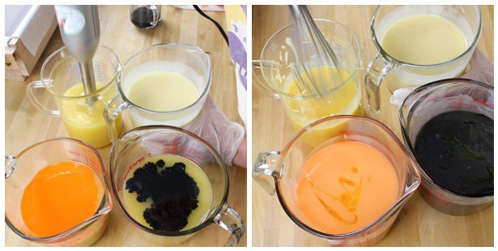
FIVE: Divide the fragrance oil equally into all 4 of the colors and mix will with a whisk. Using a whisk gives us more pouring time. Then quickly decide in what order you’ll want to pour your colors.
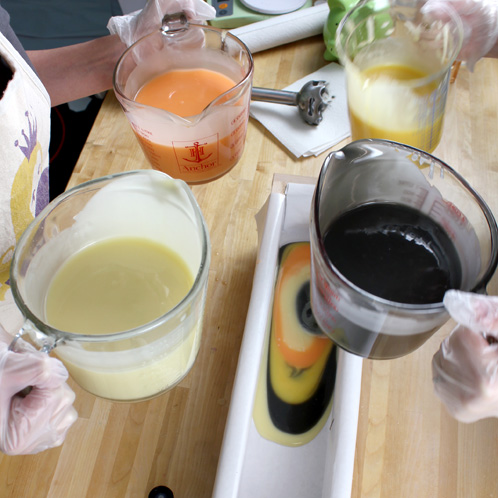
SIX: Time to call in your pouring buddy! Grab colors 1 and 2, and have your buddy grab colors 3 and 4. Starting in the middle of the mold, pour just a little bit of color 1, followed by a little bit of color 2. Have your buddy follow with color 3 and 4. Repeat this cycle over and over. While we were pouring, we would say out loud which number we were on so we wouldn’t forget our place (plus it was fun)! If you’re doing this by yourself, just be certain the fragrance you’re working with is a very slow moving fragrance so you have plenty of time to keep the technique going yourself. But, it really is more fun with a friend.
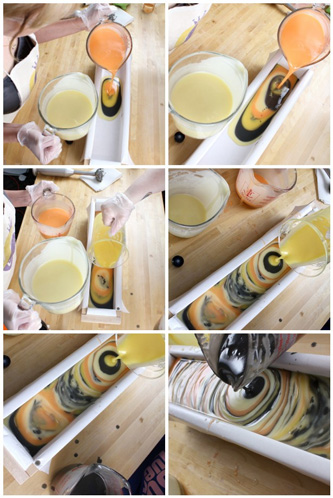
A Few Pouring Tips: 1. The closer to the surface of the soap your container is while pouring, and the slower the flow of soap is from your container, the more likely your color will stay on top and form clear lines. 2. You don’t need to worry too much about accuracy here; this is a fun and spontaneous pour technique! 3. For added interest, move your pour target to either side and stay in that spot for a few cycles. 4. As you pour, keep a whisk or two handy in case your soap gets “grainy” in the container. Keep rotating colors until your mold is full.
SEVEN: Let the soap set for 24 hours. Unmold, cut (you can cut horizontally or vertically and both cuts are beautiful!) and let cure. Sit back and enjoy your hard work! Maybe your pouring buddy has earned a bar or two? No judgments for keeping it all for yourself.

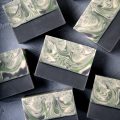
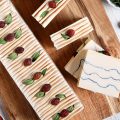
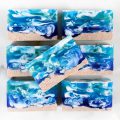
That is beutiful colors!
That’s awesome!
I tried this project a few days ago using red, black, yellow, white and it came out beautifully! I got rave reviews – I am so excited since I relatively new to CP and put on my big girl pants to try this – LOL! I named it Groovy Baby (reminded me of Austin Powers). Thanks so much for sharing. The only thing that I will do differently is use a stronger FO. I used a Vanilla Lavender from another company and am waiting for it to cure to see if it gets any stronger. Again, thanks for sharing this awesome tutorial!!!
Great job! Way to put on your “big girl pants” =)
I love to hear success stories! The fragrance oil probably won’t get stronger as it cures. If anything it may get lighter. Remember the standard usage rate for cold process is 1 ounce of fragrance oil per pound of soap.
Courtney from Bramble Berry
Fun colors!
Your videos look so well done. I can’t wait to watch more of them! I’m convinced that in soapmaking that there are no new ideas, that we’re all just building upon eachother, even when we don’t know it. Thanks for posting – I can’t wait to watch your videos. Happy Soaping, indeed!
I understand that this-lack of time)) I have three daughters))
I wanted to know, will whether such contest – Fair Ivy Round Up? I also want to share! My shop at etsy http://www.etsy.com/shop/cactusik
Hm, another Fair Ivy contest? I don’t know! We’d have to ask them but I did check out your site. Lots of fun stuff there! =)
Oh! Thank you)))
I already answered you on the mail, received?
very nice and easy! Thank you! I did something like this , if you’re interested take a look! http://www.youtube.com/watch?v=4xSA0Q5cyOk
Where did you get that awesome tall measuring
pot, Anne-Marie(in the first picture)? I love how deep it is with little markings on the side and also
clear!
Our local restaurant supply store called Cash n Carry. We LOVE it so much for teaching classes with it.
This is so dramatic and I love the look!
I think next time I make my Odyssey Soap
with patchouli, orange and lavender that I will
definitely do this technique and also maybe
Karma.
Or….on second thought, do those EO’s seize?
I honestly cannot remember!
Patchouli, Orange, Lavender – no seizing or acceleration. Karma … meh, it accelerates a bit but it’s a bit much for this technique in my opinion but definitely, let me know if you try it. Live (or in this case, soap!) dangerously right?! =)
That looks fun!
Thanks; and yes, yes, it was =) You should try it too and let me know how it goes =)
Looks like a great way to get my girls involved in making soap! We will definitely try it soon!
It’s such a fun way to partner up. You can do it by yourself but it’s not as much fun =)
This is like how I make rainbow cake! I can’t wait to try this!! Thanks for the great tutorial!
Really? There are so many amazing similarities between soapmaking and baking. I love it!
Hi! Great tutorial but would have loved a video because you are usually a riot on those (especially the outtakes at the end)lol. I am wondering why when you click on the brambleberry direct order the quantities are so much higher than listed on your recipe. Is that for multiple batches. Also the charcoal is being used as one of the colors? The soap looks great and I was reading about using a column but I will try this instead. Thanks. Dee
Yes, this one would have been a riot to film so there would have been lots of outtakes for the end. Ha ha =)
Bramble Berry only sells in certain quantities so you’ll have left over product after you’ve made your batch so we try to put everything in the cart that you’d need to make the recipe in the smallest size we offer it =)
Yes, the Charcoal is the black. It makes a great color, doesn’t it? =)
I think I might need to grow an extra pair of arms so I can try this! 😉
Coolio! Beautiful soap and great teamwork, guys!
I really like the pitcher you are mixing your soap into. I use large pails and I’d rather be able to see through mine. Can I ask if that’s glass or plastic?
Thanks!
Swell tutorial – yet again, AM!
It’s a food grade plastic tub from Cash and Carry, which is our restaurant supply store. They are great for making big batches of soap.
Courtney from Bramble Berry
Awesome tutorial~ beautiful soap! Thanks so much! I can’t wait to try it.. (I did notice though, A-M, you have short sleeves on~ tsk, tsk!!!) 🙂
You’re right, Renee. I’ll get on her tomorrow =)
Courtney from Bramble Berry
Ha ha, consider me chastised Courtney =) In all seriousness, I’ve gotten so many lye burns on my hands and arms in the last 18 years that they don’t phase me any more so I get lax but never ever ever lax on Goggles. Never ever ever – you can’t unring that bell if there’s a mistake with your eyes and lye.
That soap looks awesome! What brand of stick blender is Anne Marie using it looks top quality! I might need to ask for one for Christmas! 🙂
CuisineArt…we love them! Try Target.
Courtney from Bramble Berry
I’ve been playing with a two-color version of this technique lately. It’s fun and easy and the soap looks awesome – but now I want to scale it up to the four-color!
Alright! Go for the four colors!
Courtney from Bramble Berry
Wow! I can’t wait to try this!
Have you ever experimented with doing a similar technique with melt and pour? Maybe it would work if the base has cooled? I don’t have enough hands to experiment with it. LOL!
Melt and Pour doesn’t have the viscosity to create a look like this. It may work if the base were cooler but that wouldn’t leave us much time to work with it. This would be a fun project to experiment with =)
Courtney from Bramble Berry
That looks so easy and fun! Excellent colors, too. And you look very serious pouring in that lye. 😉
I was ticked I was getting bubbles in my mixture! LOL! =)
Your soap turned out so good. I absolutely love the color combo you chose. Give your soaping buddies a pat on the back! They did a great job!
Courtney from Bramble Berry