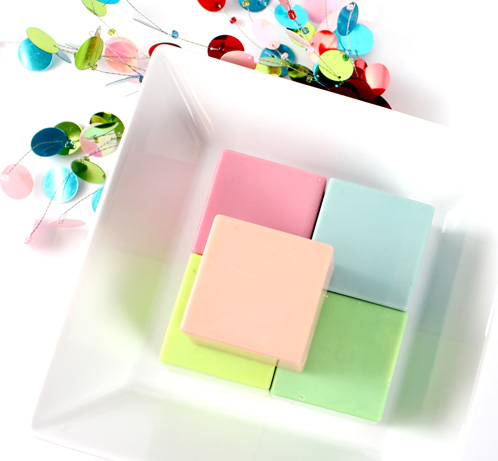
I am still so in love with our new cube mold! For this project, I wanted to create a seasonal feel using non-traditional colors and an unexpected yet comforting scent blend. What a great way to welcome the colder months.
Recipe:
24.5 oz. Coconut Oil
39.2 oz. Olive Oil
24.5 oz. Palm Oil
9.8 oz. Palm Kernel Flakes
14.4 oz. Lye
33 oz. Distilled Water
2.2 oz. Sodium Lactate
4.5 oz. Rise and Shine Fragrance Oil
2.25 oz. Christmas Tree Cybilla Fragrance Oil
1.75 teaspoons diluted Red Velvet LabColor
1.75 teaspoons diluted Green Apple LabColor
1.75 teaspoons diluted Citrus Green LabColor
1.75 teaspoons diluted Blue Mix LabColor
1.75 teaspoons diluted Soft Orange LabColor
Get all of the ingredients in the click of a button!![]()
If you have never made cold process soap before, I strongly suggest getting a couple of basic recipes under your belt before diving in. Check out Soap Queen TV on Cold Process if you want to get started with cold process. It’s a 4 part series that will take you through the basics (and be sure to watch the episode on Lye Safety). If you’re a book worm, Bramble Berry also has some helpful reading on the cold process technique.
PREP: I mixed Rise and Shine (citrusy, fruity blend) with Christmas Tree Cybilla for a balanced yet unexpected blend, perfect for the transition into Fall! Also, If you have never diluted your Bramble Berry LabColors learn how here.
TIP: Blending basics denote the need for a top (citrus) note, a middle (fruity and/or floral) note, and a base (vanilla, musk) note. For this unique blend, I relied on the balsam (pine) notes of the Christmas Tree to act as the base note and carry the fruity and citrusy notes of the Rise and Shine. Top and middle notes are the first to disappear, thus the need for a 2 to 1 mix of Rise and Shine to Christmas Tree.
ONE: Suit up! Make sure you’re wearing long sleeves and put on your goggles and gloves. Carefully add the lye to the water (never the other way around!) and mix until the water is clear, taking care to not breathe in the fumes. Set aside to cool.
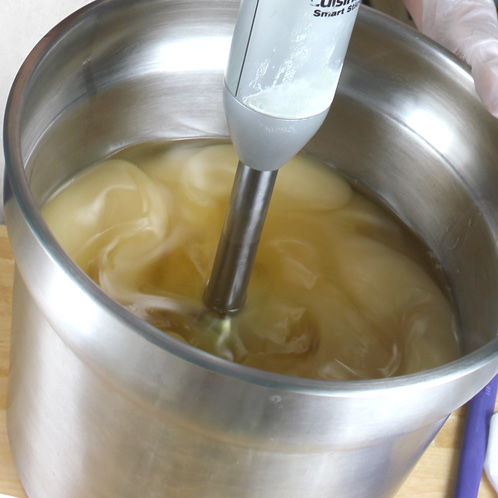
TWO: Melt and mix the Coconut Oil, Palm Oil, Olive Oil, and Palm Kernel Flakes. Add Sodium Lactate to cooled Lye water. Slowly add the lye water to the oils, stick blending for about 15 seconds or until you reach a super light trace. Add the Christmas Tree/Rise and Shine Fragrance Oil blend and stick blend for a few more seconds, taking care to stay within a super light to light trace range.
THREE: Divide your batch into 5 equal parts. I measured each part out at 3.5 cups (about 28.5 ounces by weight) each.
TIP: For the next step, I switched to a whisk. I wanted the soap to stay at a light trace for as long as possible so that I had plenty of pouring time. Make sure that you keep your eye on all five batches; give each batch a little bit of love with the whisk from time to time.
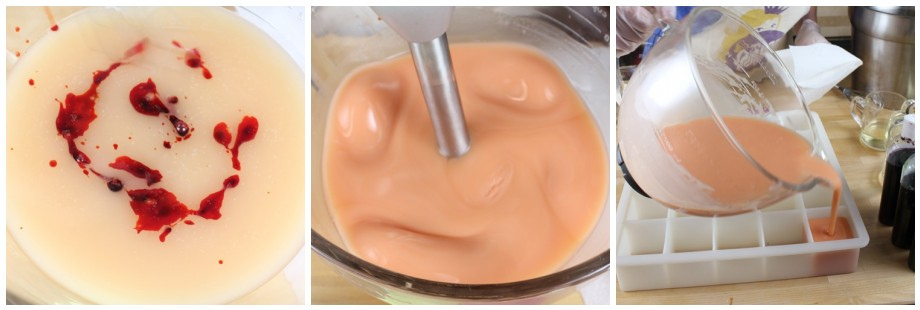
FOUR: Color your batches. LabColors work on a WYSIWYG basis (What You See Is What You Get), so start off with the amounts above but feel free to add more colorant as you see fit. Keep in mind, though, that if your soap goes through gel phase the colors will brighten quite a bit! If you’ve never worked with LabColors before, check out the post we did here. As you color each batch, mind the others to make sure they don’t lose trace and mix a bit just to be sure.
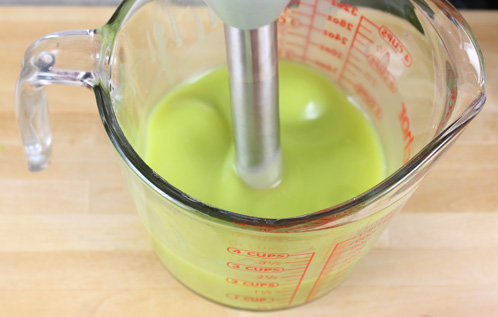
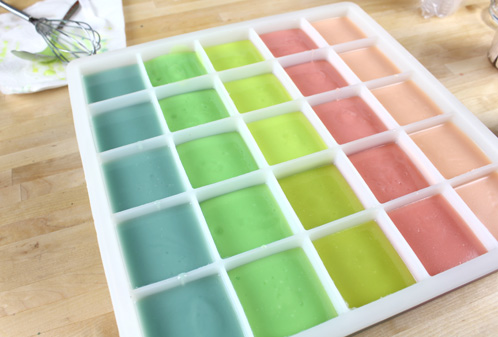
FIVE: Pour each colored batch into your mold. Each part should fill about 5 cavities, but as you are pouring make sure to leave about ¼ of an inch of space at the top to ease in the unmolding process. I poured in columns so the outcome was a rainbow effect in the mold!
SIX: Leave the soap in the mold for at least 7 days. Yes, 7 days! We found that because of the self-insulating tendencies of the mold, the soap just isn’t ready to come out until it’s been sitting for a full 7 days.
 SEVEN: Unmold the soap by pulling the mold gently away from the sides of the soap, and gently push out (the soap that wasn’t exposed to air will still be soft and prone to denting) and allow to cure for 4-6 weeks.



I’d love to make CP soap but I hate the thoughts of lye burns! 😛
Hi Gretta! Lye burns are something to take seriously but as long as you are being careful you have nothing to worry about. 🙂
-Becky with Bramble Berry
Might give it a shot with the right equipment! It looks like fun making your own soap from scratch 🙂
I am absolutely in love!!!
I made a very hard recipe and in place of the sodium lactate, I uped my percentage of cocoa butter. 24 hours later (I know…I’m weak. I just can’t help myself) out they came with just a bit of effort. No sticking to the sides and no dents.
They are beautiful, shiny and just the right size for a cube. I was concerned that the cube would be awkward to use but holding it in my hand, I know it’s going to be a joy. I ordered the 9 bar mold and once I poured my first batch, I knew I was going to love it…so I ordered two more and ALL of my soaps will now be coverted to these awesome cubes! Best mold ever!!!!!!
Thanks!
Comments like these totally make our day! I’m so glad you’re loving the cube mold as much as we are.
Great tip on adding the extra cocoa butter to harden it up (and I totally love cocoa butter in my soap).
Have fun with your new mold =)
Courtney with Bramble Berry
I LOVE this mold. My recipe accelerated and became a little thicker than I would have liked, so I had trouble pouring. I used beeswax to create a harder bar but I may not do this again because it caused a little bit of ricing too. The stick blender fixed this. I used salt instead of sodium lactate.
I unmolded after 24 hours with no problem. I simply twisted each cavity slightly, flipped the mold over, and gently tapped/pushed the cubes out. Best part? No lining!
It sounds like a great bar – salt + beeswax + super thick trace? All things that would help make a super hard bar and the harder the recipe, the faster this mold releases its soap. Thanks for the great report. =)
I bought this mold too and I love it because of the perfect square shape. I did have to put it in the freezer for about 30 minutes to release the soap, but I didn’t know at the time that it needed to be left in the mold for a week. I’ll try that suggestion the next time I use it.
Keep me posted on how the next few batches turn out Patrice. I’m glad that the freezer did it for you the first time. I don’t do the freezer and just do the longer time in the mold. They both end up with the same results so you could do either of those options.
I never knew you can make home made soap that looks so beautiful! I bet it smells so good too from the look of it and the sound of the ingredients. Is t better than commercially prepared soap?
In my opinion, it’s way better than the large soap brands you see in the store. Try some handmade soap from a co-op or farmer’s market and I think you’ll be pleasantly surprised. =)
OOOHHH love the colours. I am glad it is not only me that has their soap stay soft in Silicone moulds. Thanks for the information.
I recently made a batch of soap using paprika infused in olive oil. I forced some to gel but didn’t allow others to gel, depending on what mold they were in. the ungelled soap was really pale, but the gelled soap was such a bright orange, and it almost was translucent.
It’s really interesting isn’t it? Gel phase very much makes colors pop out so much more than non-gelled soap in my opinion =)
I’ve never pushed the buy it now button and tried that today. Was surprised that the items that fill your basket aren’t enough to do the recipe. Fragrance amount is way off. I didn’t check out the oils.
Just FYI.
OOPS please forgive me haven’t had my coffee.
I see the buy it now button has two bottles of fragrance of each scent to do the recipe. That will be plenty of fragrance. There are two of nearly everything on the list.
I like this feature now!
Thanks Pam! I about had a heart attack when I read your first comment so I am so glad that we had the right amounts in there. Phew! =)
I bought two of these molds because I loved the shape, the shipping wasa expensive to france, but I thought it worth it. It is not possible to make superfatted cold process soap in these molds. Even after the week that is recommended (this wasn’t stated at time of sale by the way, it is an afterthought). The soap has to be pushed out so hard that it becomes disfigured and dented. Very bad investment for us.
Perhaps after your 7 days in the mold you could freeze the soap for 1/2 hour to get it to pop out. Maybe you tried that if so please post a reply.
Hi Nia,
Gosh, I’m sorry to hear that you’ve had a rough time with the mold. The lack of air flow makes the mold need a little bit more TLC than your typical wooden mold but the size and shape of the bars makes it worth it =)
The superfat I’ve done is 4% and gotten the soaps out successfully. Some hints:
(1) A 15%-30% water discount will help a lot.
(2) Sodium Lactate will help. If you don’t have any sodium lactate, use some salt dissolved in your lye water and that should also help with hardness (but not nearly as much as the sodium lactate).
(3) A large amount of solid oils (especially Palm Kernel Oil) is your friend.
(4) After 7 days in the mold, don’t hesitate to freeze if the soap doesn’t come out easily. I don’t force the soap out at all. I pull the sides of the mold away from the soap and turn the soap mold upside down so that gravity naturally helps pull the soap out. Forcing the soap will dent it.
The mold really makes an amazing bar of soap – such a beautiful shape – and you can see by our photos that the soap can come out looking smooth and lovely. I hope you give it another try. =)
The scent combo sounds divine and I love that mold. The colours are soft and dreamy.
gorgeous!!!!!