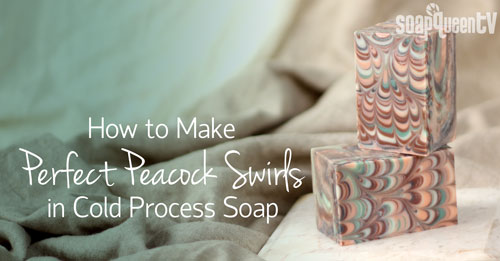
In this episode of Soap Queen TV, I redeem myself. In case you don’t remember, I posted a video on how to do the Peacock Swirl in cold process soap and although the soap turned out nice, it wasn’t a great example of the peacock swirl design. So I designed a set of tools to help me do it perfectly every time. While I’ve used the swirl tools in previous tutorials (peacock challenge, frog foot swirl, & butterfly swirl), you get to see them in action in this video!
Please Note: The in-video links only work on the YouTube website (darn!).
See the basic cold process videos here.
SAFETY FIRST: Suit up for safe handling practices! That means goggles, gloves and long sleeves. Make sure kids, pets, and other distractions and tripping hazards are out of the house or don’t have access to your soaping space. Always soap in a well-ventilated area.
 Get everything you need to make this soap with the click of a button!
To make the soap in this video you will need:
- 32 oz Pure Olive Oil
- 12 oz Rice Bran Oil
- 16 oz Coconut Oil
- 16 oz Palm Oil
- 4 oz Shea Butter
- 10.9 oz Sodium Hydroxide
- 26.4 oz Distilled Water
- 3.5 oz Lavender 40/42 Essential Oil
- 1.5 oz Anise Essential Oil
- 1 teaspoon Brown Oxide
- 1 teaspoon Hydrated Chrome Green
- 1 teaspoon Black Oxide
- 1 teaspoon Burgundy Oxide
- 2 teaspoons Tangerine Wow! pigment
- 2 teaspoons Titanium Dioxide
- 8 tablespoons Sunflower Oil
Tools and molds I used include:

Beautiful, Anne-Marie! Perfect. The colors are amazing. 🙂
Hi Amanda!
Thanks so much! Glad you like the soap. 🙂
-Kelsey with Bramble Berry
Oh my goodness – exquisite beauty!!!
Hi Teresa!
I’m so glad that you enjoyed this blog post 🙂
-Amanda with Bramble Berry
This soap is absolutely beautiful!! I know this may be a silly question but I am fairly new to the soaping world, can you use the swirl tools and this technique on a melt & pour version of this??
Hi Jennifer!
Not a silly question at all! Unfortunately doing a peacock swirl does not work well with melt and pour, because as the melt and pour hardens it creates a skin on the top, and you would not be able to drag the swirl tool through the soap. Basically, melt and pour hardens too quickly!
That being said, you can still achieve pretty swirl designs using melt and pour. You might enjoy this melt and pour tutorial 🙂
Faux Swirl Melt and Pour Tutorial: http://www.soapqueen.com/bath-and-body-tutorials/melt-and-pour-soap/faux-swirl-melt-and-pour-cubes/
-Amanda with Bramble Berry
Most of the swirl designs are done in a slab mold. Are there any good designs you can do in loaf molds? Do you have any videos of those?
Hi Anna!
While slab molds do work great for swirl deigns, you can still have fun with swirl designs using a loaf mold! While we do not have photos for these tutorials, I hope these give you some ideas! 🙂
Mica Topped Cold Process: http://www.soapqueen.com/bath-and-body-tutorials/cold-process-soap/soap-challenge-mica-topped-cold-process/
Indigo Spoon Plop Soap:
http://www.soapqueen.com/bath-and-body-tutorials/cold-process-soap/indigo-spoon-plop-soap-cold-process-tutorial/
Mantra Swirl:
http://www.soapqueen.com/bath-and-body-tutorials/cold-process-soap/soap-challenge-mantra-swirl/
I hope this helps!
-Amanda with Bramble Berry
Thank you for posting this. Your site is always so inspirational! I really want to master the peacock swirl and so far have not had much luck. After watching the original video, I tried your peacock swirl recipe three times. Each time it failed for me. At first everything looked great, but after 24 hours, the top swirly part of the soap was cracked and very crumbly. It was as if the swirled part was entirely soda ash. After 24 hours the swirl produced a tongue zap, but the base didn’t. So I cut off the swirl and rebatched it. In the end, it still made a nice soap, but what happened to the swirl? Why so crumbly? After trying the natural colorants twice, I tried a third time using oxides, but it still crumbled. Any ideas of what to change next time? The only thought I had was maybe I used too much water. I’m including the recipe in case it helps. Each time I soaped at approximately 90 degrees F, and covered and insulated the soap afterwards.
Recipe (44 oz of oils)
– distilled water 16.7 oz
– lye 6.3 oz
– pinch of silk fibers in lye water
– coconut oil (76 degree) 13.2 oz
– canola oil 8.8 oz
– olive oil 11 oz
– palm oil 11 oz
Swirl #1 & #2 (colorants dispersed in sweet almond oil):
– 1 tsp titanium dioxide in base
– 2 Tbsp alkanet root powder (infused in oil)
– 2 Tbsp annatto seeds (infused in oil)
– 1 tsp activated charcoal
– No fragrance added
Swirl #3 (colorants dispersed in sweet almond oil): – 1.5 tsp titanium dioxide in base
– 1.5 tsp yellow oxide
– 1.5 tsp green oxide
– 2 tsp activated charcoal
– Added essential oils of lemongrass and sage to base soap
Hi Ramona!
I’m sorry to hear this recipe did not quite turn out for you. One thought is that the swirl was poured too cold and too thin, so temperature might be a factor and resulted in a deep soda ash. You may find this post explaining soda ash helpful!
Explaining and Preventing Soda Ash:
http://www.soapqueen.com/bath-and-body-tutorials/tips-and-tricks/explaining-and-preventing-soda-ash/
I hope this helps next time you give this recipe a try!
-Amanda with Bramble Berry
What a cool tool! I was curious to see how to use it when it was listed. Too bad I only do M&P soap! If I did CP soap I would definitely give this technique a try!
Hi Leanna!
Cold process soaping is a lot of fun, maybe you should give it a try! 🙂 If you do (or even if you don’t), we would love to see your creations on our Facebook page!
https://www.facebook.com/BrambleBerry?sk=wall&filter=2¬if_t=wall
-Amanda with Bramble Berry
This isn’t a Melt & Pour tutorial but I still enjoyed it! I was curious as to how the tool works when I saw it listed on BrambleBerry! What a pretty CP design technique!
Hi Leanna!
So glad you enjoyed this post. It’s so fun to see the swirl tools in action! Keep your eyes out for a Melt and Pour tutorial coming sometime this week 🙂
-Amanda with Bramble Berry
Wow…this design is awesome!!! I just love it. Anne…I am feeling curious to make those peacock swirl soap for me too.
Hi Evelyn!
I hope you give this Peacock Swirl a try, it’s so beautiful! If you do, we would love to see photos on our Facebook page 🙂
https://www.facebook.com/BrambleBerry
-Amanda with Bramble Berry
Gorgeous, gorgeous, gorgeous! I LOVE the colors!
Hi AshMac!
Aren’t they pretty? I love them as well, glad you liked this post!
-Amanda
Absolutely beautiful! I plan on getting the tools and trying this technique soon! Can I ask what you sprayed on the soap at the end? I’m wondering if it’s something to prevent ash? I live in Oregon and I think there is something about the moisture level in both our states that brings it on! Fantastic video! Thank you for sharing:-)
Hi Heather!
So glad you enjoyed this post 🙂 At the end we sprayed the soap with 99% isopropyl alcohol to prevent soda ash from forming. For more info regarding soda ash, you may find this post helpful! 🙂
Explaining and Preventing Soda Ash:
http://www.soapqueen.com/bath-and-body-tutorials/tips-and-tricks/explaining-and-preventing-soda-ash/
Isopropyl Alcohol:
https://www.brambleberry.com/Isopropyl-Alcohol-99-16-oz-P5682.aspx
I hope this helps!
-Amanda
I really LOVE that swirl and can’t wait to try it!
Hi Tina!
Isn’t it gorgeous? I love it too! If you end up giving it a try, we would love to see it on our Facebook!
https://www.facebook.com/BrambleBerry
-Amanda with Bramble Berry