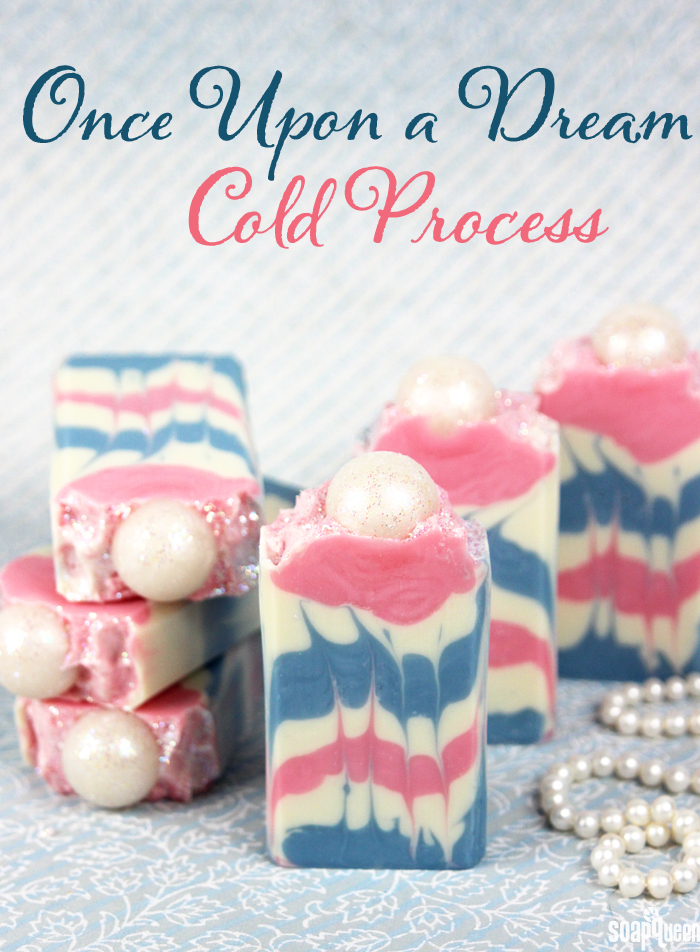
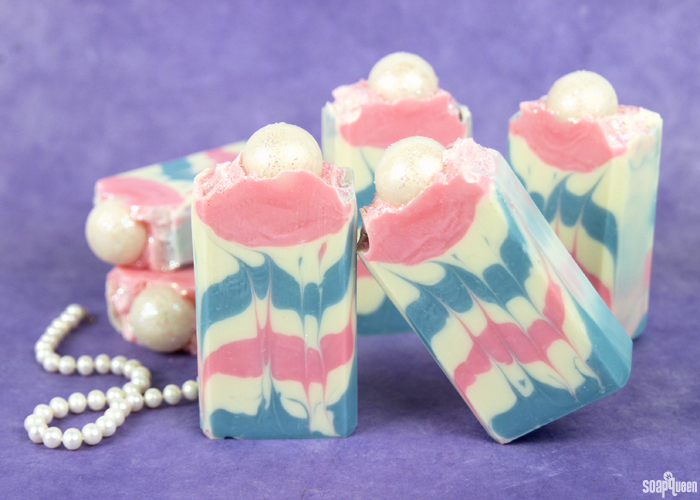
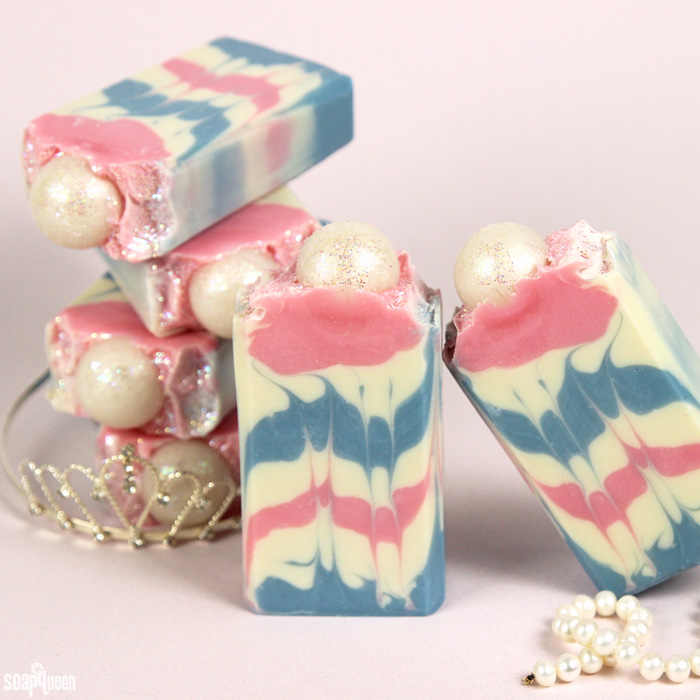
 Princess stories often include themes of true love, happiness, magic and morality. They are universally appealing. When these themes are mixed with plenty of sparkle and beauty, what’s not to love? This Once Upon a Dream Cold Process was inspired by the magic of fairy tale princesses. In particular, the new Cinderella movie served as a direct inspiration for the soft color palette and girly design. Of course, there is lots of shimmer and sparkle!
This project features a hanger swirl technique. Best suited for more advanced soapers, this technique involves layers and swirling with the use of a bent hanger or wire tool. Scented with the crisp and fresh White Rose Fragrance Oil, this soap smells as feminine as it looks. Like many florals, this fragrance does slightly accelerate trace, so be prepared to move quickly. Sparkly melt and pour spheres on top give the allusion of pearls for added charm and elegance. A big thanks to the.balm.boutique on Instagram for the “Once Upon a Dream,” name idea!
What You’ll Need:
Tall Narrow Wood Loaf Mold
1.9 oz. Avocado Butter
5.9 oz. Avocado Oil
7.8 oz. Coconut Oil
9.8 oz. Olive Oil
5.9 oz. Palm Oil
7.8 oz. Rice Bran Oil
5.3 oz. Sodium Hydroxide Lye
12.9 oz. Distilled Water
Titanium Dioxide
Bright Blue Jean Colorant
Electric Bubble Gum Colorant
Iridescent Glitter
2 oz. White Rose Fragrance Oil
Hanger tool
Embeds:
Medium 9 Ball Silicone Mold
6 oz. Clear Melt and Pour
Super Pearly White Mica
Iridescent Glitter
 Click here to add everything you need for this project to your Bramble Berry shopping cart!
 Make the Embeds:
COLOR PREP: Mix 1 tsp. Super Pearly White Mica in 1 Tbs. 99% isopropyl alcohol. Use a mini mixer to get rid of any clumps.
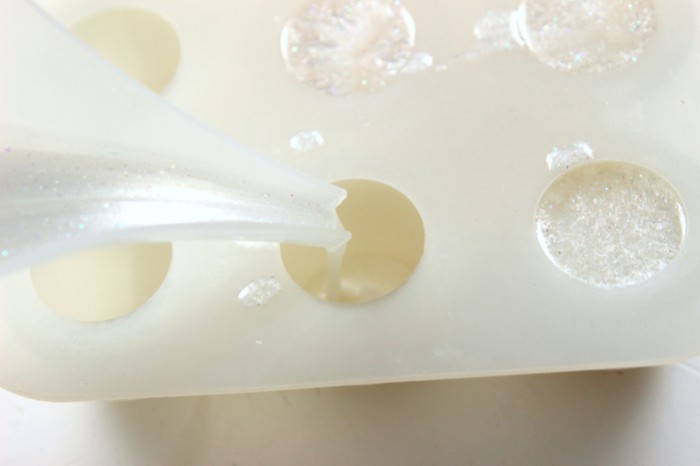
ONE: Chop and melt 6 oz. of clear melt and pour in the microwave using 15 second bursts. Add all the Super Pearly White mixture and stir to thoroughly combine. Add 1/8 tsp. Iridescent Glitter and stir to combine.
 TWO: Carefully pour the soap into the Medium 9 Ball Silicone Mold cavities. After pouring each sphere, spray with rubbing alcohol to disperse any bubbles. Set aside, and allow to fully cool and harden. Note: if you live in a particularly humid climate, you may need to run a fan over the soapy topping spheres for four to eight hours to ensure no glycerin dew forms on the soap balls as they are fully exposed to air.
If you’ve never made Cold Process soap before, stop here! I highly recommend checking out our FREE four part SoapQueen.tv series on Cold Process Soapmaking, especially the episode on lye safety. And if you’d rather do some reading, Bramble Berry carries a wide range of books on the topic, including my newest book, Soap Crafting. You can also checkout the digital downloads for that instant gratification factor.
SAFETY FIRST: Suit up for safe handling practices! That means goggles, gloves and long sleeves. Make sure kids, pets, and other distractions and tripping hazards are out of the house or don’t have access to your soaping space. Always soap in a well-ventilated area.
COLOR PREP: To ensure that the Titanium Dioxide blends smoothly into the soap batter, we recommend micronizing it before dispersing it in oil. Please note this is an optional tip but it does help with the titanium dioxide clumping in the soap =) To micronize colorant, simply use a coffee grinder to blend the colorant to break up any clumps of color and prevent streaks of white from showing in the final soap. We like to use a coffee grinder that has a removable, stainless steel mixing area for easy cleaning. Then, disperse 2 teaspoons of the colorant into 2 tablespoon of sunflower or sweet almond oil (or any other liquid oil). Disperse 2 teaspoons of the Bright Blue Jean Colorant into 2 tablespoons of a light liquid oil. Finally, disperse 1 teaspoon Electric Bubble Gum Colorant into 1 tablespoon light liquid oil. Use a mini mixer to get the clumps of color worked out smoothly.
MOLD & TOOL PREP: Line the Tall Narrow Wood Loaf Mold with freezer paper with the shiny side up. For tips on how to line the mold, click here. Bend your hanger tool so it fits the mold perfectly by length.
ONE: Slowly and carefully add the lye to the water and gently stir until the lye has fully dissolved and the liquid is clear. Set aside to cool.
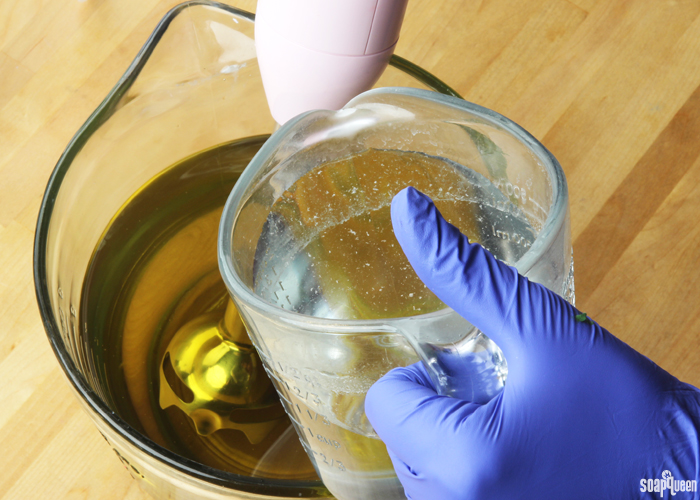
TWO: Melt and combine the avocado butter, avocado oil, coconut oil, olive oil, rice bran oil, and palm oils (remember to fully melt then mix your entire container of palm oil before portioning). Once the lye water and the oils have cooled to 130 degrees or below (and are ideally within 10 degrees of each other), add the lye water to the oils and stick blend until thin trace. If you’d like a harder bar of soap that releases faster from the mold, you can add sodium lactate to the cooled lye water. Use 1 teaspoon of sodium lactate per pound of oils in the recipe. For this recipe, you’d add about 2.5 tsp. sodium lactate.
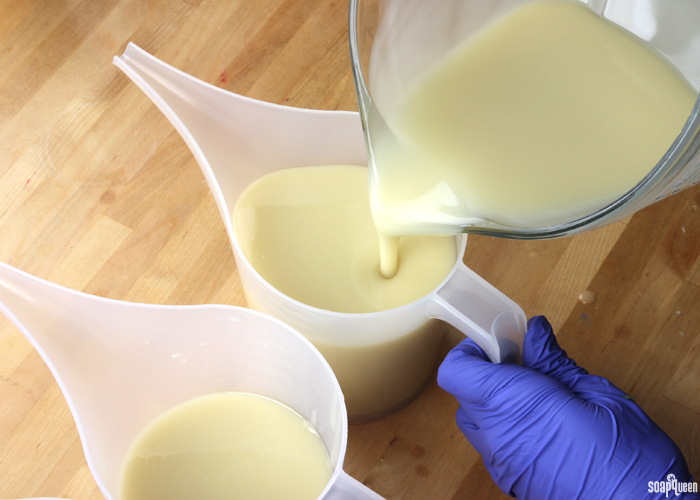
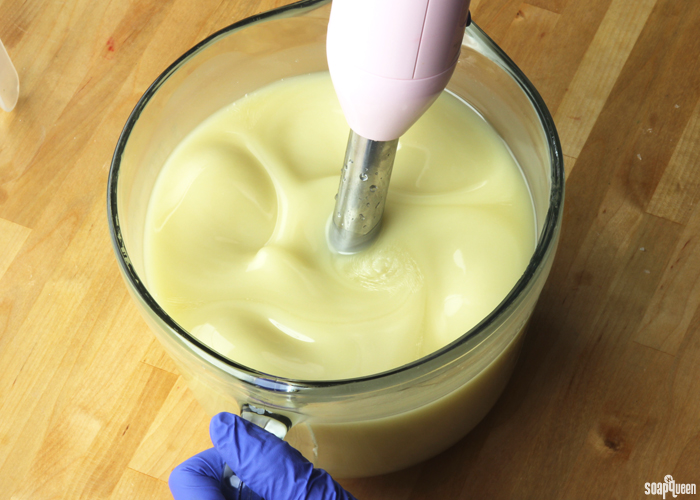 THREE: Once the batter has reached a light trace, split the batch into three separate containers. Two of the containers should contain about 500 mL, and the third container should contain about 700 mL.
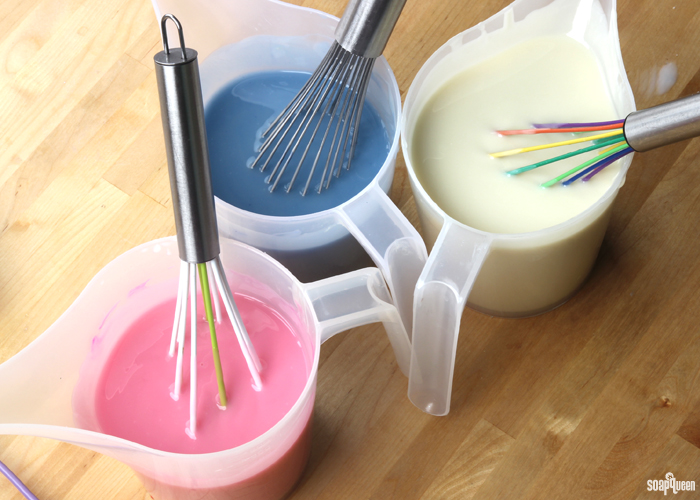
 FOUR: To the first small container, add 1/2 tsp. dispersed Electric Bubble Gum Colorant. To the second small container, add 5 tsp. dispersed Bright Blue Jean colorant. To the larger container, add all of the dispersed Titanium Dioxide Pigment. Use a whisk to thoroughly mix in the colorants.
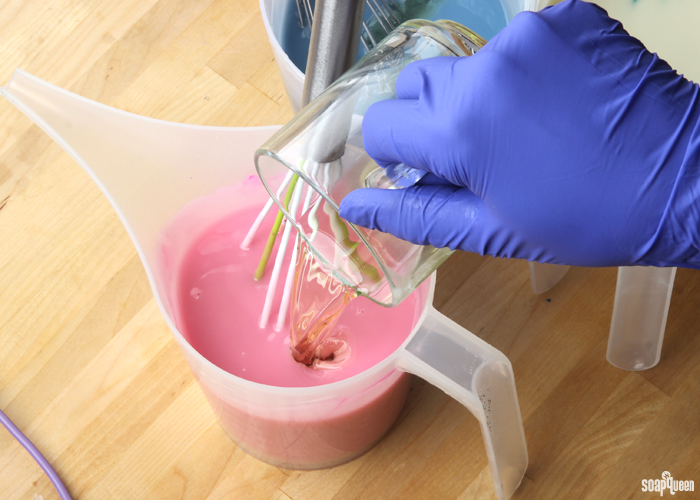
 FIVE: Add the White Rose Fragrance Oil evenly between the three containers. It’s okay to eyeball it! Use a whisk to thoroughly combine.
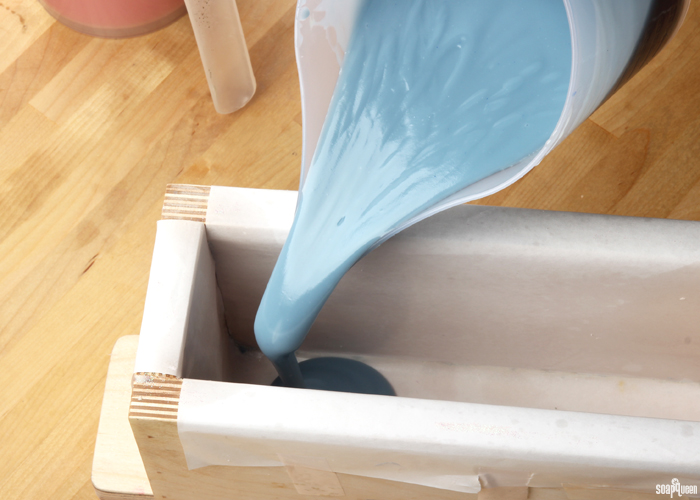
 SIX: Pour half of the blue soap into the mold and tap the mold firmly on the counter to eliminate bubbles.
 SEVEN: Slowly and carefully, pour 1/3 of the white soap on top of the blue layer. Pouring a small stream of soap very slowly will help prevent the white layer from breaking through the blue.
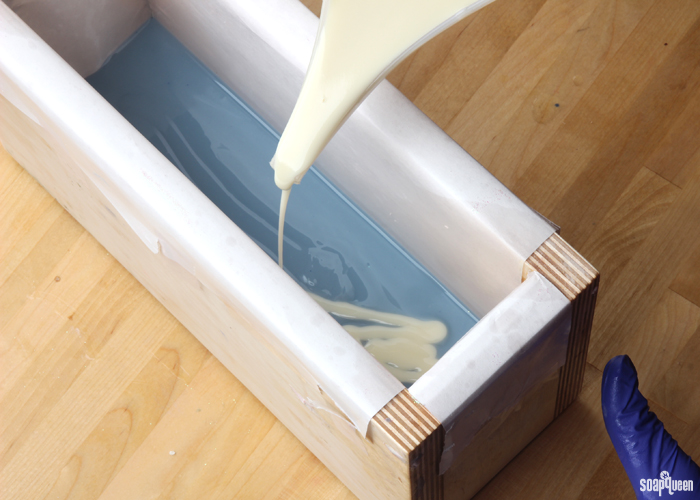 EIGHT: Continue to pour until the entire blue layer is covered. Tap the mold firmly on the counter to release air bubbles.
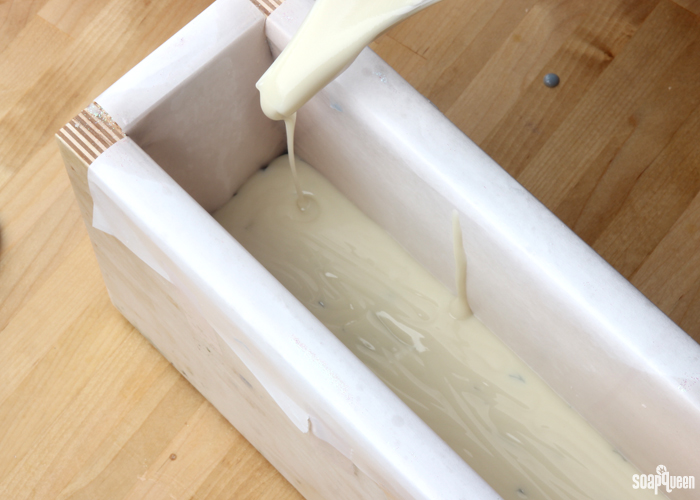 NINE: Slowly and carefully pour half of the pink soap on top of the white layer. Pour the soap carefully to prevent the soap from breaking through the bottom layers. Tap the mold firmly on the counter to help get rid of air bubbles.
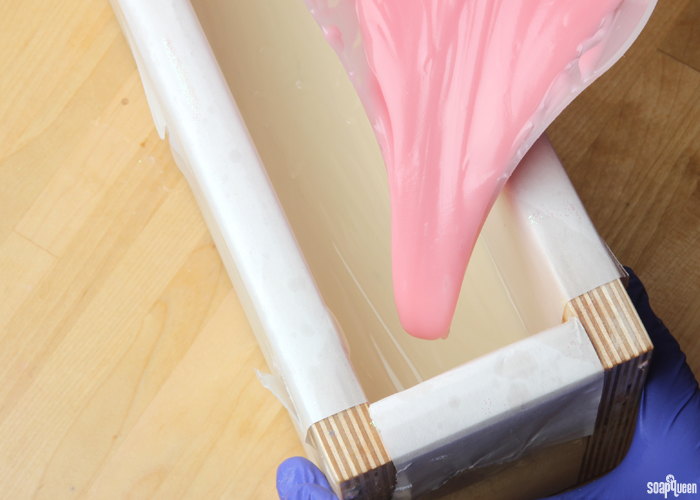 TEN: Slowly pour another 1/3 of the white soap on top of the pink. Pour very slow to ensure it does not break through to the next layer. Tap the mold firmly on the counter.
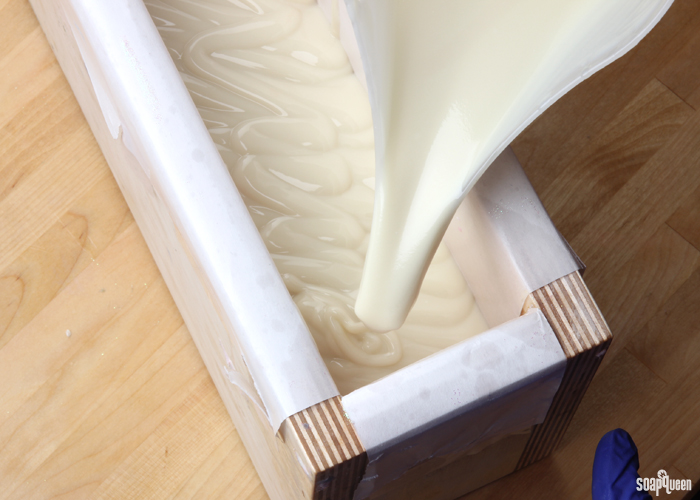 ELEVEN: Pour the remaining blue soap over the white layer. Tap the mold firmly on the counter.
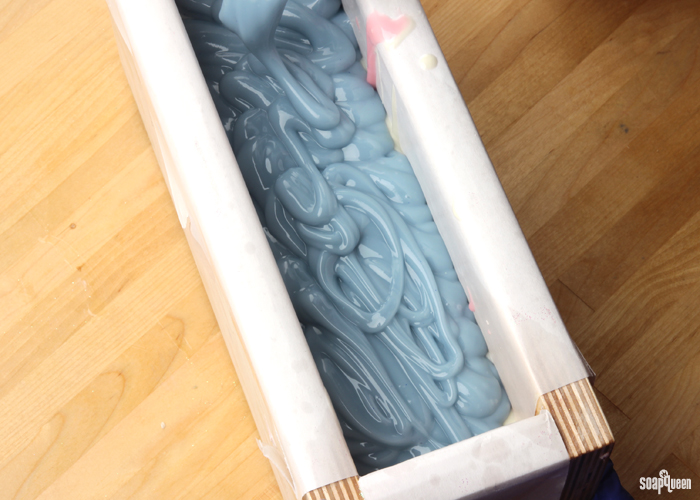 TWELVE: Pour the remaining white soap over the blue layer and tap down the mold on the counter. Now it’s time to make the hanger swirl! Insert the hanger into the soap against the long side of the mold furthest away from you. Drag the hanger against the bottom of the mold toward you; once you drag the hanger about 1/3 of the way, pull the hanger up and out of the mold (shown below). Once the hanger is out of the mold, continue to move it towards you, and insert the hanger back into the soap, next to where it was pulled out. Drag the hanger against the bottom, and pull out against the long side of the mold mold, closest to you.
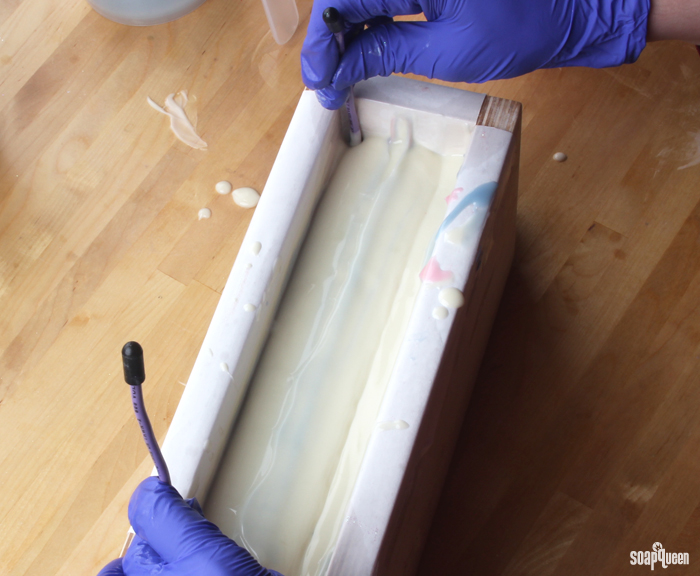
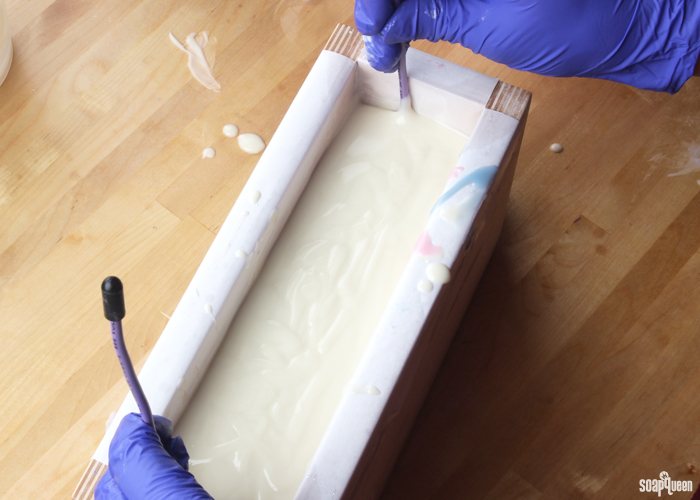 THIRTEEN: Now, it’s time to repeat the process, going in the opposite direction. Insert the hanger tool along the side of the mold closest to you, and drag the hanger against the bottom of the mold. Drag the hanger up and out of the soap. We did this process once in each direction for a total of two times, but you can repeat the motion more if you’d like.
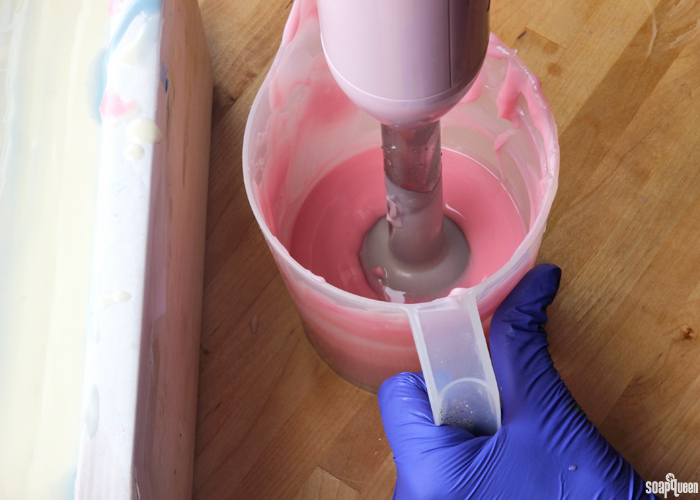
 FOURTEEN: Check the consistency of the remaining pink soap. If it is not a thick trace, pulse the pink soap a few times with the stick blender to thicken.
 FIFTEEN: Use a spoon or spatula to place the pink soap on top.
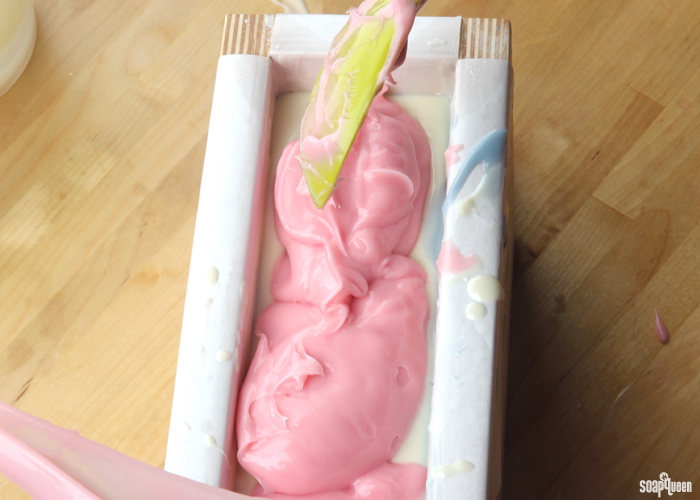 SIXTEEN: Using a spoon, begin to mound the soap towards the center. Don’t worry about making it perfect, lots of texture looks great!
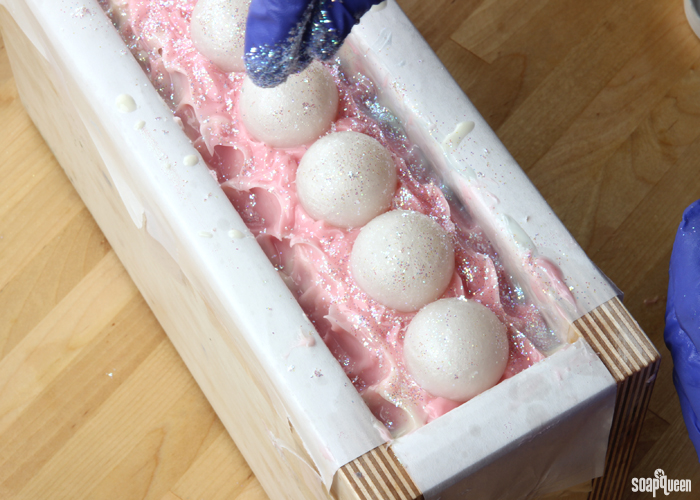
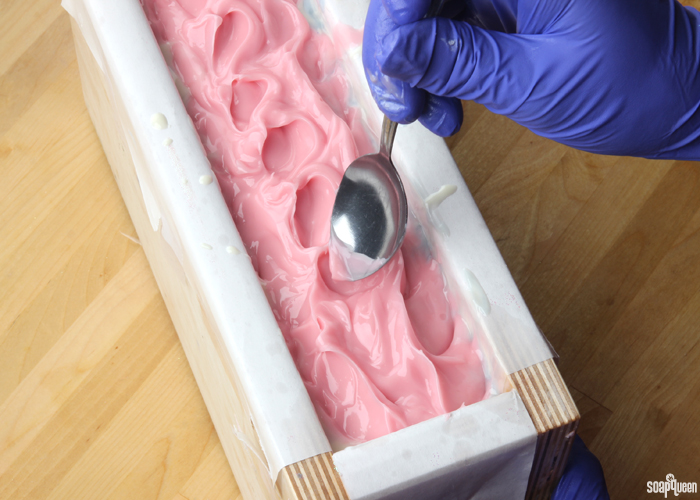 SEVENTEEN: Place the sphere embeds into the pink soap. Leave a very small space in between each sphere so you have room to cut later.
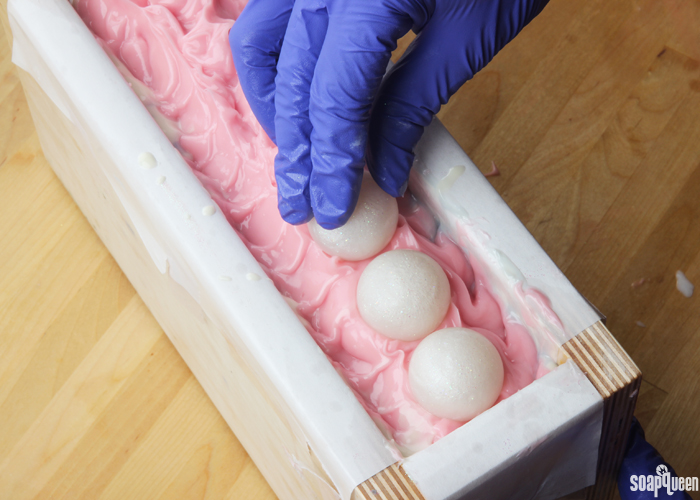 EIGHTEEN: Sprinkle the top with Iridescent Glitter, and spritz with 99% isopropyl alcohol to prevent soda ash. Allow the soap to harden for 3-4 days before unmolding. Allow it to cure for 4-6 weeks and enjoy!
What is your favorite fairy tale? Cinderella is such a classic!
- Tall Narrow Wood Loaf Mold
- 1.9 oz. Avocado Butter
- 5.9 oz. Avocado Oil
- 7.8 oz. Coconut Oil
- 9.8 oz. Olive Oil
- 5.9 oz. Palm Oil
- 7.8 oz. Rice Bran Oil
- 5.3 oz. Sodium Hydroxide Lye
- 12.9 oz. Distilled Water
- Titanium Dioxide
- Bright Blue Jean Colorant
- Electric Bubble Gum Colorant
- Iridescent Glitter
- 2 oz. White Rose Fragrance Oil
- Hanger tool
- Medium 9 Ball Silicone Mold
- 6 oz. Clear Melt and Pour
- Super Pearly White Mica
- Iridescent Glitter
- Chop and melt 6 oz. of clear melt and pour in the microwave using 15 second bursts. Add all the Super Pearly White mixture and stir to thoroughly combine. Add ⅛ tsp. Iridescent Glitter and stir to combine.
- Carefully pour the soap into the Medium 9 Ball Silicone Mold cavities. After pouring each sphere, spray with rubbing alcohol to disperse any bubbles. Set aside, and allow to fully cool and harden.
- Slowly and carefully add the lye to the water and gently stir until the lye has fully dissolved and the liquid is clear. Set aside to cool.
- Melt and combine the avocado butter, avocado oil, coconut oil, olive oil, rice bran oil, and palm oils (remember to fully melt then mix your entire container of palm oil before portioning). Once the lye water and the oils have cooled to 130 degrees or below (and are ideally within 10 degrees of each other), add the lye water to the oils and stick blend until thin trace. If you’d like a harder bar of soap that releases faster from the mold, you can add sodium lactate to the cooled lye water. Use 1 teaspoon of sodium lactate per pound of oils in the recipe. For this recipe, you’d add about 2.5 tsp. sodium lactate.
- Once the batter has reached a light trace, split the batch into three separate containers. Two of the containers should contain about 500 mL, and the third container should contain about 700 mL.
- To the first small container, add ½ tsp. dispersed Electric Bubble Gum Colorant. To the second small container, add 5 tsp. dispersed Bright Blue Jean colorant. To the larger container, add all of the dispersed Titanium Dioxide Pigment. Use a whisk to thoroughly mix in the colorants.
- Add the White Rose Fragrance Oil evenly between the three containers. It’s okay to eyeball it! Use a whisk to thoroughly combine.
- Pour half of the blue soap into the mold and tap the mold firmly on the counter to eliminate bubbles.
- Slowly and carefully, pour ⅓ of the white soap on top of the blue layer. Pouring a small stream of soap very slowly will help avoid the white layer breaking through the blue.
- Continue to pour until the entire blue layer is covered. Tap the mold firmly on the counter to release air bubbles.
- Slowly and carefully pour half of the pink soap on top of the white layer. Pour the soap carefully to avoid the soap from breaking through the bottom layers. Tap the mold firmly on the counter to help get rid of air bubbles.
- Slowly pour the white soap on top of the pink. Pour very slow to ensure it does not break through to the next layer. Tap the mold firmly on the counter.
- Pour the remaining blue soap over the white layer. Tap the mold firmly on the counter.
- Pour the remaining white soap over the blue layer and tap down the mold on the counter. Now it’s time to make the hanger swirl! Insert the hanger into the soap, against the long side of the mold furthest away from you. Drag the hanger against the bottom of the mold toward you; once you drag the hanger about ⅓ of the way, pull the hanger up and out of the mold (shown below). Once the hanger is out of the mold, continue to move it towards you, and insert the hanger back into the soap, next to where it was pulled out, drag the hanger against the bottom, and pull out against the long side of the mold mold, closest to you.
- Now, it’s time to repeat the process, going in the opposite direction. Insert the hanger tool along the side of the mold closest to you, and drag the hanger against the bottom of the mold. Drag the hanger up and out of the soap. We did this process once in each direction for a total of two times, but you can repeat the motion more if you’d like.
- Check the consistency of the remaining pink soap. If it is not a thick trace, pulse the pink soap a few times with the stick blender to thicken.
- Use a spoon or spatula to place the pink soap on top.
- Using a spoon, begin to mound the soap towards the center. Don’t worry about making it perfect, lots of texture looks great!
- Place the sphere embeds into the pink soap. Leave a very small space in between each sphere so you have room to cut later.
- Sprinkle the top with Iridescent Glitter, and spritz with 99% isopropyl alcohol to prevent soda ash. Allow the soap to harden for 3-4 days before unmolding. Allow it to cure for 4 – 6 weeks and enjoy!


Is a “hanger tool” just something you make yourself or is it something you can actually buy?
We have a hanger tool on BrambleBerry.com that works really well! You can find that here: https://www.brambleberry.com/Hanger-Swirl-Tool-P6263.aspx
You can also use a regular hanger you have at home! Just make sure it’s not aluminum, as that can react with the lye and create toxic fumes. Stainless steel works best. 🙂
-Kelsey with Bramble Berry
This is a beautiful soap ! Definitely a must try : )
The thing is, I would like to try and use only natural colorants. Although is pricey, I thought I could use blue chamomile to achieve the blue hue, and pink clay for the rose hue. But I couldn’t find the blue chamomile EO in your fragrance calculator, and I wouldn’t want to waste a drop of such an expensive product. Any ideas of how much I should use?
Hi Rosy!
So glad you like the soap! Have fun giving it a try. 🙂
Natural colors would look great in this recipe! This Sunday Night Spotlight: Brazilian Clay has more information on how to add clay to your soap: http://www.soapqueen.com/bramble-berry-news/sunday-night-spotlight-brazilian-clay/
As for the Chamomile, German, Blue Essential Oil, I would recommend starting out with just a couple of drops and mixing it in the soap. If you want it a little darker, you can add some more drops. You can add up to .7 ounces per pound of cold process soap, but I don’t think you’ll need that much. 🙂
Chamomile, German, Blue Essential Oil: https://www.brambleberry.com/Chamomile-German-Blue-Essential-Oil-P3820.aspx
-Kelsey with Bramble Berry
I’ve decided to take this recipe as inspiration for my cold process soap for “Into The Woods”. It uses an in the pot swirl technique and gold and teals. My favorite story as a child was the original, “Ice Queen” by Christian Hans Anderson. Thank you for the recipe, and the pearls were a nice touch
Hi Jonathan!
That sounds like such a fun soap! Gold and teal is one of my favorite color combinations right now. You’re welcome for the recipe, so glad you like it. 🙂
-Kelsey with Bramble Berry
Thank you so much for this tutorial and for the inspiration to make a series of Disney princess themed soaps starting with this one that I made last week. I am so happy with the way it turned out – it looks and smells just beautiful! I love the scent of the new White Rose fragrance which is very fitting for the Sleeping Beauty (aka Briar Rose) theme. My 3 year-old granddaughter is already claiming this as her princess soap!
Hi Jan!
You’re welcome, so glad you like the tutorial! Also, that’s awesome to hear that your soap turned out well! I love White Rose Fragrance Oil too, it’s so fresh. 🙂
We’d love to see pictures if you have any! You can post those on our Bramble Berry Facebook page: https://www.facebook.com/BrambleBerry?ref=hl
-Kelsey with Bramble Berry
And one more question. I’ve read that when you make the soap with gm you should put your mold in the freezer right away, and try to unmold after 12 hours. What if it’s not ready to come out? Put back in the freezer until it’s ready?
And after you can unmold, what next? cut your slices and leave in a rack for 4-6 weeks like any other soap? or is it ready to use? Thanks in advance !!
ps sorry that these questions are unrelated to this recipe, but the other chat had been closed.
Hi Rosy!
No worries, we are happy to answer any questions you may have! With goat milk soap, we recommend popping it in the freezer right away and letting it sit overnight. That keeps the soap from getting too hot and scorching the milk.
We like to leave it in the freezer overnight, then let it sit in the mold for another couple of days. That ensures that the soap isn’t too soft when you try to cut it. This is especially true of goat milk soap, which has added fats that make the soap a little softer. Learn more in the Goat Milk Soap video on Soap Queen TV: http://www.soapqueen.com/bath-and-body-tutorials/cold-process-soap/goat-milk-soap-tutorial-on-soap-queen-tv/
After it’s cut, we recommend letting it cure for 4-6 weeks. That makes the soap firmer, milder and last longer in the shower. 🙂
-Kelsey with Bramble Berry
hello,
I’m about to make my first gm soap. I’ve been making several cp recipes but until now I hadn’t paid much attention to the fact that my digital scale displays only one digit after the decimal point, so I’ve been rounding up the numbers (ie, 7.92oz to 7.9oz).
I haven’t used any soap yet because it hasn’t been 4 weeks after my first batch… so I don’t know how this could have affected my recipes. Do I need to buy a new scale? Please help. Thank you.
Hi Rosy!
We typically round up all of our recipes with no problems! It is such a small amount it shouldn’t affect your final soap at all. It should be just fine to use. 🙂
-Kelsey with Bramble Berry
Thank you Kelsey SO much : )
love your site : *
I will let you know how my soap turns out : )
I always set my molds in the fridge overnight before cutting. Better safe than sorry when using mp embeds. These are so pretty!
Hi Angie!
Thanks so much for sharing that tip! Also, so glad you like the soap. 🙂
-Kelsey with Bramble Berry
Gorgeous soap! It reminds me more of Sleeping Beauty, not only for the song “Once Upon a Dream”, but also for the way her dress changes from pink to blue to pink to blue to pink… so I think you nailed the princess theme beautifully!
Thanks so much Janelle! So glad you like the soap. 🙂
-Kelsey with Bramble Berry
Very pretty!!
So how thick do you cut this? Are they 1 inch bars? They just seem so small to me. I find that I have to cut them 1.25 or 1.5 inch when I’m using the tall skinny silicone mold. Thanks.
Hi Martina!
These bars are about 1 1/4″ thick. We typically cut them about 1″, but these are a little thicker because of the spheres on top. I agree, I like the bars a little thicker when I use the skinny molds! 🙂
-Kelsey with Bramble Berry
Tall 12″ Silicone Loaf Mold: https://www.brambleberry.com/Tall-12-Silicone-Loaf-Mold-P6073.aspx
Beautiful soap! Since the top is made with melt and pour and the soap is cold process how can I prevent the melt and pour top from sweating?
Hi Marleny!
To keep the melt and pour embed from sweating, it helps to cure the soap in a cool, dark place with lots of airflow. You can also run a fan over the soaps as they cure, or use a dehumidifer in your curing room.
You can also use our low-sweat bases! They have less glycerin, so there is little to no sweating. 🙂
LCP bases: https://www.brambleberry.com/Search.aspx?k=lcp
-Kelsey with Bramble Berry
Gorgeous!
Thanks so much Margaret! Glad you like the tutorial. 🙂
-Kelsey with Bramble Berry
Do you cover this soap or just set it to the side to harden?
Hi Karen!
We let this soap sit at room temperature. You can definitely cover it if you like though! You can put a piece of cardboard on top and cover it with blankets to force it to go through gel phase.
Keep in mind the melt and pour spheres on top have a melting point of about 120F, so if it gets really hot they may start to melt slightly. That’s something to consider before gelling!
-Kelsey with Bramble Berry
Jazzed About Gel Phase: http://www.soapqueen.com/bath-and-body-tutorials/tips-and-tricks/gel-phase/