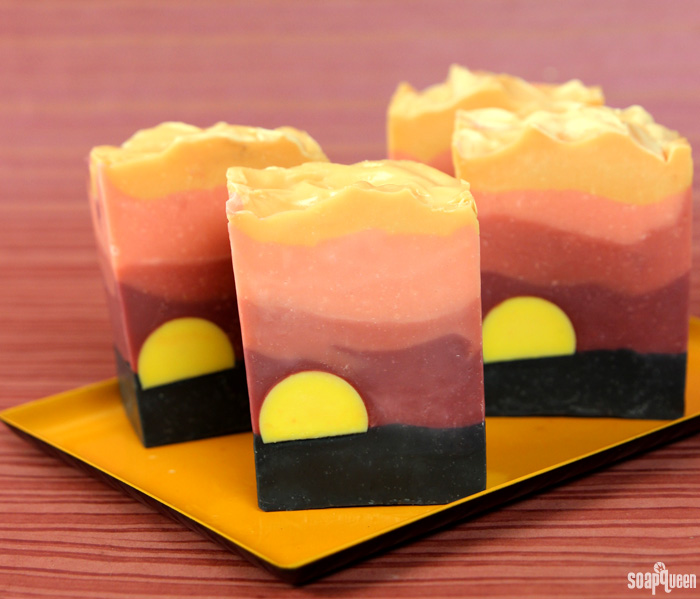
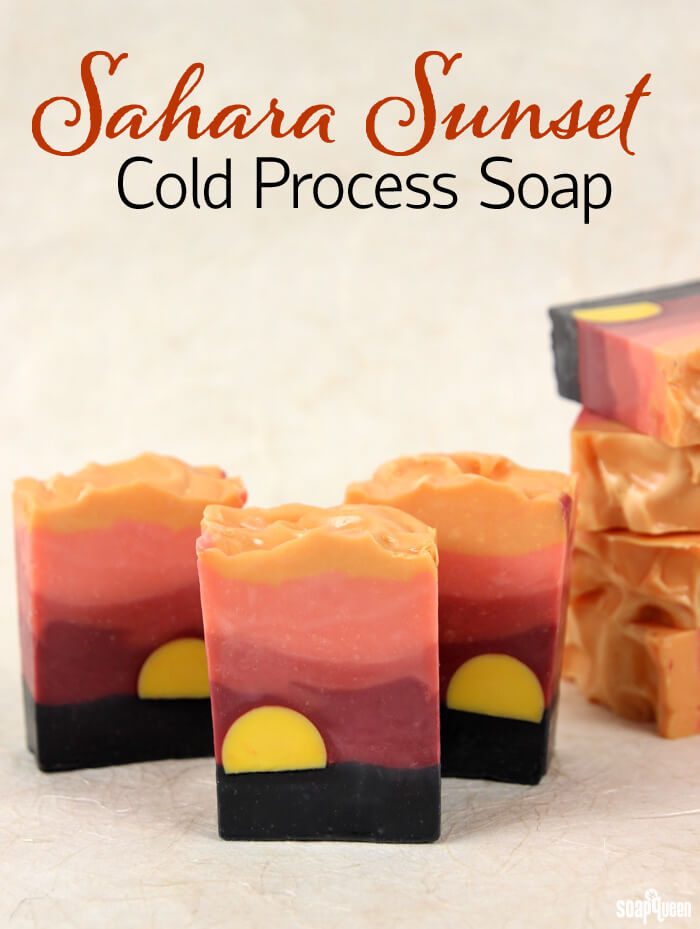
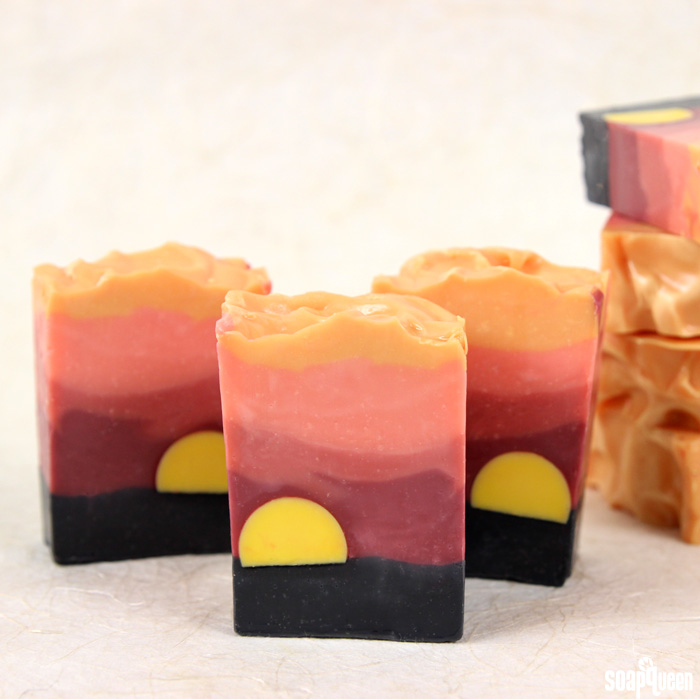
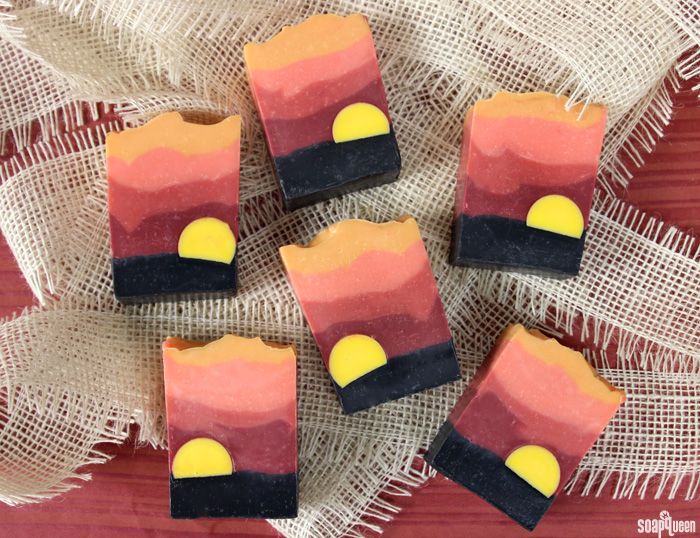
Soap design inspiration can come from anywhere. From fragrances to color, places and people, inspiration can strike at any moment. This Sahara Sunset Cold Process was inspired by the iconic image of an African sunset. As the bright yellow sun sets over the landscape, the silhouettes of wildlife and flora come to life. The bright yellow sun is created with LCP (like cold process) melt and pour soap. LCP soap has little to no sweating, which makes it perfect for embeds.
Layers of red, orange and yellow cold process are then layered on top. This project is scented with a blend of Patchouli, Orange Peel Cybilla and Beau Brummel Cybilla Fragrance Oils, which results in a citrusy, spicy and complex scent. While this design looks complex, it is actually quite easy to achieve! This design relies on creating layers with medium to thick trace soap. The layers make it a great design choice for accelerating fragrance oils.
What You’ll Need:
Tall 12″ Silicone Loaf Mold
1.7 oz. Avocado Butter
3.4 oz. Canola Oil
8.5 oz. Coconut Oil
1.7 Coffee Butter
3.4 oz. Hazelnut Oil
6.8 oz. Olive Oil (Pomace)
8.5 oz. Palm Oil
4.8 oz. Sodium Hydroxide Lye
11.2 oz. Distilled Water
.8 oz. Beau Brummel Cybilla Fragrance Oil
.6 oz. Patchouli Fragrance Oil
.5 oz. Orange Peel Cybilla Fragrance Oil
Black Oxide
Merlot Sparkle Mica
Fizzy Lemonade Colorant
Electric Bubblegum Colorant
Tangerine Wow! Colorant
Embed
Mini Round Silicone Column Mold
LCP White Melt and Pour Base
Shimmer Yellow Color Block

Click here to add everything you need for this project to your Bramble Berry shopping cart!
Make the Embed
ONE: Chop and melt 6 oz. of the LCP White Melt and Pour Base in the microwave using 10-15 second bursts. Once melted, add shavings of the Shimmer Yellow Color Block and stir until you achieve a bright yellow color. Pour the soap into the mold and allow the soap to fully cool and harden.
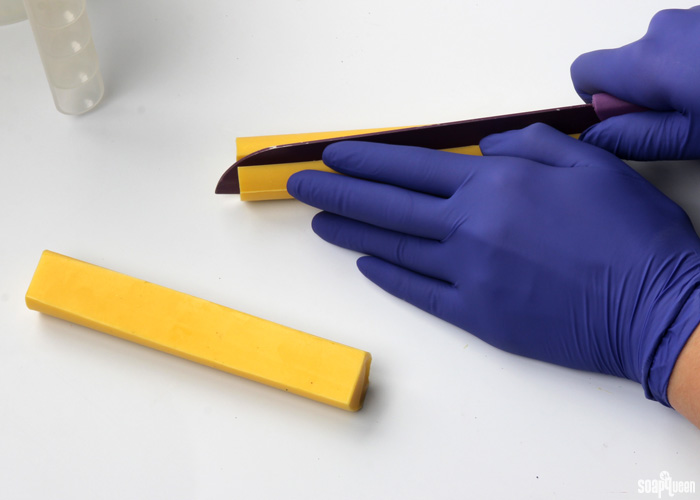
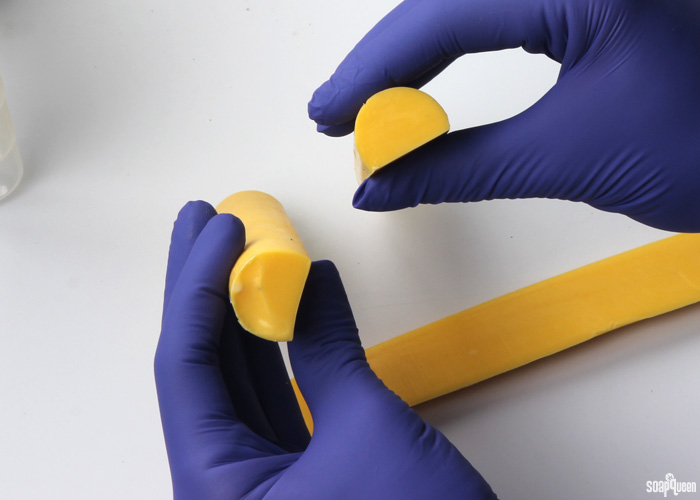
TWO: Once hardened, remove from the mold. Cut the soap embed in half vertically. Then, trim off about 1/3 of the sphere to create a flat surface. You don’t have to cut the mold in half first if you don’t want to, but I found it was easier to cut a flat surface this way =). Set the embeds aside until you’re ready to make the cold process soap.
If you’ve never made Cold Process soap before, stop here! I highly recommend checking out our FREE four part SoapQueen.tv series on Cold Process Soapmaking, especially the episode on lye safety. And if you’d rather do some reading, Bramble Berry carries a wide range of books on the topic, including my newest book, Soap Crafting. You can also checkout the digital downloads for that instant gratification factor.
SAFETY FIRST: Suit up for safe handling practices! That means goggles, gloves and long sleeves. Make sure kids, pets, and other distractions and tripping hazards are out of the house or don’t have access to your soaping space. Always soap in a well-ventilated area.
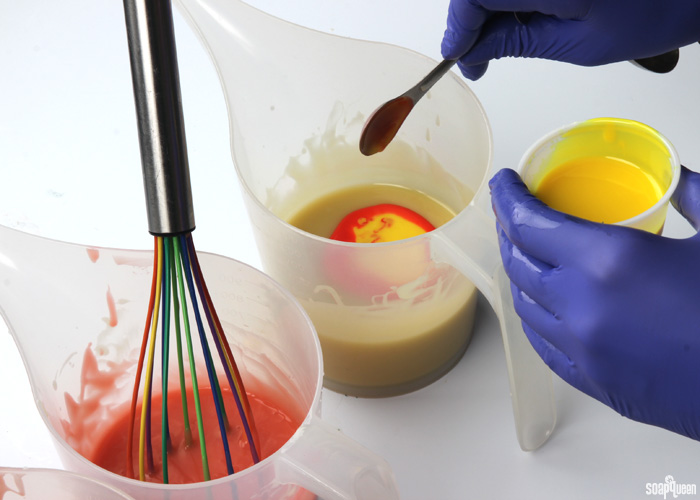
COLOR PREP: Disperse 1 teaspoon of the Black Oxide colorant into 1 tablespoon of sunflower or sweet almond oil (or any other liquid oil). In a separate container disperse 2 teaspoons Merlot Sparkle Mica, Fizzy Lemonade Colorant and Tangerine Wow! Colorant in 2 tablespoons oil. Lastly, disperse 1 teaspoon Electric Bubblegum Colorant into 1 tablespoon oil. Use a mini mixer to disperse any clumps.
FRAGRANCE PREP: In a glass, fragrance safe container, blend together the Beau Brummel Cybilla Fragrance Oil, Patchouli Fragrance Oil and Orange Peel Cybilla Fragrance Oil. Set aside.
ONE: Slowly and carefully add the lye to the water and gently stir until the lye has fully dissolved and the liquid is clear. Set aside to cool.
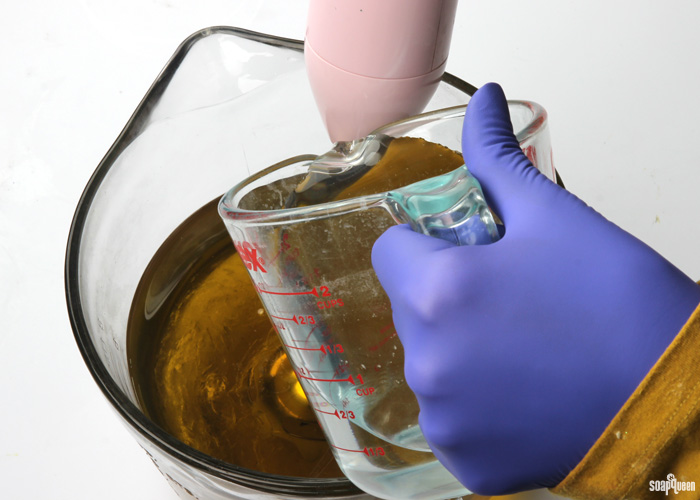
TWO: Combine the coconut oil, olive oil pomace, hazelnut oil, canola oil, palm oil, coffee butter and avocado butter (remember to fully melt then mix your entire container of palm oil before portioning). Once the lye water and the oils have cooled to 130 degrees or below (and are ideally within 10 degrees of each other), add the lye water to the oils and stick blend until you reach a light trace. If you’d like a harder bar of soap that releases faster from the mold, you can add sodium lactate to the cooled lye water. Use 1 teaspoon of sodium lactate per pound of oils in the recipe. For this recipe, you’d add about 3 tsp. sodium lactate.
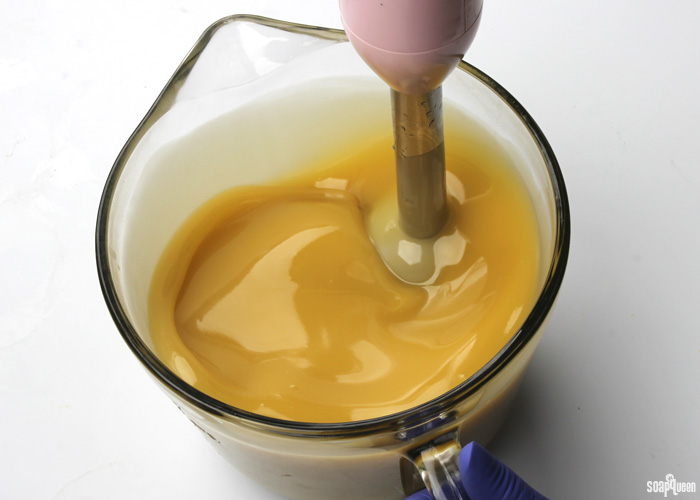
THREE: Once the soap has reached a light trace, add the fragrance blend to the entire batch and use a whisk to fully mix in.
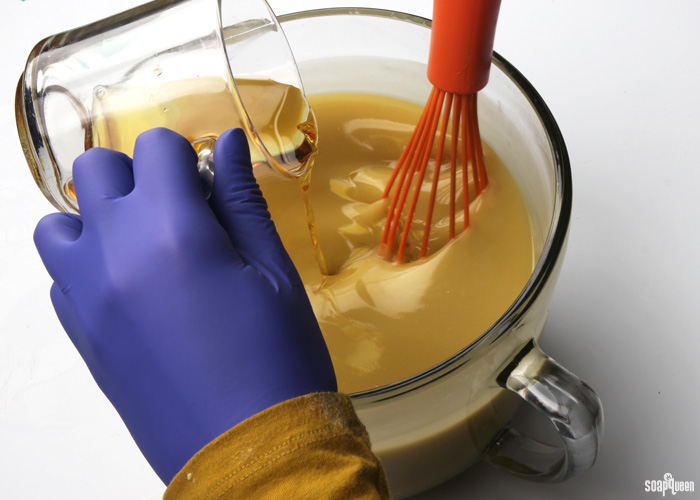 FOUR: Split the soap into four containers. Each will hold about 300 mL. You will have about 1 cup left of soap in the large container. To the soap in the large container, add 1/2 tsp. of dispersed black oxide and use a whisk to mix in.
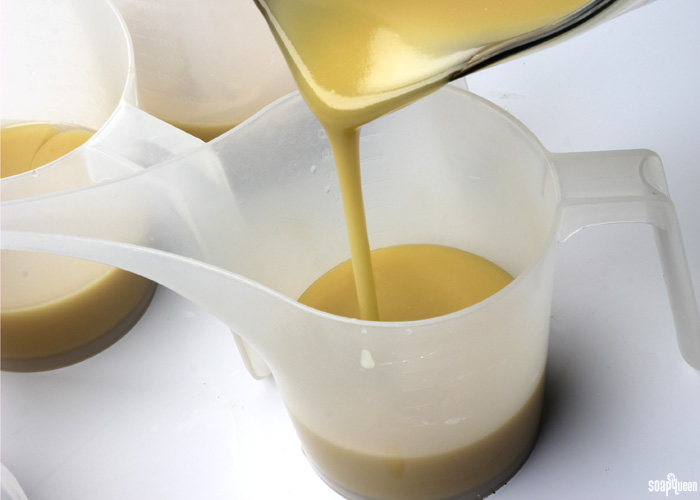 FIVE: To the remaining four containers holding 300 mL, add the dispersed colorants in the amounts below. Use a whisk to mix in the colorants completely.
- Container A (dark red): 1 teaspoon dispersed Merlot Sparkle Mica + 1 teaspoon dispersed Tangerine Wow! Colorant + .5 teaspoon dispersed Electric Bubblegum Colorant + a few drops of dispersed Black Oxide
- Container B (orange): 2.5 teaspoons dispersed Tangerine Wow! Colorant +.5 teaspoon dispersed Merlot Sparkle Mica
- Container C (light orange): 2 teaspoons dispersed Tangerine Wow! Colorant
- Container D (yellow): 3.5 teaspoons dispersed Fizzy Lemonade Colorant + .5 teaspoon dispersed Tangerine Wow! Colorant
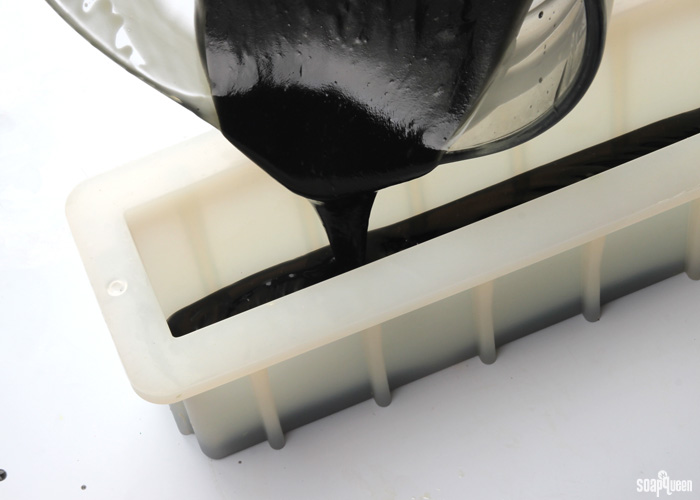
SIX: Pour the black soap into the mold, and tap down firmly on the counter to get rid of any bubbles. If your soap is still a very thin trace, stick blend for a few seconds to achieve a medium trace before pouring into the mold.
SEVEN: Place the melt and pour embeds in top of the black soap, slightly to the side of the mold. Press down very gently so the embed sticks, but is not submerged into the black soap.
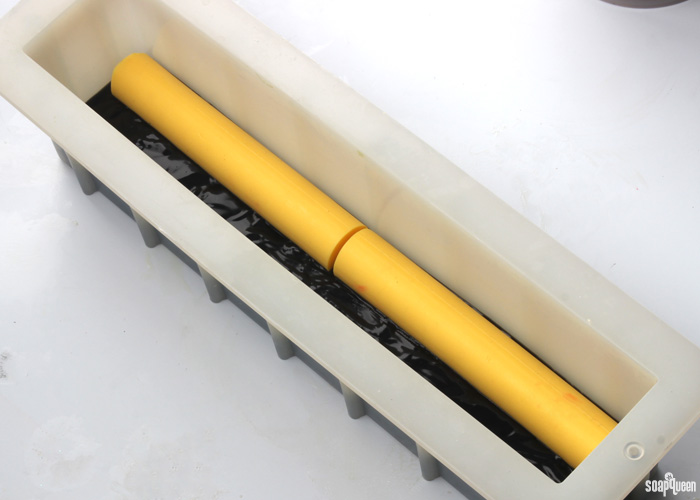 EIGHT: Check the texture of the orange, red and yellow soap. You want quite a thick trace. If it is still thin, stick blend each color light to dark for several seconds until thick. Once it is a nice thick trace (the texture of pudding) spoon the deep red soap into the mold. Use a spoon to create slight peaks into the dark red soap, don’t worry about the layer being perfectly even and straight!
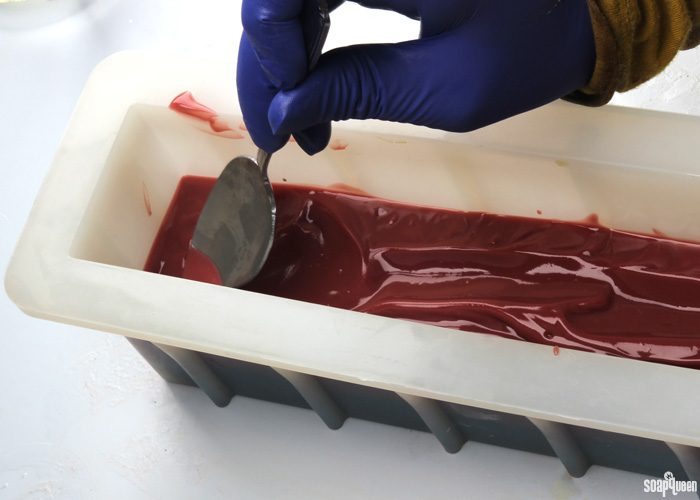
NINE: Use a spoon to plop the dark orange soap on top of the red soap down the entire length of the mold. Use the spoon to spread the orange soap evenly throughout the mold and then create very slight peaks into the layer.
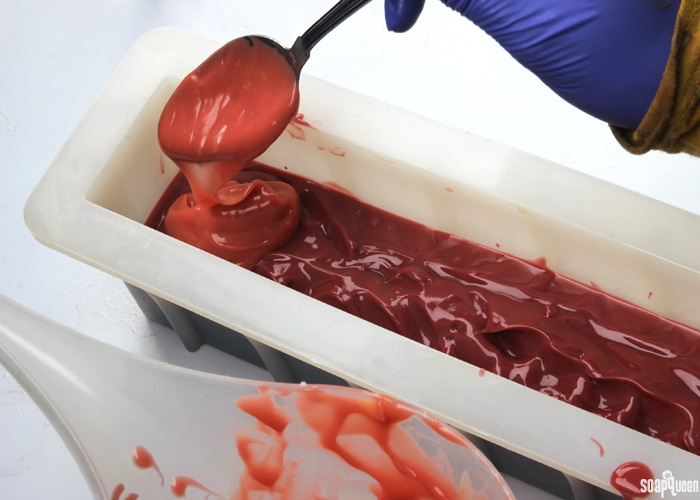
TEN: Add the light orange soap on top of the dark orange layer down the entire length of the mold, and use the spoon to create slight texture. Don’t worry about the layer being straight and even!
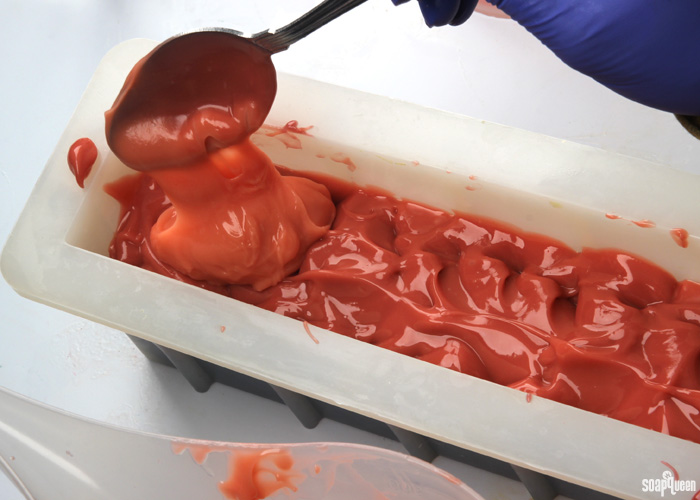
ELEVEN: Finally, spoon the yellow soap onto the light orange soap down the entire length of the mold, Use the spoon to create a nice textured top. Don’t worry about making it perfect!
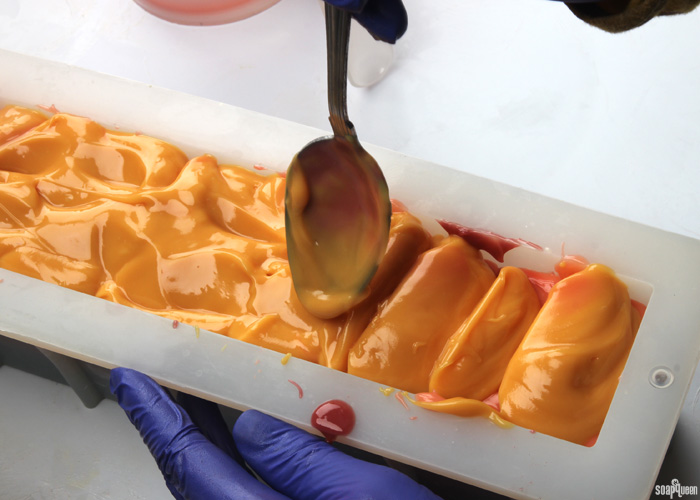
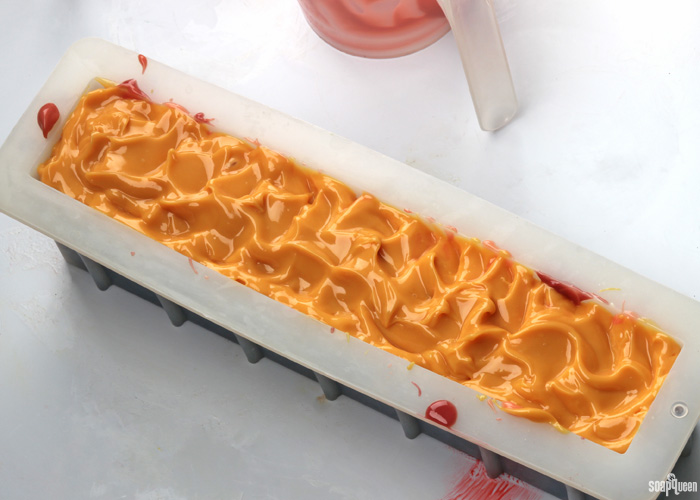
TWELVE: Once you’re happy with the texture on top, tap the mold firmly on the counter several times to get rid of any bubbles. Spray with 99% isopropyl alcohol to avoid any soda ash. Continue to spritz the top with alcohol every 15-20 minutes for the first hour. This helps form a barrier on top that prevents pesky soda ash! Allow the soap to sit in the mold for 3-4 days. Unmold, cut and allow to cure for 4-6 weeks. Enjoy!
Have you tried making “landscape” soap before? I have been trying to create a soap based on the Swiss Alps the past week…it’s a great challenge!
- Tall 12″ Silicone Loaf Mold
- 1.7 oz. Avocado Butter
- 3.4 oz. Canola Oil
- 8.5 oz. Coconut Oil
- 1.7 Coffee Butter
- 3.4 oz. Hazelnut Oil
- 6.8 oz. Olive Oil
- 8.5 oz. Palm Oil
- 4.8 oz. Sodium Hydroxide Lye
- 11.2 oz. Distilled Water
- .8 oz. Beau Brummel Cybilla Fragrance Oil
- .6 oz. Patchouli Fragrance Oil
- .5 oz. Orange Peel Cybilla Fragrance Oil
- Black Oxide
- Merlot Sparkle Mica
- Fizzy Lemonade Colorant
- Electric Bubblegum Colorant
- Tangerine Wow! Colorant
- Mini Round Silicone Column Mold
- LCP White Melt and Pour Base
- Shimmer Yellow Color Block
- Chop and melt 6 oz. of the LCP White Melt and Pour Base in the microwave using 10-15 second bursts. Once melted, add shavings of the Shimmer Yellow Color Block and stir until you achieve a bright yellow color. Pour the soap into the mold and allow the soap to fully cool and harden.
- Once hardened, remove from the mold. Cut the mold in half. Then, trim off about ⅓ of the sphere to create a flat surface. You don’t have to cut the mold in half first if you don’t want to, but I found it was easier to cut a flat surface this way =) Set the embeds aside until you’re ready to make the cold process soap.
- Slowly and carefully add the lye to the water and gently stir until the lye has fully dissolved and the liquid is clear. Set aside to cool.
- Combine the coconut oil, olive oil, hazelnut oil, canola oil, palm oil, coffee butter and avocado butter (remember to fully melt then mix your entire container of palm oil before portioning). Once the lye water and the oils have cooled to 130 degrees or below (and are ideally within 10 degrees of each other), add the lye water to the oils and stick blend until you reach a light trace. If you’d like a harder bar of soap that releases faster from the mold, you can add sodium lactate to the cooled lye water. Use 1 teaspoon of sodium lactate per pound of oils in the recipe. For this recipe, you’d add about 3 tsp. sodium lactate.
- Once the soap has reached a light trace, add the fragrance blend to the entire batch and use a whisk to fully mix in.
- Split the soap into four containers, each will hold about 300 mL. You will have about 1 cup left of soap in the large container. To this soap, add ½ tsp. of dispersed black oxide and use a whisk to mix in.
- To the remaining four containers holding 300 mL, add the dispersed colorants in the amounts below. Use a whisk to mix in the colorants completely.
Container A (dark red): 1 teaspoon Merlot Sparkle Mica + 1 teaspoon Tangerine Wow! Colorant + .5 teaspoon Electric Bubblegum Colorant + a few drops of Black Oxide
Container B (orange): 2.5 teaspoons Tangerine Wow! Colorant +.5 teaspoon Merlot Sparkle Mica
Container C (light orange): 2 teaspoons Tangerine Wow! Colorant
Container D (yellow): 3.5 teaspoons Fizzy Lemonade Colorant + .5 teaspoon Tangerine Wow! Colorant - Pour the black soap into the mold, and tap down firmly on the counter to get rid of any bubbles. If your soap is still a very thin trace, stick blend for a few seconds to achieve a medium trace before pouring into the mold.
- Place the melt and pour embeds in top of the black soap, slightly to the side of the mold. Press down very gently so the embed sticks, but is not submerged into the black soap.
- Check the texture of the orange, red and yellow soap. You want quite a thick trace. If it is still thin, stick blend each color light to dark for several seconds until thick. Once it is a nice thick trace (the texture of pudding) spoon the deep red soap into the mold. Use a spoon to create slight peaks into the dark red soap, don’t worry about the layer being perfectly even and straight!
- Use a spoon to plop the dark orange soap on top of the red soap down the entire length of the mold. Use the spoon to spread the orange soap evenly throughout the mold and use the spoon to create very slight peaks into the layer.
- Add the light orange soap on top of the dark orange layer down the entire length of the mold, and use the spoon to create slight texture. Don’t worry about the layer being straight and even!
- Finally, spoon the yellow soap onto the light orange soap down the entire length of the mold, Use the spoon to create a nice textured top. Don’t worry about making it perfect!
- Once you’re happy with the texture on top, tap the mold firmly on the counter several times to get rid of any bubbles. Spray with 99% isopropyl alcohol to avoid any soda ash. Continue to spritz the top with alcohol every 15-20 minutes for the first hour. This helps form a barrier on top that prevents pesky soda ash! Allow the soap to sit in the mold for 3-4 days. Unmold, cut and allow to cure for 4-6 weeks. Enjoy!


Can the embed be a cured CP soap?
You can definitely use a cold process embed for this recipe! However, you want the embed to be as fresh as possible (only a couple days old). That will ensure the embed and base soap cure at the same rate. If the embed is cured, the base soap may cure around it and create an uneven or warped look. Fresh is best. 🙂
-Kelsey with Bramble Berry
This is my favorite design of all and I have now made it three times. I had a few minor issues this time, but they are minimal. Overall, it is gorgeous and I love it. Check out the cutting on youtube.com under theorgelmeister. I gave a shout to soapqueen for providing the design and instructions. Thanks so much for ALL the help I get here. You folks are the best!
p.s. I’ll be doing the infinity swirl this evening for the first time!
Yay, so glad you like this design Eric! It’s one of my favorites as well. 🙂
-Kelsey with Bramble Berry
Infinity Swirl Cold Process Soap: https://www.youtube.com/watch?v=–NxCfEq8kM
Question about layering : Can you let a layer of cold process soap sit overnight and then add a second layer the next day or even a couple days later? Would there be a problem with the layers sticking together if you did this?
Hi there!
We typically like to pour those layers right away when making a layered design or doing cold process frosting. We’ve found the layers stick together that way! However, I have seen people layer them the next day to get really crisp lines. I would recommend making a small test batch of the soap to see if they stick nicely when poured the next day. That way you can be sure before making a larger batch. 🙂
-Kelsey with Bramble Berry
I am all set to make this beautiful landscape but get confused by the Colorants. Do I mix each color separately or do I combine In a separate container the 2 teaspoons Merlot Sparkle Mica, Fizzy Lemonade Colorant and Tangerine Wow! Colorant in 2 tablespoons oil. That seems like a lot of powder for 2 TBS oil. Then when it’s time to add to containers with divided soap, it seems like I am adding from individual cups of colorant. Please help!!! I really want to make this today.
Thanks so much!
Shae
Hi Shae!
Each of the colors are mixed in a separate container. Sorry for any confusion! So, you’ll need:
1 teaspoon of Black Oxide in 1 tablespoon of oil
1 teaspoon of Electric Bubble Gum in 1 tablespoon of oil
2 teaspoons of Merlot Sparkle Mica in 2 tablespoons of oil
2 teaspoons Fizzy Lemonade in 2 tablespoons of oil
2 teaspoons Tangerine Wow in 2 tablespoons of oil
Then, you can mix all those well and add them as you’re soaping. 🙂
-Kelsey with Bramble Berry
I saw this and couldn’t wait to try it. Although I used my own tried and true recipe, it worked like a charm. In fact it worked so well, I made it again a few months later.
Yay, so happy to hear that James! It’s one of my favorite designs. If you have pictures of your soap, we’d love to see it on our Facebook page. 🙂
Bramble Berry Facebook: https://www.facebook.com/BrambleBerry/
-Kelsey with Bramble Berry
I made this using a standard 3 lb loaf mold so the design is horizontal, and my sun embed was from trimmings from a prior CP batch that was yellow with calendula petals. I did let mine gel since everything was CP. It looks amazing. I unmolded and cut at 2 days and yes the colors can smear because the black is the last color I went through (I use a bench scraper to cut). I just wiped the cutter off in between bars and everything was fine. Thank you for this inspirational idea. I’ll now be doing more layered scenes!
Sorry for the duplicate post, it didn’t look like my first one went through.
Yay, so glad to hear you enjoy the recipe! You’re very welcome for the idea. We’d love to see the finished bars if you have pictures! You can post those on our Bramble Berry Facebook page if you like. 🙂
Bramble Berry Facebook: https://www.facebook.com/BrambleBerry/timeline
-Kelsey with Bramble Berry
Do you need to insulate the soap or just let it sit in the air for 3-4 days? Thanks.
Hi Lena!
That’s a great question! During gel phase, the soap can get really hot – up to 180F. That may melt the sun embed, which can cause it to warp in the design. I would recommend letting it sit uncovered at room temperature. That’s how we stored this recipe. 🙂
Learn more about gel phase and when to insulate the soap in this post: http://www.soapqueen.com/bath-and-body-tutorials/tips-and-tricks/when-to-insulate-handmade-soap/
-Kelsey with Bramble Berry
Thanks! So I’ve tried this recipe twice and keep have a same problem. After I divided the soap into 4 containers and started work on them one by one, they seem to trace too quickly for me to work on. When I poured the third and forth containers of soap into the mold, they were already almost solid. I am not sure if I did anything wrong. Just wondering would you know any possibility leads to this result?
Hi Lena!
Hmm, I’m not entirely sure! This soap is designed to be thicker, but it should still be workable! How long are you stick blending the soap before adding color and fragrance?
It may help to split the soap at thin trace, then add fragrance and color. Then, stick blend each color right before you’re about to use it. That way they don’t continue to thicken as you’re building your layers. You can also add the fragrance blend right before each layer too, as the fragrance blend does accelerate. 🙂
-Kelsey with Bramble Berry
Thanks Kelsey! I’ll definitely try it again 🙂
I blended it for about 4 – 5 min to reach a light trace before I poured them into different containers. Is it a normal length of time?
You’re welcome!
How long you stick blend for depends on the recipe, and your stick blender. This recipe has more hard oils, so we got to light trace in about 30 seconds to 1 minute.
When you’re blending, it can be tempting to continue to blend until it’s on the thicker side. However, keep in mind the soap will thicken naturally as you make your design. I would recommend stick blending until it’s just emulsified. That means it’s all one color and there are no streaks of oil, but it still has a very thin consistency. It’s similar to that of a melted milkshake.
The fragrance oil will thicken the soap, as will the time it takes to add your layers. If you find the soap is a bit thin, you can stick blend for another 10-20 seconds before adding the layer. 🙂
Learn more about trace in this post: http://www.soapqueen.com/bath-and-body-tutorials/tips-and-tricks/trace/
-Kelsey with Bramble Berry
One thing I learned from making these bars is that if you cut with a knife you run the risk
of smearing the colors. Or maybe I should have waited the suggested 3-4 days instead of just 2.
Next time I will rig up a taut wire to cut with … and also let the loaf set for 3-4 days before cutting.
This is an excellent design. The colors work very well together. The end result looks like
a painting.
Hi Tom!
So glad you like the soap Tom! I love the gorgeous layers and sun embed. 🙂
The soap can get drag marks if it’s still a bit soft. I would recommend spritzing your soap with 99% isopropyl alcohol and wiping it with a paper towel. That may help clean up some of those marks. Also, waiting an extra couple of days before cutting will help too, as the soap won’t be as soft!
-Kelsey with Bramble Berry
99% Isopropyl Alcohol: https://www.brambleberry.com/99-Isopropyl-Alcohol-16-oz-P5682.aspx
Do you have any recipes like the lush shower smoothie ”Turkish Delight”? Ive tried so many recipes and can’t get it right.
Hi Lexi!
From what I understand, that product is an in-shower body butter. We have an awesome recipe for a Rose and Aloe In-Shower Lotion you may like! It’s creamy and feels great on your skin. 🙂
Rose and Aloe In-Shower Lotion: http://www.soapqueen.com/bath-and-body-tutorials/lotion/rose-aloe-shower-lotion/
You can add our Turkish Mocha Fragrance Oil for a delicious coffee smell.
Turkish Mocha: https://www.brambleberry.com/Turkish-Mocha-Fragrance-Oil-P3353.aspx
Also, you can use our Fragrance Calculator to find out exactly how much to add: https://www.brambleberry.com/Pages/Fragrance-Calculator.aspx
-Kelsey with Bramble Berry
How much NAOH?
preface has 4.8 oz, the tutorial down below has 7.6 oz.
Thanks!
Hi Tom!
You’ll want to add 4.8 ounces of lye. Sorry about the confusion! I updated the blog post to be more clear. Thanks for catching that. 🙂
-Kelsey with Bramble Berry
I agree! This has a wonderful look to it and could easily be adapted to a number of color combinations and moods. Thanks!
Absolutely! A night sky with a white moon and purple and black sky would look pretty! You’re welcome Michael, thanks for reading. 🙂
-Kelsey with Bramble Berry
Just gorgeous! I love the look you’ve achieved with this soap 🙂
Thank you so much Margaret! We were so excited when the bars were cut, we couldn’t wait to share the tutorial. 🙂
-Kelsey with Bramble Berry