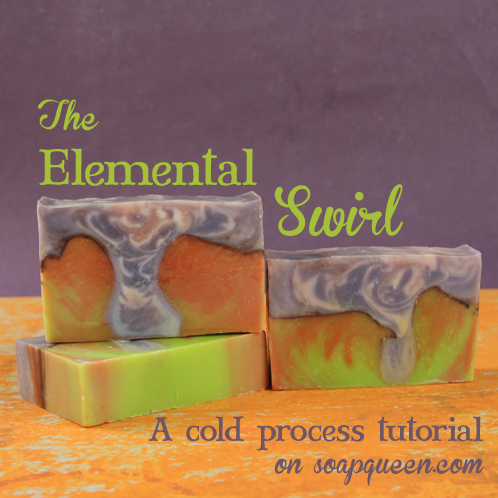
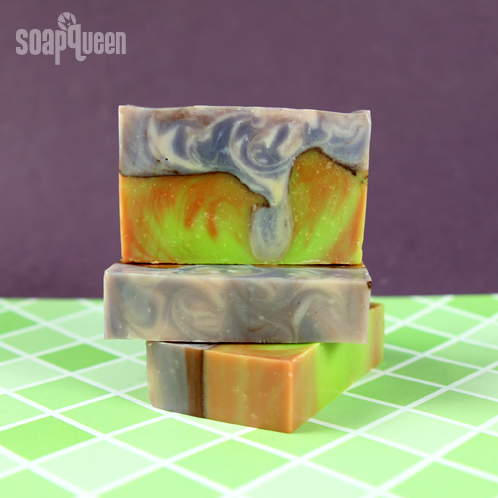
When Amy of Great Cakes Soapworks announced her Elemental Swirl Soap Challenge, we couldn’t wait to jump on board. This particular soap utilizes several soaping skills, including two in-the-pot-swirls, a mica vein and a psychedelic top swirl. All of these techniques combine to create a textured-looking soap with one-of-a-kind ruptured, uneven layers.
Recipe:
33 oz. Swirl Quick Mix
4.5 oz. Sodium Hydroxide (Lye)
11 oz. Distilled Water
1 oz. Pink Grapefruit Fragrance Oil
.5 oz Lime Fragrance Oil
.5 oz. Kumquat Fragrance Oil
Optional:
Click here to add everything you need for this project to your Bramble Berry shopping cart!
Don’t want to buy the Swirl Mix or want to make a recipe up from scratch? I’d recommend at least 60% liquid oils and no more than 40% (total) of solid oils and butters to give yourself a long time to work with this intricate design.
If you have never made cold process soap before, I highly recommend you get a couple of basic recipes under your belt. Check out this (free!) 4-part series on cold process soap making, especially the episode on lye safety. Bramble Berry carries quite a few books on the topic as well, including this downloadable book on making cold process soap.
COLOR PREP: Disperse 1 teaspoon of each pigment into 1 tablespoon of Sunflower Seed Oil. Prepping your colors in the beginning will allow you to work quickly and give you more time to work with your soap. Use the mini mixer to get all those clumps worked out smoothly.
FRAGRANCE OIL BLEND: In a glass container, measure 1 oz. of Pink Grapefruit Fragrance oil. This will fragrance the bottom orange and green swirl layer. In a second glass container, blend .5 oz. Lime Fragrance Oil and .5 oz. Kumquat Fragrance oil. This will fragrance the top purple and pink swirl layer.
SAFETY FIRST: Suit up for safe handling practices! That means goggles, gloves and long sleeves. Make sure kids, pets, and other distractions and tripping hazards are out of the house or don’t have access to your soaping space. Always soap in a well-ventilated area.
ONE: Slowly and carefully add the lye to the water, and stir until clear. Set aside to cool. If you’d like a harder bar of soap that lasts longer in the shower, you can add Sodium Lactate to the cooled lye water. Use 1 teaspoon of Sodium Lactate per pound of oils in the recipe.
TWO: Melt the entire bag of Swirl Quick Mix and portion out 33 oz. in a large glass container. Once the lye water and the oils have cooled to 130 degrees or below (and are ideally within 10 degrees of each other), add the lye water to the oils and stick blend until thin trace. You can use any standard recipe with this design if you don’t have the Swirl Mix on hand but keep in mind that you need a lot of working time with multiple techniques.
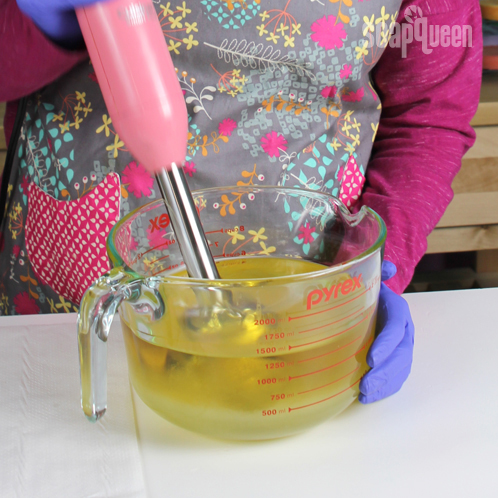
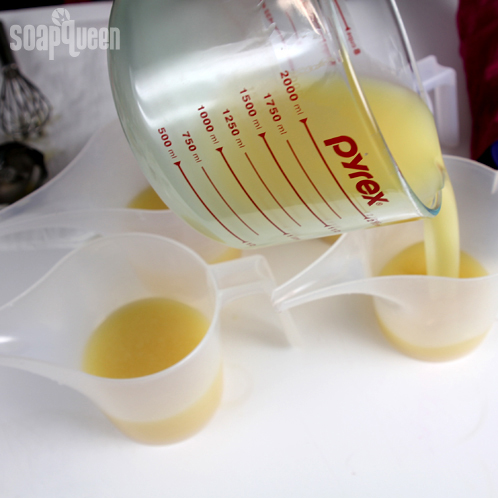
TWO: Split the soap into 4 separate containers, pouring about 1.5 cups into each container.
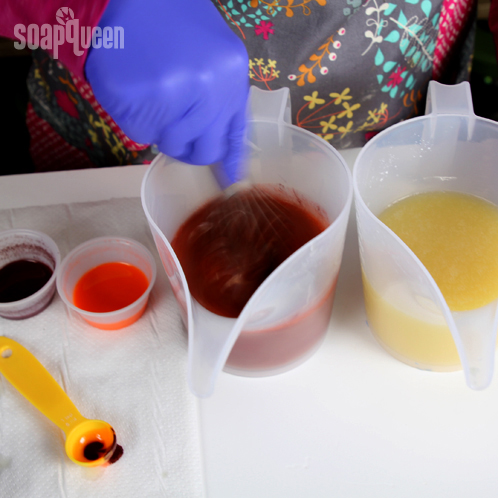
THREE: Color each of the split batches. In one container, add 3 teaspoons of dispersed Tangerine Wow! and 1/2 teaspoon dispersed Burgundy Oxide. In another container, add 1 teaspoon of dispersed Ultramarine Pink. In the third container, add 1 teaspoon of dispersed Ultramarine Violet. In the fourth container, add 1/2 teaspoon of dispersed Green Oxide and 3/4 teaspoon of dispersed Fizzy Lemonade pigment. Using a whisk or spatula, blend the mixtures until the colorants have been fully dispersed. Mixing the colorants in starting with the lightest color and going to the darkest will allow you to use the same whisk for all four portions, resulting in less dishes to clean!
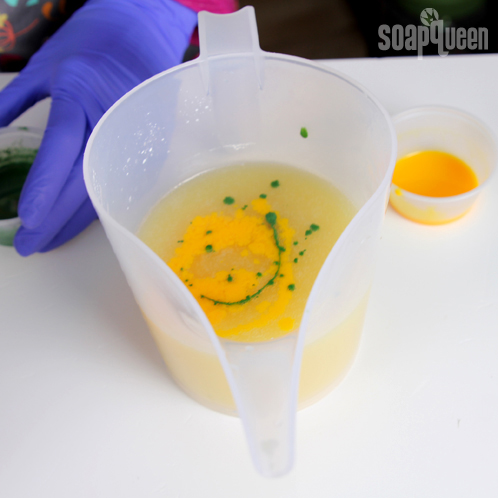
FOUR: Add half of the Pink Grapefruit Fragrance oil to the orange soap and half to the green soap and mix using a whisk or a spatula. Avoid using a stick blender as it could accelerate trace.
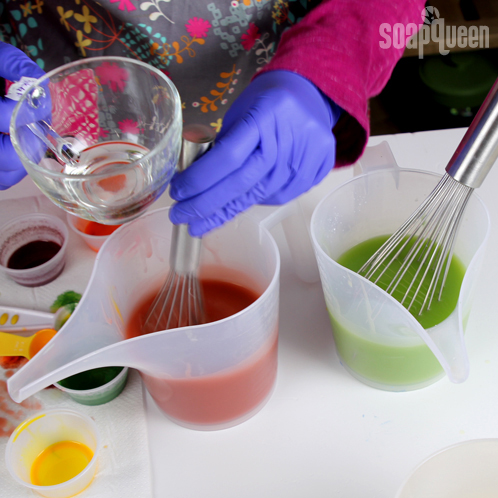
FIVE: For the first in-the-pot swirl, start by pouring the lime green colored soap into the orange colored soap in 4 places: 12:00 o’clock, 4:00 o’clock, 8:00 o’clock, and center. Pour from a high point so that the soap penetrates the entire depth of the soap in the pot, which will create a swirl throughout the mixture. Using a spatula, chopstick or dowel, swirl the soap by running the tool through each of the entry points once. It is important to swirl only once because you do not want the colors to completely blend together.
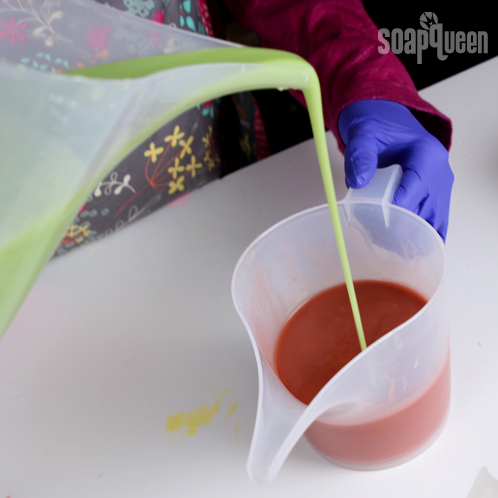
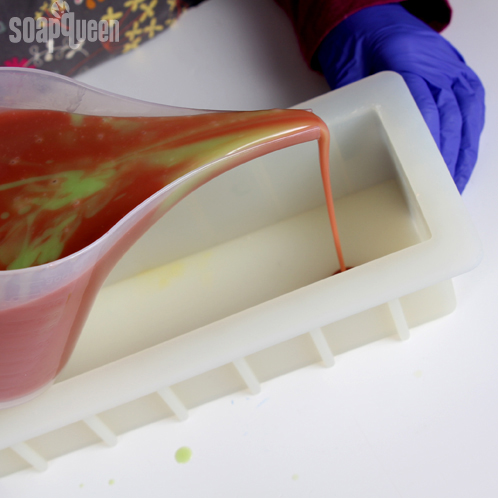
SIX: Pour the freshly swirled soap into the silicone mold. Tamp the mold on the table after you are finished pouring to ensure even coverage and disperse bubbles, but be careful to not overmix the swirl.
SEVEN: To create the mica vein, use a powder duster to sprinkle a thin layer of Cappuccino Mica over the freshly poured orange and lime swirl soap. Sprinkling too much mica can cause your layers to separate so take extra care to achieve just a light dusting of mica. Then, still wearing your goggles, close your eyes and gently blow on the mica to lightly press it into the soap. Because mica is so fine, this part can get messy. Be sure to have paper towels and isopropyl alcohol on hand to clean up any mica that sticks to the mold or your work surface.
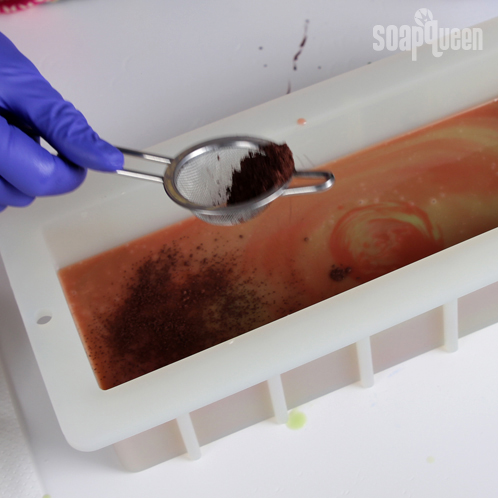
EIGHT: Add half of the Lime and Kumquat fragrance oil blend to the purple soap and half to the pink soap, mixing in thoroughly with a whisk. When the fragrance oils have been fully incorporated into the batter, create your second In-The-Pot-Swirl using the same technique as before.
Pour the Ultramarine Purple colored soap into the Ultramarine Pink colored soap in 4 places: 12:00 o’clock, 4:00 o’clock, 8:00 o’clock, and center. Pour from a high point so that the soap penetrates the entire depth of the soap in the pot, which will create a swirl throughout the mixture. Using a spatula, chopstick or dowel, swirl the soap by running the tool through each of the entry points once. It is important to swirl only once because you do not want the colors to completely blend together.
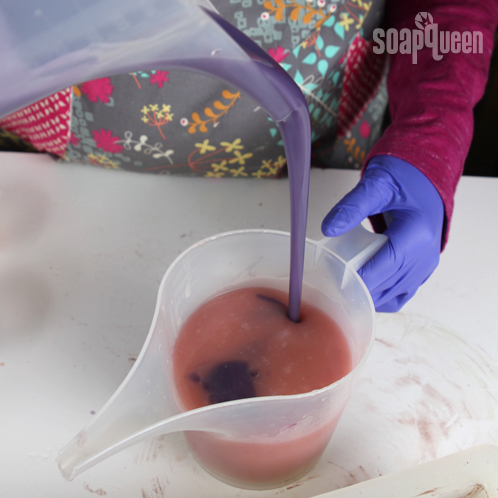
NINE: From a high point, pour the purple and pink soap into the center of the silicone mold. Pouring from high up will create the ruptured and uneven layers you see in the final soap.
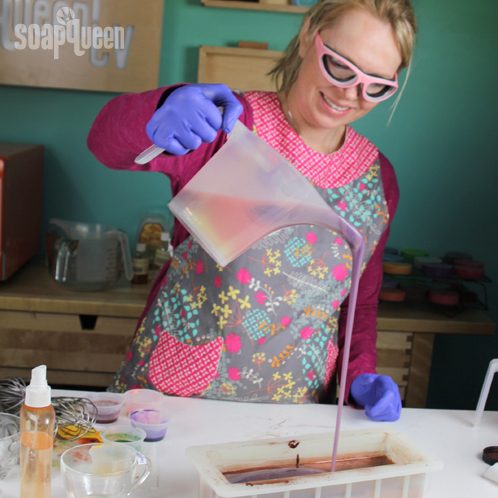
TEN: Drizzle any remaining soap in a zig-zag pattern across the top to enhance the final design.
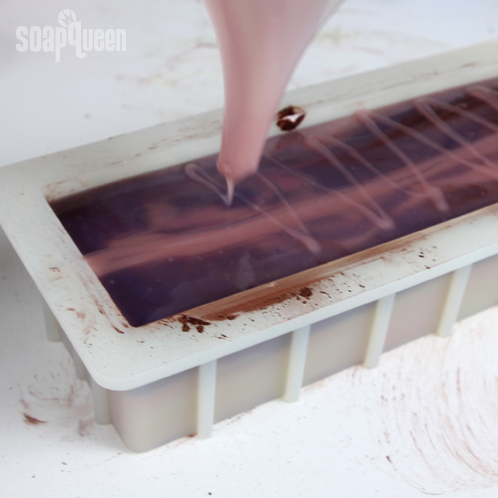
ELEVEN: Drag a chopstick or dowel inserted into the top 1/4″ of the soap down the length of the mold, making a series of short s-curves that are perpendicular to the lines created by the poured soap. Once you’ve gone from one end of the soap to the other, make small loops back down the length of the mold. When you reach the end of the mold, create one big loop that carries you into the next row, and do a reverse loop back across the mold again. Continue this pattern until all of the soap is swirled.
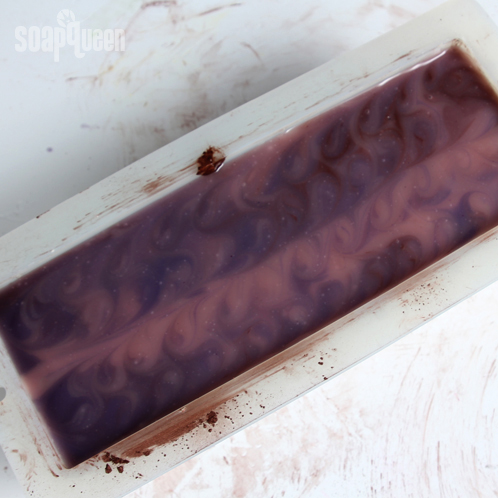

TWELVE: Spray the entire top with 91% Isopropyl Alcohol to reduce soda ash. Cover and insulate for 24 hours and unmold after 3-4 days. Allow to cure for 4-6 weeks and enjoy!


Well, it’s over 1 year since you posted this and I just realized I have never done the Elemental Swirl – so I alleviated that situation today!! It worked great with some FO’s I had that accelerate trace. I made 4 layers, colored them all, and scented each right before ITP swirl & pouring; adding Copper Sparkle mica in between each layer. Of course there is a question (or 2) here:
I have found that after adding the mica layer & blowing on it, I have spritzed with alcohol and in the past this seems to help cement the layers together.
Question 1: Is spritzing alcohol really helping or hindering?
Question 2: Opps….I grabbed the wrong clearly marked bottle and sprayed one layer with vinegar….. I know, dumb….Any ideas how this might affect my soap?
Thank you so much!!
Hi Sly!
That sounds like such a gorgeous soap! I bet it looks amazing. 🙂
Alcohol can help to a point. While it does help distribute the mica evenly, too much can cause your layers to separate. To be on the safe side, we usually recommend just one or two spritzes, or gently blowing on the mica to distribute it.
As for the vinegar, I’m not exactly sure! We have accidentally sprayed witch hazel on soap, which does some odd things. I would recommend watching your soap over the next couple of weeks and seeing how it goes. You may want to pH test it too, just in case. Learn how to do that here: http://www.soapqueen.com/bath-and-body-tutorials/tips-and-tricks/test-ph-red-cabbage/
-Kelsey with Bramble Berry
Copper Sparkle Mica: https://www.brambleberry.com/Copper-Sparkle-Mica-P3062.aspx
Sunday Night Spotlight: 99% Isopropyl Alcohol: http://www.soapqueen.com/bramble-berry-news/sunday-night-spotlight-99-isopropyl-alcohol/
Another project to add to my ‘to try’ list! I agree with the comment about it looking like the centre of the earth….so pretty.
In the final photo, it looks like the bars have tiny white spots…what causes these? I have them in some of my soaps ( all CP ) and can’t figure out if it is a particular ingredient, or temperature or ??? I haven’t noticed them affect the quality of the soap, but do they?
I would really appreciate your advice. Thanks
Hi Jo!
I’m happy to hear you are going to give this recipe a try! I agree, it is such a pretty bar of soap :). The little white spots are actually just air bubbles in the soap! They definitely don’t effect the quality of the soap. Ways to prevent air bubbles in your soap are to “burp” your stick blender while combining the water and oils, and to firmly “slam” the mold against the table to promote the bubbles from coming up. I hope this helps!
-Amanda with Bramble Berry
Hi Amanda,
Thank you so much for the reply: it definitely helps. Phew! That’s a relief,…. air bubbles I can cope with, and in fact it’s my beer soap that shows them the most, so I will just claim they are meant to be there!
And from now on, I will be a bit more rigorous with my ‘burping’ and ‘slamming’!!
Once again,I really appreciate your help,
Thank, jo
You’re very welcome Jo! 🙂
-Amanda with Bramble Berry
Thanks for sharing this tutorial, Anne-Marie! I have got to try the Elemental Swirl someday soon. I saw it a while back on Otion’s blog and have been meaning to give it a go. Thanks for the reminder and the motivation! It looks like such a fun technique, and the results are gorgeous.
Hi Jenny!
You are just going to love this technique and I know you are going to come up with a super creative interpretation of this design. Be sure to let us know when you try it out, we’d love to see your results. 🙂
Happy Soaping!
-Becky with Bramble Berry
Thanks for sharing this. It was super fun to do though I don’t think mine turned out quite right- my mica line rose to the top when I poured the second swirl. LOL This one is definitely not for the faint of heart and I quickly learned the timing has to be just right. :)Cross your fingers when I unmold tomorrow.
Hi Danni!
Yay! We are so excited that you tried this technique out and we can’t wait to see pictures of how your soap looks. Mica veins can be a little tricky if you haven’t done them before, but it is always better to sprinkle less than more because too much can actually cause your layers to separate. We are totally crossing our fingers for you and be sure to let us know how the final products looks. 🙂
-Becky with Bramble Berry
As of now, my business is working where we sell our lip butters in a local salon. They’re at the front desk. The salon gets a percentage of the profits and so do we. The salon handles the tax. At this stage, should we be licensed under the state, or just have any of the licenses and insurance policies needed. We don’t sell online, this salon is the only type of selling we do right now. The second part of my question: if we started to sell online, is it possible you could sum up all the absolutely necessary things needed? All my internet research is so jumbled I have no idea where to start..
Good morning, Gabi!
Yay! We are so excited that you have started selling and can’t wait to see where your business takes you. If you are getting a license, I would talk to your local chamber of commerce or business office and start there. They will be able to provide you with what you need in your area.
When you are starting to sell online, I would make sure you have your business license as well as any insurance you plan on getting. To learn more about insurance, I’d check out this post that Anne-Marie wrote last year. It’s full of some great tips and ideas on getting started.
Business Insurance for the Handcrafted Industry: http://www.soapqueen.com/business/business-insurance-for-the-handcrafted-industry/
You might want to check out the book Craft, Inc. as well as it is full of step-by-step instructions how how to start up a business.
Craft, Inc. Revised Edition: https://www.brambleberry.com/Craft-Inc-Revised-Edition-P5655.aspx
I hope this helps! Let me know if there is anything else I can do for you. 🙂
-Becky with Bramble Berry
thank you! It’s really helpful.
Now however, I’m asking about taxes. I guess, overall, I’m confused as to how this all works. Currently, the salon we sell at is charging the tax on the lip butters. If we began to sell online, 1) would we have to immediatly start charging tax? 2) How is that all done, giving that tax money to who it needs to go to?
Thank you!
Sorry I ask so many questions! But as a 14-year-old, everything can get confusing.. So a portion of the business license forms for my city states this”
“Frontage of 40 ft. or less $25.00; for each additional foot or fraction thereof, $1.00; if the store or other place of business is in the rear, or in a basement, or on a floor above the ground floor, or shall be less than 600 sq. ft. in area, 50% of the foregoing; if the store or other place of business, in addition to the ground floor, it also using either the 2nd floor or basement for sales or service, 150% of the foregoing; if the store or other place of business, in addition to the ground floor, is using both the basement and 2nd floor for sales or service 200% of the foregoing, provided, HOWEVER, THAT THE OWNER OR PROPRIETOR OF A BUSINESS SUBJECT TO LICENSE FEES UNDER SECTION II. SHALL NOT ALSO BE SUBJECT TO THE FEES IN THIS SECTION FOR THE SAME BUSINESS OR SERVICE.”
This is where I’m confused, we don’t own a shop. So where do we come in in relation to this section?
Thanks for sharing the technique. The finished soap is very cool! I especially love the look of the mica line.
Hi Jean!
The mica line was my favorite part of this soap and I can see so many different versions of it happening. I hope you get a chance to try this recipe out. 🙂
Happy Soaping!
-Becky with Bramble Berry
Fantastic! I’m not a huge fan of swirls but this is amazing – it looks almost like the center of the earth! Love it!
Hi Elaine!
Isn’t it such a fun swirl? I just loved the colors in this tutorial and can’t wait to see what other people are going to do with it! Be sure to let us know if you try this design out. 🙂
Happy Soaping!
-Becky with Bramble Berry
Love it! Amazing as usual.
Good morning!
Thanks for stopping by! If you get a chance to try this recipe out, let us know — we’d love your feedback. 🙂
Happy Soaping!
-Becky with Bramble Berry
Thank you Soap Queen! You always share fabulous ideas and knowledge! Your how to videos got me started making soap over a year ago and helped me get over my nervousness with mixing lye. And most importantly thank you for the enthusiasm you bring to soap making. Good luck with the release of your new book 😀
Good morning!
We are so exited that you have started soaping and can’t wait to hear more about your journey. Be sure to share any photos that you get of your soapy creations on Bramble Berry’s Facebook page so we know what you are up to. 🙂
Happy Soaping!
-Becky with Bramble Berry