The architecture in Rome is stunning (don’t believe me? Google Image Search Rome + Architecture). Within the various building techniques and styles, the mosaic is among the most popular and recognizable. Created by placing small, multi-colored pieces of stone within cement, mosaics can be found in many Roman buildings.
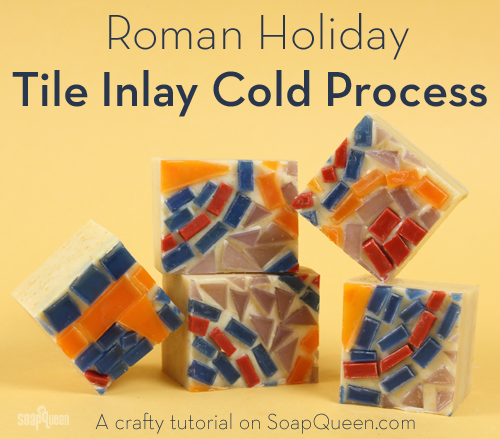
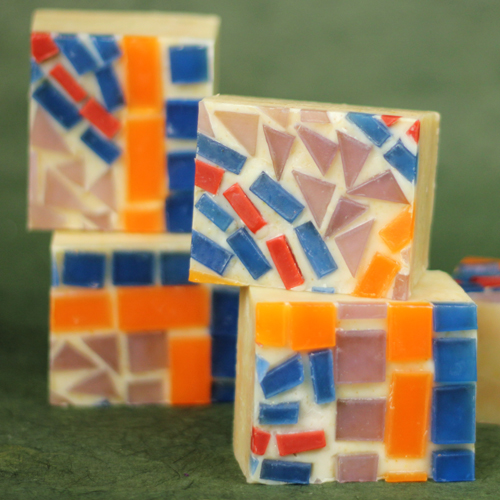
Inspired by these intricate mosaics, this Tile Inlay Cold Process project is sure to wow. With a cold process base and pieces of melt and pour to create the design, this soap brings together both soaping techniques. Scented with Neroli & Shea Blossom and using Lemon Peel Powder for texture, this project brings a bit of Roman architecture to your home!
3.8 oz. Castor Oil
22.8 oz. Coconut Oil
22.8 oz. Olive Oil
19 oz. Palm Oil
7.6 oz. Rice Bran Oil
10.8 oz. Sodium Hydroxide
25 oz. distilled water
5 oz. Neroli & Shea Fragrance Oil
18 Bar Birchwood Mold with Liner
 Click here to add everything you need for this project to your Bramble Berry shopping cart!
To make the melt & pour tiles
ONE: Cut 24 oz. of LCP Clear Melt and Pour. Split it into 4 heat-safe containers with about 6 oz. in each. Note: Why LCP soap? Like Cold Process melt and pour soap is short on liquid glycerin (this is why the clarity in the LCP clear isn’t quite as awesome as the traditional house clear base) which means it is less prone to sweating when exposed to moisture. Anything you can do to prevent your melt and pour soap from getting glycerin dew is worthwhile.
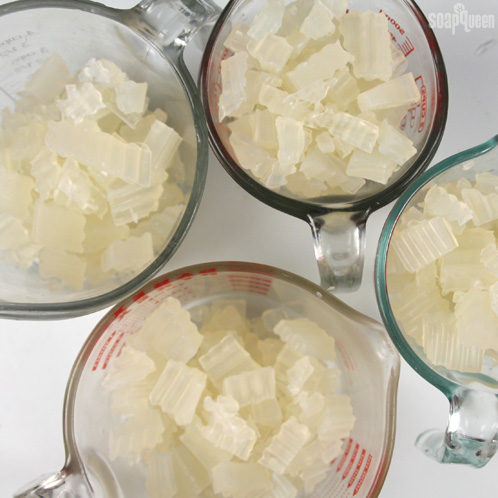
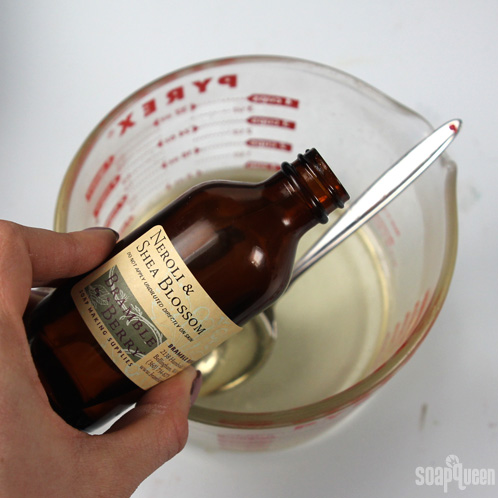
TWO: Melt each container individually on 10 second bursts. Be careful! You do not want to scorch the tiny amount of melt and pour in each. Then, add .3 oz. of Neroli and Shea Blossom Fragrance Oil to each and stir.
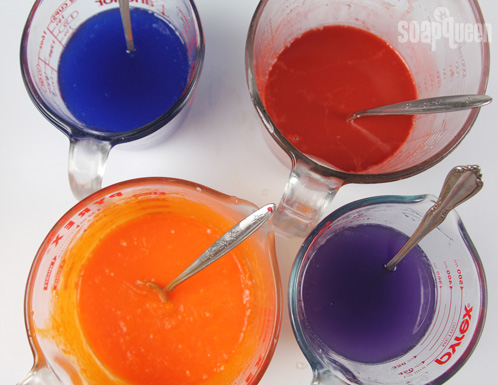
THREE: Add one color per container in the following rates:
- 1/8 tsp. Liquid Orange
- 1/4 tso. Liquid Red
- 1/2 tsp. Liquid Violet
- 1/4 tsp. Liquid Blue
Stir to fully incorporate color.
FOUR: Pour a thin layer of colored soap into the Silicone Tray Mold. You can either pour one color, wait 30 minutes for it to dry, unmold it, and then pour another color or pour one color into four separate trays. Spray the top of the soap with 99% alcohol to disperse bubbles.
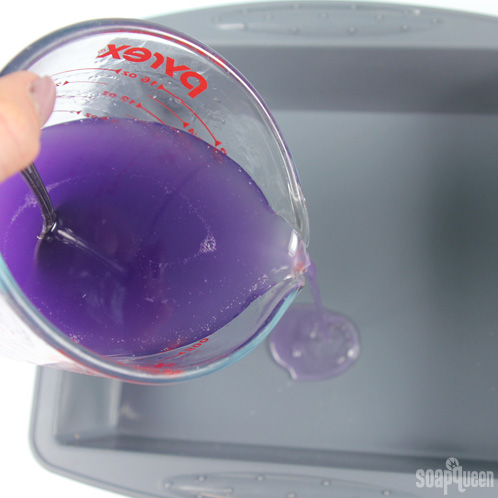
FIVE: Allow the soap to dry for at least 30 minutes. Once it’s fully dry, unmold it and cut each color into small, square & rectangular chunks. The size you cut is up to you, but our pieces varied between 1 to 1.5 centimeters in length.
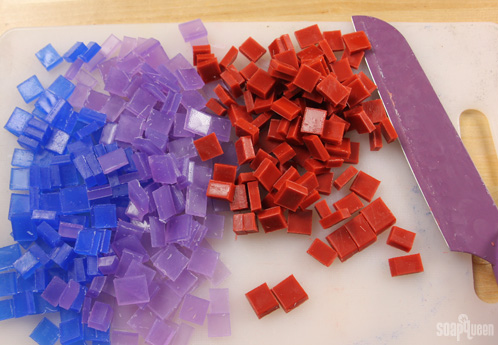
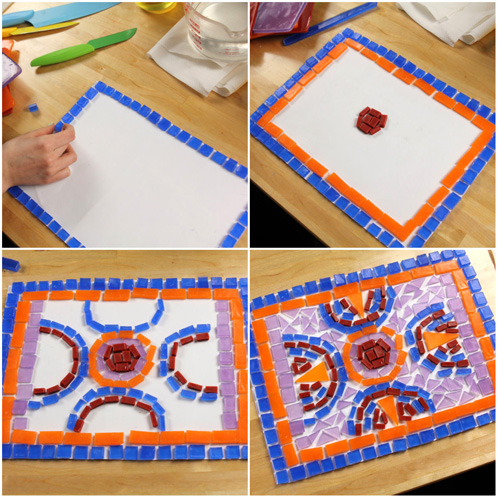
SIX: Now comes the important part! This will be the most time-consuming part of the whole process. We cut a large sheet of paper to be the exact size of the 18 Bar Birchwood Mold, and used it as the pattern to lay out our design. That way, we knew exactly what the design would be and how to lay the pieces to save time. We started with an outside layer of blue, followed by orange, and then a cluster of red in the middle. From there, we encircled the red with purple and orange squares. Then, lined the left and right inside edges with purple before forming half circles of blue with another half circle of red inside. Cut orange triangles to fit inside the half circles, and fill in the empty space with purple squares.
To make the cold process base:
If you’ve never made Cold Process soap before, stop here! I highly recommend checking out our FREE four part SoapQueen.tv series on Cold Process Soapmaking, especially the episode on lye safety. And if you’d rather do some reading, Bramble Berry carries a wide range of books on the topic, including my newest book, Soap Crafting. You can also checkout the digital downloads for that instant gratification factor.
SAFETY FIRST: Suit up for safe handling practices! That means goggles, gloves and long sleeves. Make sure kids, pets, and other distractions and tripping hazards are out of the house or don’t have access to your soaping space. Always soap in a well-ventilated area.
COLOR PREP: To ensure that the Titanium Dioxide blends smoothly into the soap batter, we recommend micronizing it before dispersing it in oil. To micronize colorant, simply use a coffee grinder to blend the colorant to break up any clumps of color and prevent streaks of white from showing in the final soap. We like to use a coffee grinder that has a removable, stainless steel mixing area for easy cleaning. Once micronized, disperse 1 tsp. Titanium Dioxide into 1 tablespoon of Sunflower or Sweet Almond Oil (or any other liquid oil). Then, disperse 2 teaspoons of lemon peel powder into 2 tablespoons liquid oil. Use a mini mixer to get the clumps of color worked out smoothly.
ONE: Slowly and carefully add the lye to the water and gently stir until the lye has fully dissolved and the liquid is clear. Set aside to cool.
TWO: Melt and combine the Olive Oil, Coconut Oil, Castor Oil, Rice Bran Oil and Palm Oil (be sure to melt the entire container of palm oil). Once the lye water and the oils have cooled to 130 degrees or below (and are ideally within 10 degrees of each other), add the lye water to the oils and stick blend until thin trace. If you’d like a harder bar of soap that releases faster from the mold, you can add Sodium Lactate to the cooled lye water. Use 1 teaspoon of Sodium Lactate per pound of oils in the recipe. For this recipe, you’d add about 4 tsp. Sodium Lactate.
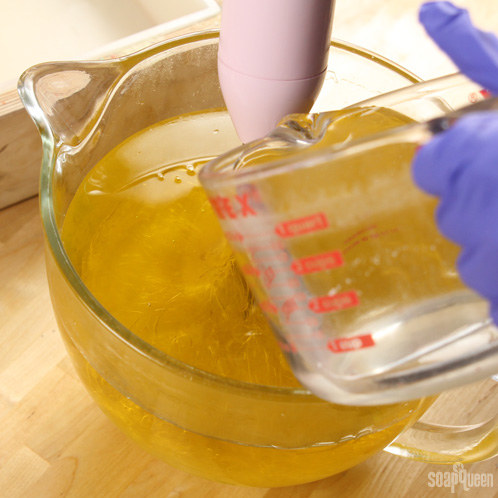
THREE: Add 2 tsp. dispersed Titanium Dioxide plus 4 tsp. dispersed Lemon Peel powder. Mix in with a whisk.

FOUR: After the colorant has been fully incorporated, mix in the Neroli & Shea Fragrance Oil. Stir with a wire whisk.

FIVE: Once the color and fragrance have been fully incorporated, pour into the mold.

SIX: Now for the tricky part! Here is where you’ll start transferring your design from the pattern you made earlier onto the actual soap. We started from the outside and worked inward. This process can get messy, so be sure to wear gloves. Don’t worry if your melt and pour chunks get cold process on them — you can wipe it off when the soap is dry. You’ll have about a half an hour to transfer your design.
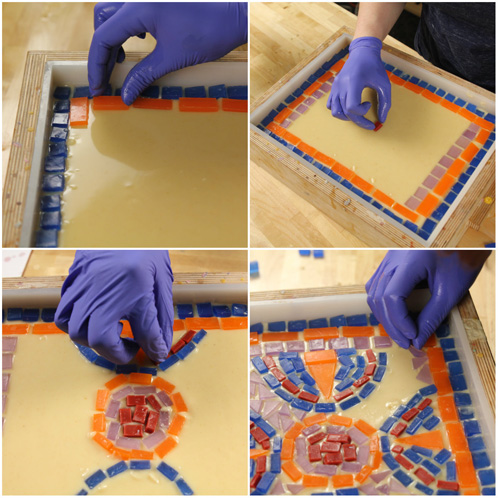
 SEVEN: Once you are happy with your design, ensure all melt and pour pieces are deep enough in the cold process to ensure they do not fall off when the soap is cut into. Allow the soap to stay in the mold for 3-4 days before unmolding. After unmolding, carefully cut into the bars and allow to fully cure for 4-6 weeks and enjoy!


Congratulations, that is absolutely amazing! I wonder if I musn’t allow my mold to gel? I mean, won’t the gelling and the heat melt my MP pieces?
Hi Claudia!
I’m so glad you liked the post!
Because the melt and pour pieces are small and on top of the soap, they should be fine because they’re being exposed to plenty of air. 🙂
We just let the soap cure without a towel, so I’m not exactly sure if that would melt the pieces. You might try a small test batch just to be sure!
-Kelsey with Bramble Berry
Very pretty! But, in step 5, you mean to say that you cut soap in 1-1.5 centimeter size chunks, not millimeter. 🙂
Hi Martina!
On average, they were about 1 to 1.5 mm. Some may have been a little bigger. 🙂
-Kelsey with Bramble Berry
Ah…I think Martina may be right. 1 milimeter is about the size of a grain of sand, or half an aphid (I have aphids on the brain because they’re all over my watermelon plants and won’t go away!). I don’t doubt your ability to work beautifully with small objects (this soap alone testifies to that), but I think you’d have difficulty making 1 mm cuts. 🙂 Unless you are a surgeon, in which case I’m sorry for the presumptioun, Doctor, and would you mind looking at this funny little mark on my cheek while we’re talking? 🙂
Also, presumption, not presumptioun. Sometimes trying to do math makes me temporarily Canadian.
Hi Danielle!
After looking into that a little more, we discovered you are correct! Those melt and pour pieces should be 1 to 1.5 cm in length.
Thanks for catching that!
-Kelsey with Bramble Berry
Beautiful, like Sarah Safira said a work of art.
Hi Marleny!
Thank you so much, that means a lot to us!
-Kelsey with Bramble Berry
this is truly an amazing work of art!
Hi Sarah!
I’m so glad you like it!
-Kelsey with Bramble Berry
Wow! That is so pretty I don’t know if I could bear to cut it up!! The bars look nice, but the whole is spectacular! I think if I try this technique I need to do it with individual bar molds and tweezers to place all the little pieces. 🙂
Hi Margaret!
Thank you so much for your kind words!
Tweezers may be a good idea – it can get a little messy!
-Kelsey with Bramble Berry