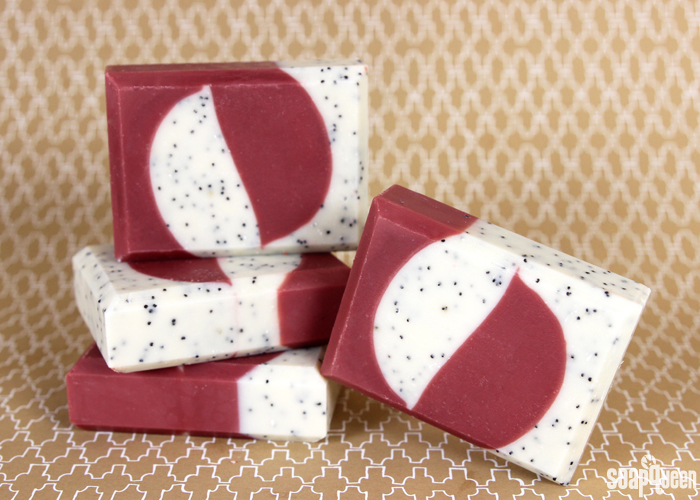
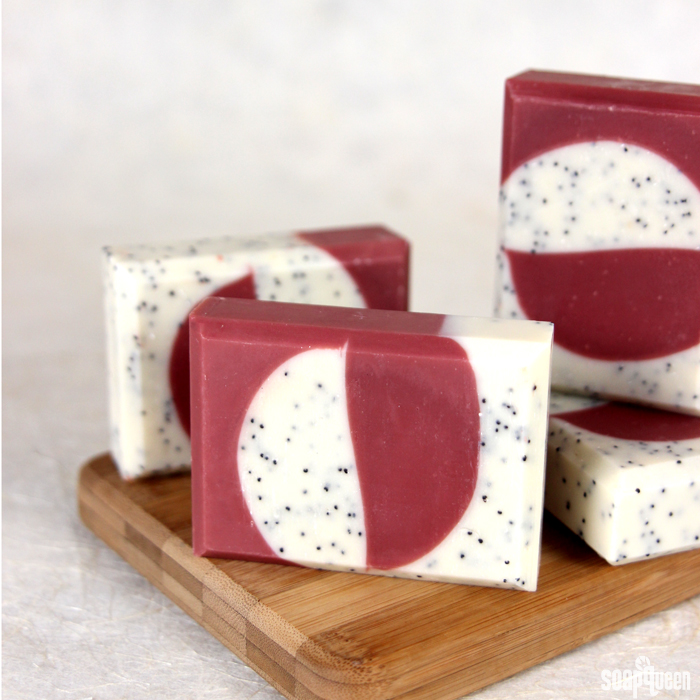
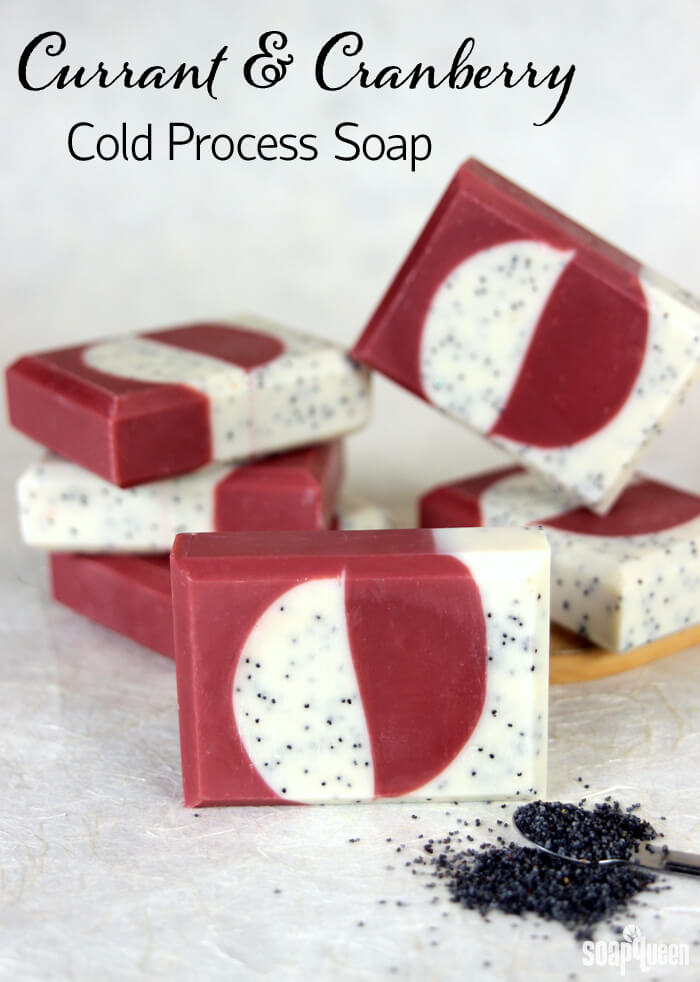
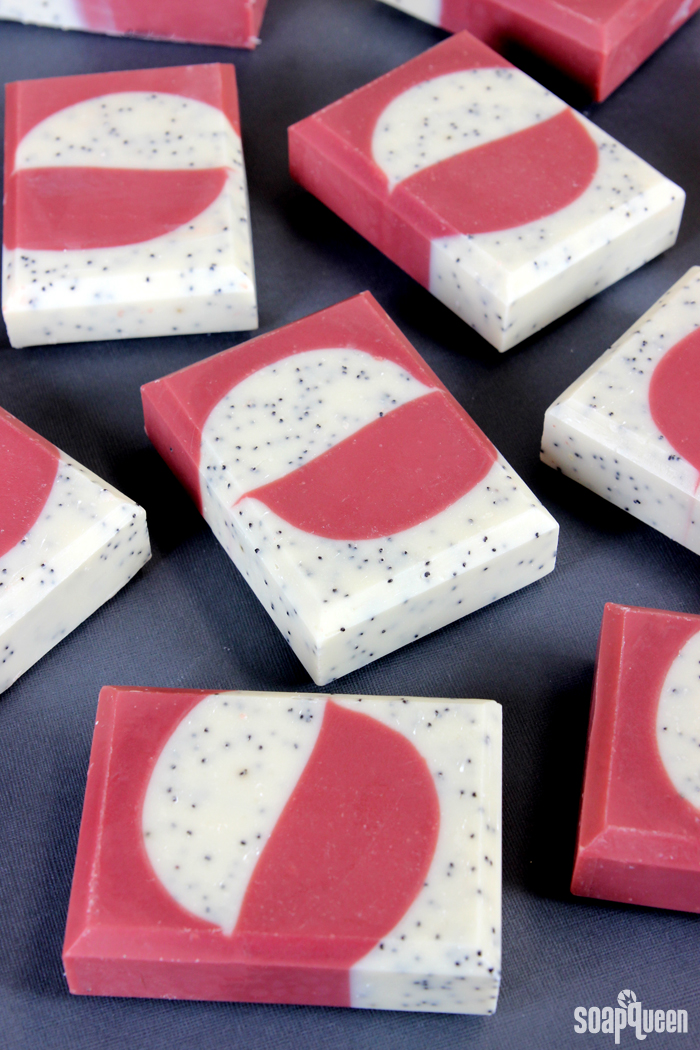
Color contrast can really make your soap stand out. It makes each color in the soap pop, and creates a dramatic effect. You can also add different exfoliants to your soap for interest and texture. This Currant and Cranberry Cold Process Soap is a perfect study in color contrast.
Merlot Sparkle Mica is used to create a lovely burgundy color, and poppy seeds add a pop of black to the white soap. The poppy seeds also help exfoliate dry winter skin. The soap is scented with a fruity blend of Pomegranate and Black Currant Fragrance Oil and Cranberry Fig Fragrance Oil. The color and fragrance combinations are festive without being too Christmas-y, making these bars perfect for a New Year’s Eve gift or a last-minute Christmas gift. Just put a “use by” date if making this soap for Christmas, as it needs a 4 to 6 week cure time. =)
What You’ll Need:
Vertical Wood Mold
2.2 oz. Cocoa Butter
10.8 oz. Coconut Oil
15 oz. Olive Oil Pomace
8.6 oz. Palm Oil
6.5 oz. Rice Bran Oil
6 oz. Sodium Hydroxide Lye
14.2 oz. Distilled Water
Titanium Dioxide
Merlot Sparkle Mica
Poppy Seeds
1.5 oz. Pomegranate and Black Currant Fragrance Oil
0.7 oz. Cranberry Fig Fragrance Oil

Click here to add everything you need for this project to your Bramble Berry shopping cart!
If you’ve never made Cold Process soap before, stop here! I highly recommend checking out our FREE four part SoapQueen.tv series on Cold Process Soapmaking, especially the episode on lye safety. And if you’d rather do some reading, Bramble Berry carries a wide range of books on the topic, including my newest book, Soap Crafting. You can also checkout the digital downloads for that instant gratification factor.
SAFETY FIRST: Suit up for safe handling practices! That means goggles, gloves and long sleeves. Make sure kids, pets, and other distractions and tripping hazards are out of the house or don’t have access to your soaping space. Always soap in a well-ventilated area.
FRAGRANCE PREP: Add 1.5 oz. Pomegranate and Black Currant Fragrance Oil and .7 oz. Cranberry Fig Fragrance Oil in a fragrance safe, glass container. Stir gently and set aside until ready to use.
COLOR PREP: To ensure that the Titanium Dioxide blends smoothly into the soap batter, we recommend micronizing it before dispersing it in oil. Please note this is an optional tip but it does help with the titanium dioxide clumping in the soap. =) To micronize colorant, simply use a coffee grinder to blend the colorant to break up any clumps of color and prevent streaks of white from showing in the final soap. We like to use a coffee grinder that has a removable, stainless steel mixing area for easy cleaning. Then, disperse 2 teaspoons of the colorant into 2 tablespoons of sunflower or sweet almond oil (or any other liquid oil). Then in a separate container, add 2 teaspoons of Merlot Sparkle Mica into 2 tablespoons of a lightweight oil.
ONE: Slowly and carefully add the lye to the water and gently stir until the lye has fully dissolved and the liquid is clear. Set aside to cool.
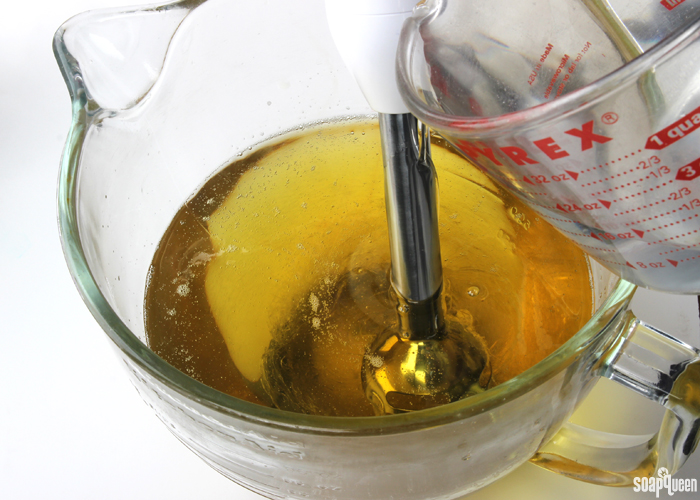
TWO: Melt and combine the coconut oil, olive oil pomace, rice bran oil, cocoa butter and palm oils (remember to fully melt then mix your entire container of palm oil before portioning). Once the lye water and the oils have cooled to 130 degrees or below (and are ideally within 10 degrees of each other), add the lye water to the oils and stick blend until thin trace. If you’d like a harder bar of soap that releases faster from the mold, you can add sodium lactate to the cooled lye water. Use 1 teaspoon of sodium lactate per pound of oils in the recipe. For this recipe, you’d add about 3 teaspoons sodium lactate.
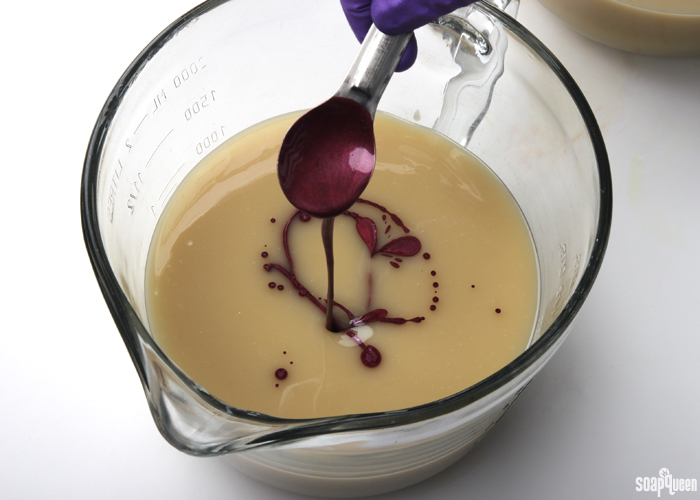
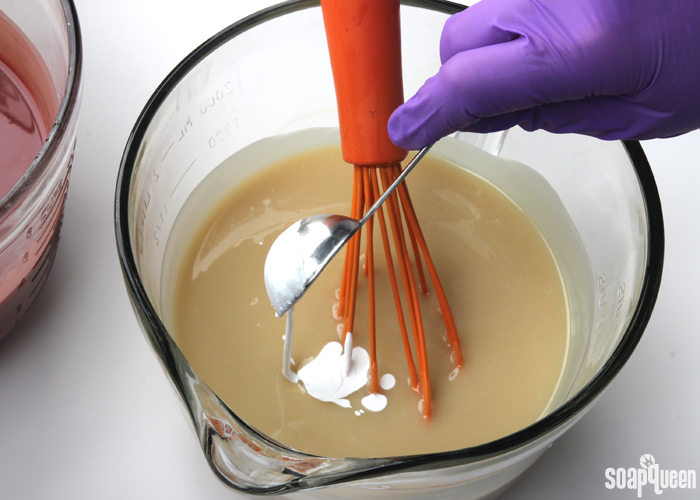
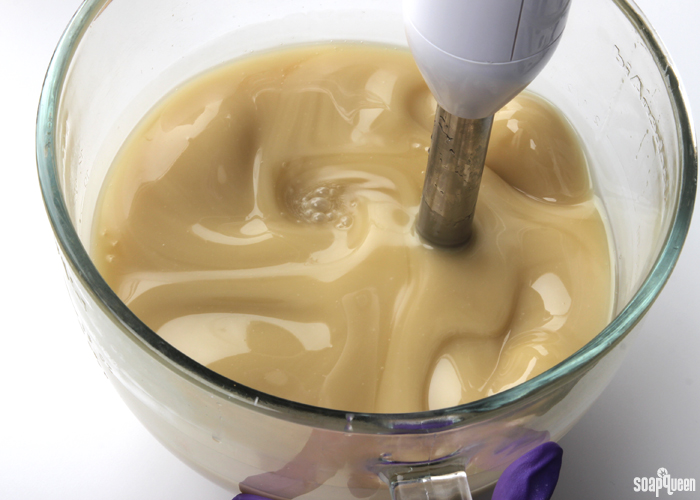 THREE: Once the batter has reached a thin trace, split the batch in half. Each container should have about 4 cups. To one container, add all of the dispersed Merlot Sparkle Mica, and to the other add all the dispersed Titanium Dioxide. Use a whisk to mix in each colorant.
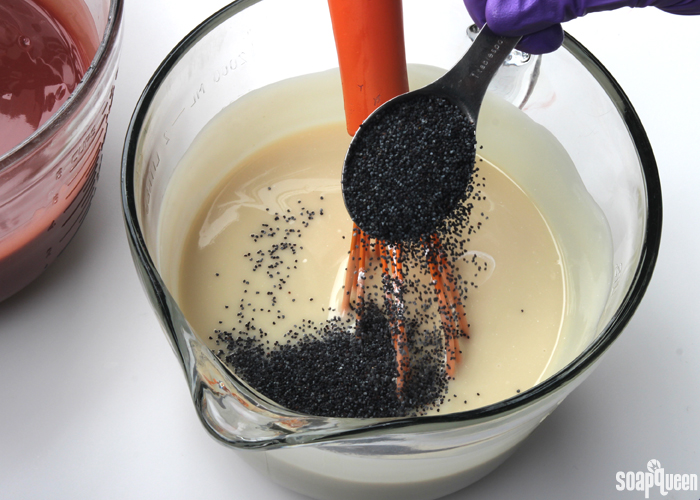
FOUR: To the white container of soap, add 1 tablespoon of poppy seeds and use a whisk to mix in.
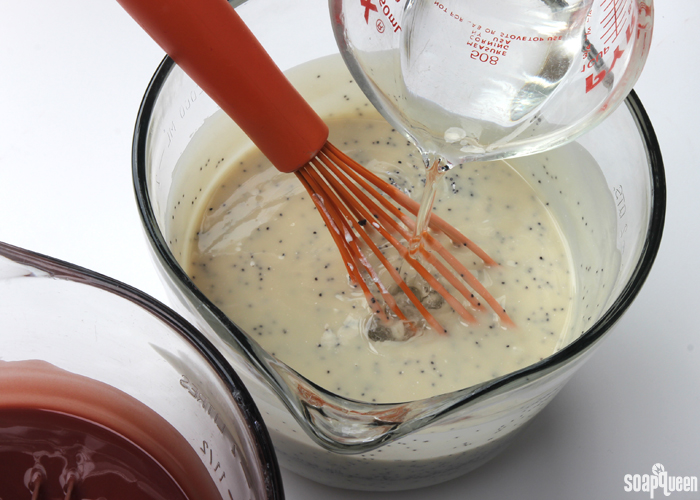
 FIVE: Add half of the fragrance oil into each container, it’s okay to eyeball it! Then use a whisk to thoroughly mix in the fragrance blend.
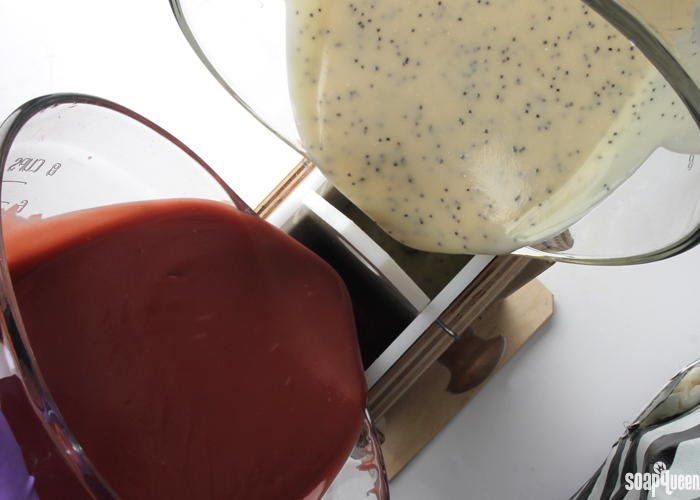
 SIX: Time to pour into the mold! If your soap batter is still very thin, whisk until it reaches a medium trace. This helps the colors stay separate from each other. Once the batter is a medium trace, slowly and carefully pour each color of soap into either sides of the divider. It’s best to pour at the same time to help either side fill equally, which prevents the center divider from moving. But, if your containers are too heavy to pour one handed, alternate pouring a small amount into each side.
 SEVEN: Continue pouring until each side of the mold is completely full. Remove the center pin.
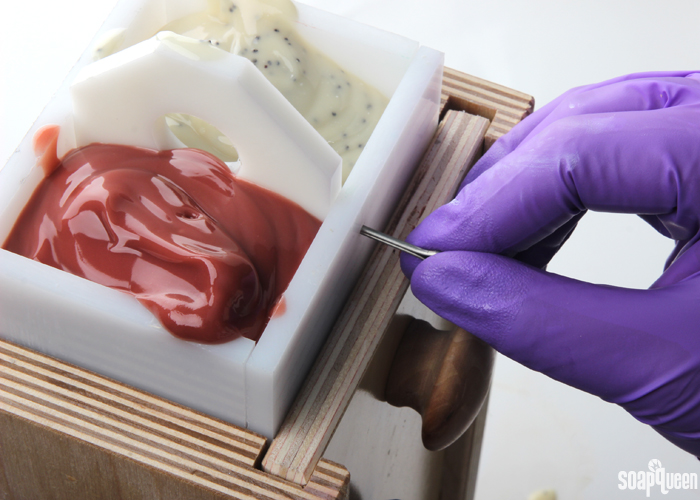 EIGHT: Slowly and carefully begin to pull the center divider up and out of the mold while turning 180 ° F (see photo below).
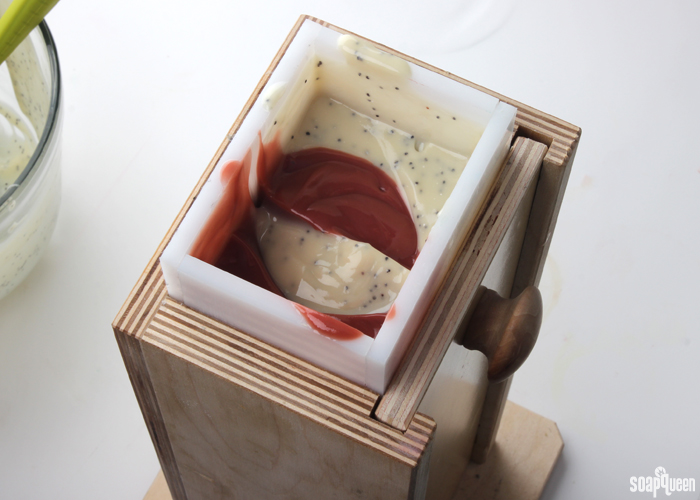
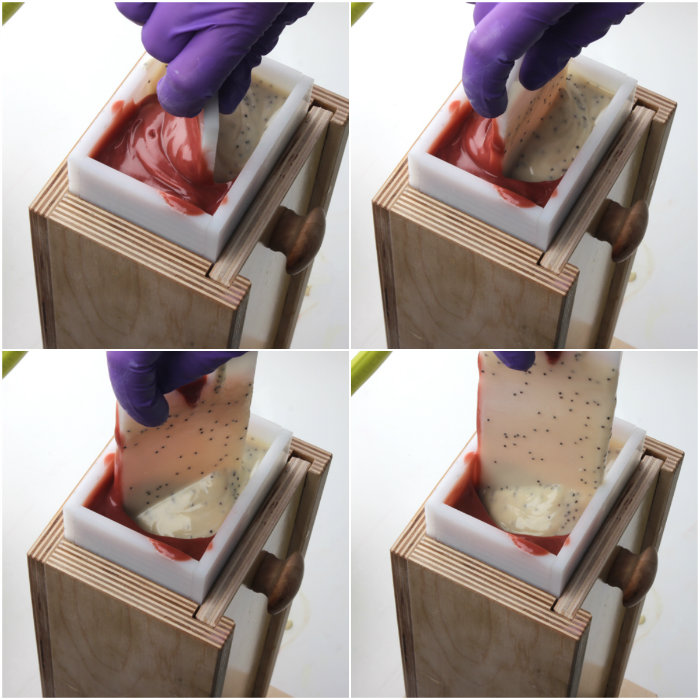 NINE: Firmly tamp the mold on the counter to help the soap settle and get rid of bubbles. Spray the soap with 99% isopropyl alcohol to prevent soda ash and cover for 24 hours. Allow the soap to stay in the mold for 3-4 days. Then unmold, cut and allow the soap to cure for 4-6 weeks. Enjoy!
 What’s your favorite exfoliant for cold process soap? I love how cute poppy seeds look. =)
- Vertical Wood Mold
- 2.2 oz. Cocoa Butter
- 10.8 oz. Coconut Oil
- 15 oz. Olive Oil Pomace
- 8.6 oz. Palm Oil
- 6.5 oz. Rice Bran Oil
- 6 oz. Sodium Hydroxide Lye
- 14.2 oz. Distilled Water
- Titanium Dioxide
- Merlot Sparkle Mica
- Poppy Seeds
- 1.5 oz. Pomegranate and Black Currant Fragrance Oil
- .7 oz. Cranberry Fig Fragrance Oil
- Slowly and carefully add the lye to the water and gently stir until the lye has fully dissolved and the liquid is clear. Set aside to cool.
- Melt and combine the coconut oil, olive oil pomace, rice bran oil, cocoa butter and palm oils (remember to fully melt then mix your entire container of palm oil before portioning). Once the lye water and the oils have cooled to 130 degrees or below (and are ideally within 10 degrees of each other), add the lye water to the oils and stick blend until thin trace. If you’d like a harder bar of soap that releases faster from the mold, you can add sodium lactate to the cooled lye water. Use 1 teaspoon of sodium lactate per pound of oils in the recipe. For this recipe, you’d add about 3 teaspoons sodium lactate.
- Once the batter has reached a thin trace, split the batch in half. Each container should have about 4 cups. To one container, add all of the dispersed Merlot Sparkle Mica, and to the other add all the dispersed Titanium Dioxide. Use a whisk to mix in each colorant.
- To the white container of soap, add 1 tablespoon of poppy seeds and use a whisk to mix in.
- Add half of the fragrance oil into each container, it’s okay to eyeball it! Then use a whisk to thoroughly mix in the fragrance blend.
- Time to pour into the mold! If your soap batter is still very thin, whisk until it reaches a medium trace. This helps the colors stay separate from each other. Once the batter is a medium trace, slowly and carefully pour each color of soap into either sides of the divider. It’s best to pour at the same time to help either side fill equally, which prevents the center divider from moving. But, if your containers are too heavy to pour one handed, alternate pouring a small amount into each side.
- Continue pouring until each side of the mold is completely full. Remove the center pin.
- Slowly and carefully begin to pull the center divider up and out of the mold while turning 180 ° F.
- Firmly tamp the mold on the counter to help the soap settle and get rid of bubbles. Spray the soap with 99% isopropyl alcohol to prevent soda ash and cover for 24 hours. Allow the soap to stay in the mold for 3-4 days. Then unmold, cut and allow the soap to cure for 4-6 weeks. Enjoy!



This recipe is going into my favorites. The ratio of pomegranate/currant to cranberry/fig doesn’t seem to make a difference at all. I’ve used them in opposite ratios and they smell the same to me. But the soap is WONDERFUL. I would like to mention, if you don’t have the vertical mold, don’t do a 1:1 one-pot swirl for a loaf mold. It’ll look like raw beef! (Or DO! My family got a kick out of it)
Ha, too funny! Glad you’re enjoying this recipe Grant. It’s one of my favorites too. 🙂
-Kelsey with Bramble Berry
This is the second time I made this soap. I made several batches using this mold where the soap absolutely would not come out and I had to cut it out. Although I felt bad about it, I left a bad review for the mold. I’m very happy to say I made this soap again with the recipe for sunshine soap (meant for this mold) and ADDED SODIUM LACTATE. The plastic pieces came off exactly the way they were supposed and the soap has a slick as glass feel. I’m very pleased with the recipe, design and now the mold! Check it out on youtube.com under theorgelmeister. Thanks everybody.
Oh, yea, this batch came out of the mold beautifully but had glycerine rivers!! Oh, well, I like the mold now and I used to hate it.
Oh I’m so glad to hear that! We’re definitely big fans of sodium lactate and add it to all of our batches. It’s great, especially if you’re impatient like I am and want to unmold quickly! 🙂
Sunday Night Spotlight: Sodium Lactate: http://www.soapqueen.com/bramble-berry-news/sunday-night-spotlight-sodium-lactate/
-Kelsey with Bramble Berry
I’ve noticed in a few of your pictures your soaps have beveled edges, and I was wondering how you were able to achieve that. It looks super clean and professional. Really enjoying your site, and excited to seriously get into soapmaking!
Hi Thomas!
We use our Soap Beveller to get those nice clean edges! You can find that here: https://www.brambleberry.com/Soap-Beveller-P4141.aspx
This post shows you how to use the tool, and offers more tips for making your soap look professional: https://www.soapqueen.com/bath-and-body-tutorials/tips-and-tricks/5-ways-professional-soap/
We also have another handy tool called the Soap Shaver. It shaves off any imperfections, like drag marks or soda ash. I absolutely love it and highly recommend it. 🙂
Soap Shaver: https://www.brambleberry.com/Soap-Shaver-P6331.aspx
Have fun trying out more soapmaking techniques! It’s a really fun craft. If you have any questions, feel free to let us know. We’re happy to help. 🙂
-Kelsey with Bramble Berry
I couldn’t wait to try this, but the result was definitely not my best, although the soap is perfectly fine to use. I had trouble getting a smooth turn and design with the center divider, but the biggest trouble was getting the plastic molds off my soap. The vertical mold had minimal leaking because I used a very thick trace, but I absolutely could not budge the plastic pieces away from the soap. Was it my recipe? My tried and true recipe has a high percent of coconut oil. I had no choice but to pull and cut the plastic molds off the side so I had a lot of trimming to do to fix the sides and it still is not very nice. I would love to try this again and have the awesome result shown here. Thanks!
Hi James!
Those dividers can definitely be tricky to get off, even with a firm recipe. The trick is to push down on the dividers and sort of twist them so they slide off the soap. This video shows you how to unmold the soap without tearing (starting about 5:54): https://www.youtube.com/watch?v=w4BswM14s3c
I also like to rub the dividers with a thin layer of cyclomethicone before I pour my soap in. Cyclomethicone is a liquid silicone that doesn’t saponify. It helps the dividers slide off a bit more easily: https://www.brambleberry.com/Cyclomethicone-P4560.aspx
I’m sorry about the tearing James, that is definitely frustrating. I think the video and the cyclomethicone will help you get smooth edges on your next batch. 🙂
We have a handy tool called the Soap Shaver you may like as well. It helps shave off any drag marks to make the soap look nice and smooth: https://www.brambleberry.com/Soap-Shaver-P6331.aspx
-Kelsey with Bramble Berry
I really, really wanted this to come out…but alas, it didn’t. My soap went from light trace to thick, goopy, non-pourable stuff really fast, as a matter of fact, almost immediately after adfing the coloring agents and the perfume oil… I ended up putting it in a regular square mold and now am hoping that it will still look ok… I will try again, at much lighter trace next time. Once this stuff takes odd, it really takes off….
Hi Andrea!
Oh no, I’m sorry that soap thickened on you! Some fragrances can misbehave in cold process soap and cause it to accelerate. In our tests and recipes, we have found that pomegranate and Black Currant Fragrance Oil and Cranberry Fig Fragrance Oil perform well in cold process. Were you using those fragrance oils? Let me know and I’ll help you troubleshoot!
Read more about misbehaving fragrances here: http://www.soapqueen.com/bath-and-body-tutorials/tips-and-tricks/soap-behaving-badly/
The soap now should be just fine to use! To be on the safe side, you can pH test it after about 5 days. Read more about pH testing here: http://www.soapqueen.com/bath-and-body-tutorials/tips-and-tricks/test-ph-red-cabbage/
If that soap is around 9-10, it’s OK to use and will feel great on the skin. 🙂
-Kelsey with Bramble Berry
Yep, used your fragrance oils. As a matter of fact i bought the whole kit from brambleberry. In reanalyzing i think i waited too long, because i wanted to make sure that i had trace….well, once i poured it i definitely had reached trace…lol. I’ll try again. It still made a very nice soap. Not sure i like the smell, it’s a bit too sweet and too strong for me. Thanks for your reply.
Andrea
Oh, and i plan to let it cure for a long time
Glad that soap turned out well! About how long did you stick blend for? Thanks for answering all my questions. We’ll get this figured out! 🙂
-Kelsey with Bramble Berry
hi Kelsey thank you for your time and effort on attending to us I really like this post very much.pls I need Ur help wat can cause soap to be quickly harden up during saponification process.here is wat happen whenever I add my lye solution into the essential oil it quickly harden up and this has cause me serious headache pls help me out.I use palm kernel oil
Hi Ade!
Absolutely, I am happy to help! I’m wondering if the lye solution is a bit cool. When cool lye water is added to the oils, it can start to harden them up before the soap is emulsified. This is especially the case with palm kernel flakes, which have a higher melt point. This is called “false trace,” and you can read more about that here: http://www.soapqueen.com/bath-and-body-tutorials/tips-and-tricks/trace/
To prevent false trace, you can increase your temperatures! With palm kernel flakes, I’d recommend having your oils and lye water around 120-130F. That will help keep everything melted throughout the process.
Also, if you’re working with an intricate design, you may want to leave the palm kernel flakes out. They tend to accelerate trace as well. Instead, you can use another hard oil like palm. That adds firmness and gives you more time to work! You can add palm oil up to 30% in your recipe. Read more about common oils and how to use them here: http://www.soapqueen.com/bath-and-body-tutorials/tips-and-tricks/free-beginners-guide-to-soapmaking-common-soapmaking-oils/
This post on substituting oil in cold process soap has some great information as well: http://www.soapqueen.com/bath-and-body-tutorials/tips-and-tricks/how-to-substitute-oil-in-cold-process-recipes/
Hope that helps! 🙂
-Kelsey with Bramble Berry
thanks Kelsey for everything
Ur post really help.pls wat can I do to reverse it in a situation where d lye is too cold for production
hoping to hear from u soonest.
tanks
You’re welcome! If your lye cools down before you get a chance to soap with it, you can pop the container in a hot water bath. That can help warm it up slightly! Make sure to watch it the entire time to help prevent any accidental spills. 🙂
-Kelsey with Bramble Berry
thanks Kelsey merry Xmas and happy new year in advance.pls is there any side effect in case if d lye temperature is too high.
thank you for your time
If the lye is a bit too hot, it can cause your soap to accelerate a little bit faster than normal. We have found that having the lye between 100-130F works really well. It’s hot enough to keep everything melted, but not so hot it accelerates the soap!
Also, thank you so much for your sweet message Ade. Happy New Year. 🙂
-Kelsey with Bramble Berry
hi Kelsey how are u I hope u are enjoying the great moment.pls I need Ur help my soap is causing skin reaction in some of my customer body and hand(wound)pls wat can I do to stop this and what is the cause.hope to hear from u soonest.thank you.
Oh no, I’m sorry to hear that! I’m wondering if your customers may be allergic to some of the ingredients. I would recommend that they stop using the soap and talk to a doctor for more information.
Read more about soaping with allergies in this post: http://www.soapqueen.com/bath-and-body-tutorials/tips-and-tricks/soaping-with-allergies-nuts-gluten-more/
It can also be the fragrance or essential oil used in the recipe. Some fragrance and essential oils can cause skin irritation if too much is used. You can find out exactly how much to add to your recipe using our Fragrance Calculator: http://www.soapqueen.com/bath-and-body-tutorials/tips-and-tricks/use-fragrance-calculator/
-Kelsey with Bramble Berry
hi Kelsey compliment of the season how are you and everybody over there.I need your help what is the effect of water on soap whether it is too small or too much.and my soap normally reduce in weight and size after some weeks and I don’t want that ,pls what can I do to it.thank you for your time
Hi Ade!
We are doing well over here, thanks so much for asking! How are you doing? 🙂
Water is very important in the soapmaking process! It dissolves that lye so you can mix it in with your oils and make soap. Our Lye Calculator calculates how much water you need for your batch: http://www.soapqueen.com/bath-and-body-tutorials/cold-process-soap/using-the-bramble-berry-lye-calculator-2/
If there is too much water in the soap, it can make the soap a bit softer. Eventually, it should evaporate. It will need a longer cure time than 4-6 weeks to get rid of that excess water. As your soap cures, it will naturally shrink in weight. That’s because the soap in the water is evaporating. That is a natural process, and will happen each time!
If you like, you can water discount your soap! Water discounting the soap helps it harden and cure faster. Also, because there is less water added at the beginning, the bars won’t shrink as much. Read more about water discounting here: http://www.soapqueen.com/bath-and-body-tutorials/tips-and-tricks/water-discounting-cold-process-soap-how-why/
-Kelsey with Bramble Berry
Can rice bran oil be substituted with another oil in this recipe?
Hi Sylvie!
Absolutely! You can substitute the rice bran oil with canola oil, or you can increase the amount of olive oil to cover the rice bran. Both olive oil and canola have similar textures to rice bran oil. Just make sure to run that recipe through the Lye Calculator again after any substitutions. 🙂
Lye Calculator: https://www.brambleberry.com/Pages/Lye-Calculator.aspx
This post on substituting oil in cold process recipes may be helpful for you as well: http://www.soapqueen.com/bath-and-body-tutorials/tips-and-tricks/how-to-substitute-oil-in-cold-process-recipes/
-Kelsey with Bramble Berry
Canola oil: https://www.brambleberry.com/Canola-Oil-High-Oleic-P5548.aspx
Hi Kelsey,
I ended up substituting with canola oil and running the recipe through the lye. Calculator. I don’t have a vertical mold so I ended up making an infinity swirl. I used jojoba beads instead of poppy seeds and went with Christmas colors and scent. I guess you can say this recipe inspired me and I ran with it!
Thank you for the oil substituting tip!
You’re very welcome Sylvie! That soap sounds gorgeous, I love the way jojoba beads look. If you have a picture, we’d love to see it on our Facebook page. 🙂
Bramble Berry Facebook: https://www.facebook.com/BrambleBerry/
-Kelsey with Bramble Berry
What did you use on this mold to prevent the soap from sticking? I used this mold once and really fought to get the soap out of the mold. I would love to give it another shot.
Hi Mary!
We used the plastic dividers to help keep the soap from sticking! Sometimes a little soap can leak out, and so it can be a bit tricky to get the soap out.
If you like, you can wrap the dividers in freezer paper! That helps them slide out of the mold and slide off the soap a little more easily. You can also line the mold itself to protect from soap leakage. Learn more about lining your molds here: http://www.soapqueen.com/bath-and-body-tutorials/cold-process-soap/how-to-line-any-mold/
You can also rub the dividers with cyclomethicone before soaping. That helps with unmolding as well. 🙂
Cyclomethicone: https://www.brambleberry.com/Cyclomethicone-P4560.aspx
-Kelsey with Bramble Berry
Wow…i used the same color combination with poppy seed few weeks back…its curing now so lets see …however am new to soap making and due to oxides n mica being expensive, i used food colors in my soap. My first batch following the simple basic soap recipe on soap queen went great…however later I when added food colors to my soap..some give really nice color but now when i use them, the color separates from lather ..the lather is great and color does washes away with water and leaves no color on skin but it looks weird having a soap leaving so much color on hand washing …any suggestions or even alternatives to food colors that are economical ?
Sarah, you’d be surprised, but even though it might seem that micas and oxides are expensive, a little goes a really long way. You are still better off buying a few, maybe just primary colors, then using food color. Oxides in particular are very, very strong and you only need a tiny bit to color soap.
thank you Martina :)…I will definitely start using them now …or the natural colors but no more food colors now :-/
Hi Sarah!
Because food coloring isn’t intended for soap, it can do some odd things like morph or fade. We don’t recommend using it.
As Martina said, the colors at Bramble Berry do go a long way (thanks Martina)! Just a couple of dispersed teaspoons can color a 2 pound batch. You can learn more about using colors here: http://www.soapqueen.com/bath-and-body-tutorials/tips-and-tricks/talk-it-out-tuesday-colorants/
You can also use natural colorants for your soap! For instance, you can use carrot puree to color your soap. We used carrot puree in the Baby Buttermilk Baby Bar for a soft yellow color: http://www.soapqueen.com/bath-and-body-tutorials/cold-process-soap/buttermilk-bastille-baby-bar-on-soap-queen-tv/
You can also use other natural colorants, like cocoa powder and paprika! I’ll include links to tutorials using those below. 🙂
Wild Leopard Print Cold Process Soap: http://www.soapqueen.com/bath-and-body-tutorials/cold-process-soap/wild-leopard-print-cold-process-tutorial/
Juicy Orange and Sweet Rose Cold Process Soap: http://www.soapqueen.com/bath-and-body-tutorials/cold-process-soap/juicy-orange-sweet-rose-cold-process/
-Kelsey with Bramble Berry
HI, I wanted to know if you could somehow do this design using The normal mold!!
I Absolutely love the design, scent, and color combonation!
Hi there!
Thanks so much, glad you love the soap! 🙂
You can get a similar look using our Multi Pour Sectioning Tools. In that case, you can pour soap on either side of the divider to get the white and red sections. Then, for the twist, you can remove the divider at an angle. That should give you a similar look!
Multi Pour Sectioning Tool: https://www.brambleberry.com/Multi-Pour-Sectioning-Tool-P5869.aspx
Multi Pour Sectioning Tool for 10″ Silicone Loaf Mold: https://www.brambleberry.com/Multi-Pour-Tool-for-10-Silicone-Loaf-P6437.aspx
You can see that tool in action in the Infinity Swirl Soap video: http://www.soapqueen.com/bath-and-body-tutorials/cold-process-soap/infinity-swirl-soap-soap-queen-tv/
If you don’t have those dividers, you can also use a piece of cardboard cut to fit your mold. We used cardboard for this Natural Colorant Taiwan Swirl: http://www.soapqueen.com/bath-and-body-tutorials/cold-process-soap/taiwan-swirl/
-Kelsey with Bramble Berry
I love to use poppy seeds, they really seem to add something to a soap bar and they are so inexpensive. And I really like the look of this soap. I’ve thought several times about getting this vertical mold, but the reviews seem to universally be against it for $60.
Hi Michael!
I love poppy seeds too! They’re nice and scrubby, and add such a cool look to soap. Also, so glad you like the look of the soap. 🙂
We absolutely love the Vertical Wood Mold because it creates unique designs like this one. It’s also great if you like to gel your soaps, as it’s insulated and keeps the soap nice and warm. It’s definitely personal preference if you want to give this mold a try! If not, we have some other great molds, including silicone and plastic.
This blog post talks about the different types of molds and the pros and cons of each: http://www.soapqueen.com/bath-and-body-tutorials/tips-and-tricks/back-to-basics-how-to-choose-a-soap-mold/
It’s really helpful when deciding on a mold! 🙂
-Kelsey with Bramble Berry
Vertical Wood Mold: https://www.brambleberry.com/Vertical-Wood-Mold-P4927.aspx