Crafty inspiration can come from anywhere. For the past few weeks, we have been sharing projects inspired by lots of shimmer and shine, including the Romantic Rose Gold Melt & Pour Bars and Sparkling Champagne Cold Process Cupcakes on Soap Queen TV. When brainstorming sparkly cold process designs, I began to think about how “sparkle” is made in nature. This led me to thinking about mining for gold…and voilà! The design for this project came together. See? Inspiration can really come from anywhere. =)
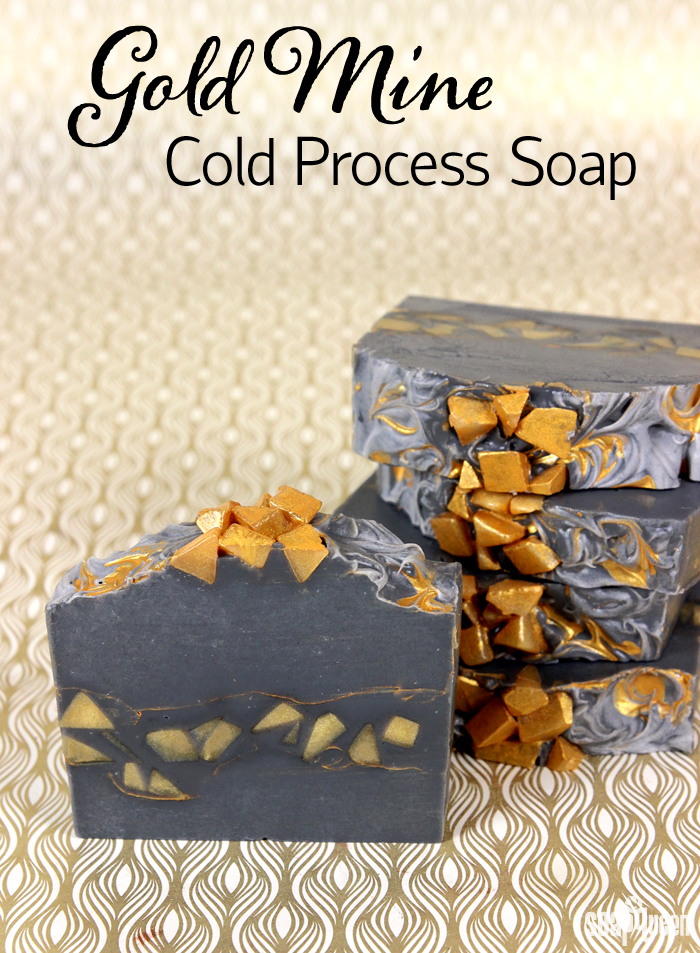
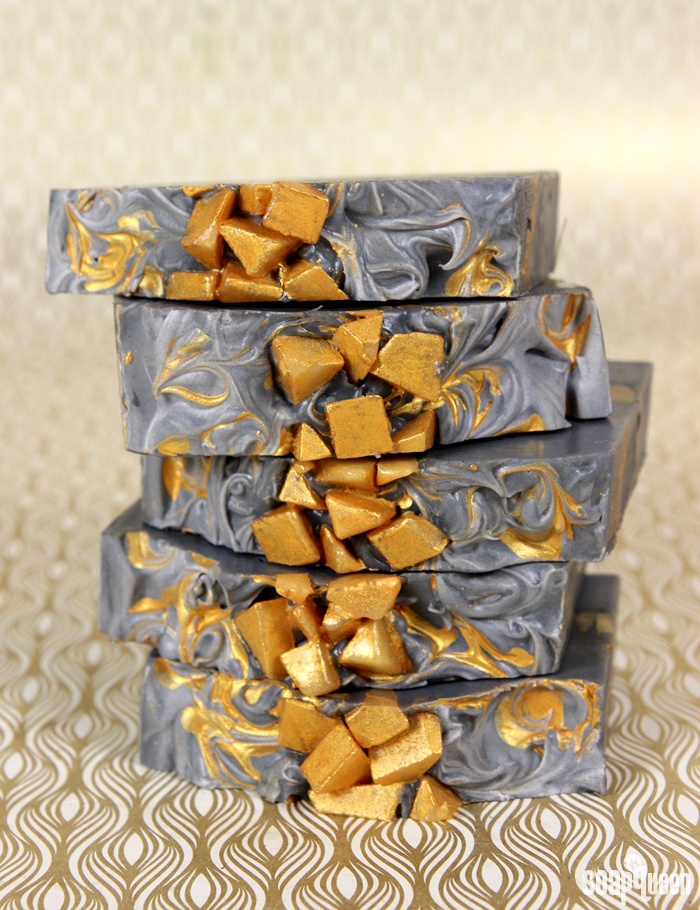
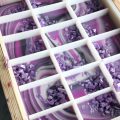
For this Gold Mine Cold Process soap, layers of mica and melt and pour embeds create the look of gold specks within a mine. The top is embellished with King’s Gold Mica painting and more embeds. If you’d like to learn more about how to mica paint, check out this blog post. Love the gold shimmer against the stormy gray base? The Black, White and Gold All Over Cold Process Soap features a slightly different take on the mica painting technique. Scented with a combination of Pure Honey and Sensuous Sandalwood Fragrance Oils, this soap smells warm, sweet and alluring.
What You’ll Need:
10″ Silicone Loaf Mold
3.8 oz. Canola Oil
.8 oz. Castor Oil
1.9 oz. Cocoa Butter Pastilles
9.5 oz. Coconut Oil
1.9 oz. Mango Butter
8.7 oz. Olive Oil
11.4 oz. Palm Oil
5.3 oz. Sodium Hydroxide Lye
11. 5 oz. Distilled Water
King’s Gold Mica
Activated Charcoal
1 oz. Pure Honey Fragrance Oil
1.5 oz. Sensuous Sandalwood Fragrance Oil
Optional: Powder Duster
Embeds:
10 oz. LCP Clear Melt and Pour Soap
King’s Gold Mica
Gold Sparkle Mica
Optional: 99% Isopropyl Alcohol
 Click here to add everything you need for this project to your Bramble Berry shopping cart!
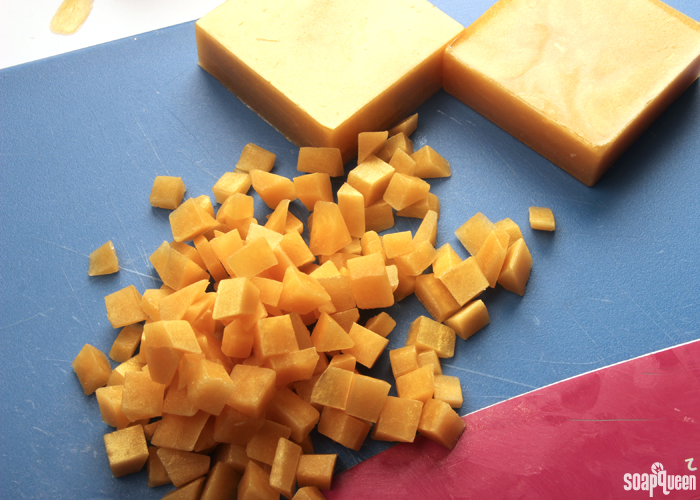
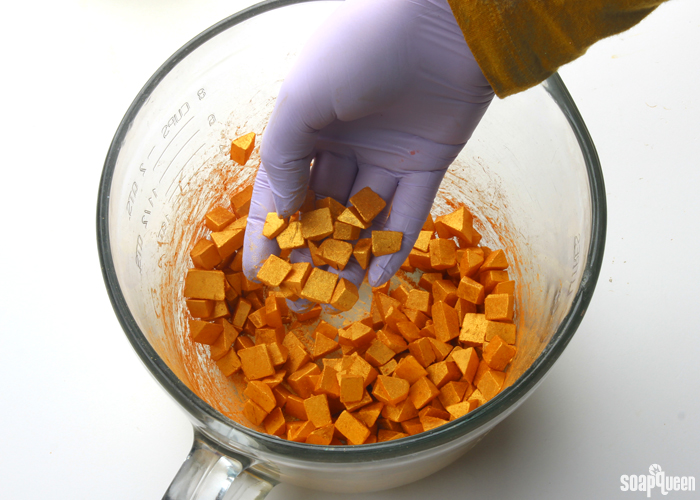
MAKE EMBEDS: Chop and melt the 10 oz. of LCP Clear Melt and Pour in the microwave using 20 second bursts. Once completely melted, add 1 tsp. of Gold Sparkle Mica and stir until the mica is completely mixed into the soap. Spray with rubbing alcohol to help break up any clumps of mica. Pour into a mold and allow to fully harden. We used the 12 Bar Square Silicone Mold, but just about any mold will work because the soap will be cut into pieces once hardened. Remove from the mold and cut into small triangle shaped pieces. Cover about 1/3 of the melt and pour pieces in a light coating of King’s Gold Mica and set aside.
If you’ve never made Cold Process soap before, stop here! I highly recommend checking out our FREE four part SoapQueen.tv series on Cold Process Soapmaking, especially the episode on lye safety. And if you’d rather do some reading, Bramble Berry carries a wide range of books on the topic, including my newest book, Soap Crafting. You can also checkout the digital downloads for that instant gratification factor.
SAFETY FIRST: Suit up for safe handling practices! That means goggles, gloves and long sleeves. Make sure kids, pets, and other distractions and tripping hazards are out of the house or don’t have access to your soaping space. Always soap in a well-ventilated area.
FRAGRANCE PREP: Add 1 oz. Pure Honey Fragrance Oil and 1.5 oz. Sensuous Sandalwood Fragrance in a fragrance safe, glass container. Stir gently and set aside until ready to use.
COLOR PREP: Disperse 2 teaspoons of activated charcoal into 2 tablespoons of lightweight liquid oil like sweet almond or sunflower oil. Then in a separate container, disperse 1 teaspoon of King’s Gold Mica into 1 tablespoon lightweight liquid oil. Use a mini mixer to disperse any clumps.
ONE: Slowly and carefully add the lye to the water and gently stir until the lye has fully dissolved and the liquid is clear. Set aside to cool.
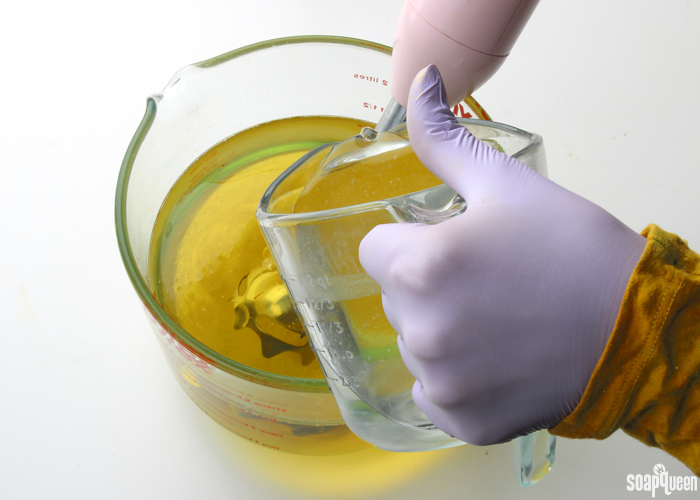 TWO: Melt and combine the coconut oil, olive oil, canola oil, castor oil, cocoa butter, mango butter, palm oils (remember to fully melt then mix your entire container of palm oil before portioning). Once the lye water and the oils have cooled to 130 degrees or below (and are ideally within 10 degrees of each other), add the lye water to the oils and stick blend until thin trace. If you’d like a harder bar of soap that releases faster from the mold, you can add sodium lactate to the cooled lye water. Use 1 teaspoon of sodium lactate per pound of oils in the recipe. For this recipe, you’d add about 2.5 sodium lactate.
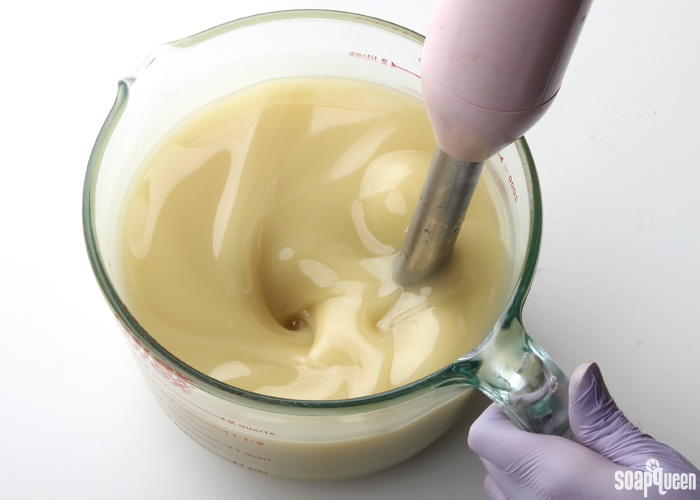 THREE: Once the batter has reached a light trace, add 2.5 tablespoons of dispersed activated charcoal. Use a whisk to mix in the colorant.
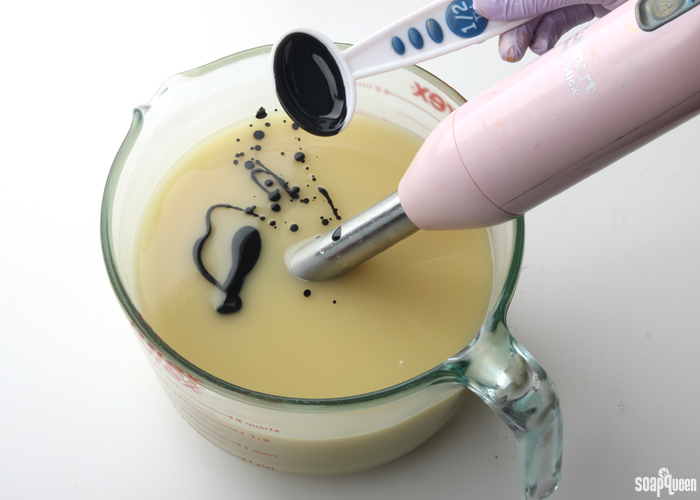 FOUR: Add the entire fragrance blend and use the stick blender to achieve a medium/thick trace.
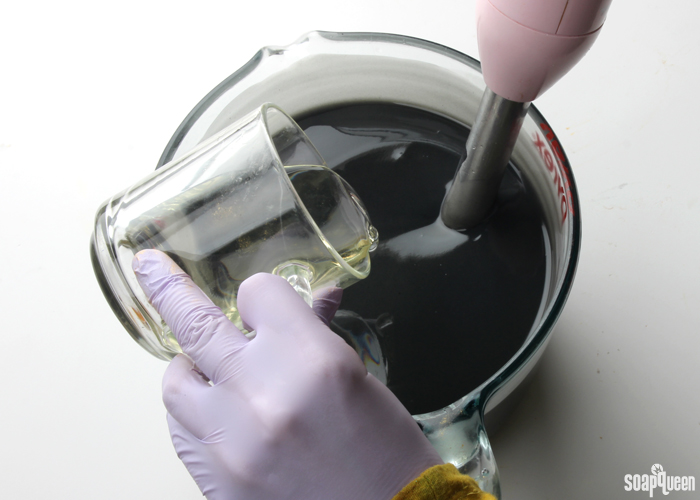 FIVE: Pour about 1/3 of the batter into the mold and tap the mold on the counter to help get rid of any bubbles. Use a spoon to spread the batter evenly and create soft texture.
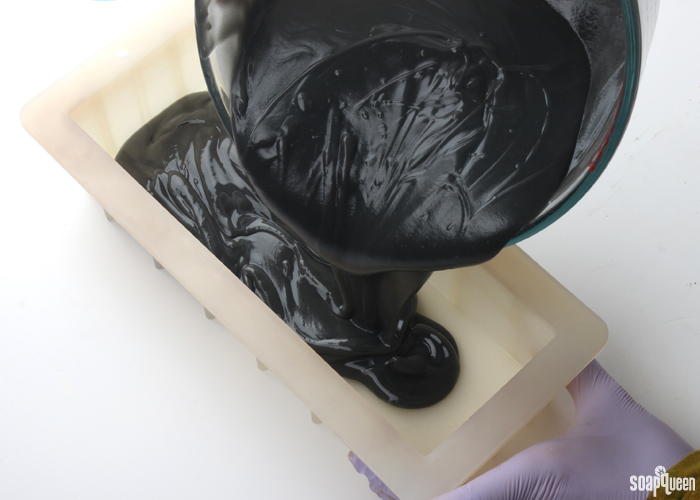
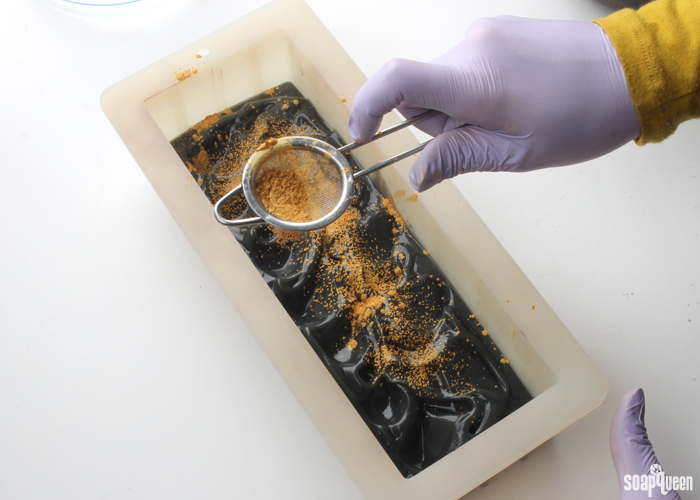
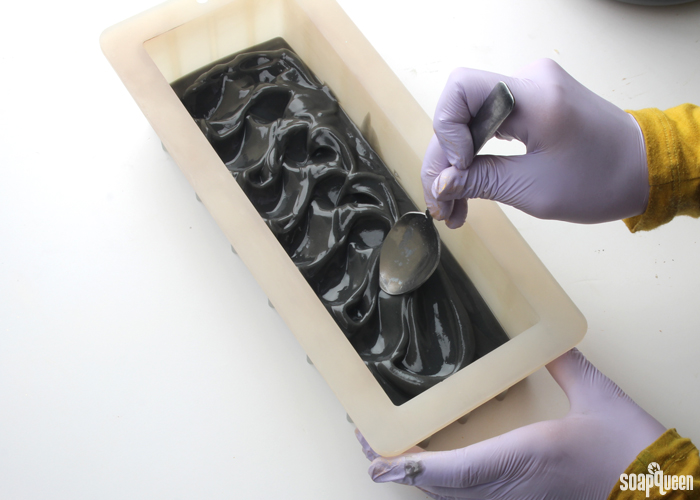 SIX: Add a small amount of the King’s Gold Mica to the powder duster, and lightly cover the soap with a layer of the mica. Close your eyes and blow gently on the color to help disperse it evenly on top of the layer. Watch out, this part can get a bit messy!
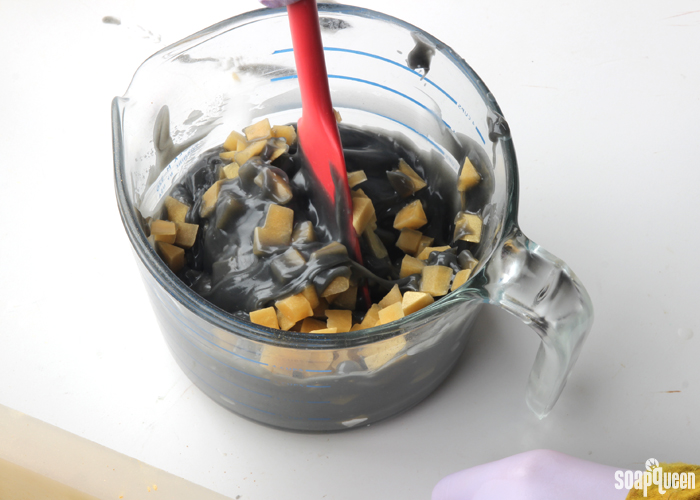
 SEVEN: Split the remaining batter in half. Add the melt and pour embed chunks that are not covered in mica into the halved batter and mix. Then, spoon this soap into the mold, being careful not to break into the layer below. If some pieces break through that’s fine…but you just don’t want the entire layer dropping to the bottom!
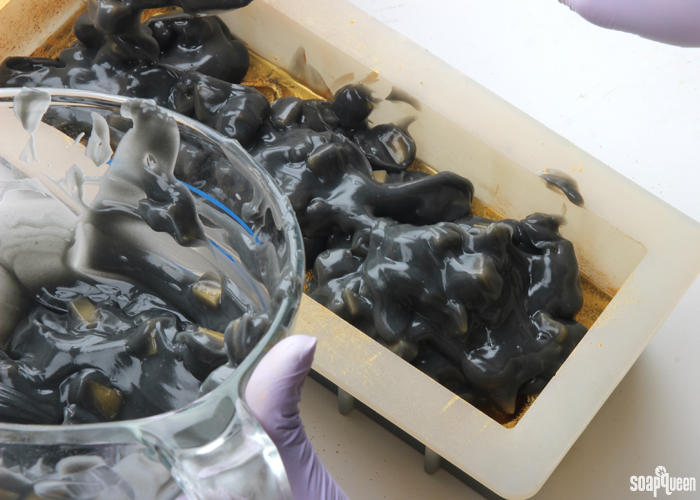 EIGHT: Use a spoon to gently spread this soap throughout the mold and create a soft textured top.
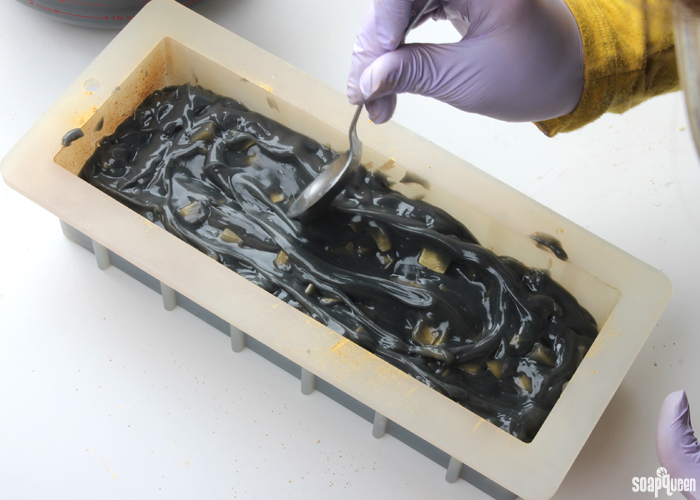
NINE: Place a small amount of King’s Gold Mica into the powder duster and sprinkle a thin layer of mica on top of the soap. Gently blow the excess mica off…be careful, this can get messy! Tap the mold on the counter to help get rid of any bubbles.
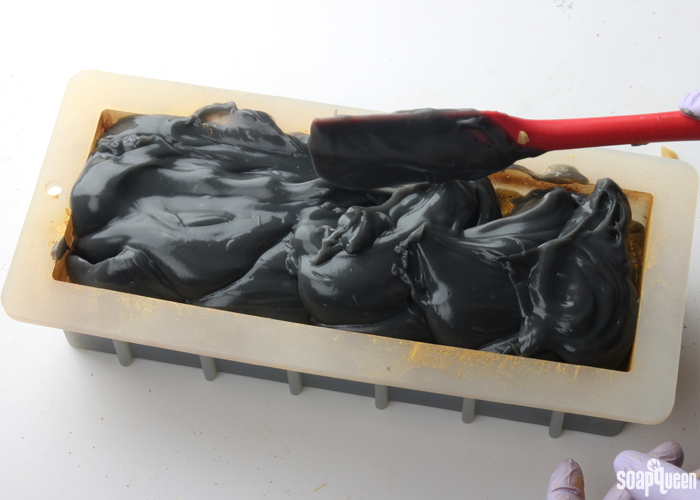
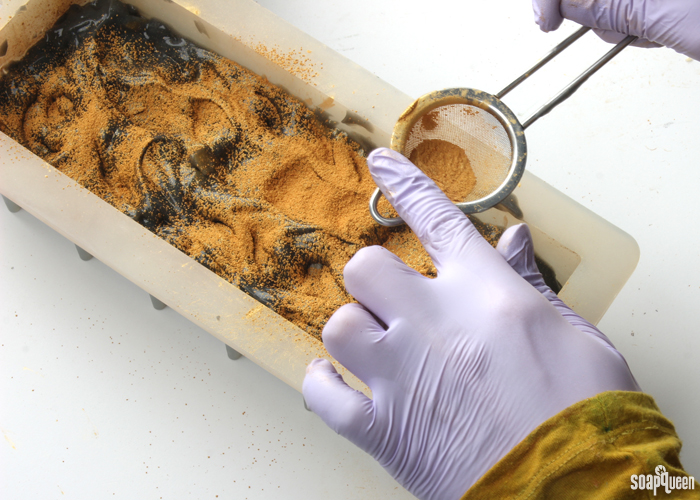 TEN: Spoon the remaining soap batter into the mold and use a spoon to spread the soap throughout the mold evenly. Then use the spoon to create soft texture and waves. There is no right or wrong way to make a textured soap top! Just have fun with it. =)
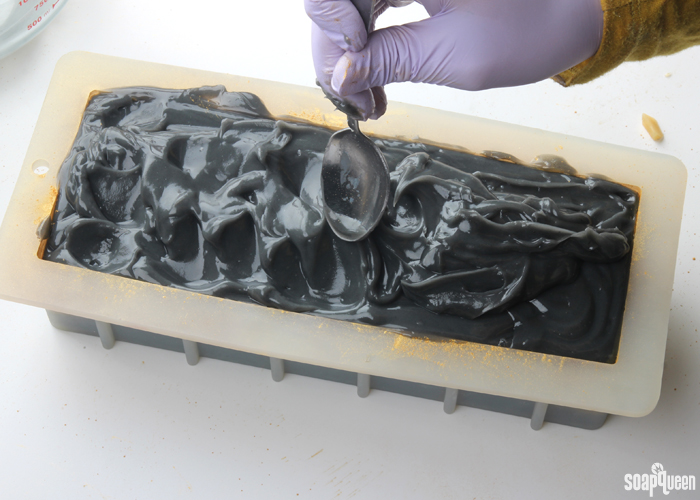 ELEVEN: Using a dropper, add drops of the dispersed King’s Gold Mica onto the top of the soap. Don’t worry too much about where each drop lands, just make sure they are somewhat evenly dispersed throughout the loaf.
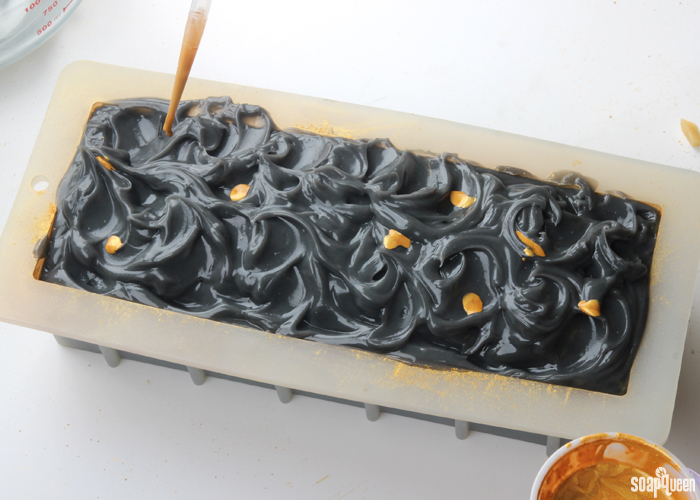 TWELVE: Insert a chopstick or dowel into the drops of dispersed mica and swirl them in various directions to create swirls throughout the bar. Do not insert the chopstick too far, you just want it to swirl the very top of the soap.
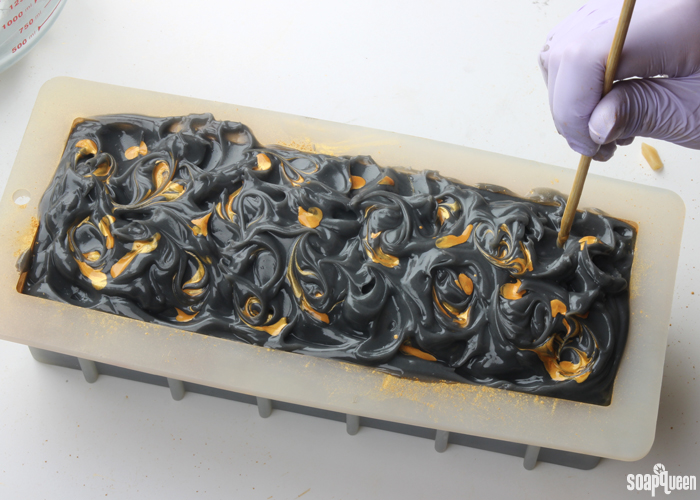 THIRTEEN: Once you’re happy with the swirls, place the melt and pour embed chunks that are covered with King’s Gold Mica onto the center of the loaf. Press the embeds very gently into the soap to make sure they stick. Continue to place them into the soap until you’re happy with the look.
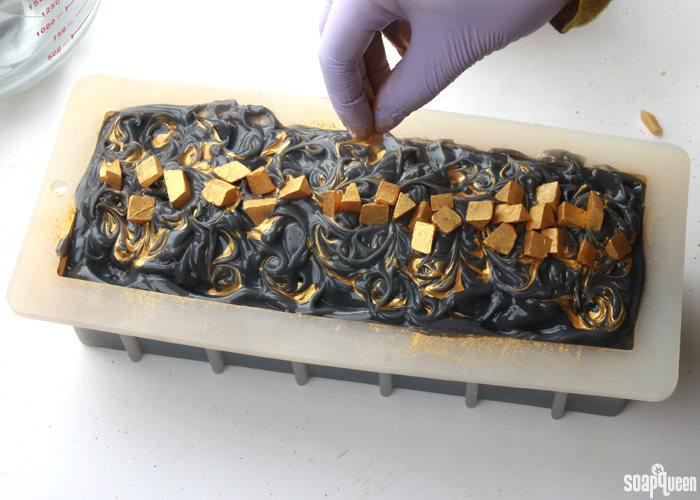
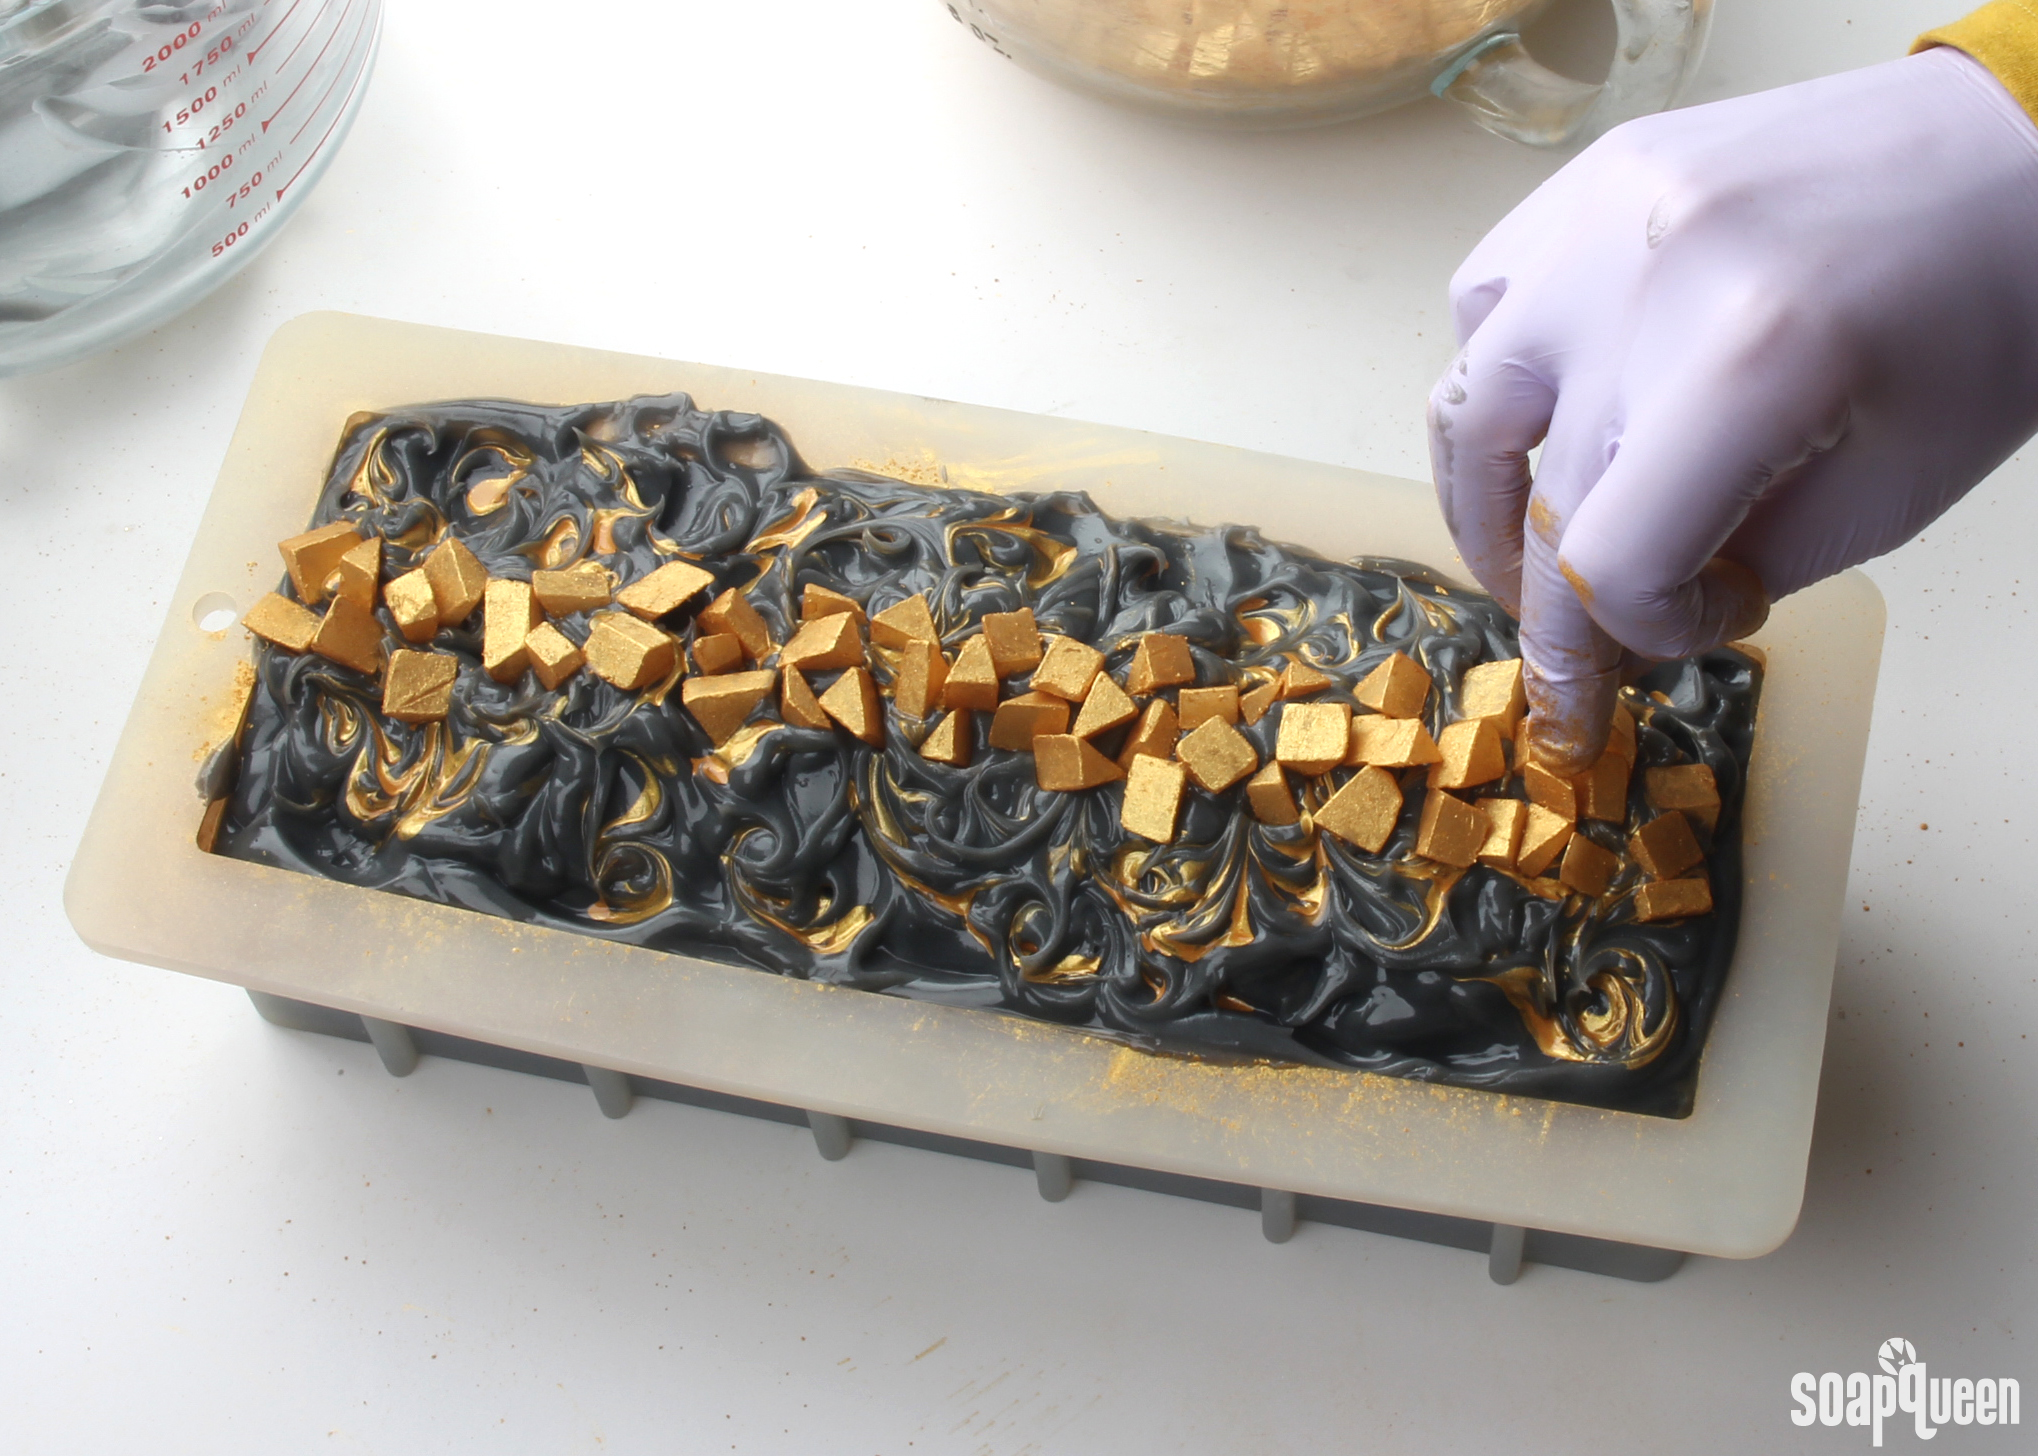 FOURTEEN: Lightly spritz the top of the soap with 99% isopropyl alcohol to prevent soda ash. Don’t spray too much, as this can cause the mica painting to disperse. Because the melt and pour pieces may melt if the soap gets too hot, do not insulate the soap. Allow to harden in the mold for 3-5 days. Once hard, remove from the mold and allow to cure for 4-6 weeks.
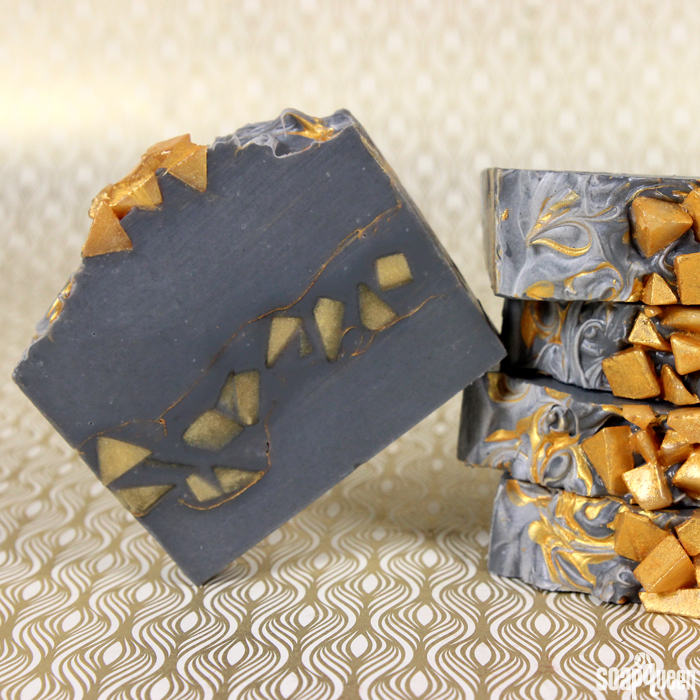
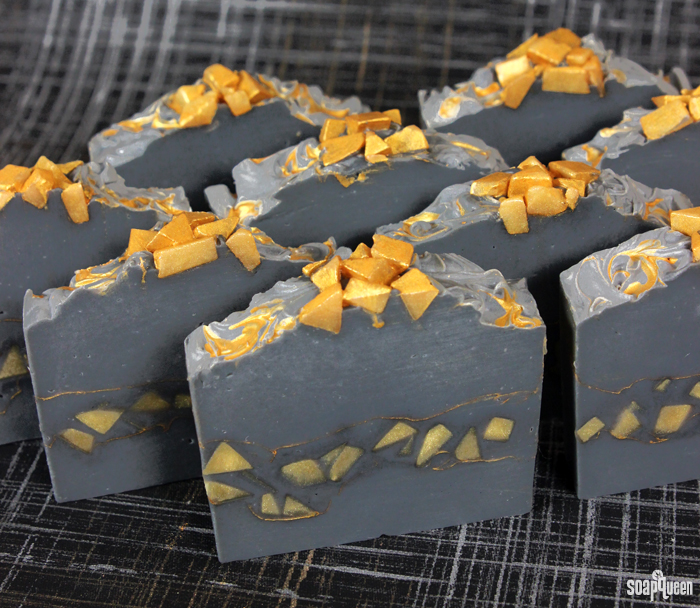
The LCP melt and pour soap does prevent glycerin dew, but may still develop a small amount while the cold process soap cures. We found it easy to wipe away the dew if it did form. =) Interestingly, the melt and pour embed pieces got a little hot, causing a slight gel phase around the pieces. You can see that the soap is a little darker around the melt and pour embeds. If you’d like to avoid this, you could place the soap into the fridge or freezer for several hours after pouring into the mold. Doing so increases the chance of glycerin dew.
Where does your soapy inspiration come from? Last week, I actually came up with a soap design in a dream! =)
- 10″ Silicone Loaf Mold
- 3.8 oz. Canola Oil
- .8 oz. Castor Oil
- 1.9 oz. Cocoa Butter Pastilles
- 9.5 oz. Coconut Oil
- 1.9 oz. Mango Butter
- 8.7 oz. Olive Oil
- 11.4 oz. Palm Oil
- 5.3 oz. Sodium Hydroxide Lye
- 11. 5 oz. Distilled Water
- King’s Gold Mica
- Activated Charcoal
- 1 oz. Pure Honey Fragrance Oil
- 1.5 oz. Sensuous Sandalwood Fragrance Oil
- 10 oz. LCP Clear Melt and Pour Soap
- King’s Gold Mica
- Gold Sparkle Mica
- Optional: 99% Isopropyl Alcohol
- Slowly and carefully add the lye to the water and gently stir until the lye has fully dissolved and the liquid is clear. Set aside to cool.
- Melt and combine the coconut oil, olive oil, canola oil, castor oil, cocoa butter, mango butter, palm oils (remember to fully melt then mix your entire container of palm oil before portioning). Once the lye water and the oils have cooled to 130 degrees or below (and are ideally within 10 degrees of each other), add the lye water to the oils and stick blend until thin trace. If you’d like a harder bar of soap that releases faster from the mold, you can add sodium lactate to the cooled lye water. Use 1 teaspoon of sodium lactate per pound of oils in the recipe. For this recipe, you’d add about 2.5 sodium lactate.
- Once the batter has reached a light trace, add 2.5 tablespoons of dispersed activated charcoal. Use a whisk to mix in the colorant.
- Add the entire fragrance blend and use the stick blender to achieve a medium/thick trace.
- Pour about ⅓ of the batter into the mold and tap the mold on the counter to help get rid of any bubbles. Use a spoon to spread the batter evenly and create soft texture.
- Add a small amount of the King’s Gold Mica to the powder duster, and lightly cover the soap with a layer of the mica. Close your eyes and blow gently on the color to help disperse it evenly on top of the layer. Watch out, this part can get a bit messy!
- Split the remaining batter in half. Add the melt and pour embed chunks that are not covered in mica into the halved batter and mix. Then, spoon this soap into the mold, being careful not to break into the layer below. If some pieces break through that’s fine…but you just don’t want the entire layer dropping to the bottom!
- Use a spoon to gently spread this soap throughout the mold and create a soft textured top.
- Place a small amount of King’s Gold Mica into the powder duster and sprinkle a thin layer on mica on top of the soap. Gently blow the excess mica off…be careful, this can get messy! Tap the mold on the counter to help get rid of any bubbles.
- Spoon the remaining soap batter into the mold and use a spoon to spread the soap throughout the mold evenly. Then use the spoon to create soft texture and waves. There is no right or wrong way to make a textured soap top! Just have fun with it. =)
- Using a dropper, add drops of the dispersed King’s Gold Mica onto the top of the soap. Don’t worry too much about where each drop lands, just make sure they are somewhat evenly dispersed throughout the loaf.
- Insert a chopstick or dowel into the drops of dispersed mica and swirl them in various directions to create swirls throughout the bar. Do not insert the chopstick too far, you just want it to swirl the very top of the soap.
- Once you’re happy with the swirls, place the melt and pour embed chunks that are covered with King’s Gold Mica onto the center of the loaf. Press the embeds very gently into the soap to make sure the embeds stick. Continue to place them into the soap until you’re happy with the look.
- Lightly spritz the top of the soap with 99% isopropyl alcohol to prevent soda ash. Don’t spray too much, as this can cause the mica painting to disperse. Because the melt and pour pieces may melt if the soap gets too hot, do not insulate the soap. Allow to harden in the mold for 3-5 days. I found this soap took a little bit longer to harden. Once hard, remove from the mold and allow to cure for 4-6 weeks. The LCP melt and pour soap does prevent glycerin dew, but may still develop a small amount while the cold process soap cures. We found it easy to wipe away the dew if it did form. =)




the recipe used for the face or body and you can used all skin and what advantage??????
This soap will work great for the body! As for the face, it does depend on your skin type. Everyone’s skin is a bit different. This soap is nice and cleansing and will work well for oily skin. If you have dry skin, you may want to use a more moisturizing recipe like this one: https://www.soapqueen.com/bath-and-body-tutorials/cold-process-soap/creamy-cow-milk-cold-process-tutorial/
-Kelsey with Bramble Berry
I love this so much, but I want to make the embedded gold pieces cold process too. I’m sure that it will work fine but I’m just uncertain if I should maybe add a bit more gold mica or something, since the colors I’m sure pop more in the melt and pour soap. What do you think? I was also thinking of adding carrot purée or annato or something to be sure it comes out a good color. Any other recommendations?
Hi Caitlin!
That will work just fine! In cold process soap, gold micas come off as more of a pale yellow. For a brighter gold color, I think annatto would be a good choice. You could also add a bit of madder root powder for a goldeny/orange color. We used that combination in this Natural Colorant Rainbow Soap Tutorial: https://www.soapqueen.com/bath-and-body-tutorials/natural-colorant-rainbow-cold-process-soap/
Then, you can dust the cold process pieces with gold mica for a bit of sparkle. 🙂
-Kelsey with Bramble Berry
Annatto seed: https://www.brambleberry.com/Annatto-Seed-P4011.aspx
Madder root powder: https://www.brambleberry.com/Madder-Root-P4940.aspx
I have a question with the immersion blender. Is it already to use it to make soaps and then to use it for food, after it is washed of course! Or is it best to have a separate immersion blender?
Thanks
Hi Natalie!
We recommend having a separate stick blender for food. Even with the best washing, lye and fragrance oil can get caught in the microcracks of the blender. That means you could accidentally ingest something from the soapmaking process. To be extra careful, we recommend two separate sets of tools. 🙂
-Kelsey with Bramble Berry
I made a variation of this soap a couple weeks ago, and it came out great! Only problem is that after sitting on the curing rack for a few days they started to sweat really bad!!! How do you cure this soap?? I’ve never used m&p embeds before and am confused as to how to both let the cp soap cure while keeping the embeds from sweating all over the place.
Yay, so glad that soap came out great!
If you notice the embeds are sweating, you can run a fan over your soaps as they cure to help keep them dry. You can also use a dehumidifier in your curing room, or place silica packets around the soap. That will help absorb excess moisture in the air, which leads to that sweating.
Read more about sweating, or glycerin dew, in this post: http://www.soapqueen.com/personal-ramblings/augh-whats-that-all-over-my-soap-2/
For future bars, we like to use LCP (like cold process) bases. They have less glycerin added during the manufacturing process, so they have little to no sweating. 🙂
LCP Clear Melt and Pour Soap: https://www.brambleberry.com/LCP-Clear-Melt-And-Pour-Soap-P4383.aspx
-Kelsey with Bramble Berry
Love the name of this, and my inspiration comes from what ever I can imagine I try and make it possible. Right now I am trying to think of a forest soap for Christmas forest. Mabye a row of pine trees. I think alot about it before I make it. Or I thought of making the top look like a pine tree. Still thinking…most of my inspiration can co.e from the scent alone.
Hi Kristie!
Thank you, so glad you like the name of the soap! Also, a lot of our inspiration comes from scent too. It can really help you with color and design!
We have a Christmas Tree Swirl Cold Process Recipe that may help inspire you. It is made with Christmas Tree Cybilla Fragrance Oil and the swirl inside looks like a little tree: http://www.soapqueen.com/bath-and-body-tutorials/cold-process-soap/christmas-tree-cold-process/
This Snowy Forest Melt and Pour has cute trees and may give you some ideas as well: http://www.soapqueen.com/bath-and-body-tutorials/melt-and-pour-soap/snowy-forest-melt-pour/
-Kelsey with Bramble Berry
hello ! I’ve read in the Soap Crafting book that lecithin is a nice additive that can be added to CP soap at trace. But it’s not yet clear to me what would be the benefits. Also, I have it in powder form, how much and how can I add it to the mix? Thanks a lot for your help.
Hi Rosy!
Lecithin is typically used in cold process soaping to slow down trace. That is helpful when you’re working with advanced designs and need a bit more time to work. 🙂
We recommend using the lecithin at 1 tablespoon per pound of soap. Also, I believe that the powdered lecithin is water soluble, so it would need to be mixed with water before being added at trace. You can use an ounce or so of distilled water to mix with the lecithin. Just make sure to discount that water from your main batch so your soap won’t have too much water.
You can also slow down trace other ways! For instance, using a recipe with a lot of soft oils will help it trace more slowly. Also, stick blending just until your ingredients are mixed and then whisking in fragrance or colorants helps keep your batter on the thinner side. 🙂
Read more about formulating recipes with soft oils here: http://www.soapqueen.com/bath-and-body-tutorials/tips-and-tricks/formulating-cold-process-recipes/
And more about trace here: http://www.soapqueen.com/bath-and-body-tutorials/tips-and-tricks/trace/
-Kelsey with Bramble Berry
If lecithin’s only advantage is to slow down trace, I think I’d better use a recipe with a lot of soft oils ; )
Thank you Kelsey for all of your help !!
You’re welcome! 🙂
-Kelsey with Bramble Berry
Anne-Marie,
I have been watching and reading your blog and youtube for about 2 years now. I just had to tell you how much i LOVE this soap! it’s SO pretty! It reminds me of the Magma Soap you made a while back. I wonder, could you use the clear LMP in this recipe as well? Oh, and before I forget! How it the repair of your home after the boiler blew?
PS I LOVE LOVE LOVE all the yummy recipes you post as well!
Hi Jill,
Gosh, you have a good memory! Nice work thinking back to the Magma Soap. That was a fun one wasn’t it? http://www.soapqueen.com/bath-and-body-tutorials/cold-process-soap/cp-mp-magma-soap/
You could totally do the clear Low Sweat MP in this recipe as well – and the color combos for both projects could be changed around pretty easily to make them super Fall or Christmas colors too.
The repair of the house after the boiler explosion went beautifully; it’s good as new again (actually, better!) and there’s even a brand new, super energy efficient boiler in the home again. =) Thank you for asking.
This soap is beautiful! That is so funny that you came up with a soap idea in a dream. I enjoy writing, and have sometimes gotten fiction story ideas in dreams. Dreams can be so random and crazy, with lots of strange ideas coming together, but sometimes that is what you need to create an original fictional storyline. I wake up and think, “That would make a great story written down!”
One place I really like to get color inspiration is from nature. I look at the subtle details in plants, insects, or landscapes. Color is designed beautifully in nature: there are hardly any color combinations in nature that look ugly. So if you can copy that in your soap, your soap colors will be beautiful. Of course, the hard part is getting the shade, tone, and saturation of the color just right!
Dreams can be an amazing source if inspiration for sure! If nothing else, they do make interesting stories the next day. Also, I totally agree – nature is gorgeous, and full of inspiration. 🙂
-Kelsey with Bramble Berry
Did you have to use a knife to cut it (because of the M&P)? Or could you use the wire cutter? I can never cut straight with a knife. 🙂
Hi Martina!
To be on the safe side, I would recommend using a sharp knife. While the melt and pour pieces are cut up, they can still be quite firm and may damage the wire cutter. Using a knife will protect your wire cutter just in case. 🙂
-Kelsey with Bramble Berry
Ooh, I love this! I am going to have to keep this project in mind and give it a try someday. Thanks for the tutorial!
You’re very welcome Jenny, so glad you love it! If you get a chance to make it, let us know how it goes. 🙂
-Kelsey with Bramble Berry
I love that design!!
I don’t like when they are too busy, and I don’t like plain. This one is just right! I think I’ll make it exactly like that, since I have all the ingredients. 🙂
What’s the difference in color in those 2 gold micas? Kings Gold looks darker in pictures to me. I only have Gold Sparkle now, but I’m ordering the other one now while it’s on sale.
I get inspired by just about everything!
Sometimes it’s the fragrance, sometimes colors, sometimes just a word, sometimes landscapes, sometimes food, art, clothes…. You get the picture! 🙂
So glad you love the design Martina! If you give it a try, let us know what you think. 🙂
Also, you are correct – King’s Gold Mica is a little bit darker, while Gold Sparkle is a little lighter. They both add a lovely gold accent to soap.
Inspiration is everywhere for soap! It can strike when you least expect it too. 🙂
-Kelsey with Bramble Berry