I have a favorite sheer lip tint from a large department store brand that I’ve loved for years. It routinely makes ‘Best Of’ lists in magazines; it’s a classic, beloved by most. And, every time I fork over $15 for this luxury indulgence, I feel a twinge of guilt. After all, I can (and should!) make the stuff myself (!). I hit the lab and created something that is my go-to staple almost every day now. Compared to lipsticks from top luxury beauty brand, I think you will find it very difficult to tell the difference. Without equipment costs, this recipe will cost you less than $2.50 per tube, so never pay $15 for lipstick again!

What You’ll Need:
0.25 oz Candellila Wax
1.25 oz White Beeswax
0.2 oz Emulsifying Wax
2.3 oz Castor Oil
0.25 oz Shea Butter
5 mL Fractionated Coconut Oil
1.5 mL Isopropyl Myristate
2 mL Vitamin E Oil
1/4 teaspoon Titanium Dioxide
4 teaspoons Burgundy Oxide
10 mL Honey Kisses Flavor Oil
30 Clear Chapstick Tubes
Lip Balm Pouring Tray
Mini Mixer
Mini Scoops
Scale
Droppers
Click here to add everything you need for this project (with clear chapstick tubes instead of white as pictured) to your Bramble Berry shopping cart!
Note: Although this specific recipe makes enough for 30 full lipstick tubes, if you buy the kit you’ll receive enough of each base ingredient to make up to 180 tubes worth of lipstick base. If you’d like to make less tubes or want to save time, check out our pre-made bases. We have two formulations: Bramble Lip Balm Base and Nourish Lip Balm Base. Or, buy more tubes and make a few giant batches =)
COLOR PREP: Micronize the pigments using a clean and sterilized coffee grinder. This ensures that the particles are tiny enough to mix with the rest of the oils well and there won’t be tiny (but noticeable) bits of unmixed colorant. Please note that you can use this coffee grinder for food again but you’ll end up tossing the first batch of coffee (or oatmeal or whatever) you grind with it. The colorants love to stick to every little nook and cranny of that coffee grinder.
POURING TRAY PREP: Stick all of the chapstick tubes to the pouring tray. Wondering how to use a pouring tray? There’s a blog for that! Click here to read it.
ONE: Combine the Candelilla Wax, Beeswax, E-Wax, and Castor Oil. Heat in a small heat-safe container in the microwave on 30 second bursts, stirring often, until the waxes are melted.
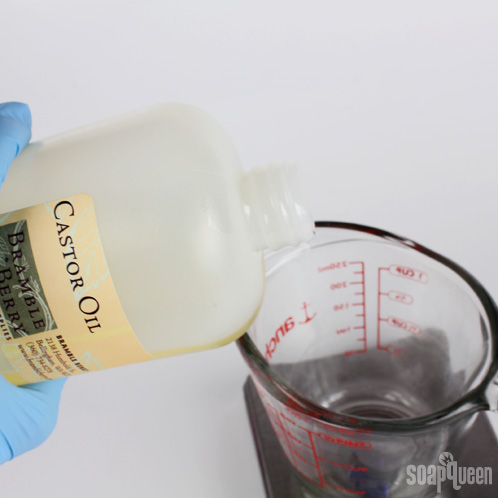
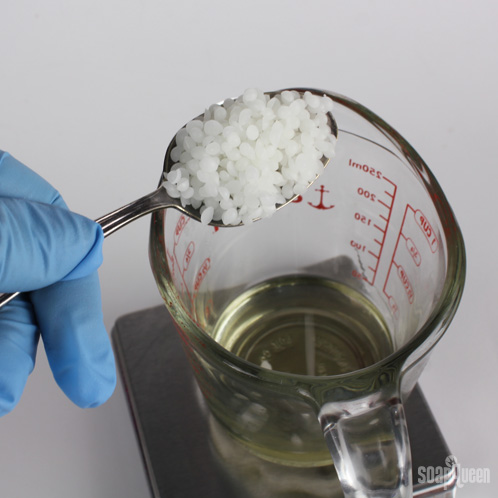
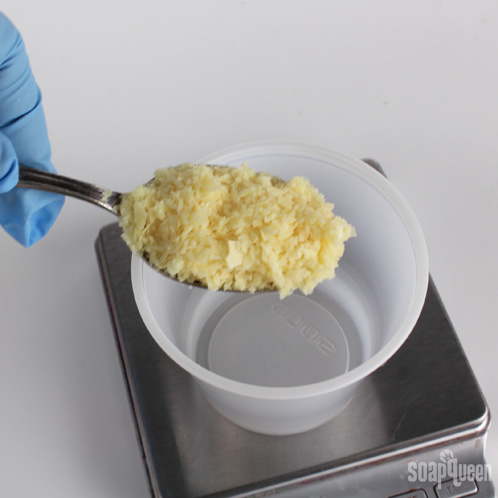
NOTE: The Castor Oil helps to regulate the heat and allow the high melt-point waxes to melt easier. However, temperatures will still get a bit high so make you’re exercising caution when removing your heat-safe container from the microwave if it’s glass. I’ve shattered the glass in the microwave before melting beeswax so that’s why short bursts, and stirring often, are necessary.
TWO: Add the Shea Butter, Fractionated Coconut Oil, Isopropyl Myristate and Vitamin E Oil. Stir until the Shea Butter has fully melted (or help it along in the microwave for 10-15 seconds. Make sure you microwave in a microwave-safe dish! You wouldn’t put this little plastic container (below) in the microwave — it would melt!).
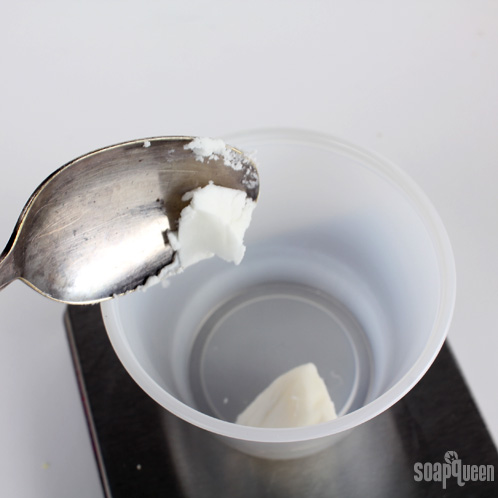
THREE: Add the Honey Kisses Flavor oil and mix well. Next, add the Titanium Dioxide and Burgundy. Mix in well using the mini mixer.


TIP: Push the powder into the oil with the tip of the mini mixer before turning it on, or you’ll get a poof of powdered pigment over your work area!
FOUR: Pour the mixture into the chapstick tubes via the pouring tray. Allow to harden overnight. Remove tubes from pouring tray and cap the tubes.

Allow the mixture to harden for 1 – 2 hours and then your lovely lipstick is ready to use!



Cera bellina wax instead of candellilla.?
Would this change the consistency of the product a lot
Hi Ness!
Cera bellina wax has a unique, gel-like texture that’s different from candelilla wax and beeswax. It will give the balm a bit of shine and helps it spread easily. It will feel a bit different though, so I would recommend making a small test batch to see if you like the consistency. 🙂
Read more about lip product ingredients and how they act in balm here: http://www.soapqueen.com/bath-and-body-tutorials/lip-products/how-to-create-lip-product-recipes/
-Kelsey with Bramble Berry
Cera bellina wax: https://www.brambleberry.com/Cera-Bellina-Wax-P5642.aspx
Hi – this lipstick (store bought) is my daughter’s absolute favorite, and I would love to replicate it for her. The problem is the amount – there is no way I could use 50 lipsticks! Would it be possible to have a recipe for adding the colors to your pre-made lip balm base, to make 4 tubes at the most?? Thank you! BrambleBerry is my favorite supplier!
Hi Nancy!
First of all, thanks so much! So glad you like the products. 🙂
Also, you can definitely use our Lip Balm Base and size this recipe down. Our Lip Balm Tubes hold about .25 ounces, meaning you’ll need about 1 ounce of lip balm base for 4 tubes.
You want the flavor oil to be 1-3% of your recipe. For 1 ounce, that would be .003 ounces for 3%. It’s such a small measurement, I would recommend just a tiny drop or two. 🙂
Read more about flavoring oils here: http://www.soapqueen.com/bramble-berry-news/sunday-night-spotlight-flavoring-oils/
As for color, it will take a little bit of testing to get your perfect shade. I would recommend using 1 mini scoop of Titanium Dioxide and 2 mini scoops of Burgundy Oxide to start out with. Then, dip a frozen spoon in the mixture to check the color. You can see how to do that trick in the Spoon Trick post: http://www.soapqueen.com/bath-and-body-tutorials/tips-and-tricks/spoon-trick/
-Kelsey with Bramble Berry
Lip Balm Base: https://www.brambleberry.com/Lip-Balm-Base-P5883.aspx
Lip Balm Tubes: https://www.brambleberry.com/Lip-Balm-Tubes–P3024.aspx
Mini Scoops: https://www.brambleberry.com/15-CC-Scoop-P4088.aspx
Wow Kelsey, thank you so much – it worked perfectly! The good thing is that my daughter is delighted. The bad thing is that she’s now eyeing all her other (expensive) brand name makeup, and trying to figure out how she can put her sweet old, greyhaired, mother to work replicating all of it!!
You’re welcome Nancy, so glad the lipstick turned out well for you! Also, once you start making handmade products it’s hard to go back! I’ve spilled a lot of glitter on myself trying to recreate my favorite nail polish shades. 🙂
-Kelsey with Bramble Berry
I ordered a few things to make this recipe, including Isopropyl Myrsitate. It arrived frozen solid (arg!). I’ve never used it before, could there be any problems because it was frozen? Thanks!!
Hi Christine!
You can absolutely use products that have frozen with no problems! During the winter, our products can freeze during shipping in very cold temperatures. However, we use them with great results. I would recommend letting the Isopropyl Myristate sit out overnight to get back to room temperature. 🙂
-Kelsey with Bramble Berry
Isopropyl Myristate: https://www.brambleberry.com/Isopropyl-Myristate-P3213.aspx
Hello, I plan on starting a lip cosmetic business the beginning of next year. Right now I’m in the stages of picking my staple products. Originally, I was going to make and use a soy wax based product that consisted of soy wax, she butter, grapeseed oil, castor oil and vitamin E oil for all my lip balms, lip butters and lipsticks.
However, I stumbled across the vegan lip balm base on the Brambleberry site and I think I’m going to try that too. It seems quite easy and cost efficient as well. What is your opinion on a soy wax based lip product and also, would castor oil be a good thing to add to the base for added shine and stick? Thank you in advance! 🙂
Hi Myesha!
I’m so glad you like the Nourish Lip Balm Base! Because it has candelilla wax instead of beeswax, it creates a nice soft balm. It’s also vegan! 🙂
Nourish Lip Balm Base: https://www.brambleberry.com/Nourish-Lip-Balm-Base-P5231.aspx
Candelilla wax: https://www.brambleberry.com/Candelilla-Wax-P4207.aspx
We have a great recipe for lip balm using candelilla wax you may like. 🙂
Winter Lip Balm Recipe: http://www.soapqueen.com/bath-and-body-tutorials/lip-products/winter-lip-balm-recipe/
We haven’t made lip balm with soy wax, but it should be OK! It will create a softer product than beeswax, so a small test batch may be helpful.
Also, castor oil would add some great shine and stick! 🙂
-Kelsey with Bramble Berry
EcoSoya Wax: https://www.brambleberry.com/Search.aspx?k=ecosoya
Castor oil: https://www.brambleberry.com/Castor-Oil-P3195.aspx
Fabulous lipstick! Where can I find the long narrow lipstick tube and the large tin holding the smaller ones-pictures in your tutorial?
Good morning!
You can find the chapstick tubes and the large tin at Bramble Berry. The long narrow lipstick tube is actually the store bought product we were trying to replicate 🙂
Chapstick Tubes: https://www.brambleberry.com/Clear-Lip-Balm-Tubes-P4750.aspx
Lip Balm Pouring Tray: https://www.brambleberry.com/Lip-Balm-Pouring-Tray-P3223.aspx
I hope this helps 🙂
-Amanda with Bramble Berry
Can I use BTMS-50 instead of part or all of the emulsifying wax? Isn’t it supposed to be more conditioning? Or is BTMS-50 not lip safe? I always like to “tweak” a recipe – lol!
Hi Jan!
BTMS-50 is more commonly used for hair products or lotions. We have never tried it for lip balms. I would recommend making a small test batch first to see what you think 🙂
-Amanda with Bramble Berry
Hi. Can you tell me the difference between lip balm and lipstick? I know the difference in store brought but when it comes to handmade it seems in some cases the only difference is the tubes.
Thank you
Hi there!
The term lip balm and lipstick will most likely have a different definition depending on who you ask :). To me, lip balm is more sheer, or contains no color, while lipstick has a good amount of color to it. In general, the texture of lip balm is thinner than lipstick. I hope this helps!
-Amanda with Bramble Berry
Is it Possible to put this in lipstick tubes?
Hi there!
It’s definitely possible to pour this product into a lipstick tube :). I hope you give this recipe a try!
-Amanda with Bramble Berry
I’m so frustrated right now!! I followed this recipe to a T. It does not go on sheer, it’s more like a heavy lipstick color. I ended up throwing away 34 lip balm tubes (I put extra in just in case) and my lip balm tray is stained with burgundy color even after setting in a sink with bleach for over an hour. I don’t know how I will ever be able to use it again. I have scrubbed and wiped every little hole out and when I stick new tubes in it still leaves stains on the tubes. My scrub brush is stained, my sink is stained (the one that had bleach in it for over an hour)and I’ve lost money spent on trying this little venture and having to toss it all out. Now, I have to decide if I even want to attempt to make soap today!!! LOL
I’m sorry to complain because I really love most of the products I get from Brambleberry, but this recipe is a booger bear!! I use the product that this recipe is suppose to dupe and was almost out so I was really looking forward to being able to make it. 🙁
Hi Kelly!
I’m so sorry to hear that this recipe did not work out for you! I have cleaned up lipstick before, and you’re right…it can be quite messy. I have found that using rubbing alcohol works really well. I’m going to be sharing this comment with my team, and see if we can look into putting together a tutorial/video on how to clean up these lipstick trays. Again, I’m so sorry that you did not have good luck with this recipe, but thank you for your feedback.
-Amanda with Bramble Berry
I recently made this lipstick and found it quite draggy and hard to put on. Is there anything different I could do to give this more slip and make it easier to put on?
Also, can I use a liquid colouring in this recipe? IF so, how much would you recommend?
Thanks. I love how this feels on my lips, once I get it on. It last forever 🙂
Hi Tricia,
I would suggest using Candellila wax to help with the slip.
https://www.brambleberry.com/Candellila-Wax-P4207.aspx
In regards to liquid colorant, we suggest staying clear of that since it might very well stain your lips.
I found a link that will tell you all the colorants that Bramble Berry has that are lip safe. 🙂
https://www.brambleberry.com/Lip-Safe-Micas-Colorants-W37.aspx
So glad that you love the way this feels on your lips and hope this is helpful for you.
~Kevin with Bramble Berry
Thanks Kevin, I did use Candellila wax as directed in the recipe. Should I try more?
The liquid colourant I wanted to use is a lip safe colourant, purchased from another supplier.
Tricia,
You could use a little more Candellila wax to help. You could even try a little more Shea butter to help with the slip.
In regards to the colorants I did find a cool tutorial on mixing colors and testing them. Since I don’t know what product you purchased, I cannot give a recommendation for that usage.
http://www.soapqueen.com/bath-and-body-tutorials/lipstick-making-mixing-colors-and-testing-2/
I also found another great tutorial on lip balm that might help.
http://www.soapqueen.com/bath-and-body-tutorials/lip-products/talk-it-out-tuesday-lip-balm/
Hope this is helpful to you. 🙂
~Kevin with Bramble Berry
Oops! one more thing, do I have to further crush those micas they look pretty fine already.
Hi Wanda!
You can really use whatever lip-safe colorants you’d like, so if these colors are not your favorite, you could certainly go for more pink and berry tones :). The Cellini Red results in a bright red pink that is really pretty! I would recommend adding each color in small amounts until you get the color you like. One trick that might help in this process in the forzen spoon trick!
The frozen spoon trick is simply placing a spoon in the freezer about 20 minutes before making your balm. When your balm is liquid, you can place the tip of the spoon in the mixture, which will cause the liquid to immediately harden. This will allow you to try the color on your lips before the whole batch hardens 🙂
We found that micronizing the pigments beforehand helped with the smooth texture of this balm. But if you don’t want to do this step, it would be okay, I would just recommend blending extremely well to ensure the colors are well mixed with the oils and have no clumps.
I hope this helps, I’m excited for you to give this recipe a try! 🙂
-Amanda with Bramble Berry
thanks for the recipe sounds awesome! I want to make it right now! I have everything except the titanium dioxide. I have Cellini Red, Merlot and super pearly white. Would a mixture of those alone work? I don’t like really dark colors I prefer pinks and berries. thanks for sharing
Well there must be something wrong with me because anything with “intermediate or advanced” is easy for me and this “beginner” sheer lipstick has been the hardest thing I’ve done so far! Lol!
I just don’t know if I got it right. It seems very thick and the burgundy pigment (at 4 tsp) seems so dark! I did have to leave out the isopropyl myristate because I didn’t realize I was out until I was knee deep in making this! So maybe that’s it. It just seemed super thick, almost hard and very dark. Any suggestions?
By the way…thank you so much for everything you do to teach soap making! I learn so much from you!
Melissa
Louisville, KY
Hi Melissa!
I’m sorry to hear that this recipe is giving you some problems! While the Isopropyl Myristate is added in this recipe to give it additional “slip” and smoothness, leaving it out should not result in the problems you’re having; without it, it will be a little thicker and have less glide, but should still be usable.
If you are feeling that your mixture is too thick, you could add a little more Castor Oil to thin it out. Something that may help is the frozen spoon trick, in which you place a spoon in the freezer before making your balm. Then, while the mixture is liquid, place the tip of the cold spoon in the liquid and it will harden, allowing you to test the color and texture before pouring all your balm. If you are feeling that 4 tsp of Burgundy is too dark, start with 2 tsp, do the frozen spoon trick and add more if you’d like :).
I hope this helps Melissa, let me know if you have any more questions! 🙂
-Amanda with Bramble Berry
I would like to make this using your jar of 4 oz. Lip Balm Base. If I were to use the whole 4 oz. jar, how much Titanium Dioxide, Burgundy Oxide and Honey Kisses Flavor Oil would I use?
(I just purchased these from you and thought I could figure it out myself – not!)
Do I need a vanilla color stabilizer w/ the Honey Kisses?
Thank you ever so much for all your help!! I can’t wait to try this out.
Hi Susan!
I’m so glad you’re going to give this recipe a try! This recipe makes roughly 5 oz, so you could use a simialr usage rate for each pigment, just use a little less! I would suggest about 3 tsp. of the Burgundy Oxide, and about 1/6 of a tsp. of the Titanium Dioxide. I would start small, and simply add the color until you get a color that you like :).
The frozen spoon trick might help you! That’s a trick of putting a spoon in the freezer before making your balm, and while it’s still liquid, dip the tip of the spoon into the mixture. It will instantly harden, and you can see if you like the texture and the color on your lips! 🙂 You don’t need to worry about a Vanilla Stabilizer for this recipe.
-Amanda with Bramble Berry
I was really excited about this project but it didn’t work for me as written… the only 2 things that may have affected it? I made 1/3 of the recipe (usually this works just fine for me). I also accidentally added fragrance oil instead of flavor oil. I wonder if that’s what contributed to the chalky, crumbly texture that I got. I realized later that fragrance oils are not lip safe so I won’t be using this anyway. But I am hesitant to try it again with flavoring oil because the texture was so bad. It didn’t have any slip, glide, or sheerness to it 🙁 Could the accidental inclusion of the fragrance oil that did it? Thanks for any feedback that anyone can provide!
Hi Allison!
I’m sorry to hear that this recipe didn’t work well for you! You’re correct, fragrance oils are not lip safe so I would not recommend using it. Other than making 1/3 of the recipe, did you change anything else? We found this balm to be incredibly smooth. I would be happy to help you troubleshoot!
-Amanda with Bramble Berry
Nope, I didn’t change anything else from the recipe. I tried it again last night and did the frozen spoon test before adding any flavoring oil. It still had the texture that didn’t work. I added a bit more IPM and a good amount more fractionated coconut oil at that point and tested again. It came out better/usable, but still not the smooth, sheer texture I wanted. My best guess is that scaling it down so much just wasn’t a good idea. I also sourced some of the ingredients from other suppliers…just things I didn’t need to purchase to have all the necessary ingredients. (Although they’re ostensibly the same items). I bought several things from Brambleberry just for this project– lucky I got so much more than was needed because I do want to make this work! I promised my sister 😉
Hi Allison!
Well I’m glad that it turned out better the second time around! Scaling down the recipe could definitely have something to do with it. I wonder if some of the graininess is coming from the Shea Butter, because sometimes that can be a little finicky.
If heated too much, it can cause graininess. I would recommend adding your Shea Butter to your hot oils once they have cooled slightly (so they are not super duper hot). Then I would recommend sticking your balm in the fridge or freezer so that it cools quickly and does not allow the Shea Butter to separate.
I hope this helps Allison! 🙂
-Amanda with Bramble Berry
Made this yesterday…LOVE it 🙂 Put a post on fb.
Hi Karen!
I’m so glad you gave this recipe a try and loved it. I saw your post on Facebook, thanks so much for sharing that with us! It’s always great to get feedback on our recipes 🙂
-Amanda with Bramble Berry
I have that store-bought lipstick in my purse *rightnow*! 😀
Really excited to try this. Two questions:
1. What is the INCI name for Isopropyl Myristate? (it’s not listed on the product page)
2. Can this recipe be promoted as free of parabens, phenoxyethanol, SLS, SLES, and/or petroleum products?
Many thanks–love your site!
Hi Erin!
It’s a great product, but if you can make it for much cheaper…why not? :).
The INCI name for Isopropyl Myristate is simply Isopropyl Myristate. Most ingredients in this recipe are pure, and are not made up of different compounds (ie: wax, Coconut Oil, She Butter, etc). It can be promoted as free of petroleum, SLS, and SLES. The flavoring oil is a proprietary product, and is made up of hundreds of different synthetic products, so I cannot say for sure what it is made up of. If you want to me safe, you can always leave the flavor oil out of this recipe.
I hope this helps!
-Amanda with Bramble Berry
Hi… you call for 4 tap of Burgundy Oxide but it appears that you are putting 1/4 tap in the photo. Just to confirm, is it 4 tap of oxide.
Love your site and YouTube tutorial!… Heather.
Hi Heather!
Good question, it is indeed 4 tsp of Burgundy Oxide. The picture must have been taken before all of the pigment was added 🙂 I hope this helps!
-Amanda with Bramble Berry
I should have known to just trust the recipe. Thanks.
could i leave out the emulsifying wax?
Hi Amal!
We added the emulsifying wax to add extra sheen, and to help the beeswax incorporate better. We have not tried this recipe without it, my guess is that it would be a little firmer. If you give it a try, let us know how it goes! 🙂
-Amanda with Bramble Berry
Hello, I was wondering if there was any information on the elongated metal (or metallic-looking) lipstick tubes pictures in your post. I clicked the link in hopes of finding a place to order the sleek-looking tubes, but all I found was recipes for product.
Hi Jill!
The long metal tube pictured in this post is actually the store bought product we replicated. Unfortunately we do not supply this tube. I hope you give this recipe a try, it makes a great lip balm! 🙂
-Amanda with Bramble Berry
Hi,
To keep this recipe vegan, can the beeswax be omitted and an addtional .625 ozs. of candellila wax be added? (Realizing that it may not end up the same texture as the over-priced store brand).
Thanks,
Sarah
Hi Sarah!
You could make this with only Candellila Wax if you’d like, it will just be a little softer. I hope you give this a try, it’s a great recipe! 🙂
-Amanda with Bramble Berry
“Isopropyl Myristate” is misspelled on your website!
Hi Jen!
Thanks for the eagle eye, nice catch! I will get that changed ASAP 🙂
-Amanda
Looks like a perfectly nice lip product but the fact that your measurements go from ounces to teaspoons to mililiters is confusing.
Hi Kim!
I’m sorry to hear you found this recipe confusing. The reason for not using the same measurement across the board is because the ingredients that were measured in milliliters were such a small amount of product, using milliliters gave us a more exact measurement. We will definitely take this suggestion into consideration in future recipes! 🙂
-Amanda with Bramble Berry
I’ve used this recipe (from your newsletter) several times as is, and have changed the colors to suit other people. The measurements were listed as they were most appropriate. Thanks for all the quality work you do!
Hi,
I’ve wanted to make this too, but don’t want to use the isopropyl myristrate. Any suggestions for a sub? Maybe an extract like avocado?
Thanks!
Hi Dawnia!
You could certainly make this recipe without the Isopropyl Myristate, but we found it gave the product a nice slick, sheer texture. If you are looking for a substitute, using slightly more Candelilla Wax would give this product more shine and softness.
I hope this helps! 🙂
-Amanda with Bramble Berry
Haha – I think I know EXACTLY what lip product this is. I am also completely addicted. Can’t wait to try this recipe. Thanks!!
Hi Kristie!
It’s a great product, and if you can replicate it at home…even better! When you give this recipe a try, we would love to see a photo of it on our Facebook page!
https://www.facebook.com/BrambleBerry
-Amanda
Why emulsifying wax if no water is being used? Just curious. Can I add honey to the recipe?
Hi Erya!
We added a small amount of Emulsifying Wax to this recipe to add additional “slip” and to help the Beeswax emulsify with the other oils better. I hope this helps 🙂
-Amanda with Bramble Berry
Can I leave out the Isopropyl Mysitrate, or is it important to have it in there?
Hi Tricia!
The reason we used Isopropyl Myrsitate is to give the product more slick on the lips, and it also helps contribute to the sheerness of the end product. You can leave it out of the product, and while we haven’t made this recipe without Isopropyl Myrsitate, I would imagine it would be a little thicker and less sheer. If you end up giving this recipe a try, we would love to see it on our Facebook page! 🙂
-Amanda
Sara, cellini red will do the trick.
Hi Sara!
Thanks for the suggestion :). I love the Cellini Red Mica as well, although I find it to be surprisingly bright! Still a beautiful color, but it is not as brown or natural looking as the Burgundy Pigment, which might be exactly what she is looking for! 🙂
Cellini Red Lip Safe Mica:
https://www.brambleberry.com/Cellini-Red-Lip-Safe-Mica-P3068.aspx
-Amanda with Bramble Berry
I meant to add it to the burgandy to tone down the brown. I wouldn’t suggest brick red if looking for a bluer tone.
What Mica would you recommend if you wanted to have a slightly more blue tone to this instead of the brownish tone?
Hi Sara!
If you don’t want a brown tone to this product, you could try the Brick Red Oxide which is till a deep red but slightly less brown, or the Merlot Sparkle Mica which has a bit more of a berry tone.
Merlot Sparkle Mica:
https://www.brambleberry.com/Merlot-Sparkle-Mica-P3064.aspx
Brick Red Oxide: https://www.brambleberry.com/Brick-Red-oxide-Pigment-P4041.aspx
I hope this gives you some ideas!
-Amanda with Bramble Berry
Is the candellila wax necessary? Can I use more beewax or emusifying wax instead candellila?
Hi Vita!
You could use more Beeswax in this recipe instead of adding the Candellila Wax. We added the Candellila Wax because of its softer texture; we found this gave the lip balm a nice amount of softness and sheerness. If you give this recipe a try, we would love to see photos on our Facebook page! 🙂
-Amanda with Bramble Berry
Hello , just thought something would be useful to you .. If the ingredients are animal testing free that would be worth stating as that would definitely be another string to your bow 😉 regards Carolyn
Hi Carolyn!
Thanks for the suggestion, you are so right :). If you end up giving this recipe a try, we would love to see it on our Facebook page!
https://www.facebook.com/BrambleBerry
-Amanda with Bramble Berry