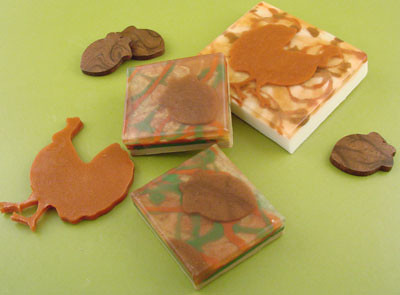
Thanksgiving is next week! (Public Service Announcement: Bramble Berry is closed from Thursday November 27 to Monday December 1. But, I’ll be working at Otion on the 28th so stop by if you’re in town.) You’re probably preparing to either go to your in-laws or for them to descend onto your house. If you are looking for a fun family project to do together, or perhaps something to entertain your long-lost-cousin who just wants to hide in the corner, this is the seasonal project for you. Plus! It’s an easy beginner’s project so even though the final product looks complex? It just requires you to follow directions.
Items needed:
Jelly Roll Pan
Festive Seasonal Cookie Cutter
Clear Melt and Pour
Soap Kit Syringe Injector
Micas in Fall Colors
Spritzer full of Rubbing Alcohol (Isopropyl Alcohol)
Fragrance (suggestions: Pumpkin Spice, Gingersnap, AppleJack Peel, Rum Nut Cake)
Step One
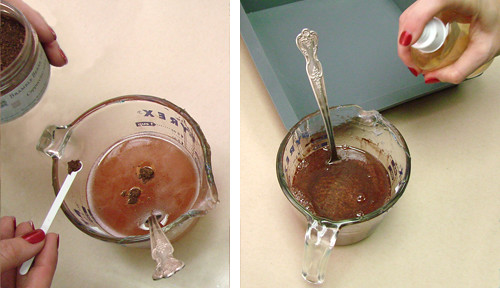
Prepare the Soap for the cookie cutter portion. We used Cappuccino Mica color in clear soap, scented it with Rum Nut Cake. The Jelly Roll pan uses about 8 ounces of melt and pour soap to make a thin layer (thin enough to push through, that is). To prepare your soap, melt it in the microwave on 30 second bursts. Color your soap to preference and add about .13 – .25 ounces of fragrance. Stir well.
Step Two
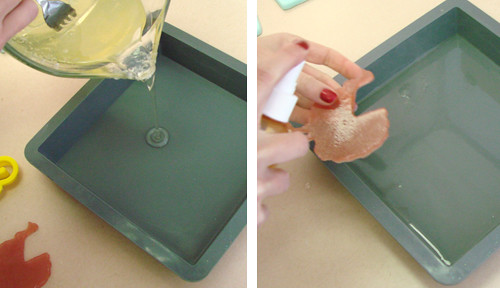
Pour your soap into the Jelly Roll silicone pan. Spritz with a finishing touch of alcohol. Allow to harden.

Step Three
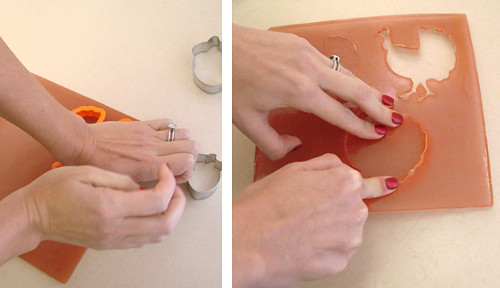
Gently peel the soap out of the mold. Use your cookie cutter to press out Fall holiday shapes.
Step Four
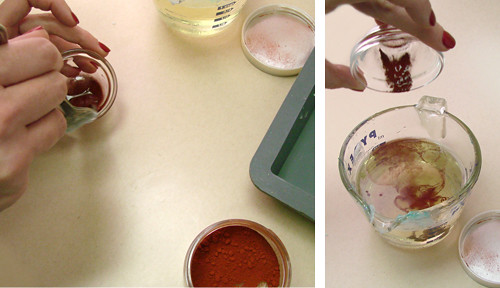
Prepare your clear soap. Melt the soap in 30 second bursts. Once it’s melted, add fragrance. Be sure to choose a non-yellowing fragrance or at least a fragrance that stays clear.
Step Five
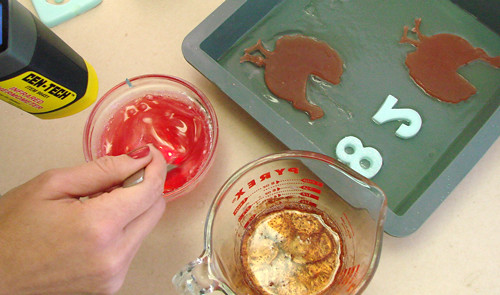
Pour off a little of your fragranced, clear soap into 3 little pots. You want .5 ounces to 1 ounce of soap per pots. Bonus points if your pots can be reheated in the microwave. Color each of these with a fall color. You want these to be bright vibrant colors so they really stand out.
Step Six
Pour a thin layer of clear soap into the bottom of the Jelly Roll Pan. Wait for soap to harden.
Step Seven
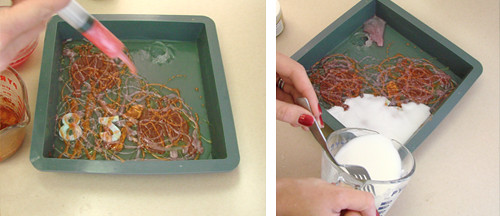
Spray the thin layer of clear soap liberally with alcohol. Spray your turkey (or other fall cut out soap) liberally with alcohol. Place the turkey down on the top of the clear soap.
Step Eight
Take your Soap Syringe/Injector and draw up a syringe full of colored soap (remember those little pots of colored soap? Now is the time to use them! If they’ve solidified, it’s okay, reheat and remelt). Pretend you’re Jackson Pollock and start drizzling. Alternate colors. Spray some more rubbing alcohol. Alternate more colors. Syringe, soap, syringe, soap, syringe. Let this masterpiece harden.
Step Nine
Prepare your background soap. It can be any color you want (we used green, gold, white and ivory – they all looked great!) so long as the drizzles stand out from the rest of the soap in a dramatic and impressive fashion. Spray your Pollock strings with alcohol. Make sure your overpour soap is around 120 to 130 degrees so it doesn’t melt your design. Pour the overpour soap gently over the entire pan, filling it 7/8th to the top or as thick as you want your soap to be.
Step Ten
Wait for the soap to harden. This will take at least an hour if not longer. It’s a thick slab of soap at this point. Gently peel out of the mold and cut into squares. I used the handy dandy scraper cutter but you could use a butcher knife.

Wrap in saran wrap, give away at Thanksgiving or use these for fun and easy place settings. Stick a skewer in them to make a sign.


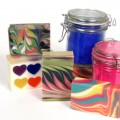
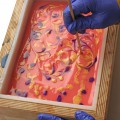
Well, once again, instead of making pots tonight, I was MAKING SOAP! I love this melt-and-pour stuff. I had some layers delaminating. I took that to mean the first layer had cooled too much. So how close in temp do they need to be to bond? Are there other ways to get these layers to bond. Tomorrow night we are going to try painting different colors of soap onto some cutouts we made tonight. Then imbedding the whole lot in clear. Trying to make 3D teacups that float. Should be a hoot if it works!
Thanks again for all your advice!
Alex, Oh my goodness! If you do a basketweave soap, I totally want to see it.
I normally let my layers set up for 10 – 15 minutes (depending on how thick they are and how hot I pour). I like a skin to form that is at least 1/16th” thick.
Teresa,
I’m so glad that you like the DVD. Yippeee! Thanks for the positive comment.
Thanks, A-M! And you know what, I should have reviewed your MP how-to DVD before I asked. I was giving ds#1 a hair cut this morning and we watched your DVD together while I was cutting, and you specifically say that micas are hard to mix into the base. I love your DVD!! I’m so glad I bought it so that we can have a refresher course every once in a while (because obviously I forget things often…LOL!).
I have to admit, this gives me some wacky ideas to try with our next batch of soap. I hadnt really thought about layering clear and opaque colors this way, over and under and such. Makes me think that it might be fun to do sort of a basketweave looking soap. Need to figure out how long each layer needs to set up before the pouring of the more-melted clear can be added. Ideas? Timing?
Temp?
Wow – very nicely done!
Tangled_Panda, I think light blue glitter snowflakes sound lovely. If you get a chance, definitely post pictures. =)
Teresa, I am spritzing the soap with rubbing alcohol. It helps burst those little mica bubbles that form during the mixing process.
I got that flexi pan from BB, so I’m going to try it for sure. 🙂
I have a question: In the photo on the right under Step One, it looks like you’re spritzing the soap with rubbing alcohol. Does that help the mica mix better? I ask because I seem to have some difficulty making the micas integrate evenly in the mp soap.
Thanks, Anne-Marie!
Love this project!
Oh absolutely adorable! Only you could make a rather “plain” looking holiday fun and cute! Thanks for the idea!
Those are too cute!! I am going to have to do that for the holidays! Light blue glitter snowflakes with white splashes and a dark blue back! And maybe some glittery Red and Green ornaments with Red, White and Green splashes! Thanks for the wonderful ideas!!
Love it, love it! Thanks for sharing!
I am not really into the whole Thanksgiving thing but I can say reading this tutorial has given me some new ideas to try with my soap making. Thanks for posting it. Now I just need more time to play in soap.