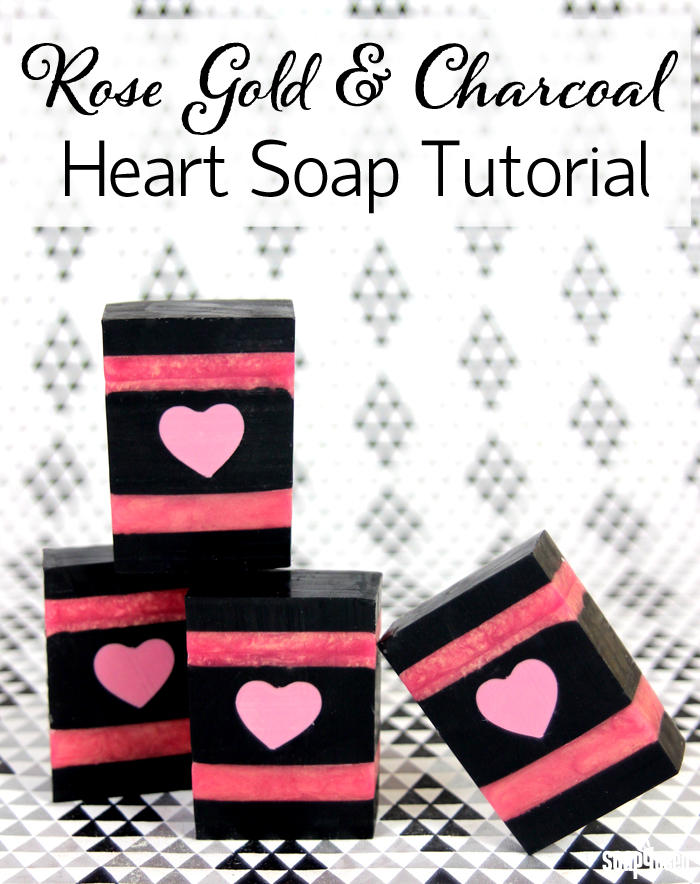
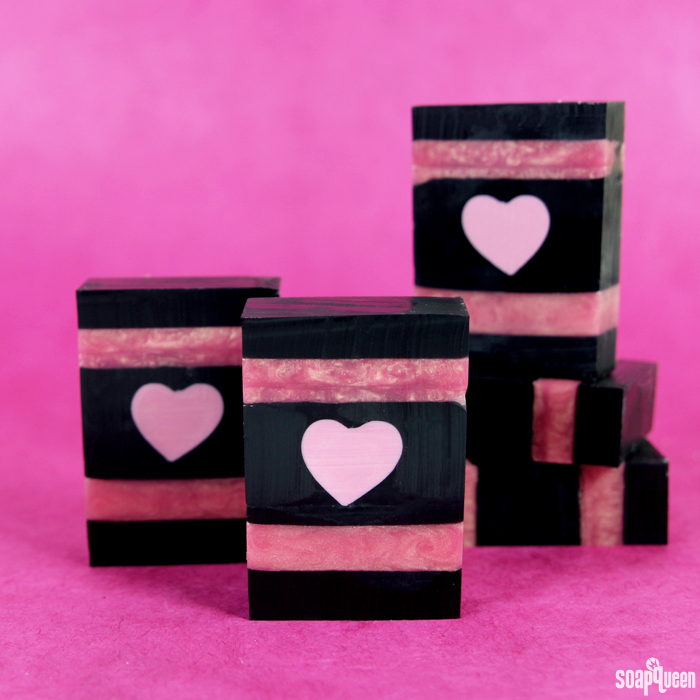
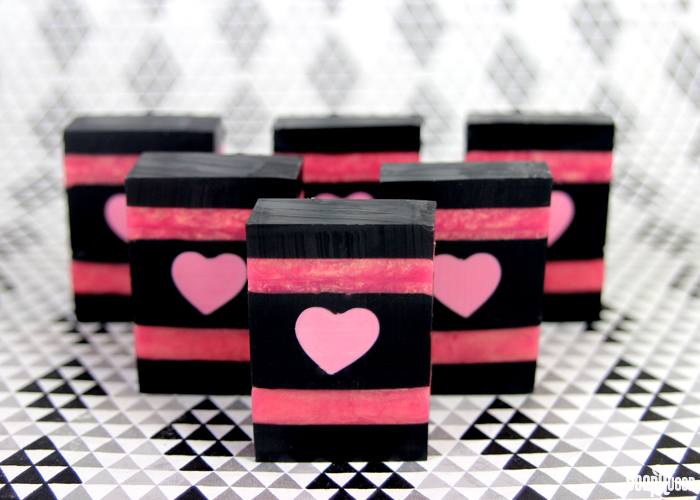
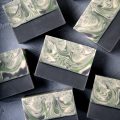
 If you’re looking for a sophisticated spin on Valentine’s Day colors, this is the project for you. Pink and black come together to create elegant contrast. The small heart in the center, made with the Mini Heart Silicone Column Mold, makes this project a great way to for show your love this February (or any time of year!) These bars are scented with the light and floral White Magnolia Fragrance Oil.
If you’ve never created layers with melt and pour soap before, I would recommend watching this Soap Queen TV video to learn the basics. Layers require a little bit of patience, but are well worth it. In addition, layers require an understanding of how melt and pour behaves at certain temperatures, so I would recommend getting a few melt and pour projects under your belt before you attempt this recipe. Some fun beginner recipes include the Sparkly Garnet Soap Gems and the Pumpkin Pie Melt and Pour Soap. Looking for a challenge? Check out the Rainbow Hearts Melt and Pour video on Soap Queen TV.
What You’ll Need:
Tall 12″ Silicone Loaf Mold
Mini Heart Silicone Column Mold
5 oz. Shea Melt and Pour Base
50 oz. Clear Melt and Pour Base
Rose Gold Mica
Activated Charcoal
1.2 oz. White Magnolia Fragrance Oil
99% Isopropyl Alcohol

Click here to add everything you need for this project to your Bramble Berry shopping cart!
MAKE EMBED: Disperse 2 teaspoons of Rose Gold Mica into 2 tablespoons of 99% isopropyl alcohol. Chop and melt 5 ounces of Shea Melt and Pour base in the microwave using 10 second bursts. Once completely melted, add all the dispersed Rose Gold Mica and stir until completely smooth and incorporated. Place the Mini Heart Silicone Column Mold into a container to position the mold upright, and carefully pour the soap into the mold. Allow the soap to fully cool and harden. Watch this video for more information on using the 2-part silicone molds.
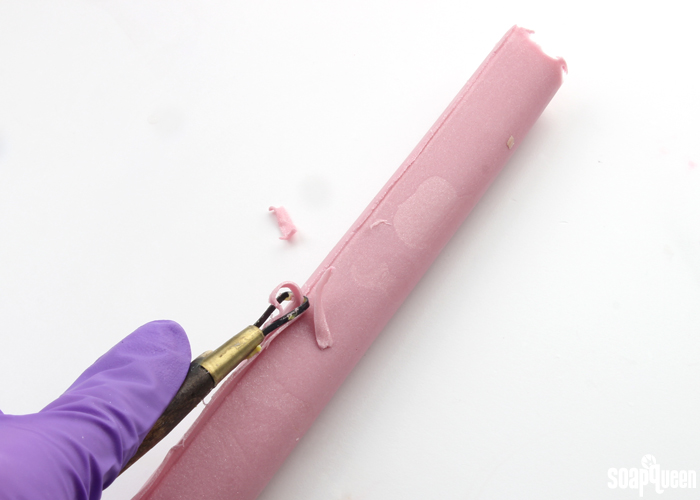
 Once the soap has been removed, trim the heart shape if necessary. I love using the Clean Up Tool for this step!
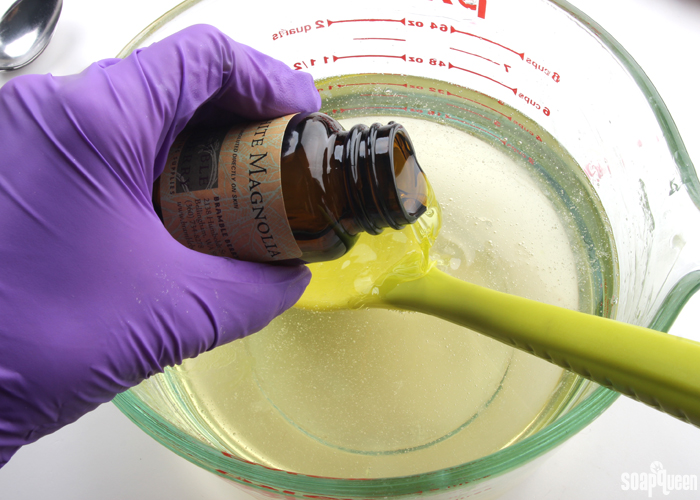
 ONE: Chop and melt 50 ounces of Clear Melt and Pour in a large bowl in the microwave using 30 second bursts. Once completely melted, add the White Magnolia Fragrance Oil. Use a spoon or spatula to completely mix in the fragrance oil.
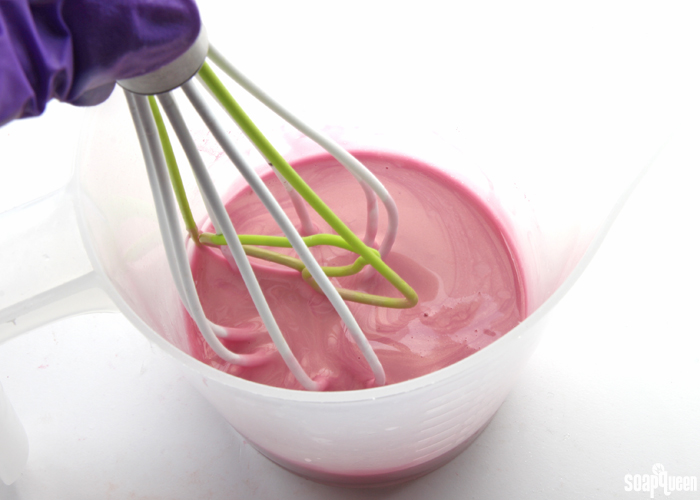
 TWO: Disperse 2 teaspoons of Rose Gold Mica into 2 tablespoons 99% isopropyl alcohol. Pour off 16 ounces of the clear melted soap into a separate container and add all the dispersed mica. Use a spoon or spatula to fully mix in. Set aside.
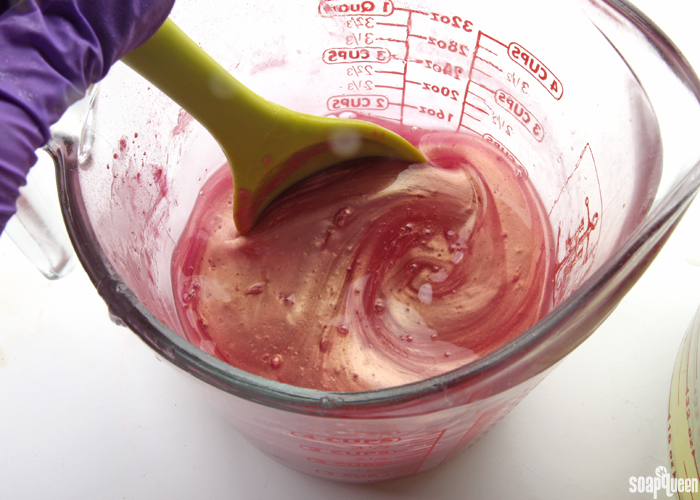 THREE: Disperse 2 teaspoons of activated charcoal into 2 Tablespoons of 99% isopropyl alcohol. Add all the dispersed activated charcoal to the remaining clear soap and use a spoon or spatula to fully mix in.
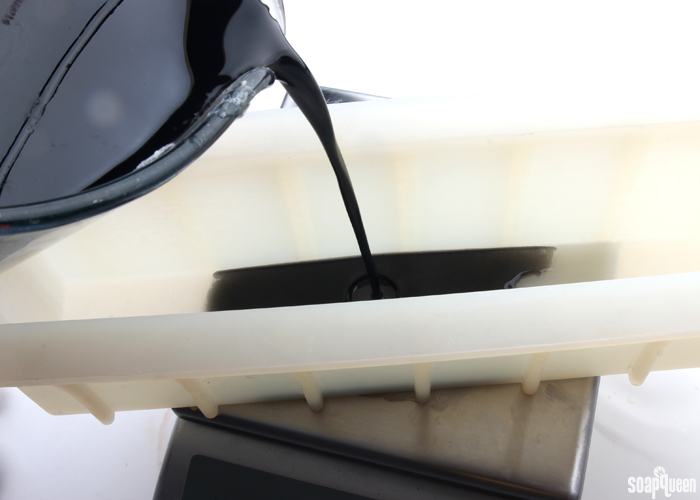
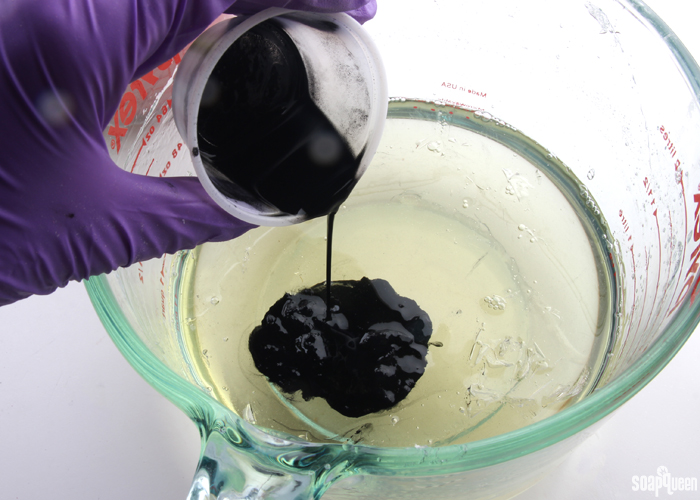 FOUR: Pour 8 ounces of the black soap into the mold, and spray with 99% isopropyl alcohol to disperse any bubbles. I recommend placing the mold on a scale to measure the amount of soap being poured exactly. This well help create even layers. Allow the layer of soap to cool and harden until a thick skin has formed, or until it’s completely hard.
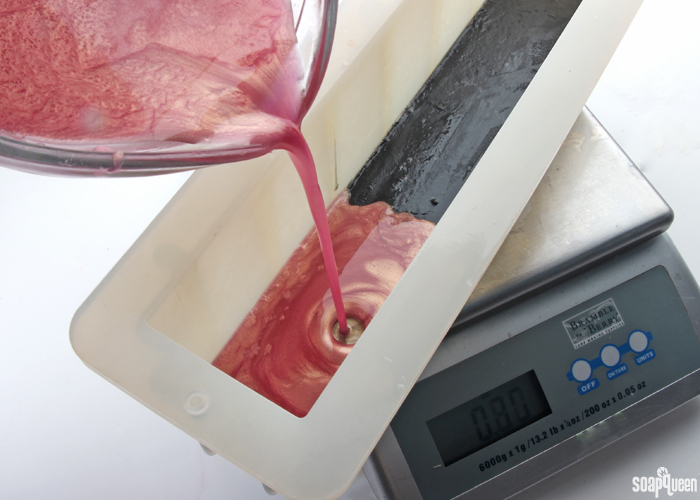
 FIVE: Remelt the pink soap in the microwave using 20 second bursts. Once melted, allow the soap to cool to 130 ° F or below. Spray the bottom layer of soap with 99% isopropyl alcohol and pour 8 ounces of the pink soap into the mold. Spritz the top of the soap with isopropyl alcohol to disperse any bubbles. Allow to cool and harden.
 SIX: Once the pink layer has hardened, spritz the pink layer with alcohol. Reheat the black soap if necessary and allow to cool to 130 ° F or below. Pour about 3 ounces of the black soap into the mold. Spritz with alcohol to disperse bubbles and allow to cool slightly. This will be the small amount of soap under the heart.
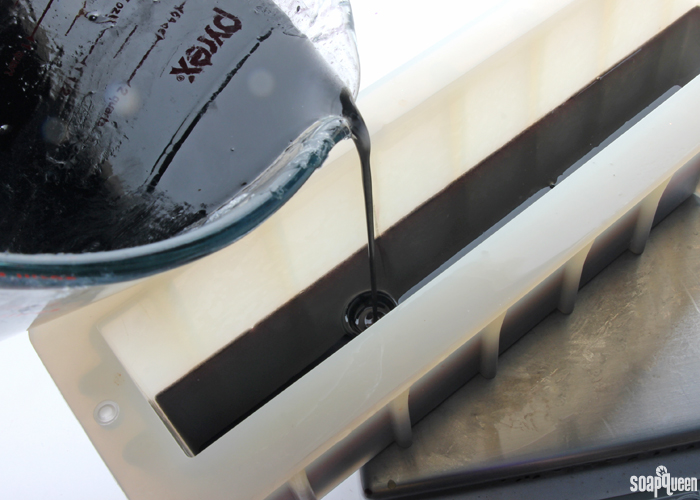 SEVEN: Once the small layer has cooled slightly to form a thick skin, carefully place the heart embed into the mold. Spritz with alcohol. While holding the embed upright with one hand, pour black soap around the bottom of the embed and allow it to cool slightly so the heart embed stays in place. Once cooled slightly, spritz the embed with more alcohol. Pour more black soap on top of the heart until completely covered. Continue to pour until there is a thin layer above the heart embed, similar to the layer of black soap below the heart. Spritz with alcohol to disperse any bubbles. Allow to cool and harden until completely hard or until it has formed a thick skin.
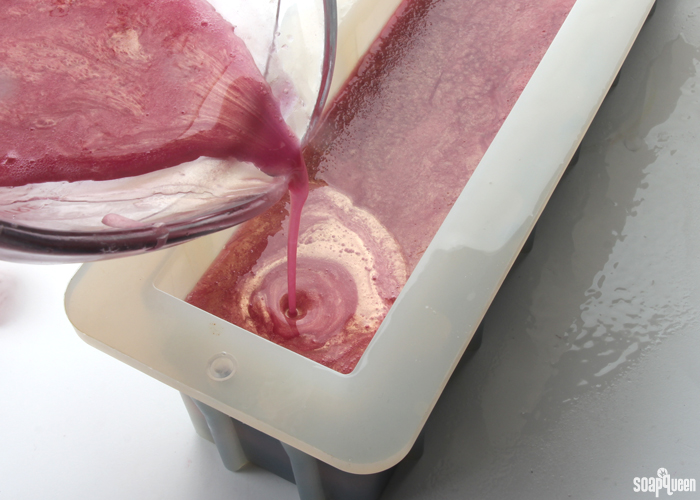
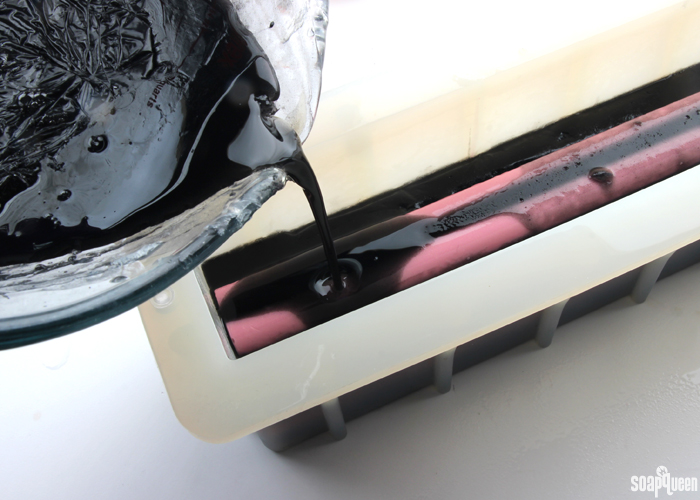 EIGHT: Remelt the pink soap in the microwave using 15 second bursts. Do not overheat! If the soap gets too hot, it can burn. Read more about how how to prevent burnt melt and pour here. Once the soap has cooled to 130 ° F or below, spritz the black soap layer with 99% isopropyl alcohol and pour the pink soap on top. Spritz with alcohol to disperse any bubbles and allow to cool and harden.
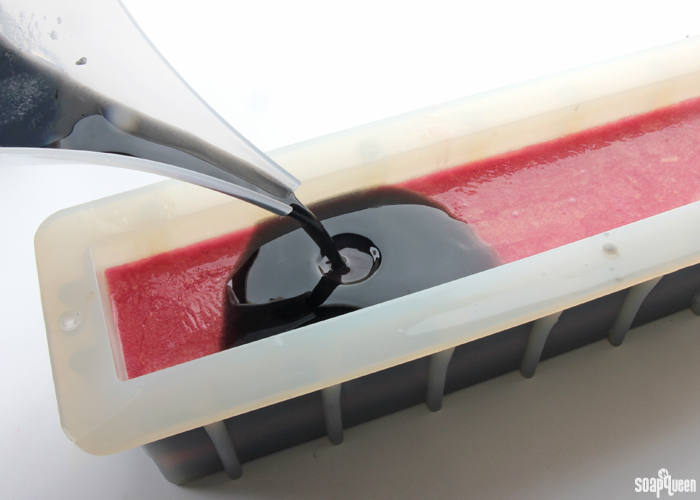
 NINE: Reheat the black soap in the microwave using 15 second bursts. Once 130 ° F or below, spritz the pink layer with 99% isopropyl alcohol and pour the black soap on top. Spray with alcohol to disperse any bubbles and allow to fully cool and harden for several hours.
 Once the soap has fully cooled and hardened, break the airlock by pulling away the sides of the silicone mold. Press the soap from the bottom to push it out of the mold. Cut into bars and enjoy! Wrap in plastic wrap or another airtight packaging option to help prevent sweating, aka: glycerin dew. Read more about storing handmade products here.
Have you started crafting for Valentine’s Day yet? Don’t wait, it will be here before you know it!
- Tall 12″ Silicone Loaf Mold
- Mini Heart Silicone Column Mold
- 5 oz. Shea Melt and Pour Base
- 50 oz. Clear Melt and Pour Base
- Rose Gold Mica
- Activated Charcoal
- 1.2 oz. White Magnolia Fragrance Oil
- 99% Isopropyl Alcohol
- Chop and melt 50 ounces of Clear Melt and Pour in a large bowl in the microwave using 30 second bursts. Once completely melted, add the White Magnolia Fragrance Oil. Use a spoon or spatula to completely mix in the fragrance oil.
- Disperse 2 teaspoons of Rose Gold Mica into 2 tablespoons 99% isopropyl alcohol. Pour off 16 ounces of the clear melted soap into a separate container and add all the dispersed mica. Use a spoon or spatula to fully mix in. Set aside.
- Disperse 2 teaspoons of activated charcoal into 2 Tablespoons of isopropyl alcohol. Add all the dispersed activated charcoal to the remaining clear soap and use a spoon or spatula to fully mix in.
- Pour 8 ounces of the black soap into the mold, and spray with 99% isopropyl alcohol to disperse any bubbles. I recommend placing the mold on a scale to measure the amount of soap being poured exactly. This well help create even layers. Allow the layer of soap to cool and harden until a thick skin has formed, or until it’s completely hard.
- Remelt the pink soap in the microwave using 20 second bursts. Once melted, allow the soap to cool to 130 ° F or below. Spray the bottom layer of soap with 99% isopropyl alcohol, and pour 8 ounces of the pink soap into the mold. Spritz the top of the soap with isopropyl alcohol to disperse any bubbles. Allow to cool and harden.
- Once the pink layer has hardened, spritz the pink layer with alcohol. Reheat the black soap if necessary and allow to cool to 130 ° F or below. Pour about 3 ounces of the black soap into the mold. Spritz with alcohol to disperse bubbles and allow to cool slightly. This will be the small amount of soap under the heart.
- Once the small layer has cooled slightly to form a thick skin, carefully place the heart embed into the mold. Spritz with alcohol. While holding the embed upright with one hand, pour black soap around the bottom of the embed and allow it to cool slightly so the heart embed stays in place. Once cooled slightly, spritz the embed with more alcohol. Pour more black soap on top of the heart until completely covered. Continue to pour until there is a thin layer above the heart embed, similar to the layer of black soap below the heart. Spritz with alcohol to disperse any bubbles. Allow to cool and harden until completely hard or until it has formed a thick skin.
- Remelt the pink soap in the microwave using 15 second bursts. Do not overheat! If the soap gets too hot, it can burn. Once the soap has cooled to 130 ° F or below, spritz the black soap layer with 99% isopropyl alcohol and pour the pink soap on top. Spritz with alcohol to disperse any bubbles and allow to cool and harden.
- Reheat the black soap in the microwave using 15 second bursts. Once 130 ° F or below, spritz the pink layer with 99% isopropyl alcohol and pour the black soap on top. Spray with alcohol to disperse any bubbles and allow to fully cool and harden for several hours.
- Once the soap has fully cooled and hardened, break the airlock by pulling away the sides of the silicone mold. Press the soap from the bottom to push it out of the mold. Cut into bars and enjoy! Wrap in plastic wrap or another airtight packaging option to help prevent sweating, aka: glycerin dew.


Hi Anne-Marie and Bramble Berry Team,
I am new to soaping and I’ve watched and re-watched your melt and pour tutorials. While I don’t feel comfortable making cold-press soaps, I do love the designs with the gold mica line running through them. So, I would like to ask if it is possible to obtain the gorgeous detail the gold mica layer creates using melt and pour. Thank you!
Hi Sheila!
Mica lines can be tricky with melt and pour. They can cause the layers to separate. Instead, you can mix gold into Clear Melt and Pour soap and pour a very thin layer in between your other layers! That will mimic a mica line. 🙂
The Sparkle Gold Color Block would be awesome for that effect: https://www.brambleberry.com/Color-Block-Shimmer-Sparkle-Gold-P5351.aspx
-Kelsey with Bramble Berry
About how long does this soap take to fully harden?
How long it takes will depend on how hot the soap was, the temperature of your house, etc. We find it takes about 1-3 hours. If after that time it’s still warm or soft, let it sit another hour or two before unmolding. 🙂
-Kelsey with Bramble Berry
Hi,
I don’t know if it would be possible to figure out about how many bars of soap this recipe would make. I’m trying to help my sister make these as wedding favors, she’s having about 90 people at her wedding. Thanks so much
Hi Courtney!
We typically cut our bars around 1″ thick, so we get 12 bars out of this recipe. That number will vary based on how thick you cut your bars! For a wedding, you can cut smaller bars for guest soaps. In that case, you may be able to get 14 or more out of this mold. 🙂
-Kelsey with Bramble Berry
What a beautiful design! I would love to make it in the 2 pound elf mold (to make fewer bars). Most of the times resizing is no problem at all, but with this kind of recipes it’s a bit complicated and more of a guess to get it right…
Hi Zala!
Resizing can be a little tricky for sure, but I can help you out! This recipe calls for 55 ounces of soap, while the 2 pound mold would need 32 ounces. So, that’s 23 ounces to cut!
The amount needed for the embed would be the same, so that can stay as is. The layers will need a bit of tweaking though! Because the 2 lb. Wood Mold is shorter, I would recommend doing 3 layers. That way the embed will fit in nicely.
In that case, I would recommend coloring 16 ounces of soap pink and 16 ounces black. You can do around 8 ounces for each pink layer, and all the black for the middle layer. That will leave you with a bit of extra soap. That allows for a little wiggle room as far as the layers go. You can pour any leftovers in another mold. 🙂
-Kelsey with Bramble Berry
2 lb. Wood Loaf Mold: https://www.brambleberry.com/2-lb-Wood-Loaf-Mold-P5239.aspx
Kelsey, you’re a doll! Thank you so much for doing the math for me. Mathematics never was my favorite hobby, but since I suffered a stroke some years ago, it even has become more challenging for me. So thanks a lot for the great suggestions!
You’re very welcome Zala! Happy to help. 🙂
-Kelsey with Bramble Berry
Bravo – another great graphic design! This would be good with other colors and embeds for different occasions as well.
Thanks so much Michael! This design would look awesome with different colors for sure. 🙂
-Kelsey with Bramble Berry
I love this! I’m not a big fan of pink (though I do like the Rose Gold mica and the Electric Bubblegum pigment) or Valentine’s Day (too much pink and red clash, and real hearts don’t look like that), but I’ve gotta make this one! I’m sure I can blend up something from my samples collection that’ll be holiday appropriate…
Any other time I’ve tried layers in MP soap they always break apart when I cut the bars; maybe instead of waiting for the layers to be completely hard I should pour after the skin forms…
Thank you so much Karin, glad you love the soap! This design would look awesome with a variety of colors. Purple would be fun and Valentine’s Day-y. 🙂
With melt and pour layers, alcohol is key! We’ve had the best luck with 99% isopropyl alcohol. Then, spray the bottom layer right before you pour the second one. If the alcohol is spritzed too early, it can evaporate. Also, we’ve found it’s best when the layer is covered with alcohol, but not drenched.
A sharp knife really helps too! I’ve had some separation with a dull blade. Sharper knives cut through the layers and help keep them intact.
Also, you can “glue” the separated layers with melt and pour soap! To do so, melt 1-2 ounces of soap on 5 second bursts. Spread a thin layer in between the layers and press them together. Let it cool and harden for 2 hours or so. That can help them stick together. 🙂
-Kelsey with Bramble Berry
That’s great information, thanks for the tips! Me and my friend started doing a soap day and I think this project will be next! We had so much fun on the last one, we did the Pumpkin Pie Melt & Pour and turned out great. I also still want to try the Star Anise one, the scent sounds so interesting!
You’re welcome Joanne! Have fun giving this project a try. The Star Anise Melt and Pour is a fun one as well. It has such an interesting look. 🙂
Pumpkin Pie Melt and Pour Soap: http://www.soapqueen.com/bath-and-body-tutorials/melt-and-pour-soap/pumpkin-pie-melt-and-pour-soap/
Star Anise Melt and Pour Soap: http://www.soapqueen.com/bath-and-body-tutorials/melt-and-pour-soap/star-anise-melt-pour-bar-tutorial/
-Kelsey with Bramble Berry
The scent on the Star Anise one is aMAAAAZing.
(Just throwing that out there. Also, people love the design :))
It does look very sophisticated. And no black bubbles?
No black bubbles! We tested these bars and they lather clear. 🙂
-Kelsey with Bramble Berry
I have never done melt and pour before but after reading this tutorial you have sparked my interest.
Yay, so happy to hear that Jocelyn! Having fun giving these bars a try. Let us know how it goes! 🙂
-Kelsey with Bramble Berry