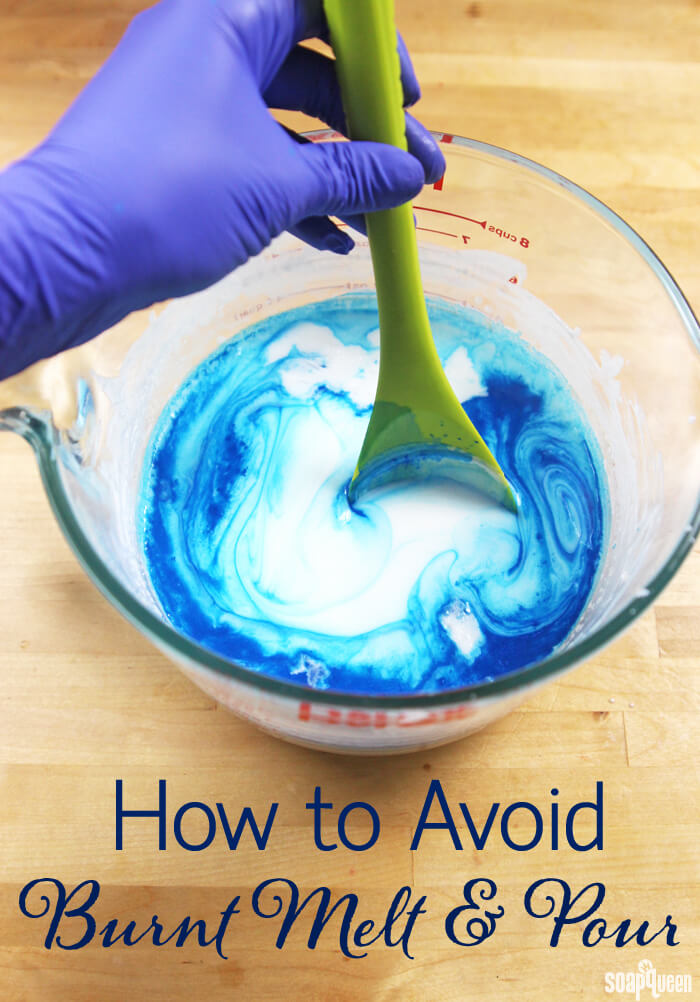
Melt and pour soap making is great for beginners. It does not require working with lye, and is easy to customize with color, fragrances and molds. While usually considered an “easy” project, melt and pour can be a little finicky when it comes to temperature. If melt and pour gets too hot, the base will burn and becomes difficult to work with. The key to avoiding burnt melt and pour? Patience!
Bramble Berry melt and pour bases begin to melt at around 120 ° F. The bases begin to burn when they become hotter than about 140-150 ° F. Melt and pour soap should never boil. If it begins to boil, you know it has been burned. When working with melt and pour I recommend always having a temperature gun nearby!
Melt and pour soap can be melted in the microwave or in a double boiler. If using the microwave, be sure to use short bursts of heat. Remember, you can also microwave the soap for longer…but once the soap is burned, there is no going back! Melting melt and pour soap in a Crock Pot or saucepan is not recommended, as the direct heat can easily burn the base. If you get a Crock Pot or turkey roaster that has multiple heat settings (low, medium, high) and melt the soap slowly and carefully, that can work. The multiple heat settings are key!
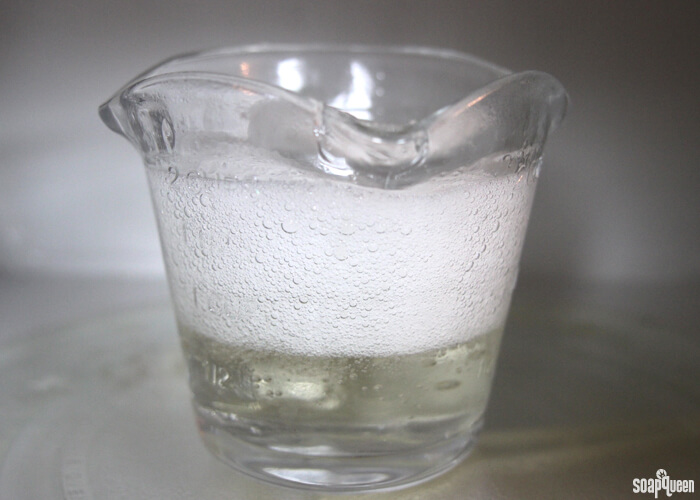 If your melt and pour begins to boil…you know it’s burned!
Burned melt and pour may smell unpleasant, and may become cloudy. In extreme burn cases, the soap can become yellow or brown-ish in color. Burned soap often develops a thick, gloppy texture once cooled slightly. This thick texture makes pouring smooth layers difficult, and creating small details becomes next to impossible. Unfortunately, once your soap has been burned and has turned into a gloppy texture, there is no way to achieve the fluid texture of not-burned soap. Burned soap is still safe to use…it just does not smell or look very pleasant. The best thing to do with gloppy, burned soap is heat it to a liquid texture, and pour into a heat safe container or mold.
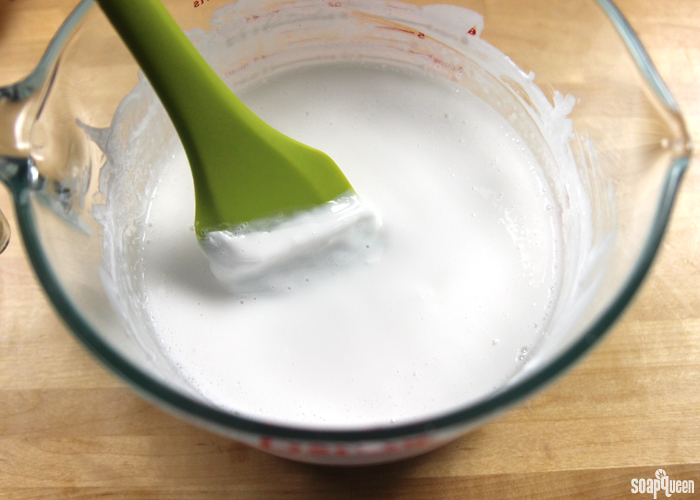
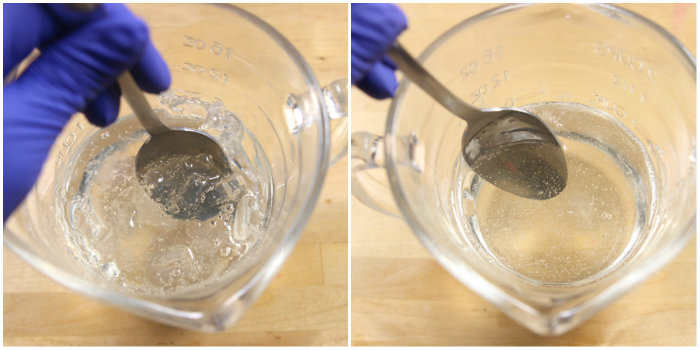
In the photos below, the soap reached temperatures of over 200 ° F. You may notice the color has a slight yellow tint in the photo on the left. It did not smell very good, and there was a lot of steam coming off the soap. While unpleasant to smell, the soap was still liquid and workable. On the right, the soap has cooled to about 150 ° F. At this temperature, unburned melt and pour would be fluid. But, because this soap was burned so badly, the soap has become a thick, jello-like consistency even at 140 ° F.
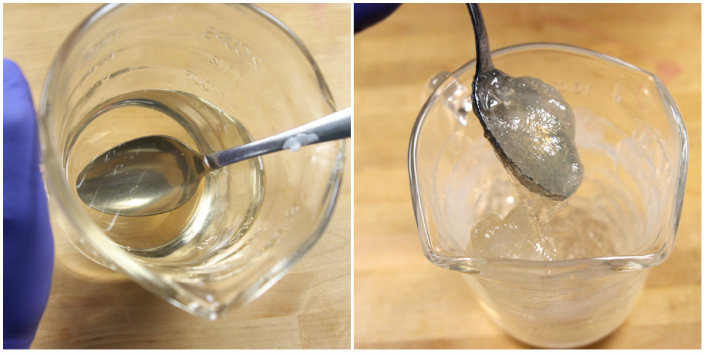 On the left, the burned soap has taken on a slightly yellow color. On the right, the burned soap has cooled slightly but has taken on a gloppy, unworkable texture.
The first step to avoid burning your melt and pour is to cut the bases into small uniform pieces. When the pieces are different sizes, they melt at different rates. This can lead to a bowl of hot and liquid melt and pour with large un-melted chunks.
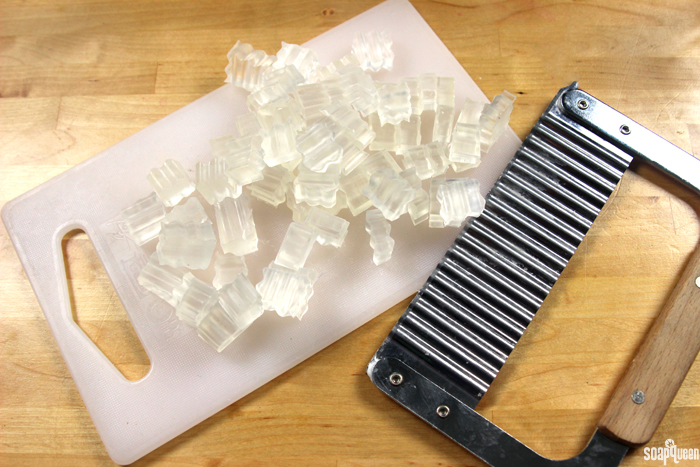 Cutting the melt and pour into small, uniform pieces helps the soap melt quickly and evenly.
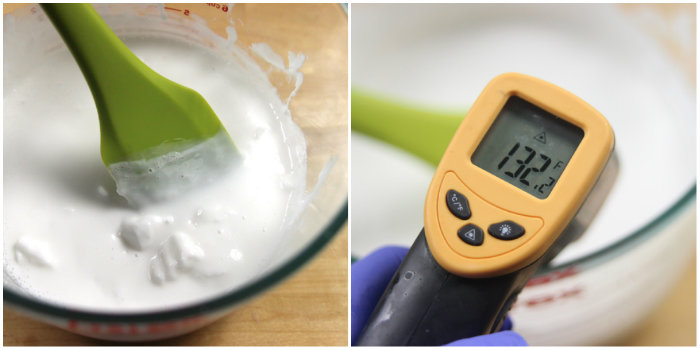
If your container of liquid melt and pour contains chunks, be careful not to over-microwave and burn the melted soap. Remove the bowl from the microwave and stir for 30-60 seconds to allow the hot liquid soap to melt the chunks. Place the container back into the microwave and use small bursts of heat. Continue to stir between each burst until all the chunks are melted. Below, you can see a bowl of melted soap that still has large chunks. But, it is already at 132.2 ° F…more microwaving could cause the soap to burn. Time to stir, stir, stir and melt in 10 second bursts between each stir. If the chunks of melt and pour are really large, remove them from the mixture and melt separately.
If melting large amounts of melt and pour (multiple pounds), a double boiler may be your best option. In the Soap Lab, we use industrial size warmers for melting large amounts of soap. When melting smaller amounts of soap, be extremely careful. Melting less than 5 ounces of soap is tricky; it’s very easy to burn small amounts of melt and pour soap. If you are melting less than 5 ounces in the microwave, use 5-7 second bursts and stir in between each burst. Melting closer to 1-2 ounces? Use 3-5 second bursts. Remember, it’s always easier to microwave the soap for longer!
 It’s so easy to burn small amounts of melt and pour. Be sure to use extremely short bursts, and stir in between each burst.
The key to melt and pour that’s fluid but not burned is patience. It’s so tempting to stick a container of melt and pour in the microwave for a minute or two and walk away…but don’t do it! Melt and pour requires short bursts in the microwave with stirring in between. Your patience will be rewarded with melt and pour that is thoroughly melted, and easy to work with.
How do you melt your melt and pour pieces? If you have any tips, I’m all ears! Do you prefer the microwave, or a double boiler?



My melt and pour came out like hard wax. It wont dissolve at all and makes not even a little lather. I didnt burn it, was very careful. did put in almond oil, coco butter , coconut oil to the base. It seemed the oils rose to the surface when in the mold so the soap came out hard as a rock. What happened?
How much extra oil did you add to your batch? We don’t recommend adding more than 1 teaspoon per pound of soap. Much more than that can make the bars hard or oily. It can also diminish the lather. Let me know and I can help you troubleshoot!
-Kelsey with Bramble Berry
I am wanting to felt my melt and pour soap after taking out of the mold. Do I need to cure this soap if that is what I want to do with it so it will hold up better under the felting process?
You don’t need to cure melt and pour soap! Once it’s cool and hard, it’s ready to use or felt. 🙂
-Kelsey with Bramble Berry
I find if it sits fir a couple days outside the mold it lasts longer then using right away
That will work as well! Just make sure the soap is in a cool, dry place so it doesn’t form glycerin dew. 🙂
Learn more about glycerin dew and how to prevent it here: http://www.soapqueen.com/personal-ramblings/augh-whats-that-all-over-my-soap-2/
-Kelsey with Bramble Berry
Hi! I’m having some difficulty with my base. Everytime I try to melt it in the microwave it never gets that liquid consistency to allow me to mix the other ingredients. Instead, when I stir it, it turns hard and really difficult to do anything with it, even to pour it in the molds. Is it because it’s burnt? or could it be the quality of the base?
It may be burnt! When the soap burns, it can get pretty clumpy and not liquefy all the way. What base are you using, and how much? How long are you microwaving it for? Let me know and I’ll help you troubleshoot. 🙂
-Kelsey with Bramble Berry
it’s a goat milk base, I used about 1/2 a pound, and microwaved it in 30 sec intervals. It formed a big bubble I would say at the second cycle.
I went to the manufacturers page and I realized it said not to melt in a microwave, so maybe that was the problem.
Maybe I should try melting it in a double boiler? Does it take much longer to melt.?
Thanks for you reply!
Because we haven’t worked with that base, I’m not entirely sure! I would recommend contacting the manufacturer to find out more. 🙂
-Kelsey with Bramble Berry
Thanks for all the useful information on this site, you’ve really helped me out a lot. As for melting the soap base I use my immersion circulator. That thing chefs use for ‘sous vide’ cooking. I set it for 140*F and drop in a bag of soap base. I can mix oils and color in the bag, snip off a corner, and pour into molds. Throw the bag away when finished and done. No chance of burning the soap. Thanks again for your wonderful site.
That’s an awesome tip Robert, thanks for sharing! Also, so glad you’re enjoying the site. 🙂
-Kelsey with Bramble Berry
Can you tell me why my mp soap base is just not got a strong scent smell to it I made a 100g lolly soap had 20 drops of fragrance oil in and you can barely smell it
Hmm, I’m not sure why that is. Our Fragrance Calculator recommends around .1 grams of fragrance for 100 grams of soap. That’s about 1 mL. You may try using the mL measurements instead, they can be more accurate. Our droppers measure in mL: https://www.brambleberry.com/Droppers-With-Suction-Bulb-P3802.aspx
You can use our Fragrance Calculator to find out how much scent to use: https://www.brambleberry.com/Pages/Fragrance-Calculator.aspx
It may also be the fragrance! Is it specifically made for soap?
-Kelsey with Bramble Berry
Many thanks I give it ago
Is there any other way to melt melt and pour soap without using a microwave?
Could I put the melt and pour soap in a glass measuring cup and put the cup in a double broiler to control the melting of the melt and pour soap?
I want to melt (melt and pour) soap and add colours, fragrances/scents, other botanicals & ingredients and then pour it into molds.
P.S. What is the fastest way to cure soap?
Thanks,
Emily
Hi Emily!
You can melt the soap using a double boiler. If you don’t have one on hand, this handy tool makes one for you: https://www.brambleberry.com/Double-Boiler-Maker-Double-Boiler-Maker-P3796.aspx
You can put the glass container in the double boiler if you like, or you can put the pieces of melt and pour in the bowl itself. Glass containers are heat safe up to a certain point, but if they get too hot they can crack. You’ll want to double check with the manufacturer to see how hot they can get and stay under that temperature!
The good news is melt and pour soap doesn’t need to cure! It’s ready to use once it’s cool and hard. If you’re making cold process soap, storing it in a cool, dry place speeds up that curing process. You can also use a water discount, which speeds up the process as well. 🙂
How to Water Discount Soap: http://www.soapqueen.com/bath-and-body-tutorials/tips-and-tricks/water-discounting-cold-process-soap-how-why/
-Kelsey with Bramble Berry
Hiii !!
I am from india, and a huge fan of yours.
i am making my own melt and pour soap base, my end product is clear but is golden / light brown in color. I want transparency same as in your soap base.
How to lighten the color of melt and pour soap base.
Do i have to use any bleach, if yes then which one.?
Thank You
Hi there! We have tried making melt and pour from scratch a couple times and haven’t found a recipe we love. So, I’m not sure how to make that soap more transparent. Sorry about that! This book may have more information though: https://www.brambleberry.com/Making-Transparent-Soap-1-Book-P3732.aspx
-Kelsey with Bramble Berry
I just did my first batch of m&p soap. My base took forever to melt in my makeshift double boiler. Everywhere I have read says it only takes about 10 minutes to melt. Mine took like 40 minutes and ever then it wasn’t liquid. My base turned chunky and pasty. Any suggestions?
Hmm, that soap should melt down fairly quickly. How much did you melt? Also, was it in a block or was it cut up? Cutting it into smaller pieces can help it melt more quickly!
-Kelsey with Bramble Berry
I’m doing an embedded melt and pour project. The clear base performs just great….nice and clear, no burning. When I unmold, the surface is cloudy. I rinsed the soap and the surface was clear, but got cloudy again when it dried. Before pouring, I sprayed the silicon mold with alcohol. Any ideas to get the surface clear? Thanks!
Hmm, I’m wondering if it may be air bubbles on the surface. Did you spray the soap with alcohol after pouring it in the mold? If not, that can help pop any bubbles and keep the top nice and clear! You can see that technique in this Soap Gems video: https://www.youtube.com/watch?v=MBwW2wIX5vk
-Kelsey with Bramble Berry
I’m struggling with a highly detailed embed soap that needs to be glass clear to see all the details through what ends up being quite a lot of soap, when it’s all done. I’ve tried microwaving at different lower power settings, but trying to make them in any sizable quantity, means that the base goes in and out of the microwave so many times (as the various embed layers are built up), that the base ends up burning by the time I finish filling the molds. I’m wondering if anyone has tried using a device like this to keep soap warm and at the right temp for pouring? It says it does a controlled temp from 100-190 and I’m thinking that since its a water based warming device, it won’t suffer the problems of trying to melt soap in a crock pot (which is a dry warmer). Thoughts?
http://www.webstaurantstore.com/avantco-w300bk-6-qt-round-black-countertop-soup-kettle-warmer-110v-300w/177W300BK.html
I think that warmer will work well! We have a similar one in our Soap Lab. The key is gentle heat. So, the kettle warmer or a double boiler works best. It keeps the soap warm but not so hot that it burns. So, set up your kettle or double boiler to simmer but not boil and let the soap melt. It will stay fluid the entire time you’re working with it. 🙂
If you don’t have a double boiler you can use this handy tool to make one: https://www.brambleberry.com/Double-Boiler-Maker-Double-Boiler-Maker-P3796.aspx
-Kelsey with Bramble Berry
My soap tends to form a skin almost as soon as I take is off the heat… I have tried to microwave it and I can work with it a little longer but I always find that the stream shifts due to the soap solidifying on the spout of the jug.. I struggle to fill the moulds properly because of this
I was using a plastic jug but have now purchased a pyrex one..
Hi Maria!
Hmm, I’m wondering if the soap may be burnt. If it gets too hot, it can form that skin and harden really quickly. How big are your batches, and how long are you heating the soap? Let me know and I’ll help you troubleshoot. 🙂
-Kelsey with Bramble Berry
Hello,
My name is Harita and I am having the same issue. I just finished doing a lavender scent soap but my soap started forming a skin as soon I reduce the heat and it gets hard so quickly that I have to melt it again and again and again and some soap molds do not look good.
Since I am a beginner, I am wondering if I need to get a thermometer for the double boiler.
Hi Kelsey,
I bought the Palm free goats milk melt and pour soap and the manufactured mentioned that the melt point is 75c, I microwaved it around 75c and it forms the skin and set up so quickly. Do I need to melt until reach the melt point or I just melt when it starts to become liquid? I am from Australia.
Thanks
Maya
I’m not sure about the other base, but we typically like to keep our soap around 140F (60C) or cooler. We find if ours gets much hotter than that it can burn. I would recommend cutting the soap in small, even pieces and heating in the microwave on 5-20 second bursts. Then, when the soap is almost melted, take it out and stir until any chunks melt. That will keep it nice and cool and should give you more time to work with it. 🙂
-Kelsey with Bramble Berry
Hi there! I just started making my own MP soap and I’m having so much fun with it! I was wondering if there’s an ideal temperature that I should be adding fragrance oils and colorants once the MP soap is melted in the microwave. Can they be added right out of the microwave? Also, is there a general rule for the amount of fragrance oils per pound that should be added in the soaps? Thanks for all the amazing info!
Hi Elena!
So glad you’re loving soapmaking! With fragrance and color, you can add those when the soap is out of the microwave. Generally, we like to add them when the soap is around 130-140F (that’s usually how hot it is right out of the microwave). At that temperature it’s nice and thin, so it’s easy to incorporate fragrance and color. 🙂
For fragrance oils, you can add up to .5 ounces per pound of soap for a strong scent. However, that will vary based on the fragrance you add. You can use our handy dandy Fragrance Calculator to find out exactly how much scent to add to your batch: http://www.brambleberry.com/Pages/Fragrance-Calculator.aspx
This post has more great tips for those just starting out: http://www.soapqueen.com/bramble-berry-news/beginning-soaper-resource-roundup/
-Kelsey with Bramble Berry
Hello- we plan to use melt and pour in bulk. So need help with instructions on how to melt slowly in big bulk heater. We burned over 40kg turning it from white to off cream colour.
Love some advice – like wax can l have it melted overnight so we can pour in the morning. Appreciate your advice
Hi Fleur!
If you’re melting a large batch of soap, I would recommend a big double boiler. Double boilers heat that soap more gently than direct heat, which prevents the soap from burning. We have several large stainless steel double boilers in our lab for melting soap. You can find those double boilers at a restaurant supply store or online. Amazon has some good options. 🙂
-Kelsey with Bramble Berry
Hi,
I just started out making M & P soaps. I am using soap flakes and in spite of heating in short intervals of 5 to 10 seconds ( in microwave) my base begins to foam and the bubbles don’t go away with rubbing alcohol. Also it forms a skin and hardens pretty fast. I was melting about 10 ounces.
Hi Raunica!
Oh no, I’m sorry about that! Even with short bursts, soap can burn in a hot microwave. I would recommend adjusting the setting to low and giving it another try. That should help prevent the burning. 🙂
-Kelsey with Bramble Berry
I have done just one MP project (the charcoal and rose clay spa bar actually) and used the left overs to make ginger bread soaps for Christmas. I did have a problem, which I haven’t seen addressed anywhere. When heating my soap base (the shea base) I was careful not to over heat it, but even as it was heating up it would develop a skin on the surface which I would have to re-melt. When I went to pour (in both projects actually) it started to pour fine, but this skin kept appearing on the surface and by the time I got to the end of the soap I was pouring it just kind of glopped in. I’m pretty sure it didn’t burn, it smelled fine and didn’t yellow, and the temp stayed between 120-140. I live in Colorado, I wondered if the altitude and general climate might have had an effect? Or did I do something else wrong? I would really like to do more MP projects, but I’m hesitant to if I will have to really fight it with this weird skin that happens on the surface. Thanks for all your help and advice! I love this site and really appreciate the sharing of experience that happens here, it’s super awesome!
Hi Elise!
Hmm, I’m wondering if the soap was actually a bit too cool! As it’s melting, the soap will be kind of gloppy, and have a skin. Right around 135F, it should be nice and smooth. Then, as it cools, it will start to form that skin. That is especially true in a more cool climate.
I would recommend heating that soap up to at least 135F when you’re working with it. That will allow you some more time to work with the soap. If you notice it’s forming a skin before you pour, pop it back into the microwave for 5-10 seconds until it’s smooth again, then pour. 🙂
-Kelsey with Bramble Berry
Newbie here if making melt and pour and wanting jasmine vanilla fragrance how much vanilla to jasmine ratio for a 2 pound block
Hi Linda!
For 2 pounds of melt and pour, you can use up to .9 ounces of fragrance for a strong scent. To find that out, I used out handy dandy Fragrance Calculator: http://www.soapqueen.com/bath-and-body-tutorials/tips-and-tricks/use-fragrance-calculator/
The ratio of fragrance you use is definitely personal preference! I would recommend starting out with a 1:1 ratio and giving that a sniff. If you want more jasmine or vanilla, you can adjust accordingly. Just make sure it adds up to .9 ounces. 🙂
This blog post on fragrance blending may be helpful for you as well: http://www.soapqueen.com/bath-and-body-tutorials/tips-and-tricks/fragrance-oil-blending-tips/
-Kelsey with Bramble Berry
Im just starting out in melt and pour soap.. my soap keeps forming a thin skin WHILE microwaving.. does this mean that it has burned? Because it also keeps getting gloppy very quickly.. also, what can i do to prevent this? Thank you!
Hi there!
From what you’re describing, I think the soap may be burning. Burnt soap can form a skin and feel really gloppy.
To help prevent it from burning, we recommend heating on short bursts – as little as 5 seconds for smaller batches. It also helps to cut the soap in small, similar size pieces so it heats evenly. Another tip is to set your microwave to a low setting. That will help the melt and pour heat gently and prevent burning. 🙂
-Kelsey with Bramble Berry
I’m going to be at a camp with no microwave, so I think I will need to use crock pots for the group? Do you have any tips on using it without burning it? Should I put water in the crock pot and then soap in a bowl in the water to simulate the double boiler?
I also need to sustain the temp so multiple children can have turns with pouring the soap into molds. Thanks!!
Hi Karly!
That sounds like such a fun camping activity! I think the best thing to do would be to create your own double boiler. To do that, you can put a large bowl on top of a pot (or Crock Pot) of simmering water (make sure the water isn’t touching the bottom of the bowl). You can also use our Double Boiler Maker: https://www.brambleberry.com/Double-Boiler-Maker-Double-Boiler-Maker-P3796.aspx
That will heat the soap gently and help prevent any burning. It will also keep it liquid so the children can take turns pouring into molds. 🙂
-Kelsey with Bramble Berry
thank you:):)
You’re welcome! 🙂
I prefer using the microwave with my melt and pour. My microwave does not have a % setting on it so I start (according to the directions on the container of soap base) for at least 8 ounces or more of melt and pour….35 sections burst to start then stir and after that 10 section bursts. Stirring in between the bursts. I do take the temperature as well to prevent overheating.
That sounds like a great method! Using a temperature gun is really helpful for preventing burnt melt and pour. 🙂
-Kelsey with Bramble Berry
I always put my soap in the microwave on low-medium heat instead of the highest setting, and it very rarely boils as long as I pay attention to it. It takes a bit longer to melt, and you still need to stir, but that way I can use longer bursts, stir less, burn less soap and it’s stress free 🙂
That’s a great idea! I think I’m going to try to adjust the microwave in our Soap Lab so we can microwave it on longer bursts. 🙂
-Kelsey with Bramble Berry
What power setting do you suggest? I feel like my soap goes from not melted at all to too hot in no time. I’ve always wondered if I should adjust the power setting. I think I also need to start stirring more. Also, for the thermometer, do you find that it only takes the surface temp?
Thank you for your blog posts. I canmot wait to see the next video you have in store!
Hi Tara!
We have our microwave on high, and heat it on very, very short bursts (just a couple seconds). However, I think lowering the setting would be a good idea, as it would prevent burning! Stirring a lot helps as well. 🙂
We find infrared thermometers are great for checking melt and pour temperatures. It can also help to check the temperature, stir and check it again. It also helps to check it in a couple of spots so you get an accurate reading.
Infrared thermometer: https://www.brambleberry.com/Infrared-Thermometer-P6087.aspx
Also, you are welcome for the blog posts! Thanks fore reading. 🙂
-Kelsey with Bramble Berry
Thanks very much for this information. I did not know M&P was not suppost to boil… but did know something was wrong since my -like CP M&P was still sweating a lot… Although I did not heat it for long, I usually had minor boiling. I think this will solve it.
With kind regards,
Annemieke
Hi Annemieke!
You’re welcome! Gentle heat will stop the melt and pour from boiling, which will help keep it workable. 🙂
-Kelsey with Bramble Berry
Very interesting about the M&P sweating. I’ve had the same problem (even with the “no sweat” type) & thought it was the humidity. I’ll try the lower temps!
I think that will help Cathie! 🙂
-Kelsey with Bramble Berry
Ah, I feel like you wrote this post for me. I have a bad habit of being impatient and heating for longer than I should. As a result, I’ve had more than my fair share of burnt soaps. The pictures really help solidify how I should be melting the cubes of soap.
I’ve seen many posts from people saying they use a slow cooker for melting, so it’s great that you’ve clarified how to use it. Thank you so much!
Hi Monica!
Me too, I’ve definitely burned a lot of melt and pour from impatience! Also you’re welcome – so glad you found the post helpful. 🙂
-Kelsey with Bramble Berry
Thank you for the info. I have tried microwave, double boiler, hot plate, and even an improvised water bath with my Crock Pot. I get the best results using the 50% power setting on the microwave. For a pound of cubed soap base, I start with 5 minutes @ 50%. Sometimes it takes a little longer, but I never go to “full strength.” It even works with small amounts of soap. Good luck to all!
You’re welcome Gretchen, glad you found the post helpful! Also, that’s such a great tip! Putting the microwave on 50% allows for a more gentle heating process. Thanks so much for sharing. 🙂
-Kelsey with Bramble Berry
I love that this has pictures to illustrate! I usually make CP, but I sometimes for melt and pour for soapy decorations and I must say it really is a different technique with it’s own tricks.
So glad you like the pictures! The gloppy one really illustrates how burnt melt and pour can act. Also, I love melt and pour decorations on cold process! Especially the beautiful details on your soap. 🙂
-Kelsey with Bramble Berry
I like this info – thanks! Yes, patience for sure. I know sometimes I stir and stir and stir then micowave and stir…. But the results are what counts and keeping the soap clear and bubble free is what you have to have.
Hi Michael!
You’re welcome, so glad you found the post helpful! Also, I learned the hard way that patience is key. Burned melt and pour does not smell great! 🙂
-Kelsey with Bramble Berry