Investing in quality soap molds take your products to the next level. Soap making molds come in various shapes, sizes and materials. Among the most popular kinds of molds are silicone and wood molds. With proper care, both wood and silicone molds will last for years.
Caring for Silicone Molds:
Silicone molds are great for both melt and pour soap, and cold process soap. Durable yet flexible, silicone molds make unmolding easy. Silicone molds also eliminate the need to line the mold with parchment paper, making them extremely convenient. The glossy inside gives soap a smooth and professional finish.
Silicone molds are extremely easy to take care of. Once the soap is removed from the mold, use a sponge and dish washing soap to remove any leftover soap from the mold. We do not recommend placing silicone molds in the dishwasher. Avoid using copper sponges on silicone molds, as they can scratch the smooth glossy inside.
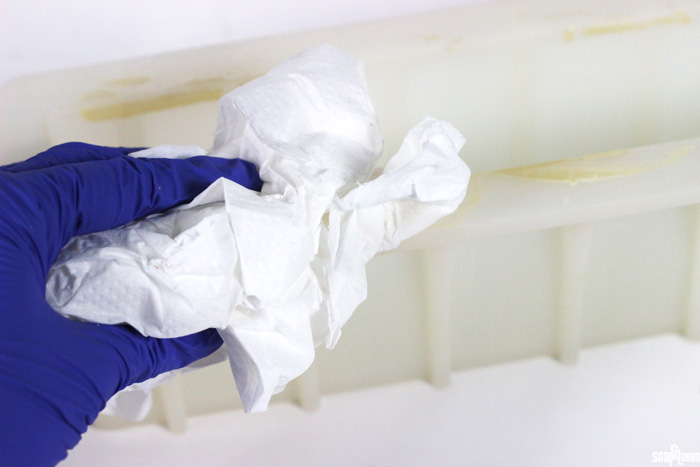
Sometimes if a soap is strongly scented, some of the scent will remain on the silicone. In particular, 10x Orange Essential Oil can leave some scent behind, along with a little color. We have found that scents and color on silicone molds do not transfer to the next project. But if you are concerned, first clean the mold with soap and water. Then, spray the mold liberally with rubbing alcohol and allow the alcohol to sit on the mold for 15-20 minutes. Spray again with alcohol and rub off with a paper towel, then give the mold another wash with dish soap and water.
When using silicone molds, sometimes soda ash can transfer to the mold. You can see an example of this in the photo below. The soda ash on the mold is completely normal and will not affect the mold itself. But, if you’d like to remove it before soaping it’s easy to do!
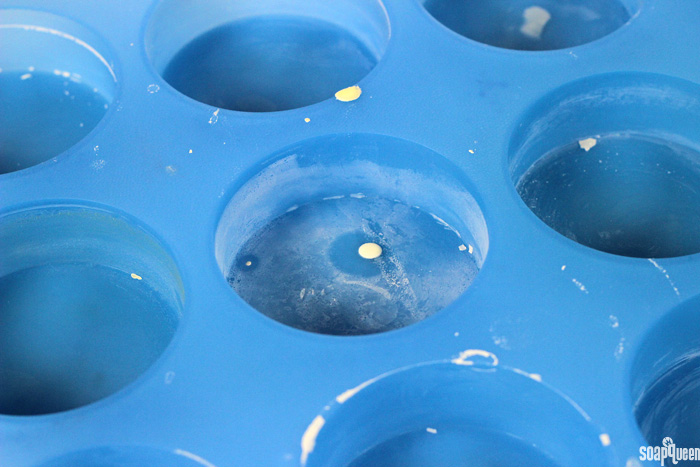 It’s normal for soda ash to remain on silicone molds. Luckily removing it is easy!
First, fill the mold with water. If the soda ash is on the sides of the mold, fill the water as full as possible. Carefully transfer the mold into the microwave and heat until the water begins to steam (usually about 1-2 minutes). Very carefully, remove the mold from the microwave. While the mold will be safe to touch, the water inside is hot so be careful to not spill the water on your skin.
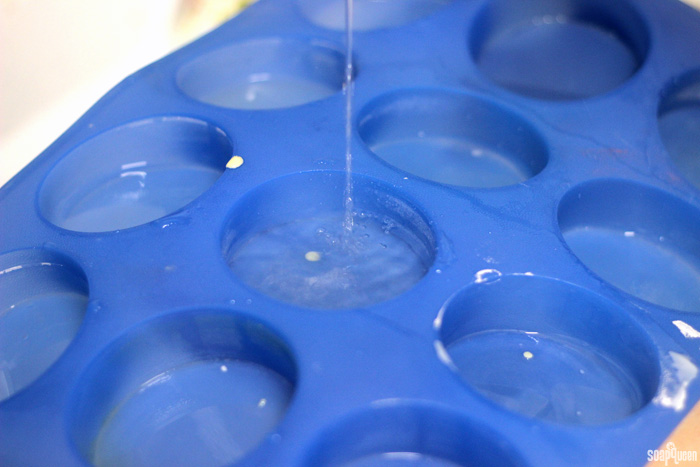 In the photo below, you’ll notice the water is slightly murky. This is the soda ash that is now ready to be washed away.
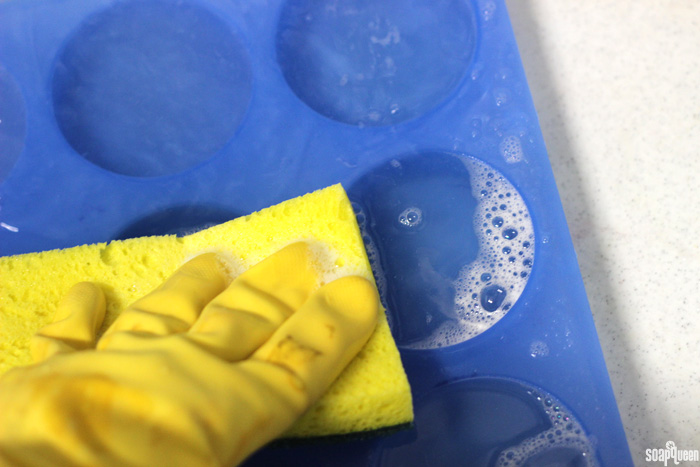
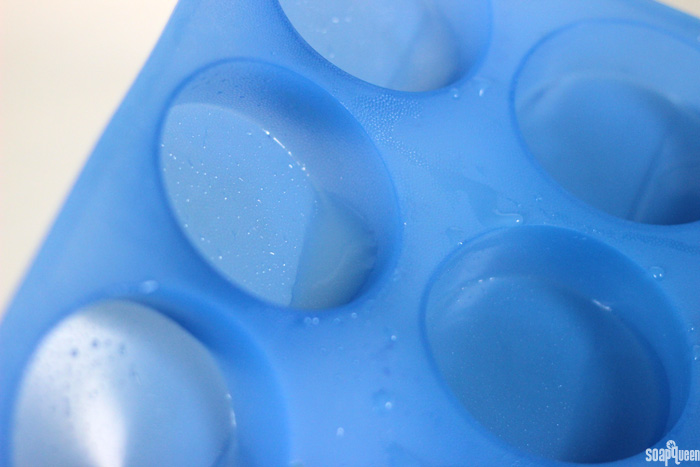 Place the mold in the sink and wash with dish soap and water as normal. Dry with a towel and the mold will be good as new!
Caring for Wood Molds:
Wood molds are a fantastic option when making cold process soap. Wood molds can also be used for melt and pour if you line the entire mold with a full sheet of plastic. Bramble Berry wood molds are made out of top grade Birch Plywood that is both sturdy and durable. The wood is fantastic for insulating the soap, which makes achieving a complete gel phase simple. Each mold is handcrafted and made locally.
Bramble Berry wood molds are unfinished. You can finish the wood with an oil finish or just allow it to patina and age naturally. A furniture polish gives a smooth and shiny finish to the molds. If you’d like to make your own polish, check out the Simple Citrus Furniture Polish recipe, used below. The polish works well to help protect the wood and makes it look brand new!
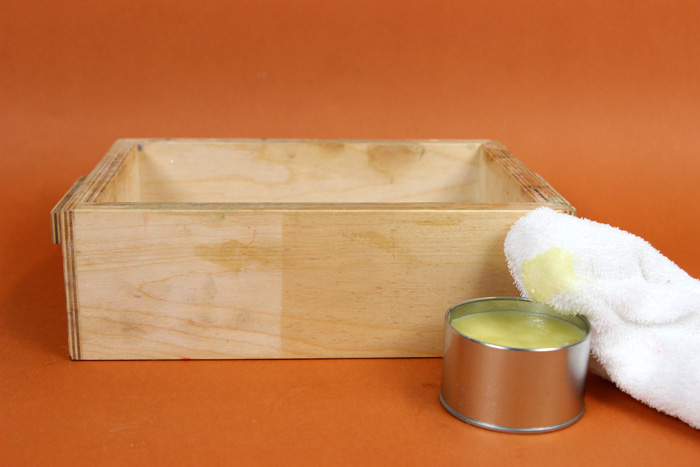 A little polish can make wood molds look brand new.
Over time, wood molds will come in contact with plenty of soap, colorant and fragrance oil. Remember, a dirty mold means it has been used and loved! Most stains are easy to remove to avoid any transfer to future projects. To clean wood molds, use 99% isopropyl alcohol and a paper towel to wipe away any colorants or soap. The soap scarper/cutter is a great tool for scraping off hardened pieces of soap from the mold. Do not immerse wood molds in water for long periods of time; doing so can warp the wood. If you feel the need to wash the wood mold with water, use a damp towel and allow the mold to fully dry.
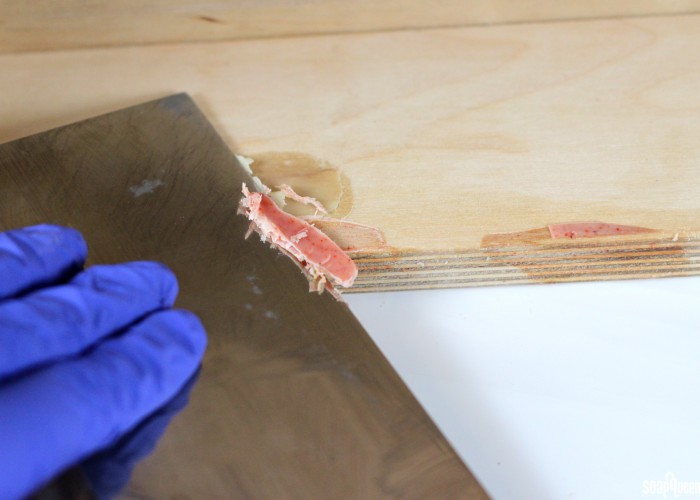 The soap scraper tool is fantastic for removing hardened pieces of soap off both wood and silicone molds!
Some wood molds are great if you like to oven process your soap. Oven process involves placing the soap in the oven to force gel phase. Because the mold is exposed to relatively high heat for an extended amount of time, make sure your wood mold is heat safe. Wood molds assembled with glue are not safe to place in the oven; the heat may loosen the glue and warp the mold. If the wood mold is held together with nails, or metal hardware, it’s safe to place in the oven. Molds that are safe to use in the oven include 2 lb. Wood Loaf Mold, ELF 4 lb. Wood Loaf Mold and the 10 lb. Wood Loaf Mold. If you’re looking for more information regarding oven process soap, check out the Hot Process Series: CPOP Swirls tutorial.
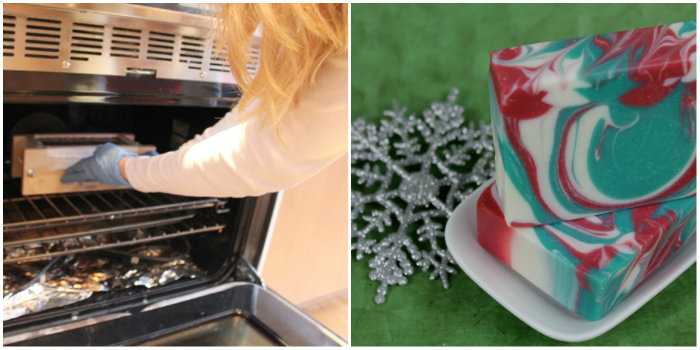 CPOP (Cold Process Oven Process) involves placing the soap into the oven to promote gel phase. Check out the CPOP Swirls tutorial for more details.
Silicone and wood molds produce beautiful soap, and have a wide variety of applications. With proper care, these molds will last for years and years. Dish soap and warm water does the trick for silicone, while wood molds require a simple wipe down with a towel and alcohol. If you have any tips and tricks for caring for your molds, I would love to hear them.
Question about a new mold… are there any preparations for a new mold? Other than maybe cleaning it, does it need oiled or alcoholed? TIA
They are ready to use once you get them! We recommend washing them to remove any debris from shipping. If you like, you can stain the unfinished wood molds, or just leave them as is. 🙂
-Kelsey with Bramble Berry
Hi all, this is a great little post with as many useful tips coming from the comment section as from the main post & I thank you all for that. I also very much appreciate that questions posted got answered in a rather timely fashion.
I was writing to ask about using plain old white distilled vinegar to get rid of both leftover scents as well as leftover oily/soapy residue. I have used vinegar for ____ {I just don’t wanna admit how much “wisdom” I have “accumulated” LOL} years to do just this sort of thing. In fact vinegar added to the wash was the only thing that got rid of fast food build up on uniforms; I add a splash of bleach to the dish water in our travel trailer (disinfects the dishes & keeps nasty smells from building up in the grey water tank) with a fair dump of vinegar in the rinse water. It does 2 things in rinse water: 1) cuts through any soapy leavings; 2) neutralizes the bleach on my hands {wearing rubber gloves was a wrong idea} & my nails went nuts—I just put a good lotion on afterwards & all is right in the world.
I have some silicone Avent brand baby bottles & nipples {only nipple out there that my kid couldn’t pull out of the bottle with that killer suck reflex; yes honest, I wouldn’t joke about that kind of mess….} from when my baby was a baby, that have withstood the years in hostile storage conditions. They discolored a bit to have a yellow tinge to them, but otherwise, washed up just fine. I washed them with soapy bleach water & hot white vinegar whenever they got left to get icky with either breast milk or formula in them.
Hot vinegar was also about the only thing that got rid of the godknowswhattheydidtothispoorcanteen in the Army basic training re-issued many many times over canteens. One more thing, the bleach/hot vinegar is also what I used in my Camelbak hydration system bladder & drinking tube. Much the easiest way to get rid of the “crud” when you use it in the godforsaken corners of the world for months at a time; after all, is it a mild acid with its own set of disinfecting properties.
Anyhow, hope this helps with other issues besides just the soapmaking world….God Bless & keep you & yours,
Ex-Army Chick
Vinegar should work just fine for molds! It’s such a great all-purpose cleaner. I love using it for grease and soap scum. Thanks so much for sharing your cleaning tips as well. 🙂
Read more about household cleaners here: https://www.soapqueen.com/bath-and-body-tutorials/tips-and-tricks/top-diy-cleaning-ingredients/
-Kelsey with Bramble Berry
I have a question about silicone molds. I have used mine for about a year now and I haven’t had a problem with unmolding till the last 3 batches. Now it suddenly gets stuck to the bottom of the mold and I have a hard time getting the soap out. I checked my recipes over and over again and they seem to be perfectly fine. Also the soap loaf seems to be wetter than usual at the bottom where it gets stuck. The last batch I didn’t unmold till 2 weeks later to see if that would improve and it still got stuck. Like I said I haven’t had a problem with it in the whole year and now it started acting up. Can silicone mold just get old suddenly? The only other thing I can think of is that the last batch I did before it started acting up was my first batch where I used goats milk, beeswax and honey as ingredients as well as the first batch I stuck in the fridge to avoid overheating due to the sugar content. I appreciate help on this topic. Thank you!
Hi Cecilia!
I think it may be the goat milk! Milk has extra fat, which makes the recipe softer. That means it can take a bit longer to unmold. What other ingredients are you using in your recipe? Let me know and I can suggest a few ingredients to help it unmold more quickly. 🙂
-Kelsey with Bramble Berry
I’d never thought of using silicone injection molds for soap making! I’d imagine that most people aren’t prepared to design their own molds, but think of the possibilities! You could create leaf molds, molds with words, and really any kind of mold you may desire! I’m very excited to try this out.
Absolutely, the sky is the limit with the Pourable Silicone and Flexy Fast Molding Putty! You can make a mold of whatever you like.
This video shows you how to work with the putty to create fun molds: https://www.youtube.com/watch?v=ok00mvuKfvg
And we made a pretty lace mat using Pourable Silicone in this tutorial: http://www.soapqueen.com/bath-and-body-tutorials/cold-process-soap/jasmine-lace-cold-process-tutorial/
Have fun making lots of molds Sandy! 🙂
-Kelsey with Bramble Berry
Flexy Fast Molding Putty: https://www.brambleberry.com/Flexy-Fast-Molding-Putty-P4444.aspx
Pourable Silicone: https://www.brambleberry.com/Pourable-Silicone-P5446.aspx
I’m looking to buy a tall and narrow loaf mold but wondering if I should buy silicon or invest in the wood mold. Why are the majority of your tutorials using wood? Why do you like wood better? What are the advantages to wood and disadvantages to silicon?
Hi Chelsea!
It’s definitely personal preference! We love using both silicone and wood molds.
Silicone molds are flexible and easy to clean, and don’t need to be lined. The Tall Narrow Wood Loaf Mold needs to be lined, but is also sturdy and comes with a lid for easy gelling. Which one you choose is definitely up to you and what fits your budget. 🙂
Tall Narrow Wood Loaf Mold: https://www.brambleberry.com/Tall-Narrow-Wood-Loaf-Mold-P6122.aspx
Tall 12″ Silicone Loaf Mold: https://www.brambleberry.com/Tall-12-Silicone-Loaf-Mold-P6073.aspx
-Kelsey with Bramble Berry
Thanks for writing as to how to get out lingering scent from silicone molds! Ever so often a f.o. will “scent” my silicone molds, and washing with soapy water, even placing them with soapy water, out in the sun just wasn’t cutting it…no pun intended. But will try the alcohol spray trick after I make soap the next time!
Hi Bernadette!
You’re welcome! Sometimes the strong scents can linger. Alcohol helps get rid of those lingering smells! 🙂
-Kelsey with Bramble Berry
Great article guys. I think a shinny new-looking silicone mold is always appreciated and it does not leave old residue on future DIY projects.
These tools used long-term (like the soap scrapper) definitely makes the DIY project more exciting.
Carlos
Hi Carlos!
You’re welcome! Glad you found the post helpful. 🙂
-Kelsey with Bramble Berry
Thanks for the info! My blue round silicone mold looks just like this one with the soda ash on it, now I know what to do!
Hi Michael!
You’re welcome! We use that cleaning method all the time to get rid of pesky soda ash. 🙂
-Kelsey with Bramble Berry
I was wondering about this just yesterday! Is GooGone safe for the silicone molds?
Hi Dawn!
I’m not entirely sure! From what I understand, GooGone is used to remove sticker residue. Normally, we use a scraper to remove hardened soap and alcohol to wipe away any stains. That works great! You may the check with GooGone manufacturer to see if it’s safe to use on wood. 🙂
-Kelsey with Bramble Berry
Hey Anne-Marie , this is another question along the lines of this article. I had purchased your bee plastic molds that I am using for solid lotion bars that are a combo of beeswax-cocoa & shea butters. What is the best way to get rid of the droplets of solid lotion from the 3 cavity mold?
Thanks Marilyn
Hi Marilyn,
When I make lotion bars, I find baby wipes are very helpful in removing any left over lotion bar material. I like the unscented ones from Sam’s. They have enough texture to scrub off the residue without scratching the molds. Any left over in tiny cracks can be scrubbed off with a baby toothbrush after soaking the mold in hot water. First, wipe the mold down with the baby wipes, and then wash the mold with soapy water. Let them air dry as normal. This gets them squeaky clean and ready for your next batch.
I use this same process to clean up after lip balm, CP soap, etc, too. Unscented baby wipes are great for cutting oils, butters, and waxes since they are made to get the same off of baby bottoms. 🙂
Heather
Hi Marilyn!
Heather has some awesome tips for cleaning that lotion residue off! Thanks so much for sharing Heather. 🙂
When it comes to cleaning off waxy substances, we typically spray them with alcohol and wipe with a paper towel before washing with warm water and dish soap. A clean up tool is also helpful to remove any stubborn chunks: https://www.brambleberry.com/Clean-Up-Tool-P4758.aspx
You can also use leftover melt and pour to clean your molds! Simply melt it down and pour into the cavities. Then, swish it around and scrape down the sides with a spoon before pouring into another container. Learn more in the How to Clean Oily Containers video: http://www.soapqueen.com/bath-and-body-tutorials/tips-and-tricks/clean-oily-containers/
-Kelsey with Bramble Berry