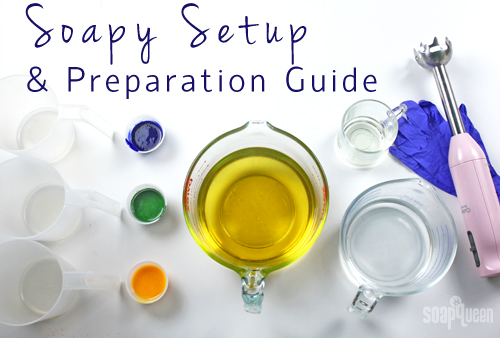
 You have done your soapy homework: the recipe is created and prepared, the design is fully thought out, and time has been scheduled in your busy day. Now, it’s time to prep your ingredients and set up the soaping work space.
Having your supplies and space fully prepared before making cold process soap is extremely important. Occasionally you need to think on your feet while soaping, and having all tools on stand-by can make all the difference!
 Safety:
Goggles: Eye protection is extremely important when making cold process soap. While unlikely, it’s possible that lye water or soap batter may come in contact with your eyes. Don’t take the chance! Some soapers prefer a full face mask when soaping.
Gloves: Protect your hands from lye burns with silicone gloves, or reusable kitchen gloves. Silicone gloves are lighter, while kitchen gloves last longer.
Long Sleeves, long pants and closed-toed shoes: Protect the rest of your body from any lye water and soap batter with plenty of clothing. Keep in mind these items may come in contact with oils, colorant or fragrances and may become damaged. Aprons are helpful for protecting clothes.
Environment:
The room in which you soap should have good ventilation, and plenty of light. Many soapers create cold process soap in their kitchen, garage, or craft room. Make sure pets and children are in another area, and do not have access to your ingredients. You should have plenty of work space; a non-cluttered counter space truly helps the process go smoothly.
 The Essentials:
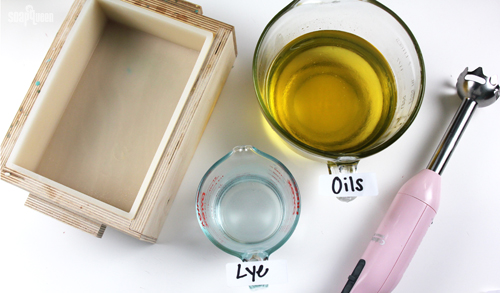
Stick Blender: Emulsifying oils and lye water can take hours using a whisk or spoon. Using a stick blender cuts this time into minutes.
Bowl for Oils: Ensure the bowl holding the oils is large enough for the total yield of your recipe (oils + lye water).
Container for Lye Water: For safety, label the container of lye while it cools. Ensure your container is heat safe.
Prepared Mold: If necessary, line mold before before you start to soap. Using a silicone mold, or lining a wood mold with a silicone liner makes this process easy (pictured above is the 9-Bar Unfinished Birchwood Mold, with silicone liner).
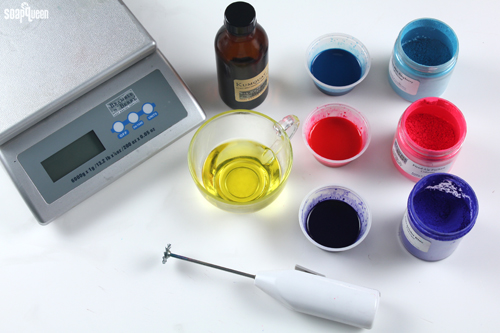 Fragrances & Colorants: Measure out the fragrance oil and if necessary, disperse the colorants. For more information on how to disperse colorants, check out the Prepare Your Colorants for Cold Process Soap Queen TV video. Ensure the fragrance oil is in a glass container, as fragrance oils can begin to eat through plastic.
 Extra Tools:
Easy Pour Mixing and Measuring Containers/Extra Containers: These handy containers are perfect for splitting your batch of soap to add different colors or fragrances. Plan ahead and have one container for each color, fragrance or other additive you plan on adding to separate portions of your total soap batter. Remember that all containers should be chemical resistant (no soft plastics) and heat safe.
Whisks: Once your soap has reached trace, using a whisk to incorporate fragrance oils and colorants helps prevent unwanted acceleration. Using a stick blender to mix in fragrances and colorants can quickly thicken your soap. One whisk for each color used in the soap is recommended.
Spatulas: When pouring your soap into the mold, you don’t want to waste a drop! Silicone spatulas and spoons are great for scraping out every last bit of soap batter. Spatulas are also great for pouring the batter over to create even, smooth layers.
Teaspoons and Tablespoons: Necessary for mixing colorants, having a few extra tablespoons and teaspoons on hand while making soap is a good idea. They are perfect for adding the colorant, exfoliants, extracts or any other special ingredient. Measuring all ingredients helps to create consistent bars over and over again.
Spoons: You never know when an extra spoon may come in handy!
Swirling Tool: Depending on your design, you may need a swirling tool. This my be a chopstick, dowel, or even a wire. Even if you don’t plan on doing a swirl in your soap, it’s nice to have one available in case you need to change your design last minute.
Molds: Having an extra mold or two on hand just in case you have extra soap batter means no soap will go to waste.
 Be sure to cover your counter space to protect your counter tops if necessary. Above, is the setup regularly used in the Soap Queen Soap Lab. This setup works best if you are right handed, but if you are left-handed, you can flip the setup. Of course you can customize this setup to whatever you prefer, but after lots of soapy sessions, we have found this layout works great.
 Setup Tips:
Place your oils and lye front and center. Because these two ingredients are the stars of the show, place them in the center of your work space.
Place the stick blender and tools to the right of the oils and lye. If you are left handed, place the stick blender and tools to the left of your oils and lye. Having these items near your dominant hands allows you to grab them quickly and with ease.
Have plenty of paper towels nearby. Soaping can get messy and if a mess arises, cleaning up splashes of soap quickly is important. We like to place paper towels under the stick blender.
To the left of your oils and lye, place colorants and extra containers. Once the oils and lye water have emulsified, having the extra containers and colorants to the left allows you to quickly split your soap and add colorants.
Placing your fragrance to the far right helps avoid any spills. Because adding fragrance is often the last step, placing the fragrance to the far right can prevent any potential spills or accidents.
Have your mold nearby. If your space is big enough, place your mold to the far right or left. The mold should be nearby, but should not make your work space cramped.
OR Combine these last two tips. Place your fragrance in your mold – ensuring that you won’t forget to add it in your excitement of making soap.



Printing out this guide to keep for future use! I am just starting to play around with cold process and this will definitely be a huge help. One thing I have yet to quite figure out is the best way to clean up after all the soaping is done! With all the bowls and containers with traces of fresh soap, lye water, oils, colorants, etc how do you go about cleaning them all? Like you would regular hand wash dishes or is there anything specific to know? Thanks!
Hi Chelsea!
That’s awesome, glad you found this post helpful! You can clean soap several ways. You can wipe it out with paper towels while it’s fresh and wash the dishes, or let the leftovers turn into soap and scrape them off. Either way works really well! Learn more in the Soapy Session Clean Up Guide: https://www.soapqueen.com/bath-and-body-tutorials/tips-and-tricks/clean-soapy-session/
-Kelsey with Bramble Berry
I have a large silicone baking mat that I use to put “used” tools on — whisk, spoons, blender. Raw soap, dribbles of oil, or even drops of lye solution don’t affect it, and it washes right off. As I am measuring and weighing oils, I start with all of them on my left, and move them to my right, so I am sure I’ve added them (or not). I have my (easy to read, LARGE PRINT) recipe in a plastic page protector, and a legal pad and pencil — won’t run, dissolve, or fade if something gets spilled, like ink will — to take notes. I have a measuring cup that is a shot glass that I love for FOs, but I am going to buy a few more for those oils I use in small quantities. Very handy! I measure my lye on a scale using a disposable plastic cup. I mix with water in glass, then crush the cup, and throw it away so there’s no chance of it accidentally being used by somebody. If only I could find goggles that fit over my glasses that I could also read through — I don’t use goggles, because my bifocals simply don’t work though them. Grrr.
Hello!
Wow, that sounds like an amazing set up! I love the idea of using a silicone mat and the plastic page protector. I usually get oil and color all over my recipes. 🙂
-Kelsey with Bramble Berry
I love this I spend the entire night before cleaning my kitchen making sure all my counters and table are cleared off and wake up really early to soap. At my house usually done by the time everyone wakes up!
Hi Kristie!
I’m so glad you like this post! Also, sounds like you have great organization when making soap. 🙂
-Kelsey with Bramble Berry
I take men’s tube socks, cut the toes off and use them as arm protectors. I can strip them off quickly in case of a lye splatter.
That’s actually an awesome idea. I usually wear long sleeves and a lab coat. The only issue being that my arms are so long, nothing covers my wrists.
I’ve never had lye spill on me, but I has had some raw soap get on my exposed wrists. I never get burned but my skin does get very irritated.
Thanks for the tip!
Hi Deena!
That’s an awesome idea, thank you for sharing! 🙂
-Kelsey with Bramble Berry
That is exactly what I do for the same reason! 🙂
Thank You!!!!