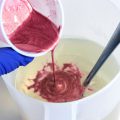
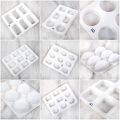
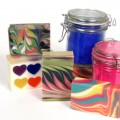
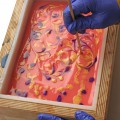
These amazing soaps were made by Nicole in Customer Service with our Flexible Knitting Mold ($14.85, made out of a flexible silicone and lasts forever).Nicole used our white house brand soap as a base and colored the entire batch with the Super Pearl White Mica to add the shimmery look to the soaps. The different colors of string were made with Cornflower Blue Mica, Yellow Mica, Rose Pearl Mica and Aqua Pearl Mica.
These make up the first layer poured into the mold using a dropper. She then used Black Mica for the coloring of the knitting needles. This was the second layer also put into the mold using a dropper. The final pour for the background of the soap is White House Soap Base colored with the Super Pearly White Mica.


Amy –
I always spray my little detail work with rubbing alcohol and then the melted soap flows a lot better into them. I either use a disposable plastic dropper but really do prefer the syringe that comes with the Melt and Pour tool kit here: https://www.brambleberry.com/kits.html
It’s $19.95 and also comes with cool tools that allow you to scrape away any overpour so even if you do miss the lines, you can carve the extra soap away so your lines look perfect.
hi there! i realize this is an older post but i just got this mold and had a question. any tips on how to make the needles look crisp? i am having a hard time filling the tiny nook for the needles and yarn string without it looking messy. i am new at this so maybe i just need practice but thought it wouldn’t hurt to ask. thanks!
Thanks for the kudos Lynn. =) I hope that the tips help.
Dear Paula and bloggers,
I have written to Paula direct but wanted other bloggers to know that I did not ignore this great response. Paula obviously ranks right up there with Anne-Marie and Bramble Berry Staff in service and just plain goodness.
Dear Lynn,
My name is Paula from PJ Soaps. I would be the one who put together your M&P tool kit.
Here is a list of things to try:
1) keep a pot of simmering water beside your soaping project to rinse your injector after each use.
2) if the tip is simply too small and clogs too fast for you, snip back the tip just a bit and try it again.
3) the way the injector is made even if the soap starts to harden at the tip you can dip the tip of the injector into hot water to melt anything that has clogged and continue to use the remainder of the soap in the injector.
Nevertheless, if you’d like to email me at [email protected] and I will be happy to send you an additional injector that has already been trimmed back (this way you’ll have a fine tip and one that is cut back for greater flow). I’d also be happy to send you a sheet of tips and tricks and answer any questions you might have. I don’t think there’s a soap I make that doesn’t utilize that tool and it has literally changed the way I’m able to make soap. My sincere hope was that it would do the same for other soapers.
Contact me and I’ll do my very best to make sure you have an outstanding tool that works for you.
Paula Kates
http://www.pjsoaps.com
[email protected]
How cute are those!!! Love ’em!
That is so cute! Perfect for the knitter..
Super job Nicole! I did my first multi-color soap using a dropper. I had much better luck with the dropper than with the syring that came in the Melt and Pour Tool Kit. I think you did a better job than I did. But I’m gonna do more!
Those are so cute!