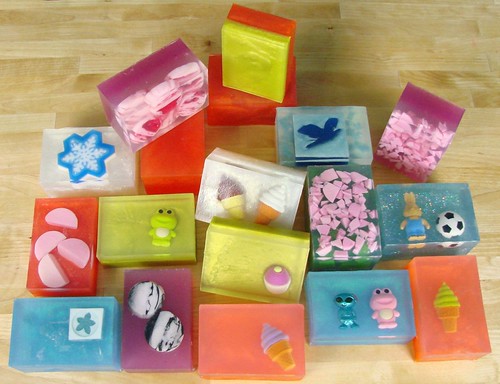
Have you seen Bramble Berry’s new Baltic Birch Molds? If not, check them out HERE. I love them SO much. They are stunningly gorgeous, so versatile and selling fast (we’re seriously having trouble keeping them on the shelves). And you can use them for more than just cold process. Here’s a colorful and fun melt and pour project!
Colorants
Before you start: Line your mold with freezer paper making sure that you have a flat bottom with the shiny side up. Remember that the bottom will eventually become the top of your soap. Once your mold is lined, add the side and end border pieces and put your inserts together so they’re ready to go to.
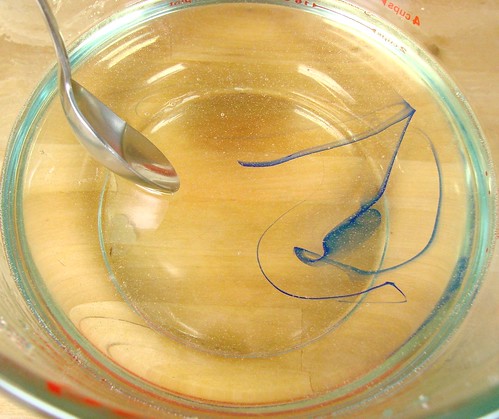
ONE: In a large microwave safe container, melt about 32 ounces of clear soap base. Once the soap is completely melted, add 1 drop of liquid blue colorant to give the soap a “clear” effect (just one drop will do the trick). Do not add any fragrance at this point.
Note: You will only need a couple of ounces for the initial pour so if you don’t have a microwave safe container that big, it’s a-okay. Just melt 1-2 ounces. To save time, I like to melt my soap in larger quantities.
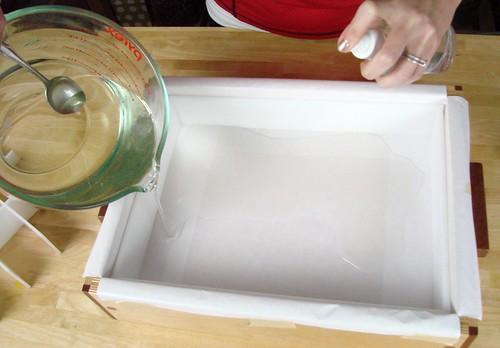
TWO: Pour a thin thin layer into the mold (about 1/8″ thick) and spritz the soap with alcohol while your pouring. This will help the soap spread out into the mold.
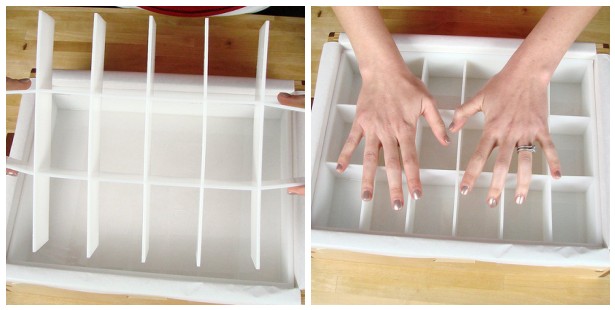
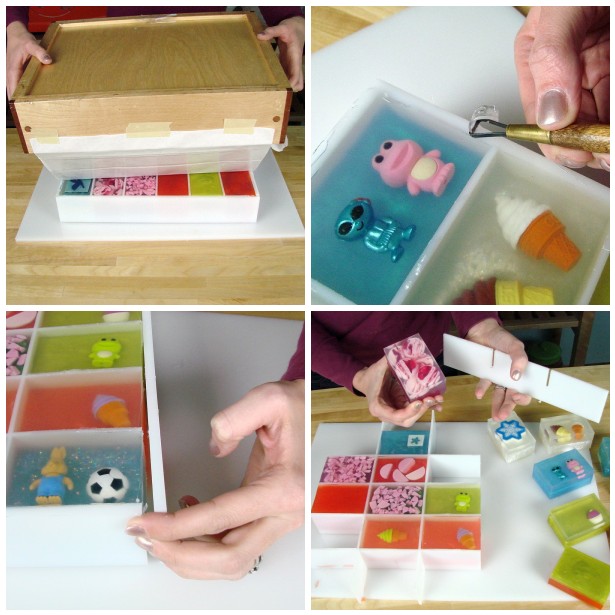
THREE: Before the soap cools, quickly place the inserts into the mold, squeezing the ends with your fingers to hold them together. Press the inserts firmly into the soap and let cool for 15-20 minutes, until the clear layer is totally hardened and the dividers are ‘sealed’ in the soap.
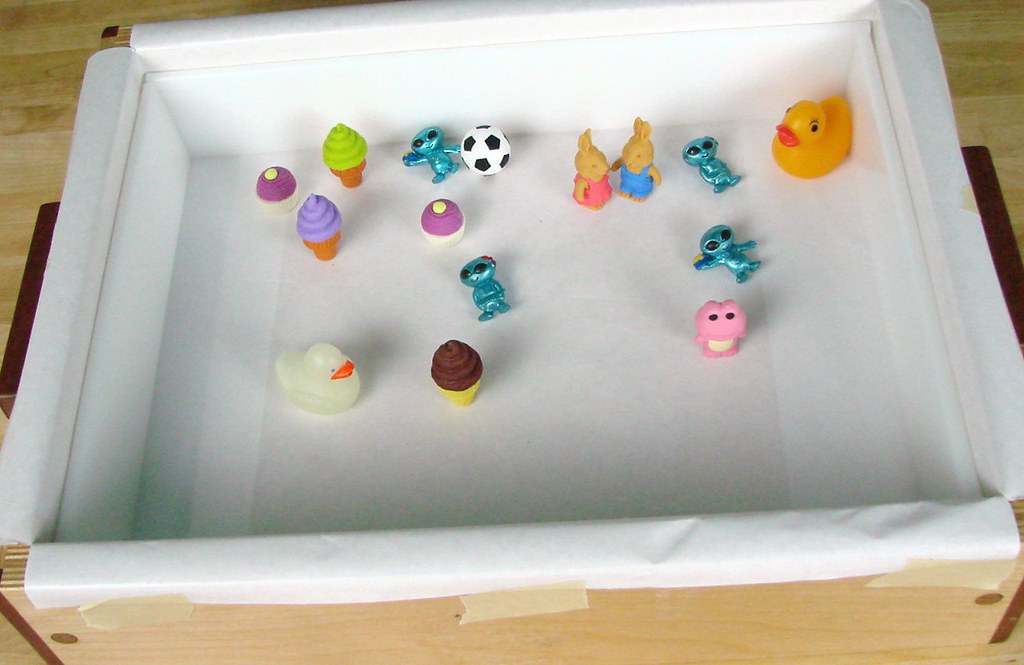
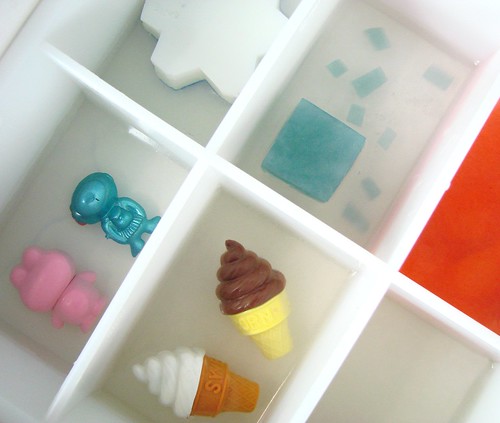
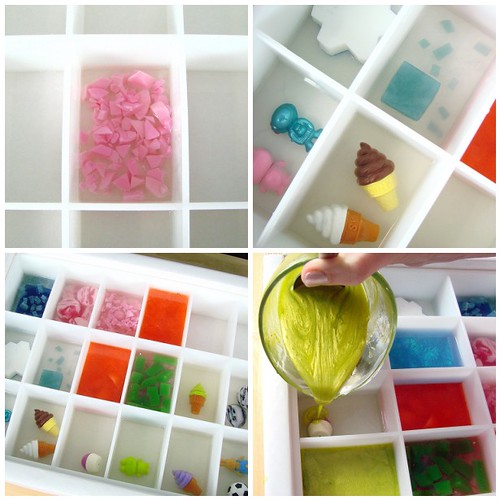
Embedding Tips: Spritz the first layer of clear soap with rubbing alcohol and pour another thin layer of clear soap (you might have to remelt your original clear soap). Liberally spritz the embedding object (whether it be soap scraps or toys) with rubbing alcohol and place it into the freshly poured clear soap.
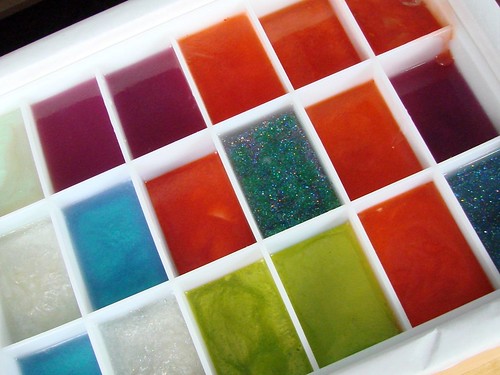
FIVE: Once the embedded layer has cooled, add the final layer of soap with color* and fragrance. I used a combination of Energy Fragrance Oil, Grapefruit Essential Oil and Yuzu Fragrance Oil. I always recommend .25 -.5 ounces of fragrance per 16 ounces of soap base. When pouring your layers, remember to spritz the embedded layer before pouring your colored layer. Also make sure your colored soap is no hotter than 120 degrees; we don’t want to melt any of your other soap layers.
All of my soaps turned out different ranging from 3.2-5.6 ounces (using 89 ounces total) so have fun and make any size that you want!
Unmolding: Place a large cutting board over the top of your mold and gently flip the soap mold over onto a hard surface. Lift the mold off of the soap and slowly remove the freezer paper from the soap. I used the scraper tool from the Tool Kit (a non serrated knife or small spatula would work) to scrape the soap off the edges of the border pieces. Then slowly pull the sides of the mold away from the soap (Note: If you ever use this mold to make Cold Process soap, you cannot pull the sides from the soap as CP soap is softer and tends to tear). Pop out your soaps and marvel at your creativity.


Love your website & company!
I did notice the misspelling of Baltic in the beginning of the recipe on the above posting:
Here’s What I used
18 Bar Balic Birch Mold
I’m sure you want to correct it.
~Rose
How right you are! Nice work Eagle Eyes =) Thanks for letting me know.
hey anne-marrie i want you to demonstrate all the soap videos that you made in youtube
Hi Kaylene!
You can find all of the videos on SoapQueen TV here on the Soap Queen blog plus more! Anne-Marie has done tutorials on everything from candles to laundry soap to bath bombs/fizzies to all sorts of fun soaps. Check out these categories on the blog for lots of soapy inspiration:
Bath Fizzies: http://www.soapqueen.com/category/bath-and-body-tutorials/bath-fizzies/
Cold Process Soap: http://www.soapqueen.com/category/bath-and-body-tutorials/cold-process-soap/
Home Crafts: http://www.soapqueen.com/category/bath-and-body-tutorials/home-crafts/
Lip Products: http://www.soapqueen.com/category/bath-and-body-tutorials/lip-products/
Lotion: http://www.soapqueen.com/category/bath-and-body-tutorials/lotion/
Melt and Pour Soap: http://www.soapqueen.com/category/bath-and-body-tutorials/melt-and-pour-soap/
Soaks and Scrubs: http://www.soapqueen.com/category/bath-and-body-tutorials/soaks-and-scrubs/
Tips and Tricks: http://www.soapqueen.com/category/bath-and-body-tutorials/tips-and-tricks/
Happy Soaping!
-Becky with Bramble Berry
I would switch to a completely transparent color, like Labcolors Orange: https://www.brambleberry.com/Or… That way, you’ll be able to see your little bugs through the soap =)
Hello, I had seen soaps like this on the Etsy website but they were completely green see through (http://www.etsy.com/listing/55… instead of a clear top layer. I tried to duplicate this using the liquid Orange from bramble berry but it didn’t come out translucent enough to see all of the skull i had embedded. any suggestions?
You could – just the middle ‘row’ might be a combo of everything =)
:-)))
If you wouldn’t tell me, I’d think it was an idea to make such soap at the first place. Looks cute though in the middle. But I’m just wondering about two “swirls” batches at the same time. I guess I’ll have to try.
Yes and no. Without the first clear “glue” layer, the soap seeps under the dividers. I did a split batch last week and you can see what happened: http://www.twitpic.com/1xblhn The middle bars were a ‘mix’ but the outer layers are perfect so I’d say that you could easily do 2 batches even better than I did if you were a bit more careful than me.
Hi Anne-Marie!
I have a question about this mold. I’d like to get this mold for 18 bars and try it for CP soap. Can I make two or three different soaps at the same time in one mold? Is it easy to do with all inside liners?
Thanks!
Elena Z.
Here’s a link to the Soap Queen TV Episode on swirling. http://www.youtube.com/user/so… You’ll need to put the dividers in first and swirl each individual cavity. I would love to see how they turn out =)
I just bought the 18-bar birch mold and want to use M&P soap and swirl. Will there be a tutorial for this?
Looks like I have to add one of those with my next order…I love making different soaps all at once just for fun!!
I hope you do. Melt and Pour is super fun and very versatile. =)
Thanks. I’m glad you like the soap. Stamps are really easy to do. You can buy stamps here: https://www.brambleberry.com/So… and they are very easy to use. You just place the stamp on top of your soap and use a rubber mallet (basically a thick rubber hammer) to tap the stamp into the soap until you get a nice impression. It’s very easy and efficient.
I should have some of your erasers delivered this week!
Wow…awesome idea Anne-Marie! Reading this tutorial actually makes me want to start playing more with M&P. Right now I just use it to add a little pizazz to my CP soaps. Love this idea.
Tapez votre commentaire ici.
bonjour!
quelles merveilles tous vos savons sont magnifiques Moi je débute…j’ai quelques moules, je fais fondre la glycerine je mets mes huilles et voilà. Sur votre site j’ai vu les timbres mais pouvez vous m’expliquer le principe? Faut il une presse? merci de votre réponse et bravo encore c’est magnifique
jennifer rpyant
Whoever wants to affiliate with my blog or for us to follow each other’s blogs on Blogger, let me know! I’m willing to return the favor, I mean we could all use some more traffic & readers on our blogs.
http://deedee1whoa.blogspot.co…
Cool thanks A-M, the kids are all 5+, but will put a note in the package.. Ill post the pictures on my blog when im done. Missing you all too. Been a grey London day and the walk sounds AWESOME. Glad last weekend at the Soap guild conf went well, so inspiring reading how people started.
Let me know what you think when you get it =)
Agree – total instant gratification.
It’s always a team effort around here – my entire Bramble Berry group is just bubbling over with exciting ideas. I’m so lucky to work with such a great group of people.
We’d love ’em! =)
That’s a bummer! I’m sure it still looks cute though =) In theory, if the eraser is dyed with food coloring, it could definitely bleed. We’ve tested all of our toy erasers and have never had that problem though so maybe it was just specific to that brand of eraser.
In theory, you could embed magnets but you might put a ‘not intended for children under the age of 3’ on there just because I worry about the magnets falling off and getting in places they shouldn’t. =) We miss you in Bellingham. It’s an amazing day (sunny, beautiful) with a fun Children’s Art Walk going on tonight that you would LOVE.
i also really like that you can make many projects at once using the clear at the bottom of the mold technique! way to go Anne-Marie!~
p.s. get ready for an onslaught of orders……=)
i made the cutest soap using an eraser embed. It wasn’t one I bought from Bramble Berry, but it was a popular brand. Well, after a few days, the color started bleeding into the white soap. I now have an orange glow from the red eraser. Is this to be expected from erasers?
Thanks!
These look great! You’re so creative! x
i want to play with all of those- so cute!
Super Awesome! Talk about instant gratification soap! 🙂
Ok, that is awesome. The mold is going on my must have list. Love all the soaps you designed.
Anne Marie, I stand in awe of your creative genius. They are absolutely ravissante (stunning)…I am so glad I got a birch mould hot of the press..guess what I will be doing for my niece’s scooby doo themed party. Sheer genius and you make it seem so effortless. The colours are just out of this world!!!! Do you think I could use magnets as embeds? Selina xxx
Lovin’ It!!!!!
(blushing) Awwww … thanks. =)
Ooooh! Let me know how it goes. Make sure to do that first thin clear layer. That’s a big deal …
They seriously are the cutest little soaps ever. I just love the production value too – 18 bars of individual soap done quickly.
I poured each soap individually and since they are sealed on the bottom with that first clear coat, they don’t ‘leak’ into the other cavities. So, if I had poured them all to the same level they would have weighed the same. But, I didn’t =) I just poured to where I felt like pouring or when I felt the design was ‘done.’
You are going to fall deeply in love … =) I can’t wait for you to catch the bug!
After seeing this and all the soaps at the HSMG conf, I may have to take up M&P!
I’m so impressed! Very very nice. I am a little puzzled as to the weight differences – I wouldn’t have thought they would vary that much?
Beautiful, colorful and full of life!!!
Congrats Anne and thanks for the tutorial with the new BB mold!
Ditto what the other ladies said! Sweeeeet!
Super cute and clever! I love the pink bar with the soap scraps in the first photo, and the sweet little froggy soaps, too 🙂
Dang, and here I’ve just sold my old BB mold~ I had it for years, didn’t think I needed it anylonger with the larger batches of CP I now make~ How creative you are~ you just never cease to amaze me~ M&P here I come~
OMG I LOVE THIS!!!!! <3
Once again, I am in awe. Brilliant!