Two days ahead of time, make your cranberry embeds This is an unscented batch of soft soap that is almost play dough like in its consistency. The batch is a small 45 oz. size and is meant to fit into our Silicone Pans.
Wearing full safety gear and following basic CP principles (unsure about CP soap? Watch the FREE SoapQueen.TV tutorials on CP soap here), make your soap.
Add Burgundy Oxide and Merlot mica at thin trace and stick blend in. If you want to ensure no clumps at all, pre-mix color with 2 tsp of oil. Pour your soap and do not insulate. To keep the soap softer and more pliable, not going through gel phase is essential.
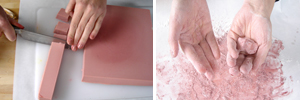
After the soap has set-up for just one day, use a melon baller, a cookie dough batter tool or just cut into squares and round off the corners and form with your hands. If the soap is too sticky, mix a little flour with Merlot Mica and apply to your hands to keep your hands from getting sticking to the soap.
Next make layers 1, 2 and 3: Get your soap to thin trace then, separate it into three batches. This recipe is designed to give a good amount of working time for multiple swirls and layers.
Green Soap: 20 oz soap batter with Emerald Labcolor and Green Chrome Oxide. Add approximately 1 oz fragrance.
White Soap Mix: 20 oz soap batter with Super Pearly White. Add approximately 1 oz fragrance.
Black Soap Mix: 12 oz soap batter with Black Iron Oxide and Vintage Gray Mica. Add approximately 3/4 oz fragrance.
Add the fragrance right before you pour so that if your fragrance accelerates trace you will still have time to embed your cranberry inclusions.
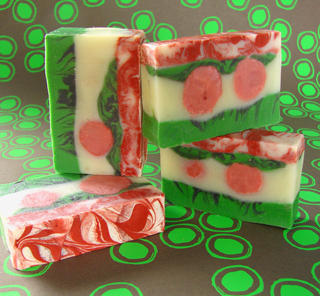
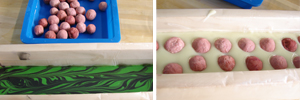
Fragrance the white layer of soap. Pour a thin layer of white soap over the black/green mixture. Add the Cranberry Inclusions, two by two, spacing evenly along projected bar cut lines. Pour the rest of the white soap.
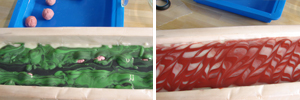
Spoon or pour the remainder of the black and green swirl over the Cranberry Inclusions/White layer.
For the last layer: Split the batch into two containers.
Red Soap: 7 oz soap batter blended with Burgundy Oxide and Merlot Mica. Approximately 1/2 oz fragrance blend.
Uncolored Soap: 11 oz soap batter with approximately 3/4 oz fragrance oil.
Swirl the colored soap and white soap together. Pour over the Green/Black layer.
Insulate well and allow to harden for a minimum of 2 days before cutting. To ensure your soap is mild and hard, be sure to make your soap by November 15th so it can dry for a full 4-6 weeks before the big day!




Thanks so Much!!! That did help a ton! Great tutorial! One more quick question… What size mold do you recommend using for this recipe?
Good morning, Hailey!
With this recipe, you can actually resize it to any amount you’d like with the lye calculator. This recipe is going to make about 4.5 lbs or soap, so I’d suggest going with one of our 5 lb. loaf molds like:
5 Lb Wood Log Mold with velcro straps: https://www.brambleberry.com/5-Lb-Wood-Log-Mold-with-velcro-straps-P3612.aspx
Or this one in conjunction with the silicone liner:
5 Pound Mold With Sliding Bottom: https://www.brambleberry.com/5-Pound-Mold-With-Sliding-Bottom-P5426.aspx
Silicone Liner for 5 lb Wood Mold: https://www.brambleberry.com/Silicone-Liner-for-5-lb-Wood-Mold-P5270.aspx
I hope this helps! 🙂
-Becky with Bramble Berry
This is beautiful Christmas Soap!! How did you make the swirls in the green/black and white/red? Did you combine them then pour into the mold or pour a layer of green then drizzle the black to make the swirls?
Good morning, Hailey!
This swirled look is achieved by doing something we call liner swirling, which is such a fun effect to use in soaps. After the initial swirl (black and green) we layered white soap and then did added another linear swirl! I hope this helps. 🙂
Linear Swirling (Cold Process): http://www.soapqueen.com/bath-and-body-tutorials/cold-process-soap/linear-swirling-cold-process/
-Becky with Bramble Berry
Thanks so much. I guess I will just play around with the amount.
So does mixing the labcolor with the oxide prevent it from bleeding… please say yes (fingers crossed)
It really depends on how much of the LabColor you’re using. If you just add a little bit of the LabColor then it’s less likely to bleed since you’re using such a small amount. The good news is that the colors didn’t bleed in this soap project.
Courtney from Bramble Berry
How much Burgundy Oxide and Merlot Mica did you use to get that red? I’ve tried combining them but can’t get that beautiful red that you have in this soap. Thanks!
Hola, buen día.
Qué bonitos jabones… uhmm ricos !!.
Técnica sobresaliente, matricula de honor !!!
La base de jabón se puede mejorar, yo uso una calculadora con predicción de resultados, no las he visto en foros ingleses ni americanos, puede que te guste esta herramienta: http://calc.mendrulandia.es/ de momento está solo en español, ya están trabajando para que esté disponible en mas idiomas, inglés, francés, alemán, pero habrá que tener un poco de paciencia… (de momento yo tengo el traductor automático de google para leerte).
Besitos y burbujas.
I love those! So festive! And these techniques can be used and interchanged for so many other super designs. Great tutorial!
Love the idea of a one day project! =) Nice tip!
LOL! The latest research with CP soap shows that the soap is lye neutral within a few days of making it BUT the soap really does need that extra 4 weeks to get as hard as possible. It flies in the face of generally accepted CP wisdom but Kevin Dunn (Caveman Chemistry) proved it and presented the paper a few years back at the Handcrafted Soap Guild Show. I still don’t give away ‘fresh’ soap but I don’t mind letting it out of my sight at the 3 week mark now =)
Frozen sounds not fun! Stay warm =)
I love how it turned out too =)
Really cool looking soap.
Lovely soap 🙂
Hint for the balls: do those HP and forming balls will be even easier.
Be sure to have enough liquid in the soap batter and work while the soap is still hot.
Extra advantage: it becomes a one-day project.
Thanks for this great tutorial!
But how do I turn back time to Nov 15? 😉
Wow! This soap is gorgeous!
I like the combination of the colors.
Thank you for the tutorial! 🙂
Greetings from frozen, snow-white Bavaria, Germany!
summerbabe
That soaps looks awesome! Great tutorial!