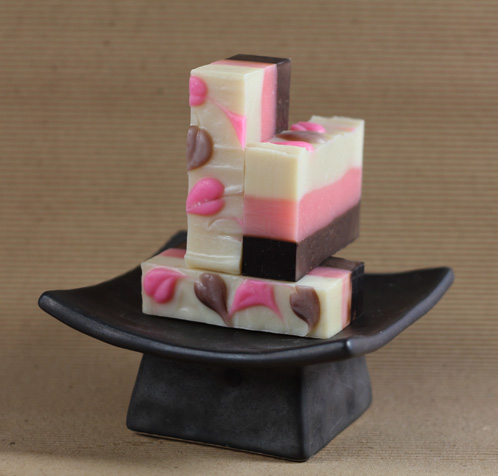
We know it’s winter but we’re screaming, we’re screaming for ice cream – Neapolitan ice cream that is! Remember the yummy taste of vanilla, berry and chocolate melting together in your mouth? Yeah, we can too so we decided to get our icy on by designing a special Valentine’s Day Soap to whet your appetite for summer days gone by. For the top of our bars, we were inspired by Kristy Rose from Kristy’s Lovely Lathers. Check out Kristy’s guest appearance on Soap Queen TV to see her demonstrate the swirly heart technique live.
Ingredients
.8 oz Cocoa Butter
4 oz Coconut Oil
13.5 oz Olive Oil
3.2 oz Palm Oil
5.42 oz Rice Bran Oil
3.6 oz Lye
8.9 oz Distilled Water
.8 oz Dark Rich Chocolate Fragrance Oil
.8 oz Non-Discoloring Vanilla Fragrance Oil
.4 oz Sun Ripened Raspberry Fragrance Oil
.4 oz Strawberry Fragrance Oil
Liquid Glycerin (for the Bubble Gum Colorant)
Sweet Almond Oil (for the Cappuccino Mica)
Tools
Skewer or toothpick
2 Squeeze bottles
Stick Blender
4 Heat safe containers
Spoon or spatula
Get all of the ingredients you need in the click of a button! Remember that you can take items out of your cart if you already have them at home.
If you have never made cold process soap before, I strongly suggest getting a couple of basic recipes under your belt before diving into this advanced, multiple layer recipe. Check out Soap Queen TV on Cold Process if you want to get started! It’s a 4 part series that will take you through the basics (and be sure to watch the episode on Lye Safety). If you’re a book worm, Bramble Berry also has some helpful reading on the cold process technique. Are you an E-book worm? Check out our E-Book on Cold Process. So bone up on the basics so we can get started making fun and creative Cold Process recipes!
ONE: Safety gear up! Make sure you’re wearing long sleeves and put on your goggles and gloves (preferably fashionable pink goggles). Carefully add the lye to the water (never the other way around!) and mix until the water is clear, taking care to not breathe in the fumes. Set aside to cool.
TWO: In a large heat safe container, melt and combine the Cocoa Butter, Coconut Oil, Olive Oil, Palm Oil and Rice Bran Oil.
THREE: When the oils and lye are around the same temperature (I usually shoot for 120-130 degrees), slowly and carefully add the lye water to the oils and mix with a stick blender for 15-20 seconds. We’ll be stick blending later so you don’t want the soap to trace yet. Just make sure the lye and oils are fully emulsified and evenly mixed.
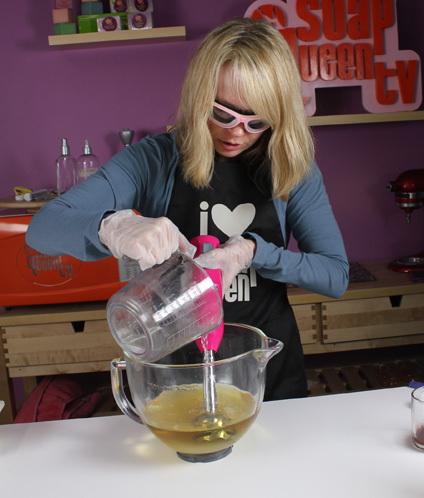
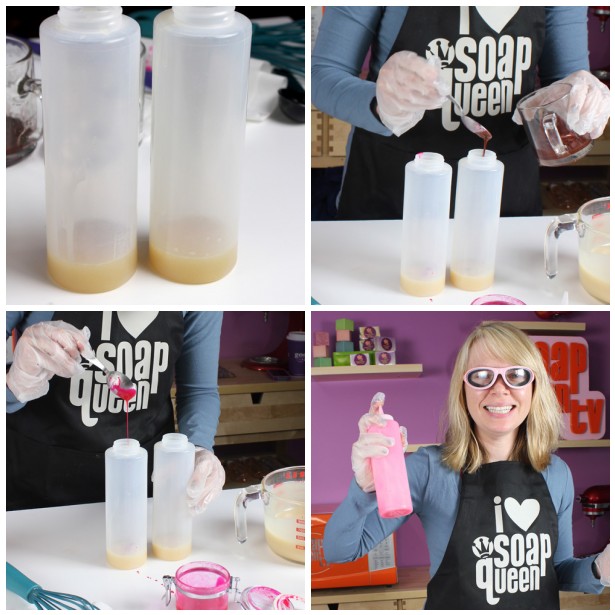
FOUR: Pour about 1 ounce of the soap mixture into two different squirt bottles and add your colorant of choice to each. Put the caps on, cover the open tops with your finger and shake the bottles to mix. Set the colorant bottles aside until the very end.
Coloring Tips: I premixed 1 Tablespoon of Sweet Almond Oil to 1 Teaspoon of Cappuccino Mica, then added 1/4 Teaspoon of that mixture to the 1 ounce of soap batter. For the pink I used a premixed concoction of 1/3 Cup of Liquid Glycerin to 1/2 teaspoon of Bubble Gum Colorant, then added 1/4 Teaspoon of that mixture to 1 ounce of soap batter. Check out a tutorial on mixing your Neon Colorants HERE .
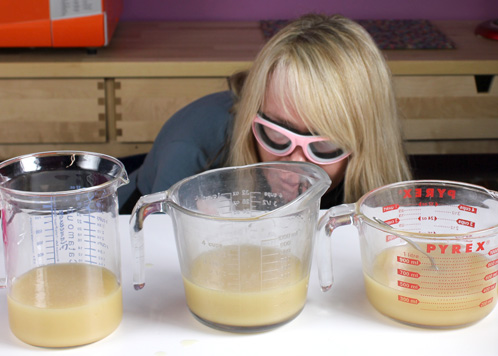
FIVE: Back to our soap batter! Even disperse the soap into three separate containers. There should be 1 1/2 cups (by volume) per container.
SIX: To the first container of soap, add .8 ounces of Dark Rich Chocolate Fragrance Oil and 3 mini scoops of Cappuccino Mica. Mix with a stick blender for 20-30 seconds until you reach a thick trace and pour the soap into the mold. Tap the soap mold down on the counter to get rid of any air bubbles and smooth out the surface of the soap.
TIP: Quickly rinse off your stick blender or, if you’re like me and have multiple stick blender attachments, switch out the blender attachment before the next color.
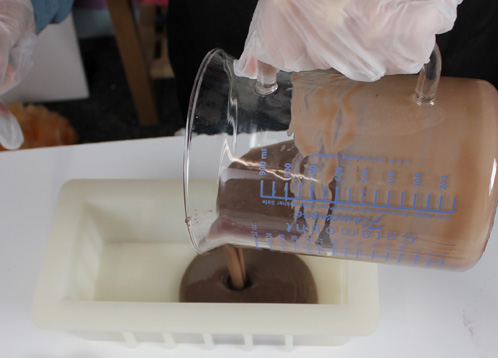
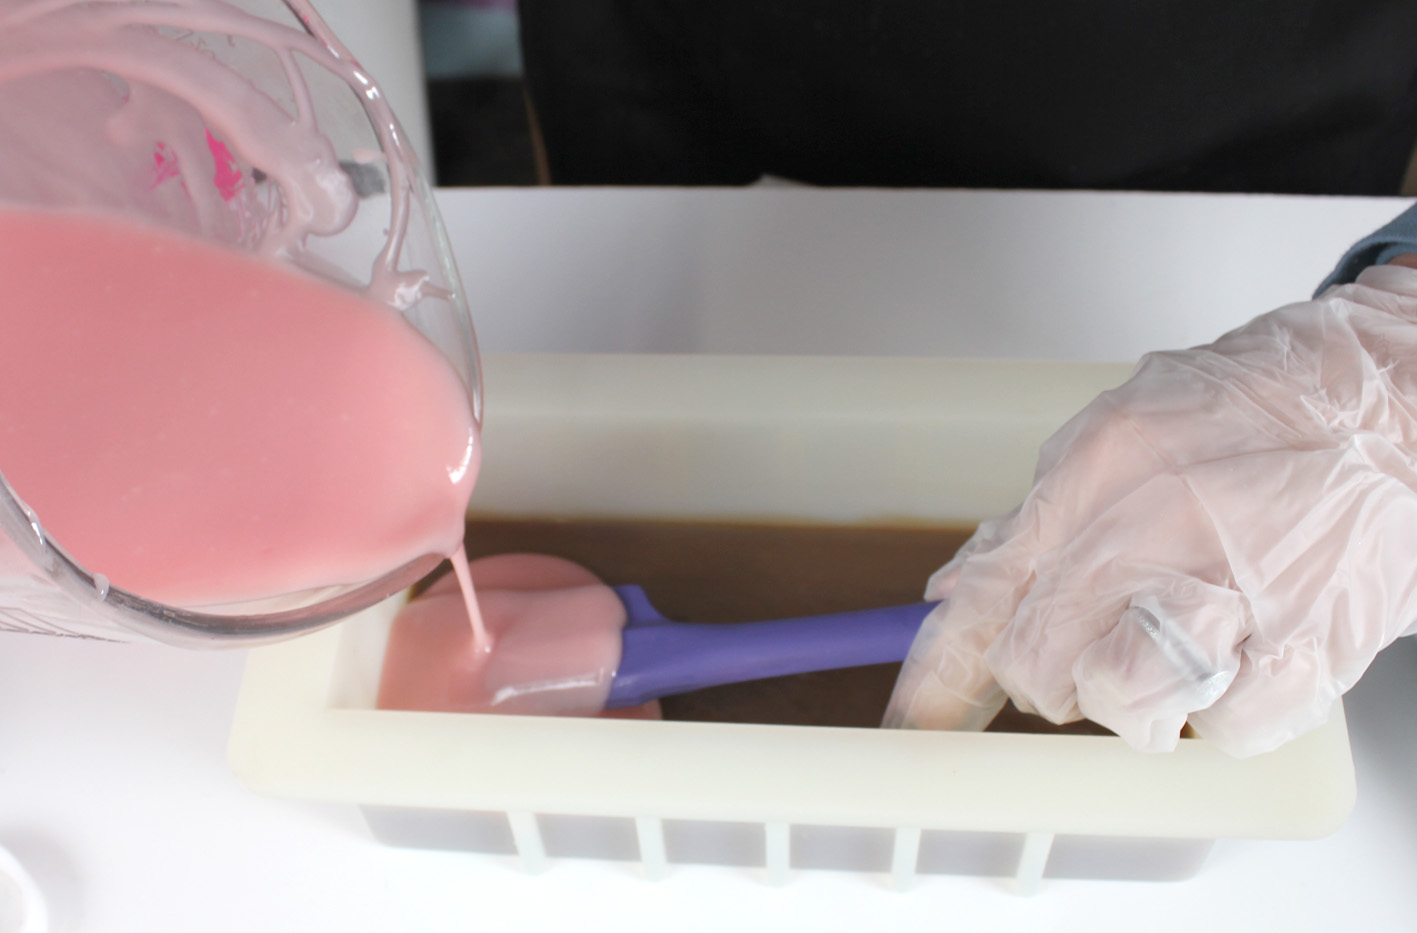
SEVEN: To the second container of soap, add .4 ounces of Strawberry Fragrance Oil, .4 ounces of Sun Ripened Raspberry Fragrance Oil and 1/2 Teaspoon of the Bubble Gum Colorant mixture. Mix with a stick blender for 20-30 seconds until you reach thick trace. Pour the pink soap on top of the brown layer but over a spatula so it hits the first layer of soap gently preventing a “break through”.
TIP: Again, quickly rinse off your stick blender or change the blender portion before the next color.
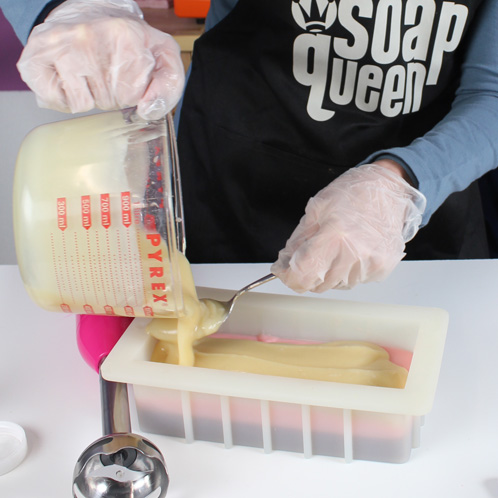
EIGHT: To the last container of soap add .8 ounces of Non-Discoloring Vanilla Fragrance Oil and 4 mini scoops of Super Pearly White Mica. Because this particular fragrance oil has a tendency to accelerate trace, whisk in the colorant and fragrance oil together then pour the final layer of soap using the “spoon trick”.
NINE: And now for the fun and creative part of the project! Use the squirt bottle to create randomly spaced dots of pink and brown all over the top of the soap.
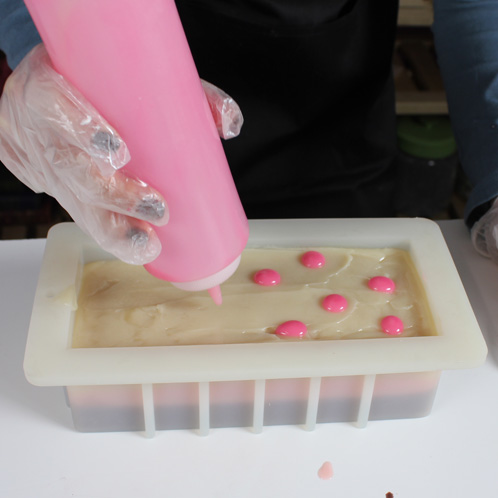
TEN: Then use your skewer to drag through the circles turning them into hearts. Just connect the dots . Unsure of how to connect the dots? Watch this tutorial if you want to see the magic it in action!
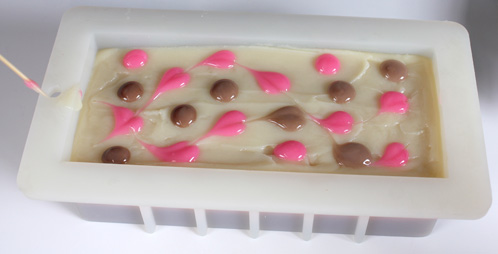
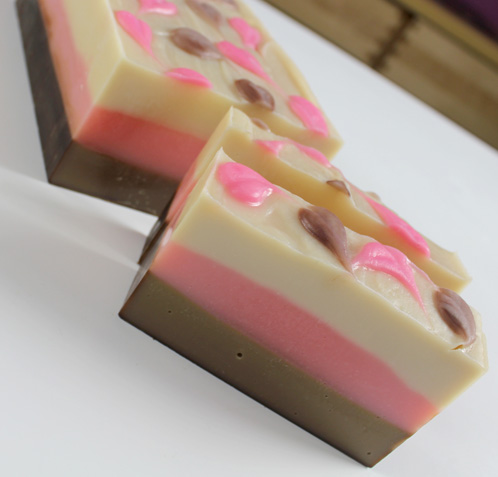
Let this soap harden and cure for 4 to 6 weeks before using it or giving it away. It looks and smells just like a wonderful icy Neapolitan treat!



This is gorgeous! I was working on the order, and just had a couple of questions: can I substitute mango butter for the cocoa butter? can I leave out the chocolate mica since the chocolate FO appears to give the soap a nice chocolately color? can I use sweet almond oil for the pink bubblegum mica or does it need to be the liquid glycerin? Thank you so much in advance for your help! 🙂
Good morning, Karly!
The Cocoa Butter in this recipe is actually a harder butter and taking it out would change the consistency of this recipe. But, because it is such a small amount, you can leave it out. Be sure to run your recipe through the lye calculator (sans Cocoa Butter) so that you can make sure and have the correct lye & water amounts for your recipe.
Lye Calculator: https://www.brambleberry.com/Pages/Lye-Calculator.aspx
You can totally leave the mica out if you want to use the natural discoloration of Dark Rich Chocolate in this particular recipe.
When dispersing oxides and pigments (like the Electric Bubble Gum), you can used any fixed oil you have on hand, either Sweet Almond Oil or Olive Oil will work.
Sweet Almond Oil: https://www.brambleberry.com/Sweet-Almond-Oil-P3205.aspx
Olive Oil: https://www.brambleberry.com/Olive-Oil-Pure-P5246.aspx
I hope that this helps! Let us know how it turns out. 🙂
Happy Soaping!
-Becky with Bramble Berry
Hi Becky!!! Sorry I missed that you’d replied, and just saw this. Thanks so much for your help:):)
Can this soap tutorial be tried with the melt and pour process?
Great question! While the layered look of the body of this soap is easily duplicated with melt and pour, the hearts on top will unfortunately most like not work. Melt and pour lacks the viscosity needed for this heart technique.
Kristen with Bramble Berry
Hi Anne-Marie
At step 6, I wonder if you add 3 mini scoops of Cappuccino Mica to the 1st container directly or you mix mica with oil before adding to the container?
Hi Annie!
You can either add your mica to your oil before adding it to your container or you can add it directly to the container. In this case it’s just a matter of preference as micas typically blend quite well into soap. 🙂
If you are having problems with your mica blending in, just try whirring your stick blender a bit and it should mix it right in!
-Becky with Bramble Berry
Hi Anne-Marie,
I absolutely adore this soap. It’s delectable! I must try it soon. You’re awesome and super talented. Thanks so much for sharing!
I love your Neapolitan CP for Valentine’s Day, and I will try to do it. Tks
Isn’t it fantastic! I think it’s a perfect gift for Valentine’s Day!
-Becky with Bramble Berry
Hello , please make a video tutorial how to make this. my english is not the best so the text is kinda complicated.
I’m so glad you like the recipe! We do not have a video tutorial on this right now, but you can use Google Translate to translate this page!
http://translate.google.com/
-Becky with Bramble Berry
What a great idea. Making the hearts on top is such a simple concept and is so effective. I like the color scheme. In the past I have an organic cocoa powder when making a brown colored soap, it worked very well.
Cheers
Cody Wellard
I love this technique! You’re right; simple and effective =)
Lovely…they are just too adorable.
I am trying to follow your recipe, but the quantity of water and lye I have ti use according to Soapcalc is a different one. How much water as percent of oils do you use? Thanks.
Water is 30-35% as a percent of oils. Could it be the superfat amount that is making the difference?
Well boooohoooo!! 🙁 I just finished un-molding this and the chocolate layer totally separated from the pink. The white layer is hard and the pink and brown are softer. I used the exact ingredients and the same mold you did Anne Marie. Everything to the tee! This is my first try at layers and my first batch of soap that I have failed. I sure hope I can figure out what to do with it so it’s not a waste. This was an expensive one to make.
It’s tough to say what happened with the first two layers without seeing the soap but you could cut up the soap layers and embedd into another soap – that would be super cute when it was cut.
The only time I get separating layers with my soap is when one layer isn’t fully traced so it’s a little oily – that little bit of oiliness can wreck havoc.
So, you could cut bar soap from the two layers that stuck together and just use the chocolate layer to put into another bar of soap as fun and interesting color pop? Or you could put all three colors in.
Let me know what you think. I want to help you save your soap – one way or another =)
Would it be a trace issue if I mixed the whole thing and split it up after? Or the addition of the colorant that had to be mixed with the added glycerin and sweet almond oil that could make it oily? I went step by step exactly by your recipe. All is not lost though.. only a few of the bars came apart (then ends) and the middle ones seem to be ok. They are drying and we will see how it goes. I will use the scraps for adding to another batch. I used the left over soap from the squirt bottles to make hearts for my cupcakes 🙂 I probably won’t try layering again for a while. I will stick to solids and swirls.. lol 🙂
May I ask where you get those glass beaker pitchers?
The beaker? IKEA (!!!) Go figure. I wish I had purchase the entire store worth. They are amazing!
Hi,
Did you add any titanium dioxide? My uncolored soap wasn’t as white as yours. Thanks for your help.
I used the Super Pearly White mica which is basically a finely ground form of titanium dioxide to get it extra white. I believe I put that in the instructions. Shame on me if I didn’t! =)
Cool 🙂 Thanks!
Love it!! So have to go try it but I don’t have Rice Bran oil on hand what would be a good substitute?
Canola or Sweet Almond oil would be good sub. Be sure to run the recipe through the lye calculator again. I’d love to see your results! ~ Amber
These are cute as a button! You’ve inspired me to do a little valentines day project.
Thanks!
Erin
These turned out SO CUTE!!! If I hadn’t already made my Valentines soaps, I might be tempted to try this!!
Thanks so much for sharing your technique! Can’t wait to try it!
Looks lovely 🙂
Wow, try not to bite into that bar!
Love it!
What is the secret to keeping the Dark Chocolate FO from turning the pretty pink layer brown too?
It will eventually turn the pink layer brown – I just took the photo before it did! =) But it’ll take a couple months! =)
Beautiful!! I have stuck to my tried and true recipe from you that I got with my Bramblebery soap making kit but this ones sounds nice too!
Just to make sure-it is .8 oz Cocoa Butter??
Thanks!!
It’s definitely .8 ounces (point eight) – a small amount =)
So very pretty! It’s beyond my ability right now, but I can’t wait until I can make this. 🙂
It will be in your ability soon enough =) Just keep practicing. You can do it!
I love this soap! I can’t wait to try it. Thank you for sharing–you are such an inspiration!
Lovely! Do you cover up the soapbatch while it hardens, to get it through gelphase evenly? I poured cp soap into individual molds recently, and didn´t cover, and the middle part of the soapbars looked almost transparent afterwards.
I put a cardboard cover on it and then let it sit out in a normal room temperature room. It went through gel phase evenly which was nice. Some of that was pouring at a warmer temperature (120-140) so that definitely helps. Yes, gel phase does look different in soap than non gel phased soap. A little shiner. A little more translucent.
I love this Anne-Marie! Thank you so much for sharing xx
I love that you share these tutorials with us. You have such great ideas! I’d like to suggest that you post these with a printable version. I’m sure I’m not the only one that likes to copy your ingredients and instructions!!!
Could this be done with melt and pour too?
What a fun project! And I love the sweet heart design on top. Wow, you work fast with that CP, great photos. And the pink goggles? To die for!
The key to working fast is to have everything set up ahead of time! I have learned way too many times … the hard way! =)
These look great! Could something similar be done using rebatch base?
Will they be available for purchase on the SoapQueenLab etsy site?
Thanks Lori!
Yes, they will be for sale in the SoapQueen Etsy shop but they need a couple more weeks cure time. I got a bit behind with the SoapQueen projects over the holidays (go figure).
Yes, you can do rebatch base – definitely. I did some layered rebatch here: http://www.soapqueen.com/personal-ramblings/rebatching-can-be-sweet-redux-2/
I love the way the fresh CP looks. Just personal opinion, but it looks so much more smooth and neat and clean than the rebatch. That’s just me.