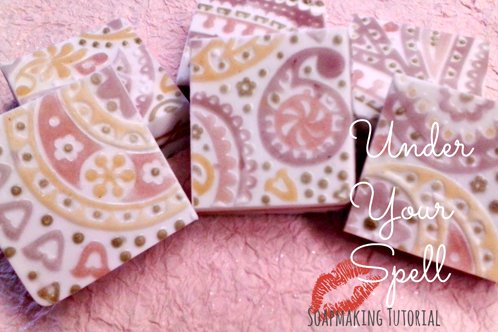
Have you used Bramble Berry’s new Brazilian Clays yet? Otion did and they came up with this fabulous Paisley Melt and Pour Soap that was done exceedingly well. Read on to be inspired and learn how they made it.~A-M PS – This injector tool is the secret weapon of many talented melt and pour artists.
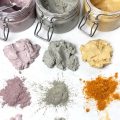
We’re head over heels for these lovely clays, and they’re a perfect for those romantic and sultry colors. We used the Paisley Tray Mold and a Syringe Injector to do the detail work with the purple, yellow, dark red Brazilian clays and heavy metal gold for some sparkly touches.
Ingredients:
1 lb Aloe Vera Melt and Pour Base
Click here to add everything you need for this project to your Bramble Berry shopping cart!
ONE: Cut up and divide your aloe base into 4 mugs. We’ll work with the colors one at a time, so melt one mug and add 1/4 tsp of your first color clay and 3 ml of Lovespell fragrance. Mix well! Use the injector tool to fill in the areas you like, remembering that you’ve got 3 other colors to work with, so don’t fill in everything! You can always go back and change your mind later, so don’t worry too much.
Tip: To see your details better, put your mold on top of a white piece of paper!
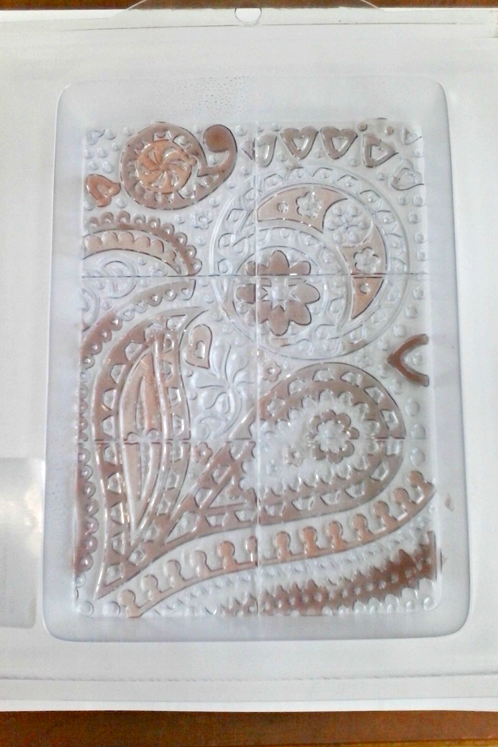
Repeat with the rest of your colors until all the detail cavities are filled. Wait for them to cool, and spray liberally with alcohol.
You should have quite a bit of colored soap left over; don’t worry, we’ll use it up!
TWO: Melt 4 oz of shea soap base carefully. We don’t want it too hot, or it’ll melt all that detail work! It should not be steaming, but rather should be cool enough to have formed a thin skin (just like pudding!) on the top of the container. Stir in the skin to melt it, and spray you detail work with alcohol. Pour the shea soap over your details. Allow to harden fully, and spray with rubbing alcohol before the next step.
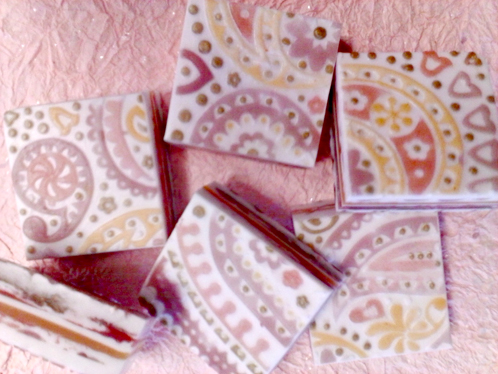
THREE: Melt back down all your other colors and remnants, and the rest of your shea soap base (12 oz). Add an additional 1/2 oz of fragrance to the melted shea soap. Alternate pouring white with your colors before each layer has hardened fully for a swirled effect, or allow each layer to harden before pouring the next to get crisp layers. (I found I didn’t have enough soap left over to do complete layers).
If you only have a tiny amount of a color left over, like I did with my purple and gold, drizzle over a white background randomly for a lovely marbled effect. Whatever you do, you’ll have color all through your soap so it never gets boring once the design has washed off!
Tips and Tricks:
1. Have a cup of very hot water around to clean out your syringe. Clean it often with the hot water to prevent soap from clogging it up!
2. Patience, patience, patience! Don’t worry about coloring outside the lines, because you can always clean it up later with a tooth-pick or scraper tool. But don’t rush things! If your soap is too hot when you try to use it with the syringe, it will squirt out in big, hard to control puddles.
3. Have fun! This is your work of art, and it’s a great way to spend a rainy afternoon and practice your soap art skills.


Hi there!
Thanks so much, I’m happy to hear you liked this post!
-Amanda with Bramble Berry
Beautiful! I think I’m going to make these for Christmas gifts with red clay and some sea clay to get a green in there. These are really special looking, hopefully my family and friends will agree
Hi Amanda!
That is going to be a lovely gift, your family and friends are just going to love it. If you get a chance to get any photos, be sure to share them with us on Bramble Berry’s Facebook page.
Happy Soaping!
-Becky with Bramble Berry
https://www.facebook.com/BrambleBerry
I am excited to try this. I am somewhat sad that I didn’t notice the injector tool wasn’t included in the “click here to buy everything you need” button. Would a medicine syringe, though clunky, work or should I just order the tool and be more patient? I love paisley!
Hi Judy!
Thanks for the eagle-eyes on the injector tool, we are actually fixing it up so that it is included it the kit now. We’ve never used a medicine syringe for this project, so you could try it out to see if it works for you. But, I would definitely invest in the injector tool as it is great for so many different soapy projects. =)
-Becky with Bramble Berry
Injector Tool: https://www.brambleberry.com/Injector-Soap-Tool-P4660.aspx
This look is right up my ally! I have seen these molds on BB, but never could figure out if they would hold up to cold process soap….Do you know?
Thanks
Hi Susie!
You can actually use these molds for both cold process and melt & pour. Just be aware that if you use them for cold process they may be a little harder to pop out than melt & pour. If you get a chance to use this mold with cold process, be sure to let us know how it turns out for you. =)
Happy Soaping!
-Becky with Bramble Berry
Those are gorgeous! The colors, the detailing, love it!
Good morning!
This is such a fun project and one of the gals in our office actually made her own version of it last night. We hope you get a chance to try it out! =)
-Becky with Bramble Berry
That’s gorgeous. Detailed work like that is a love hate relationship for me, I love how it looks when it’s done, but I curse all the mistakes I make along the way. 🙂
Hi Monica!
Don’t we all curse those little mistakes along the way? 😀 If you try this project out, we’d love to see how it turns out for you!
-Becky with Bramble Berry
Thanks Becky! I’ll have to do a lot more practicing first. 🙂
~~~~ A d o r a b l e s !!!….♥
Hi Maria!
We are so glad that you like it and I know you are going to figure out some fun way to include these clays in your designs. =)
-Becky with Bramble Berry
Just Gorgeous!
Hi Cyndi!
Thanks for stopping by — we are totally in love with this project from Otion and hope you get a chance to try it out. =)
-Becky with Bramble Berry
Those are amazing! I was literally JUST scouring the archives to get an idea on the best way to use clay with M&P. By the time I finished reading the first “Talk it out Tuesday” post, which had info about clay use in it, this post was on my main screen and I shrieked with happiness. Thank you for, unknowingly, being in my head LOL
Good morning, Michelle!
We are so glad we could give you a tutorial that works perfect for you! If you are looking for other clay tutorials, here are a few that I think you would just love:
Natural Eco Chic Soap on Soap Queen TV: http://www.soapqueen.com/bath-and-body-tutorials/melt-and-pour-soap/natural-eco-chic-soap-on-soap-queen-tv/
Natural Colorants for Melt and Pour Soap: http://www.soapqueen.com/bath-and-body-tutorials/melt-and-pour-soap/natural-colorants-for-melt-and-pour-soap/
Would You Like Some Bamboo With That?: http://www.soapqueen.com/bath-and-body-tutorials/melt-and-pour-soap/fresher-than-fresh-bamboo/
I hope this helps out!
-Becky with Bramble Berry
These are BEAUTIFUL!!
Hi Ginger!
We thought so too and was so excited that Otion allowed us to repost this tutorial. I really love the pop of color that the Brazilian Clays give this soap. =)
-Becky with Bramble Berry
https://www.brambleberry.com/Brazilian-Clay-Sampler-P5510.aspx