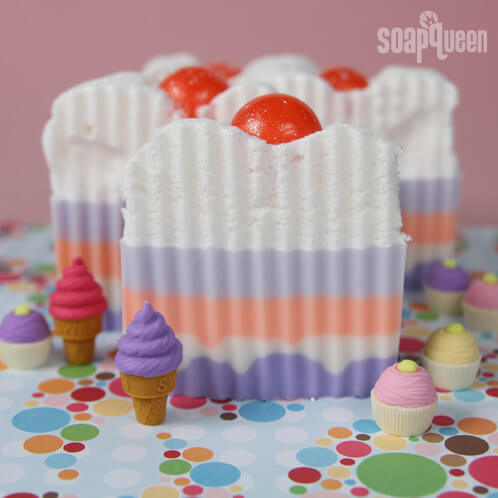
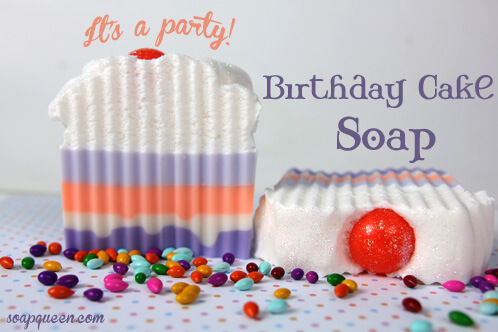
Who doesn’t love birthdays? There’s always plenty of sweets, frivolity and maybe even a few presents. Best of all, birthdays are opportunities to get together with family and friends to celebrate! Of course, no birthday is complete without a birthday cake. This fun (obviously Lily-inspired) Birthday Cake soap was adapted from a tutorial our friend Debbie of Soapy Love did several years ago, and we’ve added a few special twists of our own. A little frosting, plenty of glitter and lots of bright, deliciously scented layers will make this cake a hit at any party.
What You’ll Need:
For the cherries
6 oz. ClearMelt & Pour base
For the cake
46 oz. White Melt & Pour base
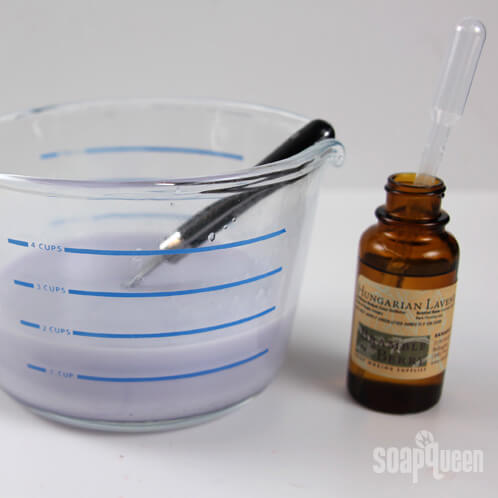
12 mL Hungarian Lavender Essential Oil
5 ml Buttercream & Snickerdoodle Fragrance Oil
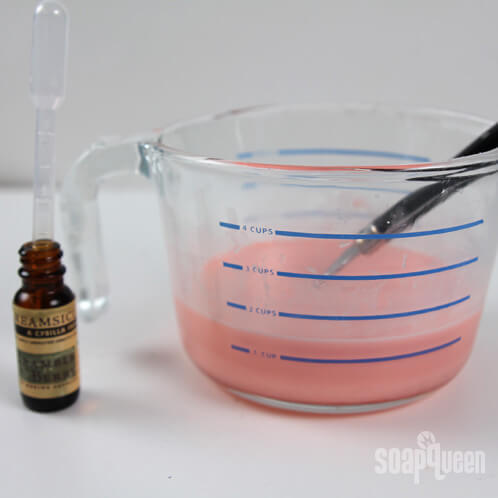
7 mL Creamsicle Cybilla Fragrance Oil
Ultramarine Violet Color Block
For the frosting
8 oz. White Melt & Pour Base
2 oz. Liquid Castile Soap Base
3 mL Buttercream & Snickerdoodle Fragrance Oil

Click here to add everything you need for this project to your Bramble Berry shopping cart!
Part One: Make the Cherries
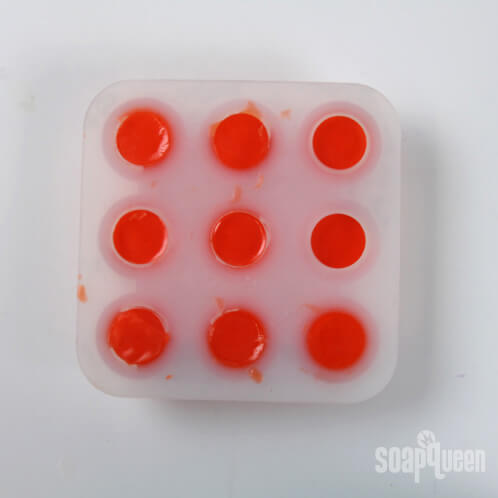
ONE: Cut 6 oz. of Clear Melt & Pour into small cubes and put into a heat-safe container. You can also cut up the Perfect Red color block and add them to the cubes. Color blocks are WYSIWYG, so add more of the block for a darker color. Note: The Perfect Red color block is a non-bleeding color. That’s important for this design. Not sure what “Non-Bleeding” means? We have you covered here with an explanation.
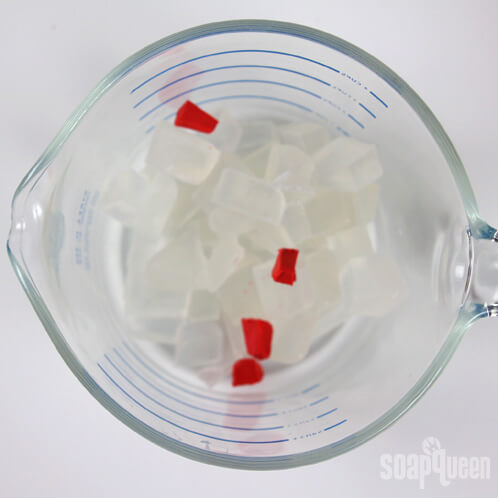
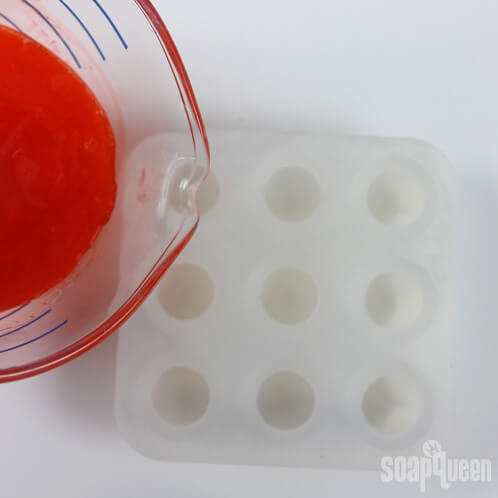
TWO: Melt the soap on 30 second bursts, stirring between each heat. Once the soap chunks are fully melted and the colorant is incorporated, pour into the silicone mold.
THREE: Spray the soaps with isopropyl alcohol and allow to sit for 1 – 2 hours before unmolding.
Part Two: Make the Cake
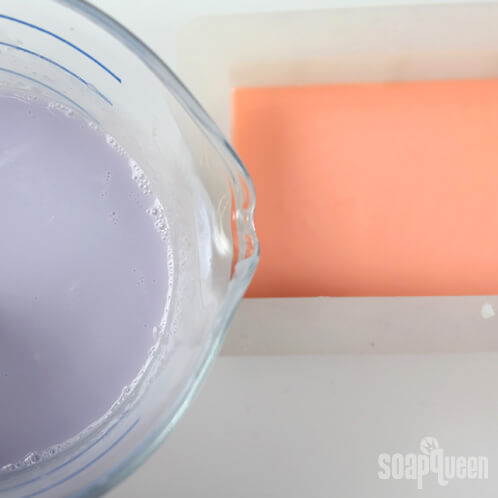
ONE: Cut and melt 12 oz. of White Melt & Pour base in a heat safe container. Heat the soap on 30 second bursts, stirring between each heat. Shave off chunks of the Ultraviolet Color Block and add into the mixture until you reach your desired color. Add 4 mL of Hungarian Lavender essential oil and stir until the oil and color have been fully incorporated into the soap.

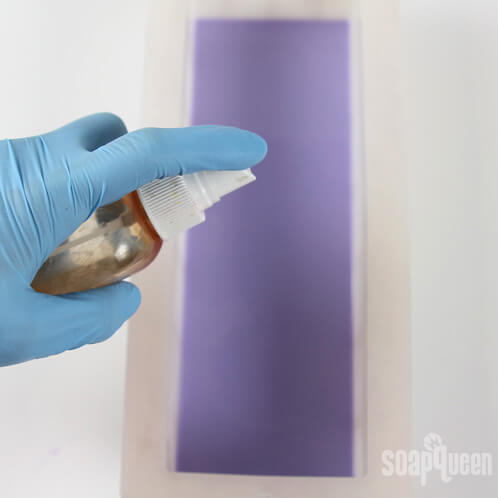
TWO: Pour the lavender soap into the loaf mold and spray liberally with isopropyl alcohol.
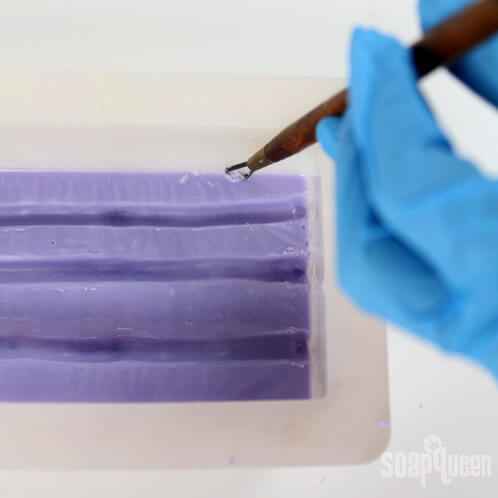
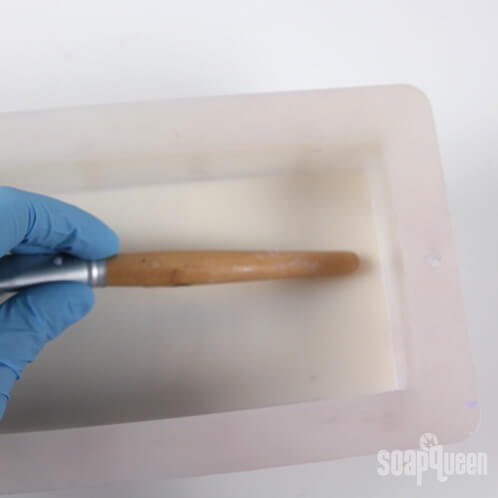
THREE: Allow the soap to form a thick skin on top but remain soft enough so that you can push a dent into it with your finger. Using an object with a blunt end, make grooves in the soap from end to end. We used the end of a paint brush to make three grooves. Use a clean up tool to tidy up the grooves or any soap that ended up on the sides of the mold.
FOUR: Set the mold aside and start making the second layer. Cut and melt 8 oz. of White Melt & Pour base and add 5 mL of ButterCream & Snickerdoodle Fragrance oil. Because this oil contains vanillin — which discolors soap — add 5 mL of Vanilla Color Stabilizer to keep the soap white. It’s important to do the layers quickly one right after another as soon as the first layer is hardened to give the layers the best chance of adhering to one another.

FIVE: Spray the purple layer with isopropyl alcohol, and then pour the white layer. Be sure the lavender soap has hardened to the point where the white soap wont break through.
SIX Once the white layer has solidified but not fully hardened, use the same technique as before to make grooves in the white soap.
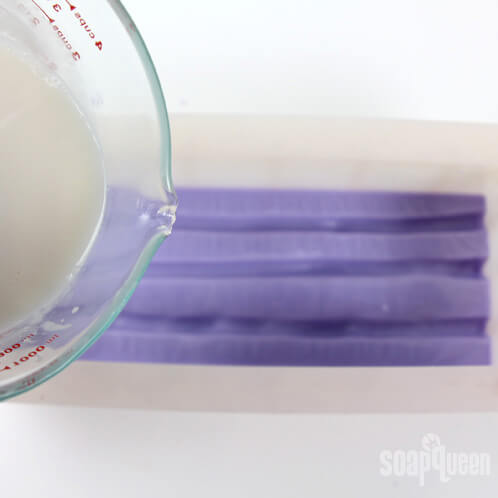
SEVEN: Cut and melt 12 oz. of White Melt & Pour base in a heat safe container. Heat the soap on 30 second bursts, stirring between each heat. Shave off chunks of the Tangerine Wow color block and add into the mixture until you reach your desired color. Add 7 mL of Creamsicle Cybilla fragrance oil and stir until the oil and color have been fully incorporated into the soap.
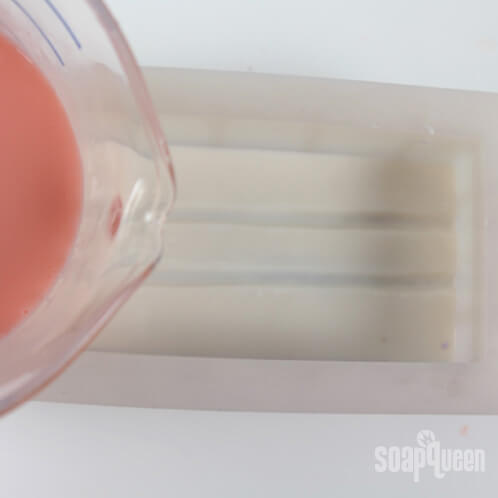
EIGHT: Spray the white layer with isopropyl alcohol, and then pour the orange layer. Be sure the white soap has hardened to the point where the orange soap wont break through.
NINE: Cut and melt 14 oz. of White Melt & Pour base in a heat safe container. Heat the soap on 30 second bursts, stirring between each heat. Shave off chunks of the Ultramarine Violet color block and add into the mixture until you reach your desired color. Add 8 mL of Hungarian Lavender essential oil and stir until the oil and color have been fully incorporated into the soap.
TEN: Spray the orange layer with isopropyl alcohol, and then pour the lavender layer. Be sure the orange soap has hardened to the point where the lavender soap wont break through.
Part Three: Make the Frosting
ONE: Cut and melt 8 oz. of White Melt & Pour base. Pour into a larger container, and then add 2 oz. of Liquid Castille Soap Base.
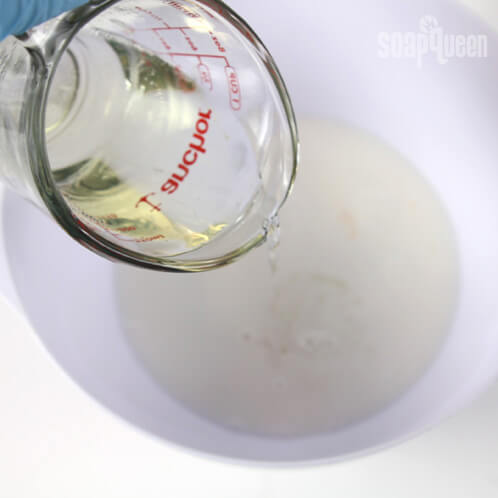
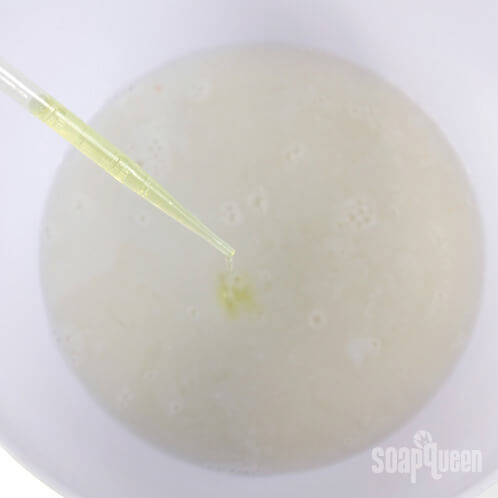
TWO: Add 3 mL of Buttercream & Snickerdoodle fragrance oil. Because this oil contains vanillin — which discolors soap — add 3 mL of Vanilla Color Stabilizer to keep the frosting white.
THREE: Whip the ingredients together with a hand mixer. Start out on medium, and turn up the speed to high after one minute. Mix until the frosting forms peaks.
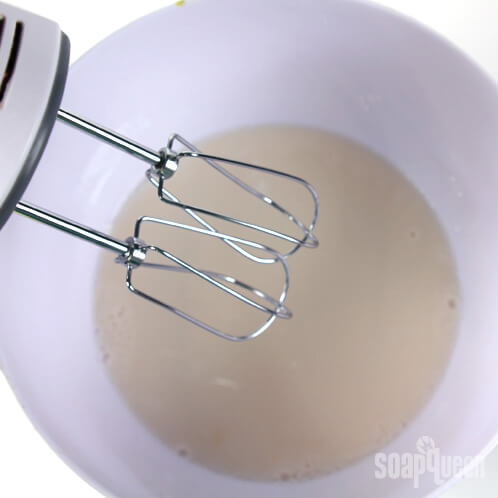
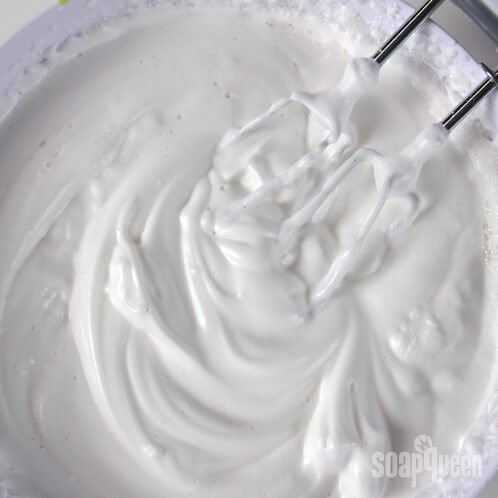
Tip: This mixture will foam up and grow very quickly! Spray with a bit of isopropyl alcohol as you mix to keep it from flowing over the sides of the container.
FOUR: Use a spatula to quickly frost the top of the soap.
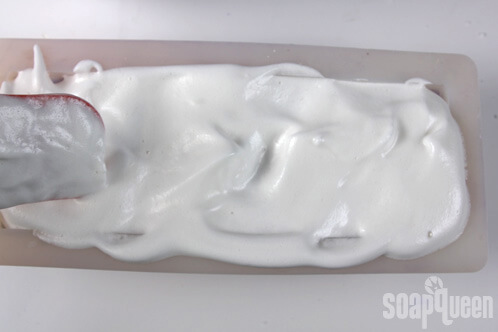
FIVE: Wait a few minutes for the frosting to firm up before placing the cherries.
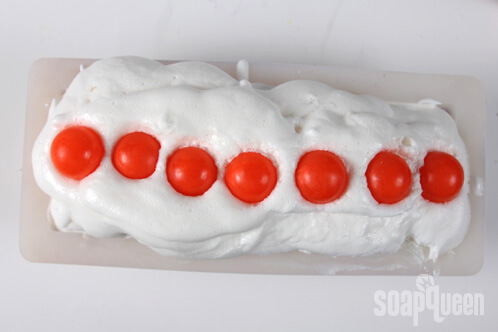
Finish off with a little iridescent glitter on top and you’ve got yourself a soap that looks good enough to eat!