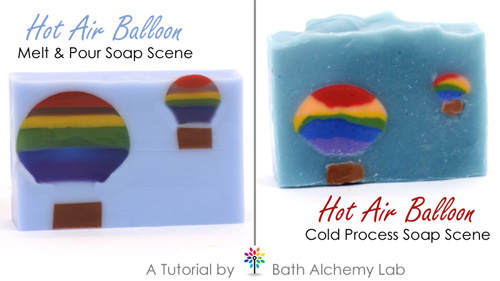
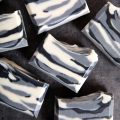
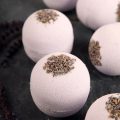
Erica Pence from Bath Alchemy makes beautiful soap and shares a wide variety of soapy tutorials on her blog. Today, Erica is sharing a tutorial for colorful Hot Air Balloon Soap! Below are the instuctions to make this soap using melt and pour, but as you can see from the photo below, it’s possible to use cold process as well. -AM

What You’ll Need:
10” Silicone Loaf Mold
4” Silicone Loaf Mold
Small 9 Ball Silicone Mold
Large 9 Ball Silicone Mold
Squeeze Bottle
48 oz. White Melt and Pour Soap Base
16 oz. Clear Melt and Pour Soap Base
Perfect Red Color Block
Perfect Orange Color Block
Yellow Oxide Color Block
Chrome Green Color Block
Ultrmarine Blue Color Block
Ultramarine Violet Color Block
Brown Oxide Color Block
2 oz. Sweetgrass Fragrance Oil

TWO: Use the squeeze bottle to layer the soap colors in the spheres starting with red on the bottom and working your way to purple on top. You will need to allow each color of soap to solidify before adding the next color. Be sure to spritz each layer with isopropyl alcohol so the next layer sticks. Make only 6 large spheres and 9 small spheres.
THREE: Melt down 2 oz. of clear soap, and add shavings of the Brown Oxide Color Block. Pour the brown soap in the 4” mold and spritz with alcohol to disperse any bubbles.

FIVE: Once the balls have hardened completely, use a knife or vegetable peeler to carefully shape the cool colors of the sphere (the lower half) to resemble a balloon. You might want to look at pictures online. Notice that the first balloon on the right is shaped, and the second balloon is left as is.
 SIX: Cut your brown soap pieces into rectangular ‘baskets’ that are proportional to each sphere. Place your large spheres on the outside of the mold where they will be placed in the mold ready to go. Do the same for the small balloons on the other side of the mold.
*This is to act as a visual guide for the basket placement, and it is CRITICAL so don’t skip this step, as you will be working blind.
 FIVE: Melt 48 ounces of white soap base. Add a small mount of the Ultramarine Blue Color Block and fragrance. Do this all at once in a large microwave safe bowl, so you do not have to try to keep the blue the same shade in each layer. You will repeatedly stick this same blue soap in the microwave throughout this process.
SIX: Pour a thin layer of soap into the mold. In a row on one side, place the large baskets in a line spaced evenly apart about where they should be to rest beneath a balloon. Add a very thin layer of blue over the baskets and allow to cool.
SEVEN: You are now blindly placing the large balloons over the baskets, which is why you laid them out next to the mold. Do not press down. Simply rest them in a line. Do NOT place the balloons right up against the inside mold wall. You want the balloons fully embedded without having to fight to get the blue soap to surround it.
 SEVEN: Pour a thin layer of soap into the mold. In a row on one side, place the large baskets in a line spaced evenly apart about where they should be to rest beneath a balloon. Add a very thin layer of blue over the baskets. You will need to cool and set between each layer.

EIGHT: Fill the mold halfway with the blue soap, slowly and carefully. Note the large balloon will only be half submerged at this point. Line up the little baskets in a line on the opposite side of the mold.
Note: Don’t forget that each time you pour a new layer, you need to let it cool and set before moving on. Just pop your bowl with blue soap back in the microwave when you are ready. Be sure to spritz each layer with rubbing alcohol. Add a very thin layer of blue soap to cover the little baskets.
NINE: Place the small balloons over these baskets. Carefully add the remaining soap. Allow to completely cool and set before cutting and enjoy!
If you would like a video demonstration or are looking to learn more about Erica’s soap, feel free to check out her online scenery soap class – click here.
If you make a hot air balloon soap in any style or colors, feel free to submit a photo of Erica’s blog, or on our Facebook page!
Find Erica:
Bath Alchemy Lab
Soap-Blog


Wow! That is way cool and so creative. Thanks for sharing this, Erica!
Hi Jenny!
Isn’t it fun? So happy you like it. 🙂
-Kelsey with Bramble Berry
Wow! That’s the neatest! Can wait to try doing it myself 🙂
Hi Pam!
So glad you like it! 🙂
-Kelsey with Bramble Berry