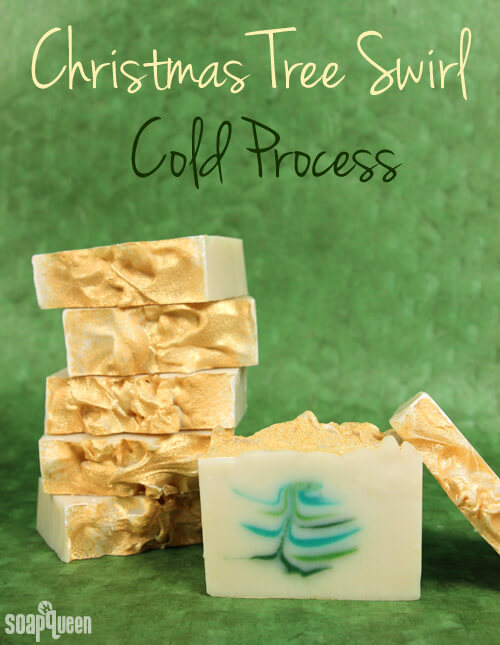
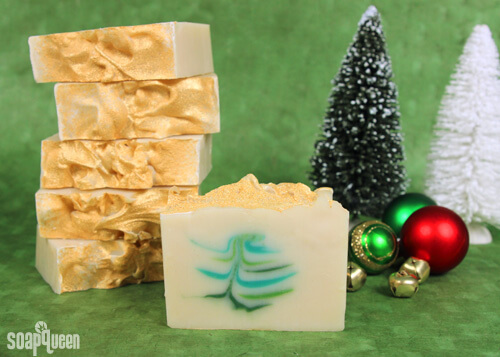
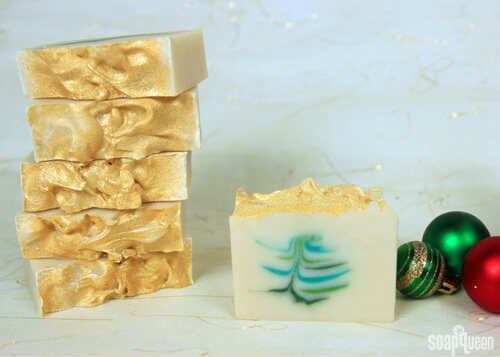
Handmade cold process soap makes a fantastic gift. Everybody loves the beautiful designs, fun colors and skin loving properties. Because many people have never experienced handmade soap before, it’s extra fun to give! This festive Christmas Tree Swirl Cold Process features a reverse hidden feather swirl, made popular by Handmade in Florida. Topped with Sparkle Gold Mica, this cold process project would be perfect under the tree.
Cold process soap requires a four to six week cure time, making now the optimal time to create soap for the holidays. If you are looking for more holiday project ideas, check out the Handmade Holiday Gift Inspiration post. From lip balm to melt and pour, there is a gift for everybody on your list.
What You’ll Need:
1.8 oz Avocado Butter
10.2 oz Canola Oil
1.8 oz Castor Oil
14.4 oz Coconut Oil
13.2 oz Olive Oil
14.4 oz Palm Oil
1.2 oz Palm Kernel Flakes
3 oz Sweet Almond Oil
6.44 oz Sodium Hydroxide
15.1 oz Distilled Water
3.5 oz Christmas Tree Cybilla Fragrance Oil
Sparkle Gold Mica
5 lb Wooden Log Mold with Sliding Bottom
Silicone Liner for 5 lb Wood Mold

 If you’ve never made Cold Process soap before, stop here! I highly recommend checking out our FREE four part SoapQueen.tv series on Cold Process Soapmaking, especially the episode on lye safety. And if you’d rather do some reading, Bramble Berry carries a wide range of books on the topic, including my newest book, Soap Crafting. You can also checkout the digital downloads for that instant gratification factor.
SAFETY FIRST: Suit up for safe handling practices! That means goggles, gloves and long sleeves. Make sure kids, pets, and other distractions and tripping hazards are out of the house or don’t have access to your soaping space. Always soap in a well-ventilated area.
COLOR PREP: Disperse 1 teaspoon of each colorant into 1 tablespoon of sunflower or sweet almond oil (or any other liquid oil). Use a mini mixer to get the clumps of color worked out smoothly.
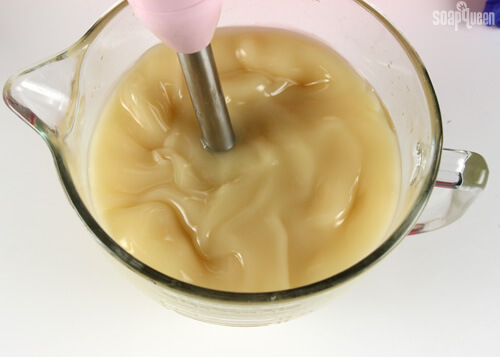
ONE: Slowly and carefully add the lye to the water and gently stir until the lye has fully dissolved and the liquid is clear. Set aside to cool.
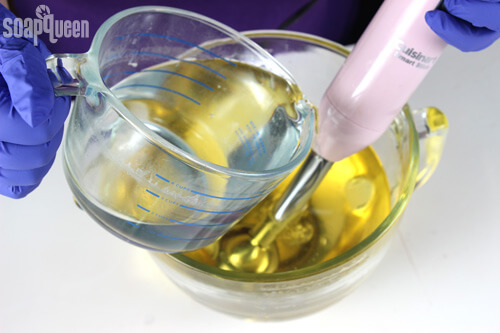
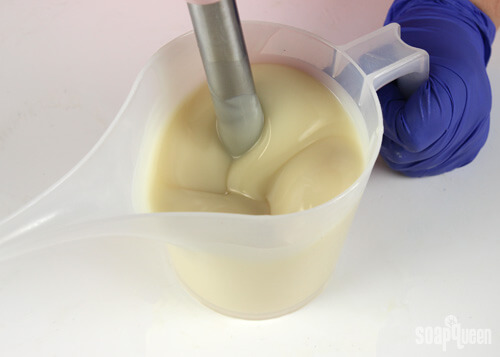
TWO: Fully melt and combine the coconut, olive oil, canola, castor, avocado, sweet almond, palm kernel flakes and palm oils (remember to fully melt then mix your entire container of palm oil before portioning). Once the lye water and the oils have cooled to 130 degrees or below (and are ideally within 10 degrees of each other), add the lye water to the oils and stick blend until thin trace. If you’d like a harder bar of soap that releases faster from the mold, you can add sodium lactate to the cooled lye water. Use 1 teaspoon of sodium lactate per pound of oils in the recipe. For this recipe, you’d add about 5 tsp. sodium lactate.
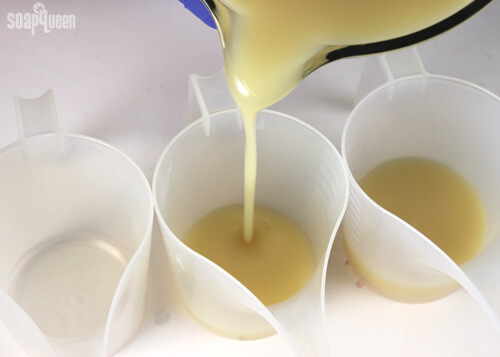
 THREE: Once you have reached a light trace, pour 100 mL of soap into 3 small containers.
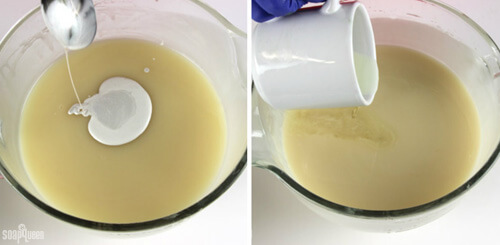
 FOUR: To the large container of soap, add 2 tbs. of the dispersed Super Pearly White Mica and 3/4 of the Christmas Tree Fragrance Oil. It’s okay to eyeball it! Use a whisk to thoroughly combine the pigment and colorant. Pour 500 mL of this soap into a separate container and set aside. This soap will later become the top. Portioning out this soap now ensures you will have soap left for the top!
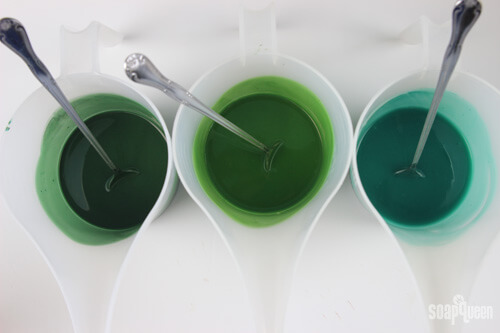
 FIVE: To one 100 mL container, add 1/2 tsp Hydrated Chrome Green, 1/8 tsp. Black Oxide, 1/2 tsp. Super Pearly White Mica and 1/4 tsp. Chrome Green Oxide. To the second container add 1/2 tsp of Chrome Green Pigment. To the third container add 1/2 tsp Hydrated Chrome Green Pigment. Use a whisk to thoroughly incorporate the colorants.
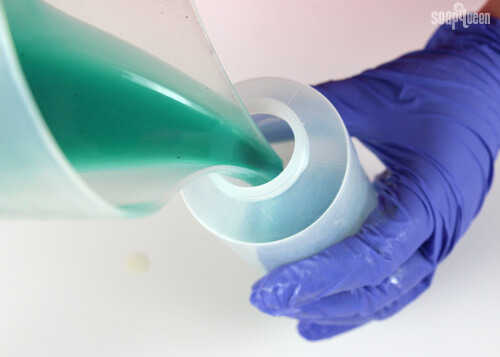
 SIX: Pour each green shade of soap into a squeeze bottle. Doing so allows you to create clean, even lines.
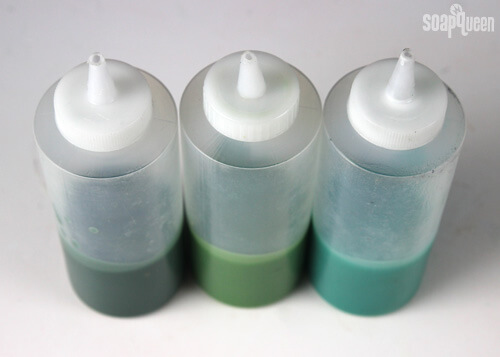
 Left to right: dark green, medium green and light green soap.
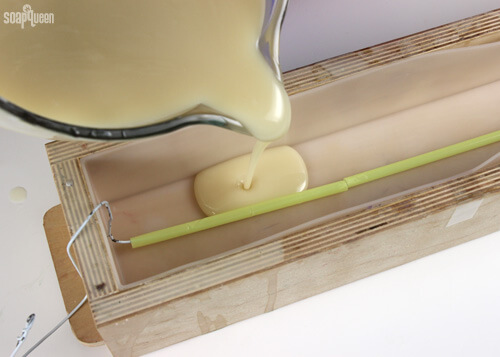
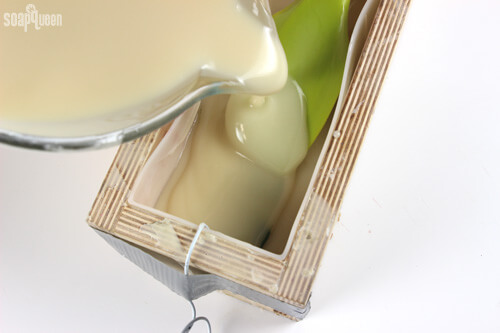
 SEVEN: Place the hanger tool in the center of the mold. You may find taping the wire hanger tool to the mold helpful. Slowly and carefully, pour the white soap over the hanger. During the entire pouring process, it’s important to not move the hanger. Pour soap until hanger is just covered.
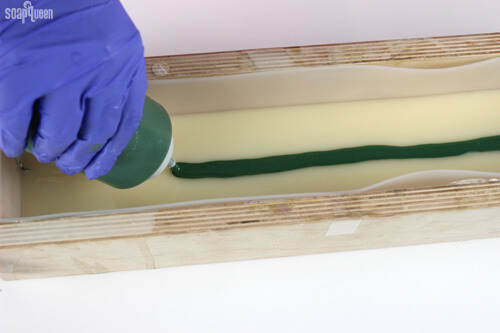
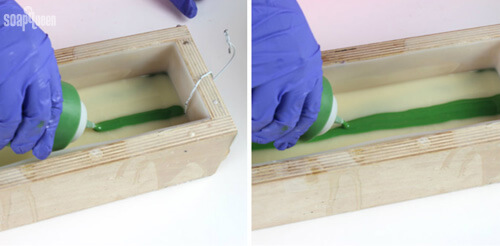
 EIGHT: Using the hangers edges as a guide, squirt a line directly over the hanger with the dark green soap. After making the first line, squirt a second line directly next to the first, to create one line that is two lines thick.
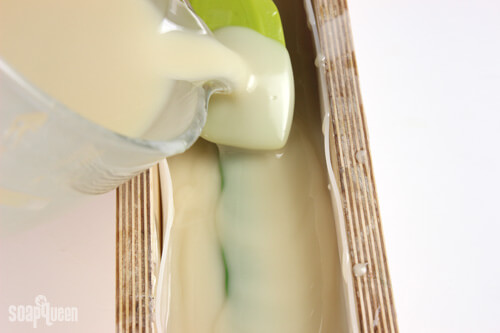
 NINE: Slowly and carefully, pour a thin layer of the white soap over a spatula. Pouring over the spatula helps avoid breaking through the layers below. Continue to pour until the green line is just covered.
 TEN: Using the medium green soap, squeeze two, side by side lines over the hanger and dark green soap line.
 ELEVEN: Slowly pour the white soap over a spatula until the medium green line is lightly covered. Using the light green soap, squeeze two side by side lines down the length of the mold, over the hanger and medium green lines. Continue the process of squeezing lines over the hanger and covering with a thin layer of white soap until you have two lines of each green color.
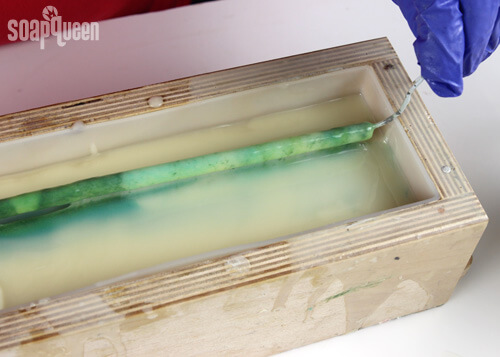
 TWELVE: Once two lines of each color have been drawn, cover with a thin layer of white soap. Slowly and carefully, pull the hanger straight up and out of the mold. Do your best to keep the hanger straight while pulling out of the mold. Set hanger tool aside.
 THIRTEEN: Add the rest of the fragrance oil and stick blend the remaining 500 mL white soap until a thick trace is reached.
 FOURTEEN: Gently spoon the thick white soap on top, and use a spoon to create a textured top. Be careful to not disrupt the layers below.
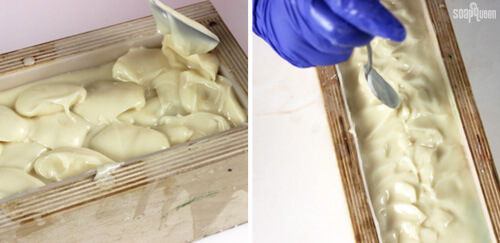 FIFTEEN: Using a powder sifter, dust the top with Sparkle Gold Mica.

 Allow the soap to harden for 3-4 days before unmolding. Allow it to cure for 4 – 6 weeks and enjoy!
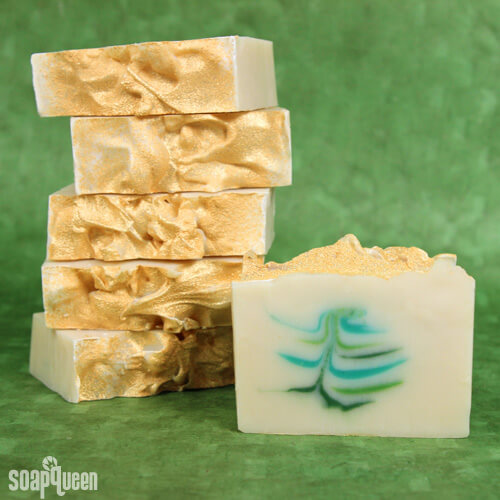
I love giving cold process soap as gifts. Everybody uses soap, and very few people have ever tried handmade soap before. What is your favorite kind of bath and body product to give or receive?