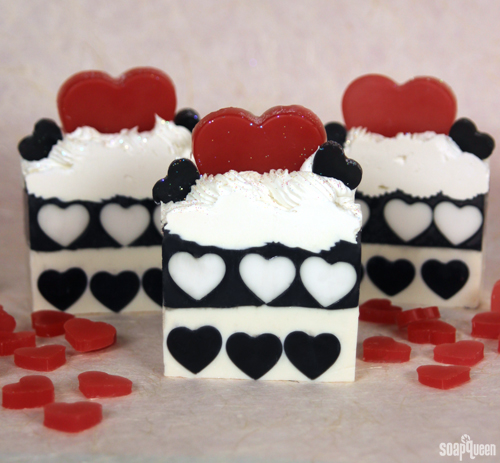
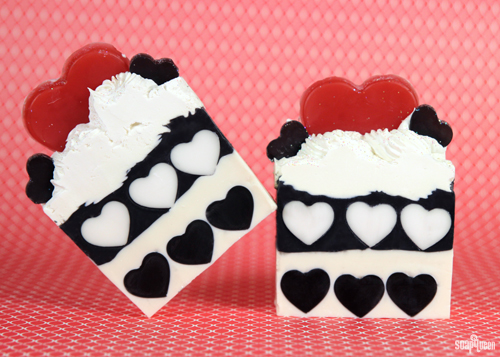
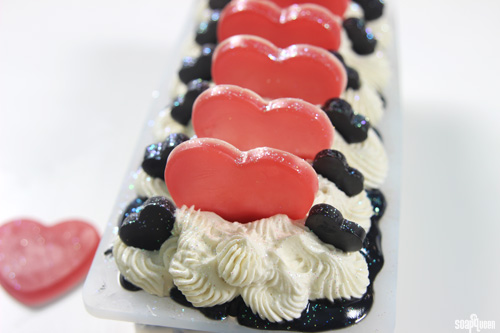
Inspired by the regal character from Alice in Wonderland, this Queen of Hearts Cold Process soap is full of eye-catching contrast. Created with melt and pour embeds, a cold process base and soap frosting, this sophisticated soap will make a fantastic Valentine’s gift (it will be here sooner than you think!). LoveSpell and Baby Rose fragrance oils create a rosy, warm and slightly juicy scent blend that is wonderfully feminine.
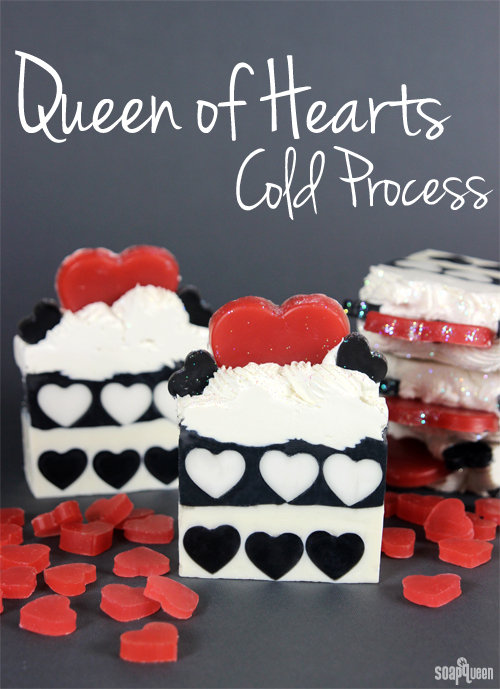 This project does require a little extra preparation, but it’s completely worth it! The heart embeds and soap frosting should be prepped a day ahead of time. This gives the melt and pour embeds time to harden, and the frosting lye and oils time to cool. LCP melt and pour soap is used for the embeds because it contains less glycerin, which results in reduced sweating and shrinkage.
If you’ve never made cold process frosting before, check out the Whipped Cold Process Soap Frosting episode on Soap Queen TV. The key to soap frosting is to allow the lye water and oils to completely cool to around 60-70 °F. Made with cocoa butter and shea butter, this frosting is palm free and skin-loving.
Note: The Large Heart Silicone Mold used in this tutorial has been discontinued. Instead, you can use the Floral Heart Mold for the middle red embeds.
What You’ll Need:
Base and Embeds
Mini Heart Silicone Column Mold (Three molds)
10″ Silicone Loaf Mold
Floral Heart Mold
7.4 oz. Coconut Oil
6.3 oz. Olive Oil
1.1 oz. Avocado Oil
2.1 oz. Cocoa Butter
4.2 oz. Meadowfoam Oil
2.9 oz. Sodium Hydroxide
6.9 oz. Distilled Water
.6 oz. LoveSpell (Type)Fragrance Oil
1 oz. Baby Rose Fragrance Oil
Black Oxide Pigment
Titanium Dioxide
Perfect Red Block
Black Oxide Color Block
13.5 oz. LCP White Melt and Pour Soap
17.5 oz. LCP Clear Melt and Pour Soap
Frosting
3 oz. Cocoa Butter
3 oz. Olive Oil
3 oz. Shea Butter
6 oz. Coconut Oil
2.2 oz. Sodium Hydroxide
4.9 oz. Distilled Water
Disposable Frosting Bag
4B Frosting Tip
Titanium Dioxide
1 oz. Baby Rose Fragrance Oil
Iridescent Glitter
 Click here to add everything you need for this project to your Bramble Berry shopping cart!
Make the Heart Embeds
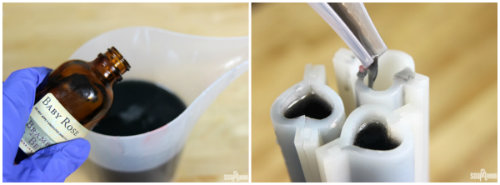
ONE: In a heat safe container, melt 13.5 oz. of the LCP Clear Melt and Pour base. Add shavings of the Black Oxide Color Block until a dark, rich black is achieved. Stir in .2 oz. of the Baby Rose Fragrance Oil until thoroughly mixed. Place the three Mini Heart Silicone Column Molds into a cup in order to hold them upright. Pour the black soap into the embeds and spritz the top with 99% isopropyl alcohol to disperse any bubbles. Once the soap is completely cool and hard, remove from the molds. The reason this project uses Low Sweat, Like Cold Process Melt and Pour is because traditional melt and pour tends to get soggy or glycerin dewy when embedded in cold process soap.
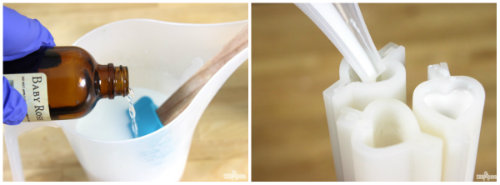
 TWO: In a heat safe container, melt 13.5 oz. of the LCP White Melt and Pour base. Stir in .2 oz of the Baby Rose Fragrance Oil until thoroughly mixed. Place the Mini Heart Silicone Column Molds into a cup in order to hold them upright. Pour the white soap into the three embeds and spritz the top with 99% isopropyl alcohol to disperse any bubbles. Once the soap is completely cool and hard, remove from the molds.
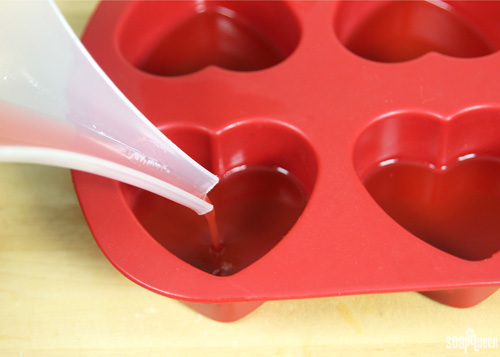
 THREE: In a heat safe container, melt 4 oz. of LCP Clear Melt and Pour base. Add shavings of the Perfect Red Color Block until a rich red color has been achieved. Pour about .5 oz. of soap into each cavity the Floral Heart Mold (formerly the Large Heart Silicone Mold). Each cavity will be about half a centimeter full. Spritz with 99% isopropyl or rubbing alcohol to disperse any bubbles. Allow to fully cool and harden, and remove each heart from the mold.
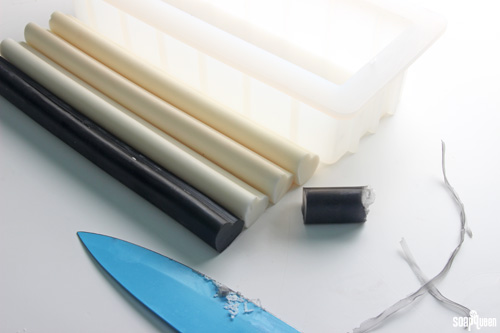
 FOUR: Cut each heart embed to the same length as the 10″ Silicone Loaf Mold. With the extra black heart embeds, cut them into small heart slices. These will later go on the top.
Make the Cold Process Base
If you’ve never made Cold Process soap before, stop here! I highly recommend checking out our FREE four part SoapQueen.tv series on Cold Process Soapmaking, especially the episode on lye safety. And if you’d rather do some reading, Bramble Berry carries a wide range of books on the topic, including my newest book, Soap Crafting. You can also checkout the digital downloads for that instant gratification factor.
SAFETY FIRST: Suit up for safe handling practices! That means goggles, gloves and long sleeves. Make sure kids, pets, and other distractions and tripping hazards are out of the house or don’t have access to your soaping space. Always soap in a well-ventilated area.
COLOR PREP: Disperse 2 teaspoons of the Titanium Dioxide into 2 tablespoons of sunflower or sweet almond oil (or any other liquid oil). Disperse 1 teaspoon Black Oxide into 1 tablespoon of light liquid oil. Use a mini mixer to get the clumps of color worked out smoothly.
ONE: Slowly and carefully add the lye to the water and gently stir until the lye has fully dissolved and the liquid is clear. Set aside to cool.
TWO: Combine the coconut, olive oil, avocado oil, cocoa butter and meadowfoam oil. Once the lye water and the oils have cooled to 130 degrees or below (and are ideally within 10 degrees of each other), add the lye water to the oils and stick blend until thin trace. If you’d like a harder bar of soap that releases faster from the mold, you can add Sodium Lactate to the cooled lye water. Use 1 teaspoon of Sodium Lactate per pound of oils in the recipe. For this recipe, you’d add about 2 tsp. Sodium Lactate. Because this soap is palm free, sodium lactate is recommended.
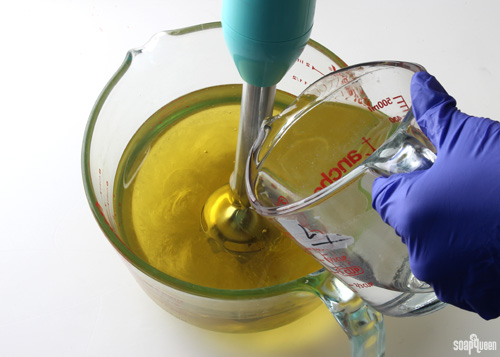
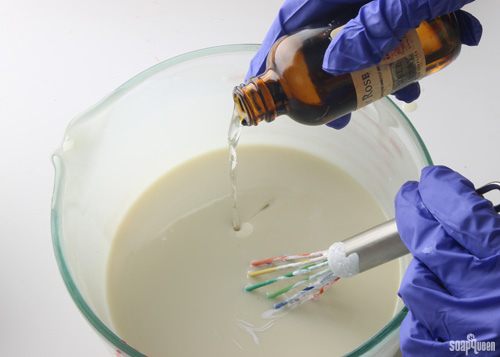
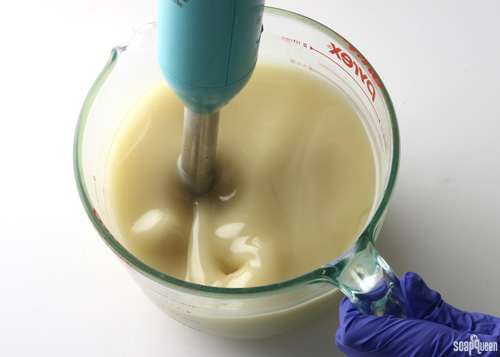 THREE: Once a thin trace has been achieved, split the soap into two equal containers. To one container, add all the titanium dioxide and .6 oz Baby Rose Fragrance Oil. Stir with a whisk to completely incorporate.
 FOUR: Pour about half of the white soap into the mold, and tap down to evenly distribute.
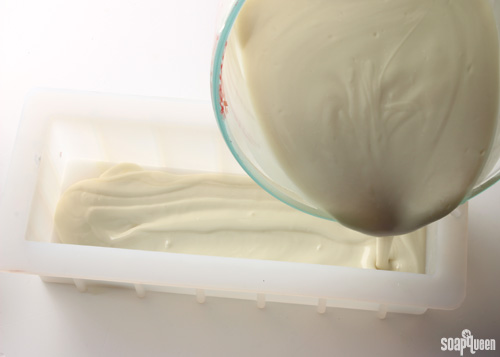 FIVE: Insert the three black heart embeds into the white soap, leaving a small space between each embed.
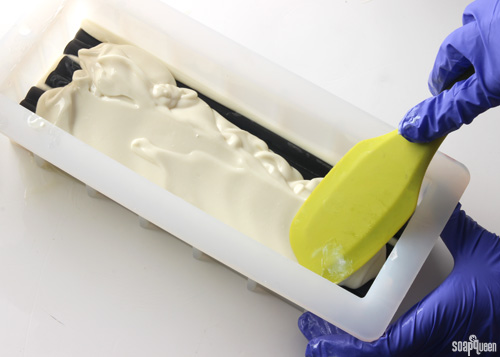
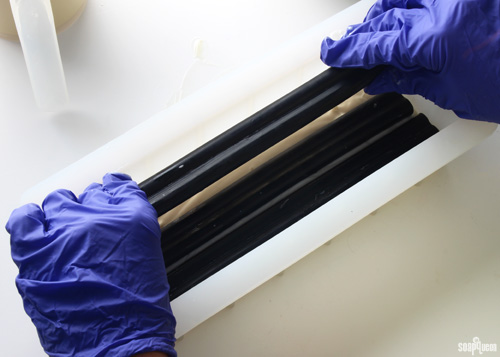 SIX: Pour the remaining white soap on top of the embeds, and use a spatula to smooth and evenly distribute the soap. Be careful to not move the heart embeds.
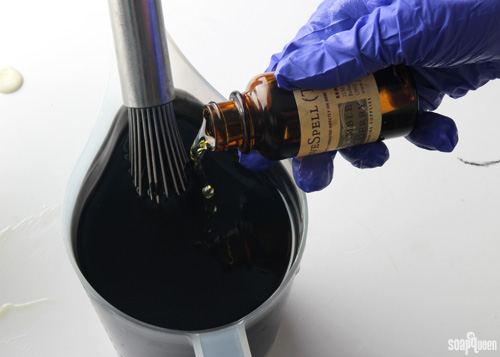
 SEVEN: To the remaining soap, add 1 tbs. black oxide and .6 oz. LoveSpell (Type) Fragrance Oil and whisk to thoroughly combine.
 EIGHT: Pour a small amount of the black soap over the white layer until the white layer is covered. Insert all three white heart embeds into the black soap, leaving a small amount of space between each embed. Be careful to not press the embeds too far into the soap, as this may disrupt the layers below. Cover the white embeds with black soap, and use a spatula to create a smooth top. Set aside, and make the soap frosting.
Make Soap Frosting:
LYE & OIL PREP: In order to get soapy frosting to actually look like frosting, the lye and oils must be very cold. We recommend making the lye water a full day ahead of time, clearly labeling it (*poison* *danger* *do not drink!*) and keeping it in a refrigerator not used for food. Alternately, you can use frozen water (eh hem: ice) to add your lye flakes to but the lye will still need to cool down. The lye should be around 60 degrees F before adding it to the oils. Additionally, you want your oils to be around 70 degrees F. You can even refrigerate them for several hours too! They should be semi-solid at this temperature. If your oils become completely solid, don’t worry! Soap frosting can be created with solid oils as well.
COLOR PREP: Disperse 1 teaspoon of the Titanium Dioxide into 1 tablespoon of sunflower or sweet almond oil (or any other liquid oil). Use a mini mixer to get the clumps of color worked out smoothly.
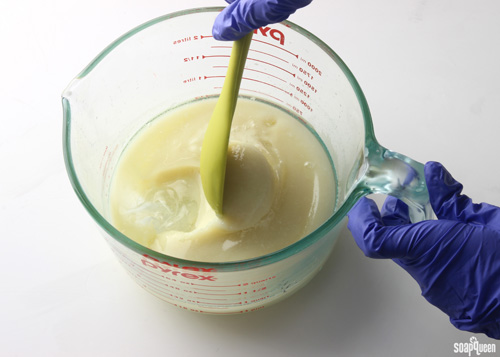
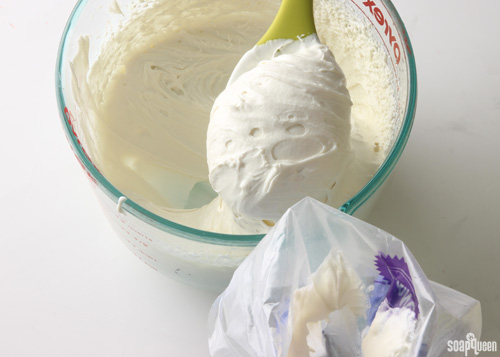
ONE: Slowly pour the lye into the whipped oils, and use a spoon to incorporate. Be super careful not to splash any lye at this point before the lye water is fully incorporated into the hardened, slushy, cool oils. Turn the hand mixer or Kitchen Aid Stand Mixer on low, and continue to whip oils until a fluffy, frosting texture is achieved. Scrape any batter that has splattered on the side of the container and then turn the mixer to a medium setting. Continue to whip for another 3-7 minutes.
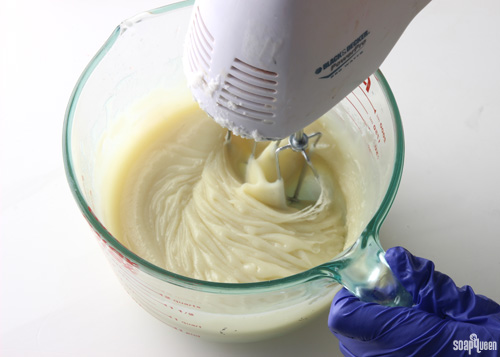 TWO: Once the oils have begun to harden, add all the titanium dioxide and 1 oz. Baby Rose Fragrance Oil. Continue to whip until the mixture is thoroughly mixed.
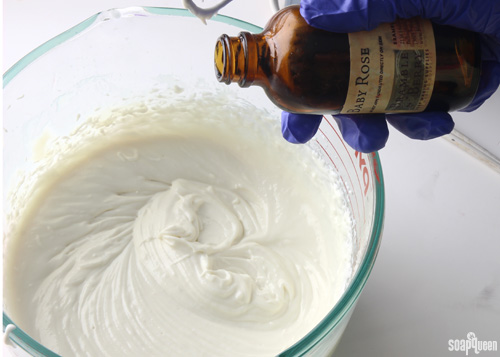 THREE: Once a frosting texture has been achieved, cut off about a half inch from the tip of the frosting bag and push the tip through. Scoop the frosting into the bag until full. You will have some frosting left over, and will need to fill the bag again during the frosting process.
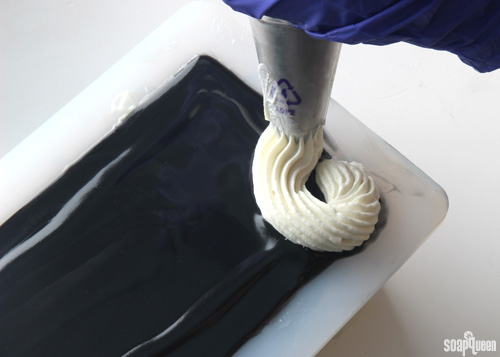
 FOUR: Beginning at the end of the mold, begin piping in a circular looping motion across the mold widthwise. Continue piping down the length of the mold. Keep in mind that each row of loops will be one bar of soap. We made eight bars.
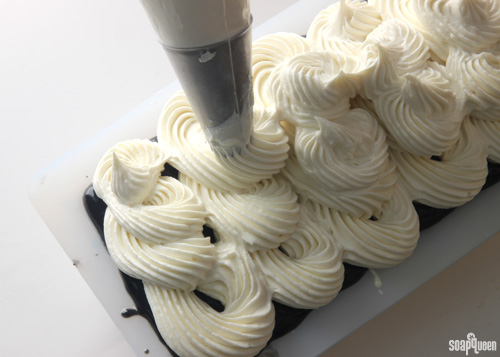
 FIVE: Once the bottom layer of frosting is complete, add two mounds on top of each bottom row of frosting.
 SIX: While the frosting is still soft, place the large heart embeds slightly behind each frosting mound. Plan on cutting the bars slightly behind the large heart embeds.
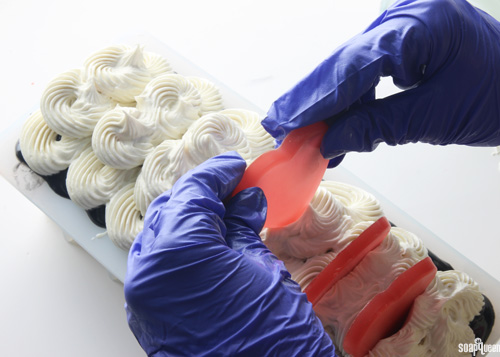 SEVEN: Place two black heart embeds on either side of the large heart embeds, slightly in front.
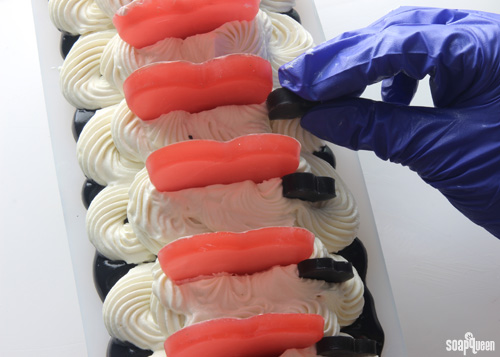 EIGHT: Sprinkle iridescent glitter on top. Allow the soap to harden for 3-4 days before unmolding. Allow it to cure for 4-6 weeks and enjoy!
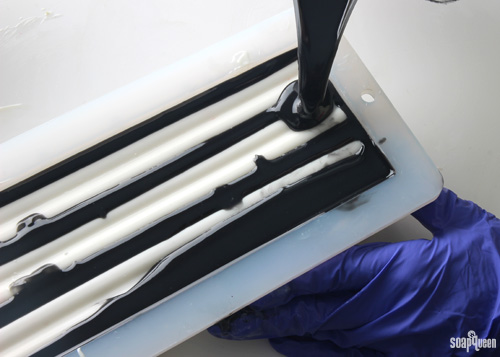
NOTE: As you can see, we experienced a little spillage with the black soap. That’s okay! Once the soap is removed from the mold and cut into bars, you can trim the sides as well.
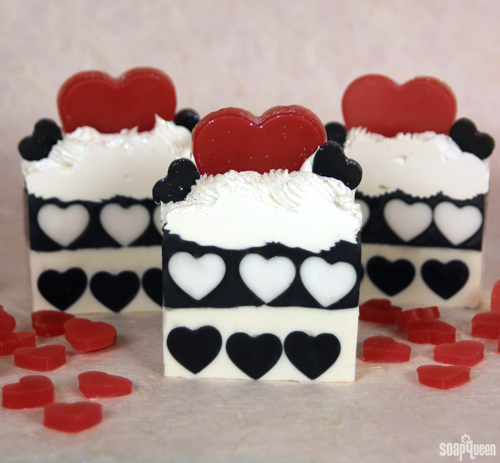 Have you started thinking about Valentine’s Day yet? It may seem far away, but it will be here in no time!
- Mini Heart Silicone Column Mold (Three molds)
- 10″ Silicone Loaf Mold
- Floral Heart Mold
- 7.4 oz. Coconut Oil
- 6.3 oz. Olive Oil
- 1.1 oz. Avocado Oil
- 2.1 oz. Cocoa Butter
- 4.2 oz. Meadowfoam Oil
- 2.9 oz. Sodium Hydroxide
- 6.9 oz. Distilled Water
- .6 oz. LoveSpell (Type)Fragrance Oil
- 1 oz. Baby Rose Fragrance Oil
- Black Oxide Pigment
- Titanium Dioxide
- Perfect Red Block
- Black Oxide Color Block
- 13.5 oz. LCP White Melt and Pour Soap
- 17.5 oz. LCP Clear Melt and Pour Soap
- 3 oz. Cocoa Butter
- 3 oz. Olive Oil
- 3 oz. Shea Butter
- 6 oz. Coconut Oil
- 2.2 oz. Sodium Hydroxide
- 4.9 oz. Distilled Water
- Disposable Frosting Bag
- 4B Frosting Tip
- Titanium Dioxide
- 1 oz. Baby Rose Fragrance Oil
- Iridescent Glitter
- In a heat safe container, melt 13.5 oz. of the LCP Clear Melt and Pour base. Add shavings of the Black Oxide Color Block until a dark, rich black is achieved. Stir in .2 oz. of the Baby Rose Fragrance Oil until thoroughly mixed. Place the three Mini Heart Silicone Column Molds into a cup in order to hold them upright. Pour the black soap into the embeds and spritz the top with 99% isopropyl alcohol to disperse any bubbles. Once the soap is completely cool and hard, remove from the molds.
- In a heat safe container, melt 13.5 oz. of the LCP White Melt and Pour base. Stir in .2 oz of the Baby Rose Fragrance Oil until thoroughly mixed. Place the Mini Heart Silicone Column Molds into a cup in order to hold them upright. Pour the white soap into the three embeds and spritz the top with 99% isopropyl alcohol to disperse any bubbles. Once the soap is completely cool and hard, remove from the molds.
- In a heat safe container, melt 4 oz. of LCP Clear Melt and Pour base. Add shavings of the Perfect Red Color Block until a rich red color has been achieved. Pour about .5 oz. of soap into each cavity the Floral Heart Mold (formerly the Large Heart Silicone Mold). Each cavity will be about half centimeter full. Spritz with 99% isopropyl or rubbing alcohol to disperse any bubbles. Allow to fully cool and harden, and remove each heart from the mold.
- Cut each heart embed to the same length as the 10″ Silicone Loaf Mold. With the extra black heart embeds, cut them into small heart slices. These will later go on the top.
- Safety First: Suit up for safe handling practices! That means goggles, gloves and long sleeves. Make sure kids, pets, and other distractions and tripping hazards are out of the house or don’t have access to your soaping space. Always soap in a well-ventilated area.
- Color Prep: Disperse 2 teaspoons of the Titanium Dioxide into 2 tablespoons of Sunflower or Sweet Almond Oil (or any other liquid oil). Disperse 1 teaspoon Black Oxide into 1 tablespoon of light liquid oil. Use a mini mixer to get the clumps of color worked out smoothly.
- Slowly and carefully add the lye to the water and gently stir until the lye has fully dissolved and the liquid is clear. Set aside to cool.
- Combine the coconut, olive oil, avocado oil, cocoa butter and meadowfoam oil. Once the lye water and the oils have cooled to 130 degrees or below (and are ideally within 10 degrees of each other), add the lye water to the oils and stick blend until thin trace. If you’d like a harder bar of soap that releases faster from the mold, you can add Sodium Lactate to the cooled lye water. Use 1 teaspoon of Sodium Lactate per pound of oils in the recipe. For this recipe, you’d add about 2 tsp. Sodium Lactate. Because this soap is palm free, sodium lactate is recommended.
- Once a thin trace has been achieved, split the soap into two equal containers. To one container, add all titanium dioxide and .6 oz Baby Rose Fragrance Oil. Stir with a whisk to completely incorporate.
- Pour about half of the white soap into the mold, and tap down to evenly distribute.
- Insert the three black heart embeds into the white soap, leaving a small space between each embed.
- Pour the remaining white soap on top of the embeds, and use a spatula to smooth and evenly distribute the soap. Be careful to not move the heart embeds.
- To the remaining soap, add 1 tbs. black oxide and .6 oz. LoveSpell (Type) Fragrance Oil and whisk to thoroughly combine.
- Pour a small amount of the black soap over the white layer until the white layer is covered. Insert all three white heart embeds into the black soap, leaving a small amount of space between each embed. Be careful to not press the embeds too far into the soap, as this may disrupt the layers below. Cover the white embeds with black soap, and use a spatula to create a smooth top. Set aside, and make the soap frosting.
- Lye & Oil Prep: In order to get soapy frosting to actually look like frosting, the lye and oils must be very cold. We recommend making the lye water a full day ahead of time, clearly labeling it (*poison* *danger* *do not drink!*) and keeping it in a refrigerator not used for food. Alternately, you can use frozen water (eh hem: ice) to add your lye flakes to but the lye will still need to cool down. The lye should be around 60 degrees F before adding it to the oils. Additionally, you want your oils to be around 70 degrees F. You can even refrigerate them for several hours too! They should be semi-solid at this temperature. If your oils become completely solid, don’t worry! Soap frosting can be created with solid oils as well.
- Color Prep: Disperse 1 teaspoon of the Titanium Dioxide into 1 tablespoon of Sunflower or Sweet Almond Oil (or any other liquid oil). Use a mini mixer to get the clumps of color worked out smoothly.
- Slowly pour the lye into the whipped oils, and use a spoon to incorporate. Be super careful not to splash any lye at this point before the lye water is fully incorporated into the hardened, slushy, cool oils. Turn the hand mixer or Kitchen Aid Stand Mixer on low, and continue to whip oils until a fluffy, frosting texture is achieved. Scrape any batter that has splattered on the side of the container and then turn the mixer to a medium setting. Continue to whip for another 3 – 7 minutes.
- Once the oils have begun to harden, add all the titanium dioxide and 1 oz. Baby Rose Fragrance Oil. Continue to whip until the mixture is thoroughly mixed.
- Once a frosting texture has been achieved, cut off about a half inch from the tip of the frosting bag and push the tip through. Scoop the frosting into the bag until full. You will have some frosting left over, and will need to fill the bag again during the frosting process.
- Beginning at the end of the mold, begin piping three figure eight loops across the mold widthwise. Continue piping down the length of the mold. Keep in mind that each row of loops will be one bar of soap. We made eight bars.
- Once the bottom layer of frosting is complete, add two mounds on top of each bottom row of frosting.
- While the frosting is still soft, place the large heart embeds slightly behind each frosting mound. Plan on cutting the bars slightly behind the large heart embeds.
- Place two black heart embeds on either side of the large heart embeds, slightly in front.
- Sprinkle iridescent glitter on top. Allow the soap to harden for 3-4 days before unmolding. Allow it to cure for 4 – 6 weeks and enjoy!


What is this type of soap bar used for? Is it body soap, hand soap, etc?
You can use it for the hands and body! It feels really lovely on the skin.
-Kelsey with Bramble Berry
When I followed the recipe exactly my white and black colors were no where near white or black like the picture, then when I attempted to add more I think I over did it and my final soap came out pretty soft and parts of it didn’t survive. I also had the issue with the drag of black to white on the hearts when I tried to cut bars but since my bars were too soft too use at all this was the least of my issues.
Hi Amanda!
I’m sorry about that! When working with colors in cold process soap, how much you add will vary based on a couple factors. For instance, oils have natural batch variation. They can be darker or lighter depending on soil, the amount of rain, etc. If your olive oil is darker for this batch, it make take a bit more color to make the soap look vibrant. This post has some great tips on how to get nice bright colors in soap: http://www.soapqueen.com/bath-and-body-tutorials/tips-and-tricks/how-to-get-vibrant-colors-in-soap/
How much color did you add to this batch? Also, did you tweak the recipe at all? Let me know and I can help you troubleshoot!
Also, if you get pesky drag marks, you can use alcohol to clean the bars up! Simply spritz them with 99% isopropyl alcohol and wipe with a paper towel. You can see that process in the Lemon Poppy Seed Cold Process Bars video: http://www.soapqueen.com/bath-and-body-tutorials/cold-process-soap/lemon-poppy-seed-cold-process-on-soap-queen-tv/
-Kelsey with Bramble Berry
I recently made a batch of cold process goats milk soap, that I used a handful of embeds all through the batch. When I started to cut the bars I noticed most of the embeds were half missing, almost like they had started to melt together with the newer soap poured around them. What would have caused this, and what can I do to avoid it. I’m going to rebatch the soap since it does not look very nice with the half missing embeds all through it, but its a shame to have that outcome after a week of making the different embeds and I’d like to avoid having it happen again
Hi Stacy!
Oh no, I’m sorry about that! Were you using cold process or melt and pour embeds in the soap? Also, how did you store the soap when it was in the mold? Can you tell me what you used in your recipe as well? Let me know and I’ll help you troubleshoot.
-Kelsey with Bramble Berry
Both the soap and the embeds were cold process, with goats milk, Coconut Oil, Palm Oil, Castor Oil, and Sweet Almand Oil. With a bit of buttercream fragrance oil and some mica colors. Mold is wooden with a silicone lining and I wrapped it in a towel and stored it in my cellar, which is a bit cooler
Hi Stacy!
Thanks so much for your recipe. I have to admit, I’m a bit stumped as to why those embeds melted! Melt and pour embeds can melt in the soap if it gets too hot, but cold process embeds are a lot sturdier. I’m wondering if it may be a temperature issue. Do you have pictures of the soap? I’d love to take a look and show some people in the office to see if we can figure out what’s up! You can email those to sma@brambleberry.com. Thank you.
-Kelsey with Bramble Berry
Can we modify this soap design using melt and pour soap? I am pregnant and I haven’t really felt comfortable making cold process soap.
Hi Ronni!
You could definitely use melt and pour if you like! We actually made a Rainbow Heart Melt and Pour Soap that has three embedded hearts in each layer. You can use that same method, but just have black and white hearts instead!
Rainbow Heart Melt and Pour: http://www.soapqueen.com/bath-and-body-tutorials/melt-and-pour-soap/rainbow-hearts-melt-pour-soap-queen-tv/
As for the colors, you can use our White Melt and Pour Base for the white. For the black, you can use shavings of our Black Oxide Color Block.
Black Oxide Color Block: https://www.brambleberry.com/Color-Block-Non-Bleeding-Black-Oxide-P5369.aspx
For the frosting, you can use Foaming Bath Whip: http://www.soapqueen.com/bath-and-body-tutorials/melt-and-pour-soap/foaming-bath-whip-frosting/
-Kelsey with Bramble Berry
I won’t use Palm oil and I thought this was a palm free recipe but the MP bases contain Palm oil. Do you have MP bases that do not contain Palm oil?
Hi Crystal!
All of our melt and pour bases contain palm oil. However, you can definitely make the embeds using palm free cold process soap! Just make sure to let those harden in the mold for 2-3 days before unmolding them. Then, make your base soap immediately after the embeds are unmolded. It’s important for the embeds to be fresh so they don’t cure faster than the base.
You can also add sodium lactate to the embeds to speed up the unmolding process. Just use 1 tsp. of sodium lactate per pound of oils.
Sunday Night Spotlight: Sodium Lactate: http://www.soapqueen.com/bramble-berry-news/sunday-night-spotlight-sodium-lactate/
-Kelsey with Bramble Berry
I’m curious if the black oxide added to the CP lathers clear? I have no experience with MP, but any time I’ve tried to get a deep black in CP I’ve ended up with either gray suds and washcloth. The black CP in the photos look as deep and true of a black as your MP, which is wonderful. I’m willing to try black oxide if it will give me that true black with no grey suds or stains! Thank you for sharing such fun recipes.
Hi Dana!
Because this soap has a rich black color, there may be a little bit of gray lather. We tried these bars out and didn’t notice a lot of gray bubbles though, and it didn’t stain our wash cloths either!
If you want to avoid potentially gray bubbles, you can add 1-2 teaspoons of black oxide rather than 1 tablespoon.
-Kelsey with Bramble Berry
I was disappointed in how this soap came out. The black and white embeds sweated a lot and some fell away from the rest of the soap. When cut with a new, very sharp knife, the black embed and black layer color dragged down into the white parts. Perhaps you can change this recipe to include low-sweat melt and pour and include some cutting tips. If I make this again I’ll omit the layers with their black and white embeds and keep the frosting, red hearts, and black hearts in the frosting.
Hi Jill!
This recipe uses our LCP bases, which have little to no sweating! We didn’t notice any sweating when we used them, and we’re in humid Washington state. Did you order the kit with this recipe? If you did, did the labels say “LCP Clear” and “LCP White”? I’m just making sure you got the right product!
LCP White Melt and Pour Base: https://www.brambleberry.com/LCP-Clear-Melt-And-Pour-Soap-P4383.aspx
LCP Clear Melt and Pour Base: https://www.brambleberry.com/LCP-Clear-Melt-And-Pour-Soap-P4383.aspx
Also, there can be some dragging when this soap is cut. To get rid of those, spray your soap with 99% isopropyl alcohol and rub the marks with a paper towel.
99% isopropyl alcohol: https://www.brambleberry.com/Isopropyl-Alcohol-99-16-oz-P5682.aspx
Let me know and we’ll get this figured out!
-Kelsey with Bramble Berry
Yes, I used the melt and pour bases from Brambleberry that were included in the recipe. I wiped off the sweat and it came back.
Hi Jill!
I’d love to help you figure this out! Can you send me an email at sma@brambleberry.com? Thanks so much.
-Kelsey with Bramble Berry
Thanks for the tip about fixing drag marks. I made an embedded soap after seeing this tutorial I changed it a bit, but used the LCP Clear Melt & Pour embedded hearts in CP soap. When I cut the loaf I put it in a wire cutter. The problem with doing this is the embedded hearts were much harder than the CP soap and the wires stopped at them. I was afraid to force the cutter for fear of breaking the wires and had to pull them back out, causing drag marks on the bars. I had posted a preview picture of the soap in the mold and a client pre-ordered almost all of these bars. I made a subsequent batch and hand cut, but she wants the bars from the original batch. I was a bit worried until I read about using the alcohol and paper towel. As far as the LCP, I have seen it sweat a bit and I am in a dry part of the state.
Hi Brenda!
You’re welcome! Glad I was able to help out.
Also, our LCP bases may sweat slightly. However, they will sweat a lot less than our regular bases, making them perfect for embedding!
LCP White Melt and Pour Base: https://www.brambleberry.com/LCP-Clear-Melt-And-Pour-Soap-P4383.aspx
LCP Clear Melt and Pour Base: https://www.brambleberry.com/LCP-Clear-Melt-And-Pour-Soap-P4383.aspx
-Kelsey with Bramble Berry
I was wondering if this recipe could be converted to a full MP recipe?
Hi Tiara!
Absolutely! This would make a great melt and pour project.
When you’re pouring the black and white layers, make sure your melt and pour is around 120-125F. That way it won’t melt the heart embeds.
Also, make sure to spray the heart embeds with 99% isopropyl alcohol before embedding them so they’ll stick! You’ll also want to spray your bottom layer with alcohol before pouring the second layer so it adheres. I’ll include a video on layering and embedding in melt and pour that may help you.
Embedding Layers on Soap Queen TV: https://www.youtube.com/watch?v=H_to0MjfFbo
You can also make frosting using melt and pour and Foaming Bath Whip. I’ll include a recipe below.
-Kelsey with Bramble Berry
Foaming Bath Whip Frosting: http://www.soapqueen.com/bath-and-body-tutorials/melt-and-pour-soap/foaming-bath-whip-frosting/
99% isopropyl alcohol: https://www.brambleberry.com/Isopropyl-Alcohol-99-16-oz-P5682.aspx
I would like to make this a 3 day process (inserts, soap, frosting). Will the frosting stick to the soap if I make the soap one day and frost it the next? If so, do I need to spray with alcohol like I would with MP layers?
Thank you, I hope to sell a lot of this one for Valentine and maybe even Mother’s Day.
Hi TJ!
We have tried putting soap frosting on dry soap a couple of times and it seemed to stick just fine! However, we’ve had great consistent results each time when we put the soap frosting on fresh soap. You may want to make a small test batch just to be sure.
-Kelsey with Bramble Berry
I made this today and I enjoyed making this! I switched rose out for brown sugar & fig and it smells great with the love spell. I also gave up on the mixer after about 15 min and just used my hand blender for the “frosting” and let it sit for a few minutes and it piped out great!
Now I’m holding my breath and waiting to unmold in about a week to see if the hearts on the inside stayed where they belonged!
Thank you! This was fun!
Hi Chris!
So glad you like it! I bet that scent combination smells amazing.
Also, soap frosting can definitely take awhile! Depending on the temperature of your oils and where you’re soaping, it can take up to 45 minutes or so. I’m glad it set up for you though. Can’t wait to hear how it turns out.
-Kelsey with Bramble Berry
How do you “put it to bed” or do you just leave it exposed before you cut it?
Hi Rhonda!
We didn’t cover this soap, we simply poured it into the mold and left it at room temperature. Nice and easy!
-Kelsey with Bramble Berry
Ok \o/. Thats’s the ticket. Cold Process, here I come.
Hi Rhonda!
That’s awesome! Have fun soaping.
-Kelsey with Bramble Berry
And the last thing- I would love it if you could update your Fragrance Calculator. I often find that the oils I’m looking for are not there. And it would be nice to include other oils, even though you don’t carry them, like Ginger EO for example. Thank you!!
Oh, and those brown bottles you ship your FO and EO’s in? All sizes? I would LOVE it if you offered those for sale too!
I’d love those for storing my own blends and such.
Thank you!!
How do you cut it? Wire cutter or the blade? I thought that M&P is too hard for wire, but the blade leaves marks on CP. What are your thoughts?
And speaking of features I would love to see- could you please add LIKE, or SAVE, or MY PROJECTS, or FAVORITES, or whatever you want to call it, on every post or tutorial?
I often think how I would love to save or bookmark a project you post, or a any info I find important, and save it in my account, so it would be easy for me to find later. That would be AWESOME! I’m sure other people would agree with me.
Hi Martina!
We used a sharp knife to cut this soap and didn’t have any drag marks! The key is to make sure the soap is firm enough so there aren’t any marks. We waited about 4-5 days. If you notice the soap is still too soft, wait a couple of extra days.
We didn’t try cutting this soap with a wire, so I’m not exactly sure how it would work! You may want to cut off a very small sliver on the end to test it out.
Also, thank you so much for that suggestions! I’ll definitely pass this feedback along to my manager.
As for fragrances, we do have a general usage rate of .8 oz. of fragrance per pound of cold process soap and .5 oz of fragrance per pound of melt and pour soap for a strong scent. If you let me know what you’re making and what fragrance you’re using, I’d be more than happy to help you out.
Fragrance Calculator: https://www.brambleberry.com/Pages/Fragrance-Calculator.aspx
-Kelsey with Bramble Berry
I would like to seeing cutting instructions for every recipe. I default to my wire cutters unless the recipe explicitly says to use a knife.
Thanks
Hi Jill!
Thanks so much for your suggestion! In general, you can use your wire cutter for all cold process recipes. However, melt and pour is a bit too firm for a wire cutter. Because this soap has melt and pour embeds, we recommend cutting it with a knife.
-Kelsey with Bramble Berry
ooo I LOVE THIS!! my mom will love this, because she loves hearts and roses! thanks for sharing! I love that this recipe doesn’t have palm oil in it!
Hi Amanda!
I’m so happy you like the recipe! We love playing around with different palm-free recipes.
-Kelsey with Bramble berry
This looks like a great recipe, I’m definetly going to make it. Also I love that I’ll be able to print the recipe
Hi Marleny!
I’m so glad you like it! Also, I’m happy you like the printable recipe cards! We were very excited about that feature.
-Kelsey with Bramble Berry