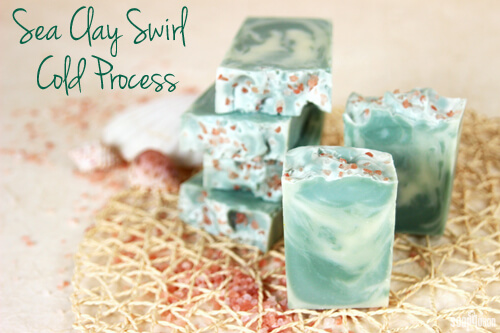
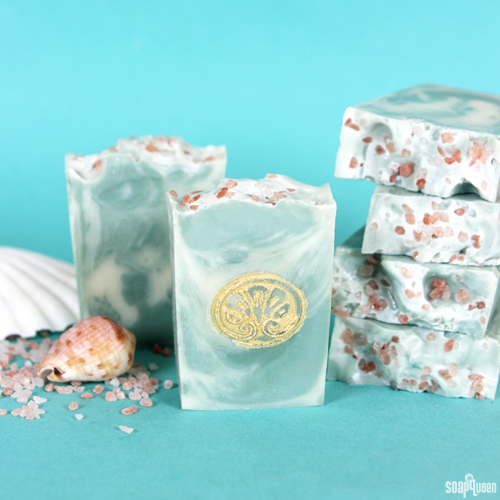
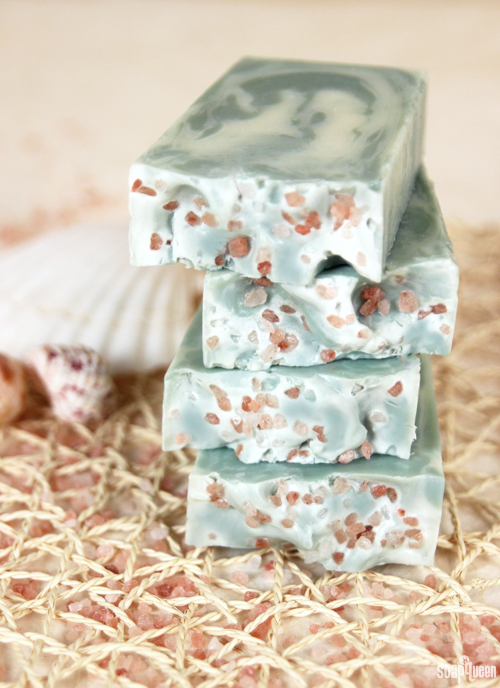
Created with sea clay, kaolin clay and pink sea salt, this soap conjures images of crystal clear waters and white-sanded beaches. In cold process soap, sea clay results in a natural grey hue, but when combined with Hydrated Chrome Green, it transforms into a soft minty green.
To achieve the wispy swirl, the white and green soap are swirled in one pot, then poured into the mold. This technique is referred to as an “in the pot swirl,” and is a great swirling method for beginner to intermediate soapers. To see the in the pot swirl in action, check out this Soap Queen TV video!
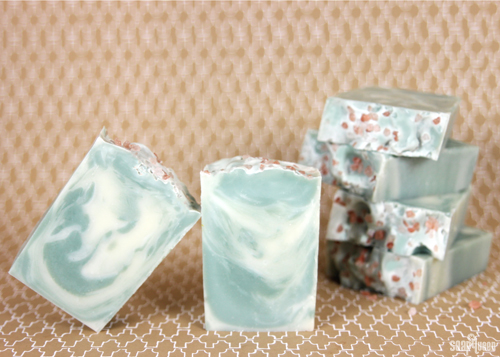
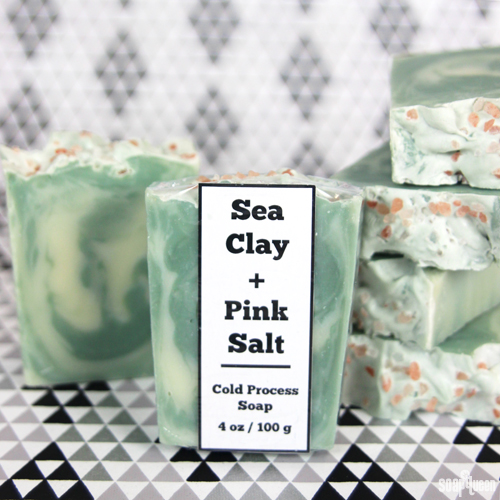
Lavender and Cedar Fragrance Oil gives this project a fantastic floral scent that is great for both men and women. As shown in the photo above, the subtle swirl makes this design a great candidate for soap stamps. If you are looking for labeling ideas, you can find a clean and modern label for this soap here. Simply print, apply to the soap and use a shrink band to keep the label in place.
3.5 oz. Sweet Almond Oil
8.75 oz. Coconut Oil
1.75 oz. Meadowfoam Oil
8.75 oz. Olive Oil
10.5 oz. Palm Oil
1.75 oz. Shea Butter
4.9 oz. Sodium Hydroxide
11.6 oz. Distilled water
2 oz. Lavender and Cedar Fragrance Oil
Kaolin Clay
Sea Clay
Hydrated Chrome Green Pigment
Pink Sea Salt, Medium
Tall 12″ Silicone Loaf Mold
 Click here to add everything you need for this project to your Bramble Berry shopping cart!
If you’ve never made Cold Process soap before, stop here! I highly recommend checking out our FREE four part SoapQueen.tv series on Cold Process Soapmaking, especially the episode on lye safety. And if you’d rather do some reading, Bramble Berry carries a wide range of books on the topic, including my newest book, Soap Crafting. You can also checkout the digital downloads for that instant gratification factor.
SAFETY FIRST: Suit up for safe handling practices! That means goggles, gloves and long sleeves. Make sure kids, pets, and other distractions and tripping hazards are out of the house or don’t have access to your soaping space. Always soap in a well-ventilated area.
COLOR PREP: Disperse 1 teaspoon of the Hydrated Chrome Green Pigment colorant into 1 tablespoon of sunflower or sweet almond oil (or any other liquid oil). Disperse 2 teaspoons of the kaolin into 2 tablespoons of distilled water, then disperse 2 teaspoons of the sea clay into 2 tablespoons of distilled water. Use a mini mixer to get clumps worked out smoothly. Prepping your colors in the beginning will allow you to work quickly and give you more time to work with your soap.
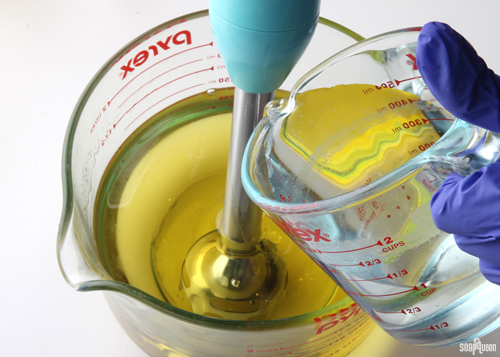
ONE: Slowly and carefully add the lye to the water and gently stir until the lye has fully dissolved and the liquid is clear. Set aside to cool.
TWO: Melt and combine the coconut, olive, shea, sweet almond, meadowfoam and palm oils (remember to fully melt then mix your entire container of palm oil before portioning). Once the lye water and the oils have cooled to 130 degrees or below (and are ideally within 10 degrees of each other), add the lye water to the oils and stick blend until thin trace. If you’d like a harder bar of soap that releases faster from the mold, you can add Sodium Lactate to the cooled lye water. Use 1 teaspoon of Sodium Lactate per pound of oils in the recipe. For this recipe, you’d add about 2 teaspoons of Sodium Lactate.
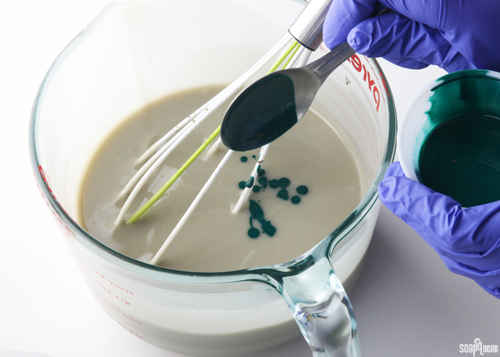
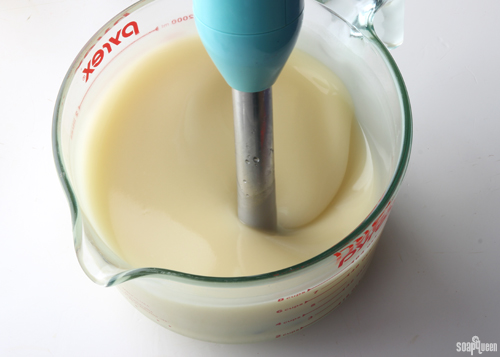 THREE: Once the batter has reached a light trace, split the batch in half. Each container will be about 3.5 cups. To one container, add all of the dispersed sea clay and 1/2 tbs. of the dispersed Hydrated Chrome Green. Use a whisk to fully incorporate the colorants.
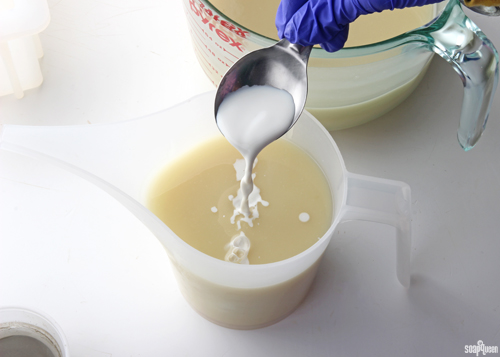
 FOUR: To the other container, add all the dispersed kaolin clay and use a whisk to fully incorporate.
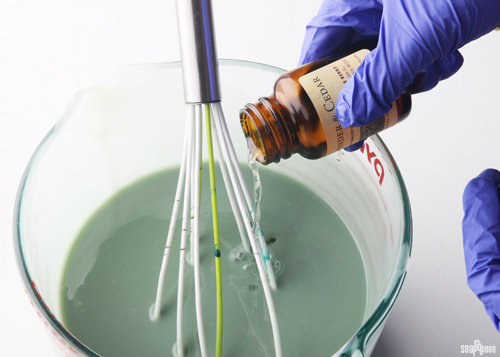
 FIVE: Add half of the Lavender and Cedar Fragrance Oil into each container. You can eyeball it! Use a whisk to mix in.
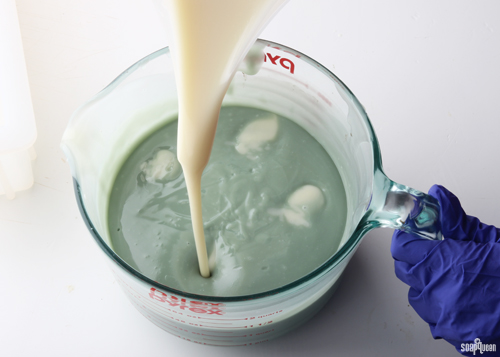
 SIX: For the in-the-pot swirl, start by pouring the white-colored soap into the green-colored soap in 4 places: 12:00 o’clock, 3:00 o’clock, 6:00 o’clock, and 9:00 o’clock. Pour from a high point so the soap penetrates the entire depth of the pot, which will create a swirl throughout the soap.
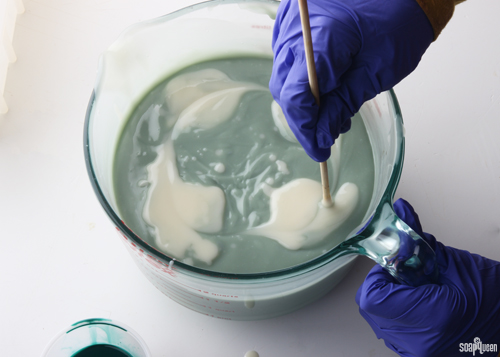
 SEVEN: Using a chopstick or dowel, swirl the soap by running the tool through each of the entry points once. Only once! You want to swirl — but not mix — the soap.
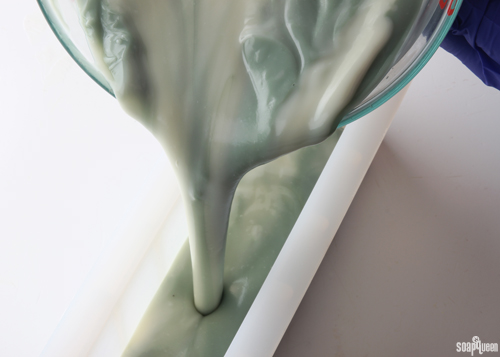
 EIGHT: Pour the swirled soap into the mold, keeping the pouring container in one place as the soap fills the mold. Tamp the mold on the tabletop to eliminate any air bubbles.
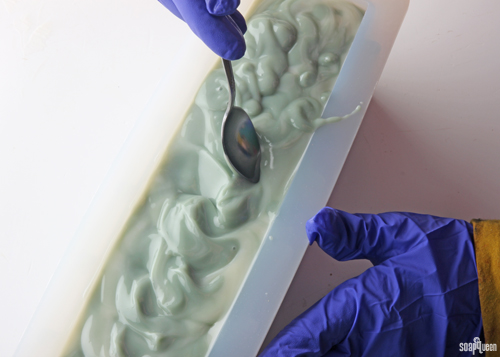
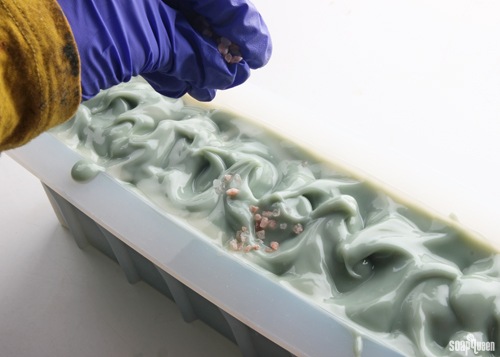
 NINE: Use a spoon to create peaks and texture on top. Once you’re happy with the texture, garnish the top of the soap with pink sea salt. Spray with 99% isopropyl alcohol to prevent soda ash.
 TEN: Unmold the soap after 3-4 days and allow to cure for 4-6 weeks. When you’re ready to cut this soap, turn it on its side to avoid pulling salt through your soap and accidentally creating deep drag marks. Enjoy!
 What is your favorite ways to use clay in your projects? There are several more clay projects coming up, so keep your eyes out for them! =)
- 3.5 oz. Sweet Almond Oil
- 8.75 oz. Coconut Oil
- 1.75 oz. Meadowfoam Oil
- 8.75 oz. Olive Oil
- 10.5 oz. Palm Oil
- 1.75 oz. Shea Butter
- 4.9 oz. Sodium Hydroxide
- 11.6 oz. Distilled water
- 2 oz. Lavender and Cedar Fragrance Oil
- Kaolin Clay
- Sea Clay
- Hydrated Chrome Green Pigment
- Pink Sea Salt, Medium
- Tall 12″ Silicone Loaf Mold
- SAFETY FIRST: Suit up for safe handling practices! That means goggles, gloves and long sleeves. Make sure kids, pets, and other distractions and tripping hazards are out of the house or don’t have access to your soaping space. Always soap in a well-ventilated area.
- COLOR PREP: Disperse 1 teaspoon of the Hydrated Chrome Green Pigment colorant into 1 tablespoon of sunflower or sweet almond oil (or any other liquid oil). Disperse 2 teaspoons of the kaolin into 2 tablespoons of distilled water, then disperse 2 teaspoons of the sea clay into 2 tablespoons of distilled water. Use a mini mixer to get clumps worked out smoothly. Prepping your colors in the beginning will allow you to work quickly and give you more time to work with your soap.
- Slowly and carefully add the lye to the water and gently stir until the lye has fully dissolved and the liquid is clear. Set aside to cool.
- Melt and combine the coconut, olive, shea, sweet almond, meadowfoam and palm oils (remember to fully melt then mix your entire container of palm oil before portioning).Once the lye water and the oils have cooled to 130 degrees or below (and are ideally within 10 degrees of each other), add the lye water to the oils and stick blend until thin trace. If you’d like a harder bar of soap that releases faster from the mold, you can add Sodium Lactate to the cooled lye water. Use 1 teaspoon of Sodium Lactate per pound of oils in the recipe. For this recipe, you’d add about 2 tsp. Sodium Lactate.
- Once the batter has reached a light trace, split the batch in half. Each container will be about 3.5 cups. To one container, add all of the dispersed sea clay and ½ tbs. of the dispersed Hydrated Chrome Green. Use a whisk to fully incorporate the colorants.
- To the other container, add all the dispersed kaolin clay and use a whisk to fully incorporate.
- Add half of the Lavender and Cedar Fragrance Oil into each container. You can eyeball it! Use a whisk to mix in.
- For the in-the-pot swirl, start by pouring the white-colored soap into the green-colored soap in 4 places: 12:00 o’clock, 3:00 o’clock, 6:00 o’clock, and 9:00 o’clock. Pour from a high point so the soap penetrates the entire depth of the pot, which will create a swirl throughout the soap.
- Using a chopstick or dowel, swirl the soap by running the tool through each of the entry points once. Only once! You want to swirl — but not mix — the soap.
- Pour the swirled soap into the mold, keeping the pouring container in one place as the soap fills the mold. Tamp the mold on the tabletop to eliminate any air bubbles.
- Use a spoon to create peaks and texture on top. Once you’re happy with the texture, garnish the top of the soap with pink sea salt. Spray with 99% isopropyl alcohol to prevent soda ash.
- Unmold the soap after 3-4 days and allow to cure for 4-6 weeks. When you’re ready to cut this soap, turn it on its side to avoid pulling petals or orange peels through your soap and accidentally creating deep drag marks. Enjoy!


This is my new favorite recipe! Will I like it as much if I use all Kaolin clay?
So glad you’re loving this recipe Peggy! You can definitely use just kaolin clay in this recipe if you like. It won’t have the same color as the sea clay, but it does feel really nice on the skin. 🙂
-Kelsey with Bramble Berry
Hi Kelsey, I am planning on making this soap with a marine blue FD, and C grade colorant (Oil soluble kind, so color bleeding isn’t a problem). It contains yellow 5, yellow 6, blue 1, blue 2, and red 40. Will any of these colors react during the saponification and cause major fading or color morphing? Thank you.
Also, can you recemmend me an oil blend for this recipe which is suitable for oilly and slightly sensitive skin?
Because we haven’t tested that color, I’m not sure how it will perform in cold process soap. You may want to make a small test batch or check with the manufacturer for more information. 🙂
Also, this recipe is amazing for oily and sensitive skin! The clay helps absorb oil and the oils and butters feel great on the skin. This Rose Clay and Charcoal Soap is another great option: https://www.soapqueen.com/bath-and-body-tutorials/rose-clay-charcoal-soap-tutorial/
-Kelsey with Bramble Berry
I just realized that I added the sweet almond oil twice, by mistake. 🙂 Is it ruined? What can I expect to get?
With that extra sweet almond oil, the soap will be fairly soft. It’s not a ton of extra oil so the soap should set up. I would recommend letting it cure for 6-8 weeks. If it’s still pretty soft after it cures, you can rebatch the soap. I would recommend rebatching it with equal or twice as much of a really hard recipe. The two soaps will mix and create a more balanced bar. 🙂
Learn how to rebatch soap here: http://www.soapqueen.com/bath-and-body-tutorials/cold-process-soap/soap-queen-tv-presents-how-to-make-rebatch-soap-2/
Our Basic Rebatch is a nice firm recipe: https://www.brambleberry.com/Grated-Rebatch-Soap-Base-Basic-P4540.aspx
-Kelsey with Bramble Berry
I used sodium lactate so I hope that will help. It’s still in the mold. We’ll see. Thanks!
You’re welcome! 🙂
In the section ‘color prep’ it says to mix 1 tsp Hydrated Chrome Green Pigment into 1 Tbs of sweet almond oil.
In process three it says add 1/2 Tbs of the green mixture to one of the containers.
My question, why only use half of the prepared mixture or is this a misprint?
Hi Bob!
We like to prepare extra just in case! That way if the batter is darker than usual you can add more color. You can prepare less color if you like, or you can store the leftovers in an airtight container. They will last as long as the oil shelf life. Just make sure to mix well before use as the colors do settle. 🙂
This post has a list of oil shelf lives: http://www.soapqueen.com/bath-and-body-tutorials/tips-and-tricks/free-beginners-guide-to-soapmaking-common-soapmaking-oils/
-Kelsey with Bramble Berry
Soap for me question. Is clay better for oily skin? I have dry skin. Can I omit the clay all-together? I do like soaps that are moisturizing.
Soap for me son question. Would this be a good facial bar for a young adult with oily skin? In that case I would add the clay.
Thanks,
Clay does tend to absorb oil, so this bar may work a bit better for oily skin! Here is the recipe now:
Coconut Oil (76 degrees): 25%
Meadowfoam Oil: 5%
Olive Oil: 25%
Palm Oil: 30%
Shea Butter: 5%
Sweet Almond Oil: 10%
For oily skin, you can bump the coconut up to 33% and decrease the olive oil. That will make it a bit more cleansing, while the sweet almond oil and shea butter will still help moisturize the skin. 🙂
Remember to run the recipe through the Lye Calculator after any changes to the recipe: https://www.brambleberry.com/Pages/Lye-Calculator.aspx
For dry skin, I would recommend decreasing the clay (or leaving it out) and increasing the olive oil and sweet almond oil. That will moisturize nicely!
Read more about formulating cold process recipes for your skin type here: http://www.soapqueen.com/bath-and-body-tutorials/tips-and-tricks/formulating-cold-process-recipes/
-Kelsey with Bramble Berry
Kelsey,
This is great information! I’m printing it out and keeping it in my notes. Thanks
You’re welcome Nitza! 🙂
-Kelsey with Bramble Berry
I made this soap and while it’s pretty and smells great every bar has white specks all through them. Could that be from the Kaolin clay?
So glad the bars turned out well! I think those specks may be the kaolin clay. Clay can clump in the soap and cause those specks. Mixing the clay with distilled water helps prevent that clumping! Also, make sure to stir the colorant right before adding it, as the clay can settle. Then, if you see any clumps left behind in the cup, don’t add those – they can create those white specks.
It may also be air bubbles. Do you have a picture of the soap you could post on our Facebook page? That way I could take a look and help you troubleshoot. 🙂
Bramble Berry Facebook: https://www.facebook.com/BrambleBerry/
-Kelsey with Bramble Berry
Hi, I always mix clays with distilled water but maybe I didn’t mix it again right before putting in it the soap………I can’t remember. And will post pictures in the fb group for you to look at
Thanks
You’re welcome! 🙂
Can you use any natural colorants instead of the chemical ones? Also can I use fresh goat milk instead of water?
Hi Misty!
Yes and yes! If you like, you can just use sea clay and kaolin clay in this recipe. It will give the recipe a softer more natural color. 🙂
Also, you can use goat milk instead of water! It will add a nice creamy feeling to the bars. Goat milk does require a few extra steps to ensure it doesn’t scorch, like freezing it before adding the lye. Learn how to work with milk in your soap here: http://www.soapqueen.com/bath-and-body-tutorials/tips-and-tricks/how-to-add-lye-to-milk-for-cold-process-soap/
-Kelsey with Bramble Berry
I purchased this kit and have a question. Do you need to cover this soap and let it gel? If you do, would that make the soap heat up too much and melt the salt? Thank you for your help.
Hi Teresa!
You can gel this soap if you like! The salt has a fairly high melting point, so it shouldn’t melt unless it gets super hot. If you want to be on the safe side, you can leave it at room temperature. We left ours at room temperature. 🙂
-Kelsey with Bramble Berry
Jazzed About Gel Phase: http://www.soapqueen.com/bath-and-body-tutorials/tips-and-tricks/gel-phase/
Hello SQ!!
I am new to soaping and have been watching your videos familiarizing myself with it and buying everything needed in making this particular soap. Feel in love with it when I first saw it lol For this soap I press the button to add everything I needed but when I received the package not all of the items had its measurement.
1. For example, the Shea Butter came as one block, would the entire block be consider the 1.75 oz. Shea Butter needed? or The Palm and Coconut Oil came in 2 packs each, would that be equivalent to the 8.75 oz. Coconut Oil and the 10.5 oz. Palm Oil?
2. As well, I notice in some videos you use a wood mold with only freezing paper. Do I have to use freezing paper with the wood mold that have silicone and the Tall 12″ Silicone Loaf Mold?
Sorry if these questions are silly, I want to make sure I am measuring everything properly. Tank you soon much in advance!!!
Hi Vanessa!
No worries, we are happy to help! 🙂
In this kit, the shea, palm, and coconut oil all come in 1 pound (16 ounce) sizes. So they will need to be measured to the correct amounts. What I like to do is pop a heat-safe glass container on the scale, zero it out then add all my oils (making sure to zero out after each one to make measuring easier). Then, I melt all those oils in the microwave on 30 second bursts. Then you can use the leftover oils in another batch of soap.
If you don’t have a scale, you can find them online, at a kitchen supply store, at a department store like Target, or Bramble Berry: https://www.brambleberry.com/Scales-Thermometers-C207.aspx
Also, you don’t need to line silicone molds! Soap doesn’t stick to it, so it will unmold easily. If you were using a wood mold, it would need to be lined because soap likes to stick to the wood. 🙂
Read more about lining wood molds here: http://www.soapqueen.com/bath-and-body-tutorials/cold-process-soap/how-to-line-any-mold/
This post has more great tips for getting started soaping, including how to add color and fragrance: http://www.soapqueen.com/bramble-berry-news/beginning-soaper-resource-roundup/
-Kelsey with Bramble Berry
Hi Kelsey!
Thank you so much for a prompt and detailed response! I will definitely follow these great tips.
One last question. The Meadow Foam Oil and Lavender & Cedar bottles did not have the measurement amount. Are the bottles equal to the 1.75 oz. Meadow foam Oil & 2 oz. Lavender and Cedar Fragrance Oil that is needed?
Thank you again!!!
You’re welcome! The meadowfoam oil comes in a 4 oz. size, so it will need to be weighed. The Lavender and Cedar Fragrance Oil comes in a 2 ounce size and this recipe calls for 2 ounces, so you can just pour in the whole bottle. 🙂
-Kelsey with Bramble Berry
Dear SQ Team,
I just made a soap similar to this one and got confused about water…
I think I might have added too much water to my soap because of dispersing clays.
Firstly, I discounted my water in the recipe by 10% by 28.5g
I planned to add just one teaspoon of French green clay, dispersed in water, to my soap. However, that amount of clay wasn’t enough to colour my soap properly. I ended up using 4 teaspoons of clay.
I also ended up adding 1 teaspoon of titanium dioxide, dispersed in water, to the other part of the batch, because my soap base wasn’t white enough.
Now I ended up with 5 teaspoons of colourant, each dispersed in a tablespoon of water. If a tablespoon of water is about 15g, then I added 70-75g additional water to my soap (at light trace). Because of water discount it seems that I now have 42g extra water in my soap (70g-28g).
What should I expect from my soap – being too soft, curing longer? Will this extra water eventually evaporate?
Did you account for extra water in your recipe by decreasing the amount of water that is mixed with lye?
24 hours later, the soap is still in the mould (I used the tall silicone one). As you’re suggesting, I want to wait longer before unmoulding.
Below is my recipe. I haven’t used this recipe before so I don’t know how it normally behaves.
(Btw. I just came up with this recipe, do you think it’s good or does it need some tweaking for future – my intention was to get a firm bar of light colour).
35% palm oil, 30% canola, 25% coconut oil, 15% Shea butter, 5% castor oil. Superfatted by 3%.
I appreciate your feedback!
Hi Joanna!
A little bit of extra water in the batch won’t affect the final bars too much, especially because the extra amount is very small! They will just need a bit more curing time to help evaporate the excess water (probably the full 6 weeks or a bit extra). The bars will be softer at first, but will firm up as that water evaporates. 🙂
When working with clays, we sometimes discount that water if we’re adding quite a bit extra with the clays. For instance, if we’re using just 1 Tbsp. of water, we won’t discount the water as it’s such a small amount. Much more than a couple tablespoons and we’ll discount the water – usually right around 10%. Read more about water discounting here: http://www.soapqueen.com/bath-and-body-tutorials/tips-and-tricks/water-discounting-cold-process-soap-how-why/
Also, your recipe looks awesome! The palm, coconut and shea butter will help make a nice firm bar. All the neutral-colored oils will create a whiter soap as well. 🙂
-Kelsey with Bramble Berry
Thank you very much Kelsey! I learn a lot from your website – Soap Queen team is fantastic!
You’re welcome Joanna! So glad to hear that. 🙂
-Kelsey with Bramble Berry
Hi, I really love this recipe. I was wondering what the calculations would be if I chose to make a smaller batch? (40 oz mold)
Thanks <3
So glad you love the recipe! Also, we have an amazing post that shows you how to resize a recipe using our Lye Calculator. I’ll link that below. 🙂
How to Resize Cold Process Soap Recipes: http://www.soapqueen.com/bath-and-body-tutorials/tips-and-tricks/how-to-resize-cold-process-soap-recipes/
-Kelsey with Bramble Berry
Hello,
I’m going to make facial bar and just ordered some rhassoul clay and activated charcoal. I will use 700 grams oil and that going to make about 1,000 grams soap. How much clay and activated charcoal do you recommend for 500 grams batter?
As for alove vera, is it better if I turn it into juice or puree? And how would you suggest to use it? Freeze them as subs of water or put them at trace? Thanks in advance 🙂
Hi Emma!
We recommend about 1 teaspoon of clay per pound of soap, so for 500 grams that would be 1 teaspoon! You can do 1/2 teaspoon of each clay, or 1 teaspoon of each clay. Clays have oil absorbing properties, so if your skin is on the oily side you can use 2 teaspoons instead of 1. 🙂
We recommend mixing the clay with distilled water to help it disperse easily in the soap and preventing clumping. Learn more about that in this Sunday Night Spotlight: http://www.soapqueen.com/bramble-berry-news/sunday-night-spotlight-brazilian-clay/
For aloe vera liquid, you can use that in place of your distilled water! We recommend refrigerating it so it doesn’t discolor as much (it turns a yellowish color). You can use it as 100% of your liquid amount, or mix it with distilled water. Learn more about working with aloe vera liquid here: http://www.soapqueen.com/bath-and-body-tutorials/cold-process-soap/defying-the-rules-of-soapmaking-100-coconut-oil-soap-with-aloe-vera-and-a-mantra-swirl/
If you have the actual aloe plant, you can grind it up and add it at trace! We recommend about 1 ounce (28 grams) per pound of soap. The aloe does contain quite a bit of liquid, so you’ll want to subtract 1 ounce from your water amount. That way the soap doesn’t get too wet. 🙂
-Kelsey with Bramble Berry
Hello!
I was wondering if I can use Cambrian Blue Clay instead of Sea Clay, and if there is another oil that i can use instead of meadowfoam oil.
Thank you very much.
Hi Carina!
You can use Cambrian Blue Clay if you like! Because it’s already wet, you won’t have to mix it with water. You can just add it right to your batch. I would recommend starting off with about 2 teaspoons of the clay, then adding more if you want a darker color. 🙂
Cambrian Blue Clay: https://www.brambleberry.com/Cambrian-Blue-Clay-Wet-P5523.aspx
For the meadowfoam oil, you can substitute that with jojoba oil. If you don’t have jojoba oil, you can leave it out and increase the olive oil to cover the difference. Just make sure to run the recipe through the Lye Calculator again after any substitutions: https://www.brambleberry.com/Pages/Lye-Calculator.aspx
This post on How to Substitute Oil in Cold Process Soap may be helpful for you as well: http://www.soapqueen.com/bath-and-body-tutorials/tips-and-tricks/how-to-substitute-oil-in-cold-process-recipes/
-Kelsey with Bramble Berry
hi everyone, I’ve tried this recipe and the pink salt teared and melted, can someone let me know what might be the reason for pink salt melt? great thanks!
Hi Yulai!
I’m wondering if instead of the salt melting, it actually sunk into the soap. If your soap is thinner, the salt may be a bit too heavy for it to support and it can sink into the bars. To prevent this, you can pour your soap when it’s at a medium trace (the texture of thin pudding). If the soap is still too thin to hold its shape, you can wait 5-10 minutes and try again. During that time the soap will start to thicken and be able to support the salt. 🙂
Read more about trace here: http://www.soapqueen.com/bath-and-body-tutorials/tips-and-tricks/trace/
It may be that the soap got really hot as well! How did you store that soap after it’s in the mold? Let me know and we’ll get this figured out!
-Kelsey with Bramble Berry
wanting to subscribe to your newsletter
Hi Sally!
That’s awesome, thanks so much for your interest! Our newsletters have fun tutorials and information about upcoming sales and promotions. You can sign up here: https://www.facebook.com/BrambleBerry/app_137918839619668
The sign up is also available on the right-hand side of BrambleBerry.com. 🙂
-Kelsey with Bramble Berry
Hi, I’ve tried this sea clay swirl CP, but don’t know why the pink salt melted? do YOu know what might be the reason for the sea salt to melt?
Hi there!
Hmm, I’m wondering if the soap got really hot and melted that salt! It may also be that the soap was a bit thin, so the salt absorbed rather than sitting on top of the bars.
If you find the soap is on the thinner side when it’s in the mold, you can wait a bit until it starts to thicken. When it’s thick enough to hold its shape, sprinkle that salt on. Then, you can leave it at room temperature so it doesn’t get too hot. 🙂
-Kelsey with Bramble Berry
Hello, do you think I could be able to achieve the same crystal clear water colors if I use French Green Clay and Spirulina? I don’t have sea clay nor the oxide. I will try anyway but I wanted to know what to expect : )
Hi Rosy!
You can definitely use French green clay and spirulina if you like! That will give you a more subtle grayish green color for the green part. Also, the kaolin clay helps make the other half a little more white, so the soap batter on its own will be a bit more yellow. It will still look lovely though. 🙂
-Kelsey with Bramble Berry
Thank you Kelsey ! I do have Kaolin Clay. I’m positive that the soap will look great !!
Absolutely, it will look great! We’d love to see pictures if you have any. You can share those on our Facebook page. 🙂
Bramble Berry Facebook: https://www.facebook.com/BrambleBerry?ref=hl
-Kelsey with Bramble Berry
Hi! This recipe looks awesome. I have never made soap before… in step three you say to slowly and carefully add the lye to the water and then set aside to cool. but I do not see a prior instruction on bringing the water to a boil or making it hot or anything. What temperature should the water be when I add the lye?
So glad you like the recipe Rebekah! You want to add your lye to room temperature water. When you add the lye, it chemically heats up the water – it can get up to 180F! That’s why you want to set the water aside to cool afterward. 🙂
You can learn more about lye, including how to handle it safely, in the Beginning Soaper Resource Roundup: http://www.soapqueen.com/bramble-berry-news/beginning-soaper-resource-roundup/
-Kelsey with Bramble Berry
awesome, thanks! one more question- your 12 inch tall skinny mold is out of stock. which mold would you recommend?
You’re welcome! The Tall 12″ Silicone Loaf Mold is expected back in June 3rd: https://www.brambleberry.com/Tall-12-Silicone-Loaf-Mold-P6073.aspx
If you want to make the bars now, you can use our Tall Narrow Wood Loaf Mold: https://www.brambleberry.com/Tall-Narrow-Wood-Loaf-Mold-P6122.aspx
You can also use our 10″ Silicone Loaf Mold (my favorite): https://www.brambleberry.com/10-Silicone-Loaf-Mold–P5199.aspx
All of those molds hold about 3 pounds of soap, so you wouldn’t need to resize the recipe. 🙂
-Kelsey with Bramble Berry
I would like to know when mixing up the Hydrated Chrome Green Pigment colorant, do I use a bit of the sweet almond oil that I have weighed for the recipe or is this 1 Tbsp, not a part of the oil used in the soap recipe. Same goes for the distilled water that is needed to mix the kaolin and sea clay. I’m thinking that you do, but just want to make sure. I have all the ingredients and can’t wait to try it.
Hi Kim!
The oil and water used in the recipe are in added oil and water. They are not considered part of your base recipe. The little bit extra oil adds some luxury to the batch, and the added water will evaporate as the soap cures for 4-6 weeks.
If you like, you can use the oils from your base recipes to mix the colors! You can also discount the water used to mix the clays. 🙂
-Kelsey with Bramble Berry
Hi! I’m new to soaping and not sure I can work fast enough to do a recipe like this–is there any way to do an in-the-pot swirl with a M&P soap? Do you have any recipes I can use to make this with a M&P? 🙂 Love your website and all I’ve learned so far from your hard work!
Never mind; I found your soap queen TV episode! ^_^
Hi Jeannine!
That’s awesome, so glad you found that video! Let me know if you have any other questions. 🙂
-Kelsey with Bramble Berry
Swirling Melt and Pour on Soap Queen TV: https://www.youtube.com/watch?v=4jcf9l5Wc44
Do you cut these at 1 inch or 1.25 inches? I’m afraid the bars will be too small if cut at 1 inch.
What do you think? Thanks.
Hi Martina!
It’s definitely personal preference! Our bars were cut at about 1 inch. If you want them a little thicker, you can up that to 1.25 inches. 🙂
-Kelsey with Bramble Berry
Question…Could you use the Lots of Lather Quick Mix or the Swirl Recipe Quick Mix with this particular recipe and just leave out the shea butter?
Hi Renee!
Absolutely! Either one of those mixes would work great with this recipe. You can use the Lye Calculator on the product page to find out exactly how much lye and liquid to use. 🙂
Lots of Lather Quick Mix: https://www.brambleberry.com/Lots-of-Lather-Quick-Mix-P5524.aspx
Swirl Recipe Quick Mix: https://www.brambleberry.com/Swirl-Recipe-Quick-Mix-P5526.aspx
-Kelsey with Bramble Berry
Hello! I want to make this recipe http://www.mommypotamus.com/sea-mud-soap-recipe/ but it is in a crockpot and I don’t have one, could I use cold process on this recipe? Do you have some other thing I can do?
So sorry for my bad english, hope you understand me!
Hi Silje!
I believe so! Instead of letting the oils melt in the crock pot, you can melt those oils beforehand. When they are fully melted and your lye and oils are around 100F, slowly pour the lye into the oils. Stick blend until they’re emulsified and pour into a mold.
Because this recipe isn’t being hot processed, it will take about 2 days-2 weeks to unmold, and 4-6 weeks to cure.
To speed this process up, you can add 1 tsp. of sodium lactate per pound of oils to your cooled lye water. You can read more in the Sunday Night Spotlight: Sodium Lactate: http://www.soapqueen.com/bramble-berry-news/sunday-night-spotlight-sodium-lactate/
Also, we had great luck with this cold process recipe! It may be a fun tutorial for you to try. 🙂
-Kelsey with Bramble Berry
Love the soap! Thank you for the recipe. Didn’t see the same stamp on the website though…;-)
I was just about to ask the same thing. 🙂
Which stamp, exactly, did you use? Thanks.
Hi Iryna and Martina!
So glad you like the soap! The stamp is our Fan Flower Stamp. You can find that here: https://www.brambleberry.com/Fan-Flower-Stamp-1-stamp-P4110.aspx
We also have an awesome video on soap stamping you may like. I’ll include a link below. 🙂
How to Stamp Soap on Soap Queen TV: http://www.soapqueen.com/bath-and-body-tutorials/tips-and-tricks/how-to-stamp-soap-on-soap-queen-tv/
-Kelsey with Bramble Berry
I use green zeolite, french pink and purple Brazilian clays in my soaps. I love the natural colors I get from clays!
Hi Lindsay!
Me too! I love the soft natural look you get from clays. 🙂
-Kelsey with Bramble Berry
Clays: https://www.brambleberry.com/Clays-C48.aspx
This looks wonderful. This tall skinny mold looks great but if I were to pour it all the way to the top to get the 3.25″ height does it bow in the middle?
I think it does. It’s clearly visible in the pictures.
Hi Fuchia!
So glad you like the soap! The Tall 12″ Silicone Loaf Mold may bow a little if filled all the way to the top. In our tests, leaving 1/2″ – 1″ space from the top made unmolding easier and didn’t bow the sides.
However, even if filled to the top, we think the soap looks gorgeous! 🙂
-Kelsey with Bramble Berry
Tall 12″ Silicone Loaf Mold: https://www.brambleberry.com/Tall-12-Silicone-Loaf-Mold-P6073.aspx