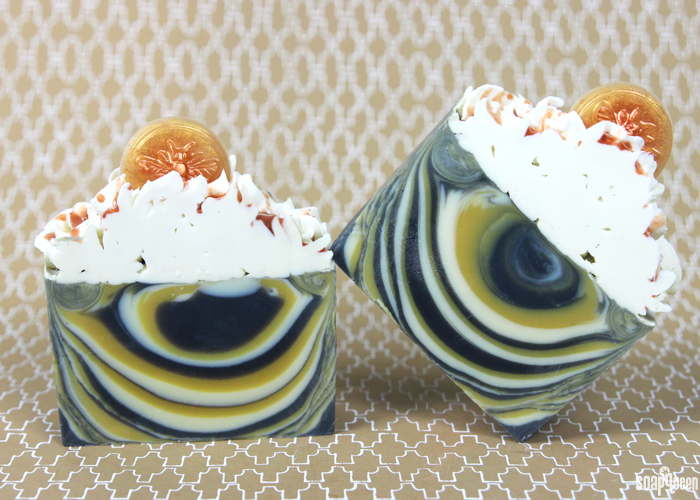
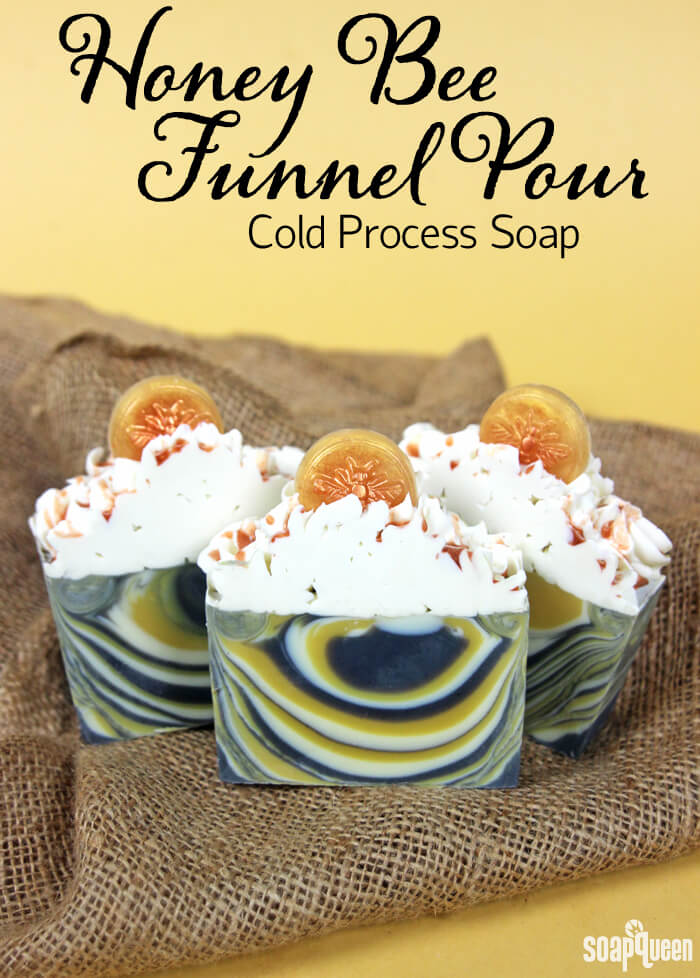
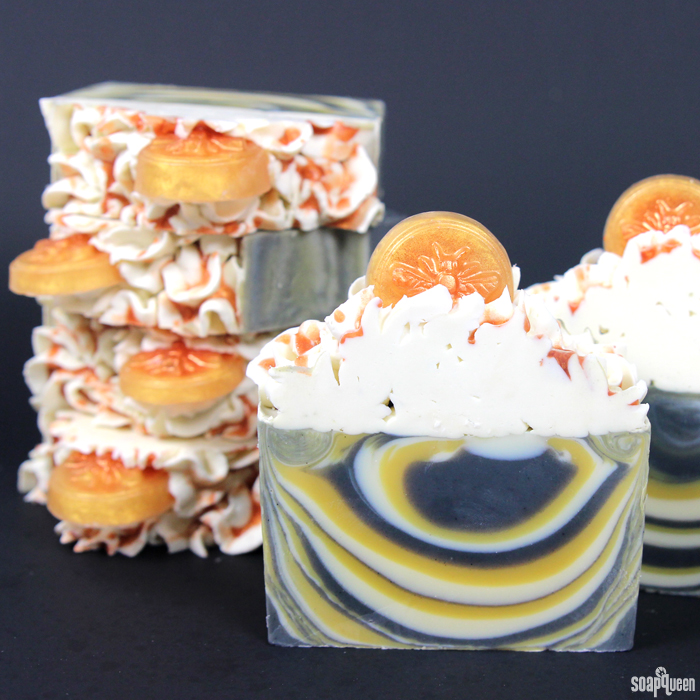
One of the sure signs of spring is honey bees floating from flower to flower. This Honey Bee Funnel Pour Cold Process Soap is inspired by the yellow and black stripes on a bee. The soap is then topped with fluffy cold process frosting, a Honey Melt and Pour Base bee embed and a golden melt and pour honey drizzle. It is scented with Pure Honey Fragrance Oil. The sweet and warm honey scent pairs perfectly with the bee-inspired colors.
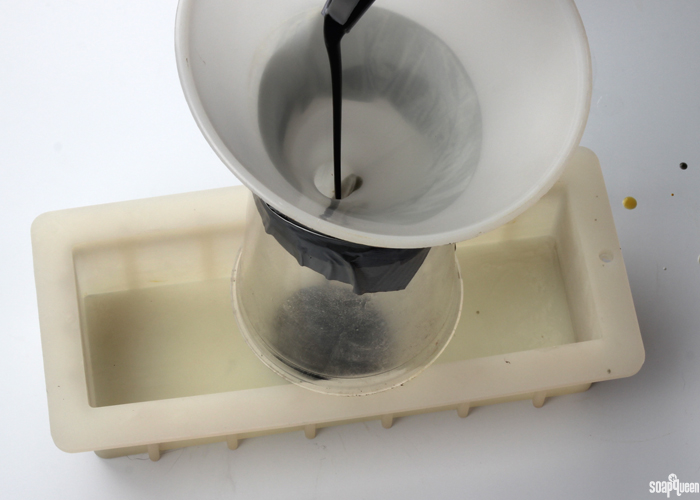
This soap is made using the funnel pour technique. Yellow, white and black soap is poured through a funnel, creating the unique layers. Check out this Funnel Pour Soap video on Soap Queen TV to see how it’s done.
If you’ve never made cold process frosting before, check out the Whipped Cold Process Soap Frosting episode on Soap Queen TV. The key to soap frosting is to allow the lye water and oils to completely cool to around 60-70 °F.
This is an advanced recipe. If you’ve never made soap before, you may want to have a couple recipes under your belt before attempting this design. While the soap does have several steps, we think the beautiful result is totally worth it!
What You’ll Need:
Base Soap
10″ Silicone Loaf Mold
16 oz. Funnel
3.4 oz. Avocado Oil
.7 oz. Castor Oil
1 oz. Cocoa Butter
6.8 oz. Coconut Oil
11.9 oz. Olive Oil
6.8 oz. Palm Oil
3.4 oz. Rice Bran Oil
4.7 oz. Sodium Hydroxide Lye
11.2 oz. Distilled Water
2.5 oz. Pure Honey Fragrance Oil
Titanium Dioxide
Activated Charcoal
Yellow Oxide
Fizzy Lemonade Colorant
Frosting
3 oz. Cocoa Butter
3 oz. Olive Oil
3 oz. Shea Butter
6 oz. Coconut Oil
2.2 oz. Sodium Hydroxide Lye
4.9 oz. Distilled Water
Disposable Frosting Bag
1M Frosting Tip
Titanium Dioxide
Embeds and Honey Drizzle
Honey Bee Wax Tart Mold
6 oz. Honey Melt and Pour Base (3 oz. for the embeds and 3 oz. for the drizzle)
King’s Gold Mica
Copper Sparkle Mica
 Click here to add everything you need for this project to your Bramble Berry shopping cart!
Make the Bee Embeds
ONE: Disperse 1 teaspoon of King’s Gold Mica into 1 Tablespoon 99% isopropyl alcohol. Mix to combine. Cut 3 oz. of Honey Melt and Pour Base in small chunks and melt in a heat safe container on 5 second bursts. Melting on short bursts ensures the soap doesn’t burn. Read more about burnt melt and pour here. Add all of the dispersed King’s Gold Mica and stir to combine.
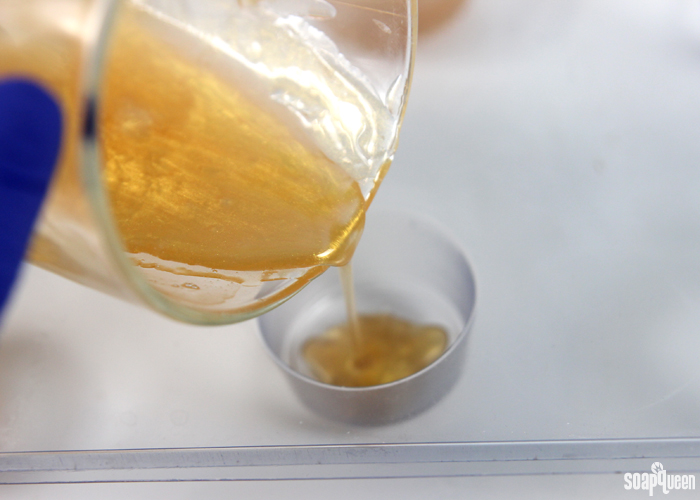
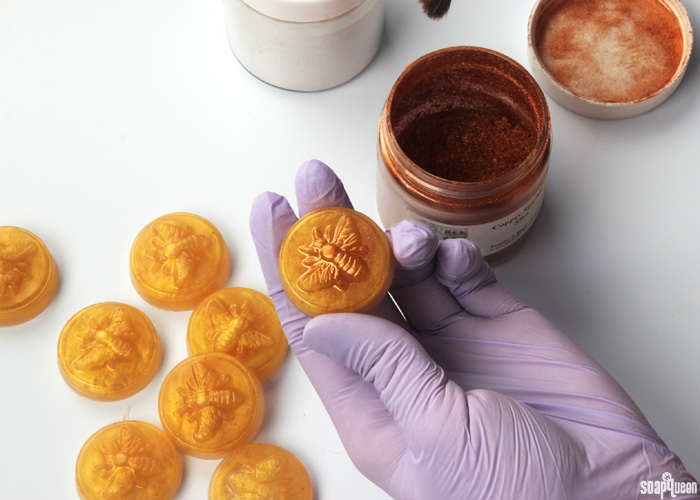
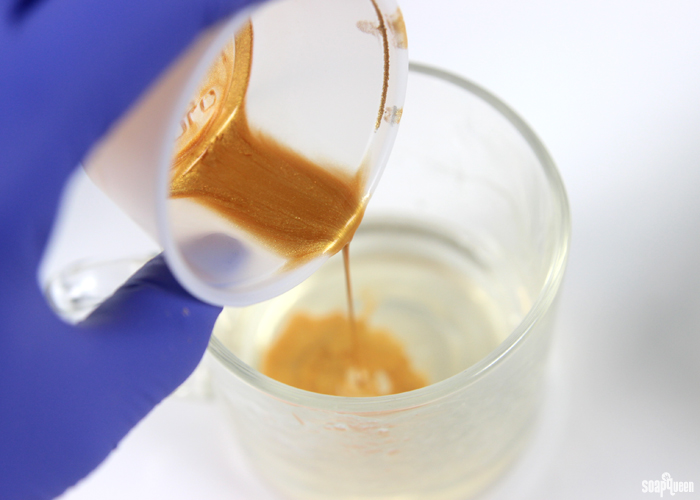 TWO: Carefully pour the melt and pour into the Honey Bee Wax Tart Mold cavities, filling each cavity about half way. Spritz with 99% isopropyl alcohol to disperse any bubbles, and allow to fully cool and harden. Remove from the mold. To really make the embeds pop, use a paintbrush to dust a thin coat of Copper Sparkle Mica on the bee image.
Make the Base
If you’ve never made Cold Process soap before, stop here! I highly recommend checking out our FREE four part SoapQueen.tv series on Cold Process Soapmaking, especially the episode on lye safety. And if you’d rather do some reading, Bramble Berry carries a wide range of books on the topic, including my newest book, Soap Crafting. You can also checkout the digital downloads for that instant gratification factor.
SAFETY FIRST: Suit up for safe handling practices! That means goggles, gloves and long sleeves. Make sure kids, pets, and other distractions and tripping hazards are out of the house or don’t have access to your soaping space. Always soap in a well-ventilated area.
COLOR PREP: Disperse 2 teaspoons of the Titanium Dioxide into 2 tablespoons of sunflower or sweet almond oil (or any other liquid oil). Disperse 1 teaspoon Activated Charcoal into 1 tablespoon of light liquid oil. Then in separate containers, disperse 1 teaspoon Yellow Oxide and 1 teaspoon Fizzy Lemonade Colorant into 1 tablespoon light liquid oil. Use a mini mixer to get the clumps of color worked out smoothly.
ONE: Slowly and carefully add the lye to the water and gently stir until the lye has fully dissolved and the liquid is clear. Set aside to cool.
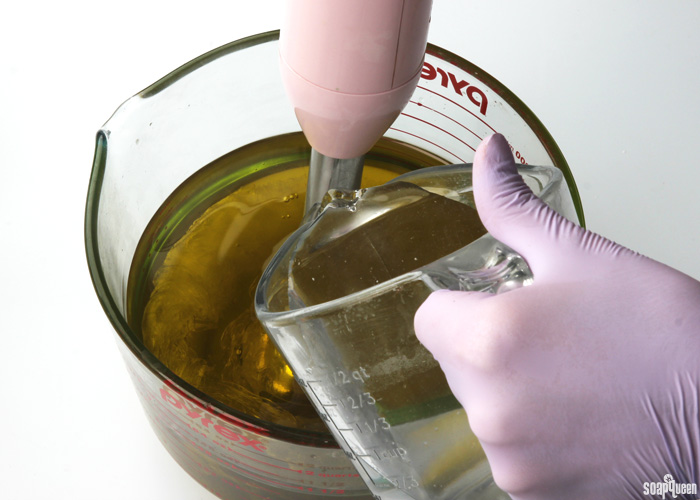
TWO: Combine the coconut, olive oil, avocado oil, castor oil, rice bran oil, palm oil and cocoa butter (remember to fully melt then mix your entire container of palm oil before portioning). Once the lye water and the oils have cooled to 130 degrees or below (and are ideally within 10 degrees of each other), add the lye water to the oils and stick blend until you reach a very light trace. If you’d like a harder bar of soap that releases faster from the mold, you can add sodium lactate to the cooled lye water. Use 1 teaspoon of sodium lactate per pound of oils in the recipe. For this recipe, you’d add about 3 tsp. sodium lactate.
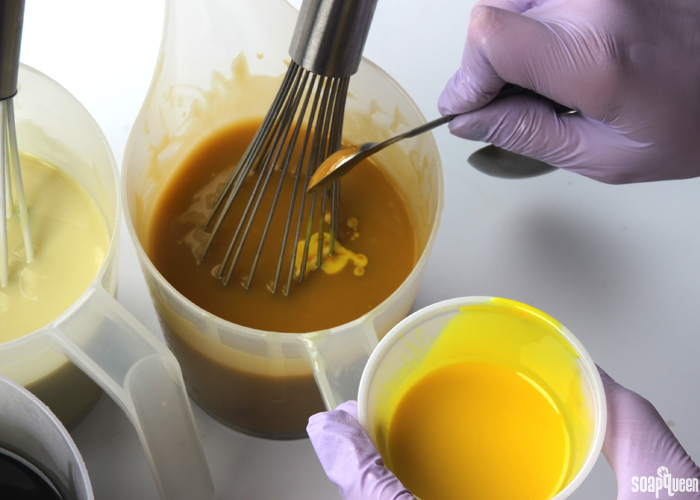
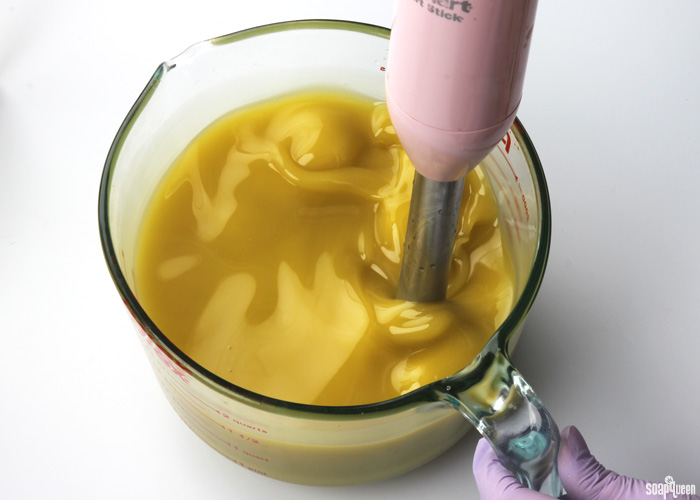 THREE: Once the batter has reached a very light trace, split the batch evenly into three separate containers. To each container, add the following dispersed colorants in the amounts below. Use a whisk to fully mix in each colorant.
- Container A: 2 tsp. dispersed Activated Charcoal
- Container B: 2 Tbs. dispersed Titanium Dioxide
- Container C: 1 tsp. dispersed Yellow Oxide + 1 tsp. dispersed Fizzy Lemonade Colorant
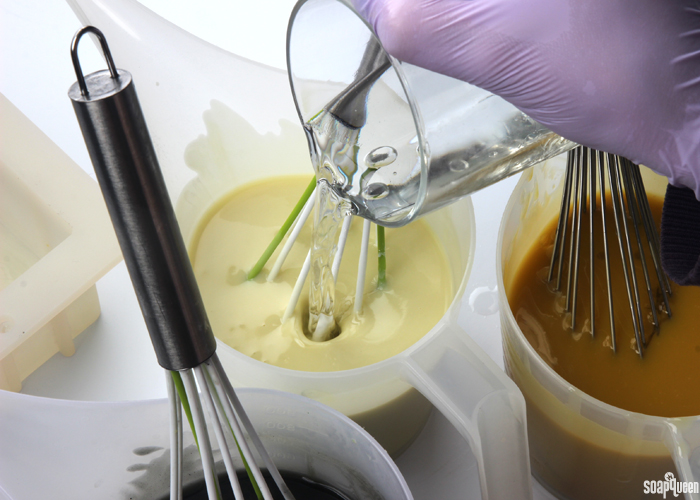
FOUR: Add the Pure Honey Fragrance Oil into each container evenly. It’s okay to eyeball it! Use a whisk to fully mix in the fragrance oil.
FIVE: Pour the black soap into the funnel. We like to count to 3 to ensure even pours. Check out the Funnel Pour Soap video on Soap Queen TV to see how to do the technique step by step.
SIX: Pour the white soap in the funnel, again counting to 3. Pour down the side of the funnel to help the color pour on top of the black soap, rather than mixing with it.
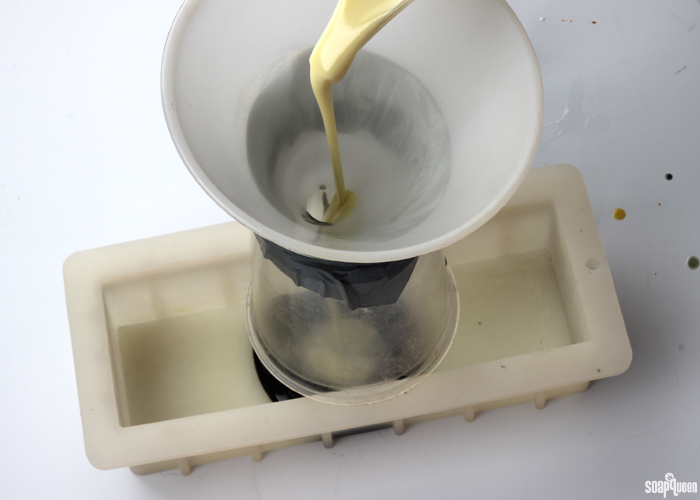 SEVEN: Pour the yellow soap on the side of the funnel and count to 3. If you notice your soap getting grainy, whisk it until smooth.
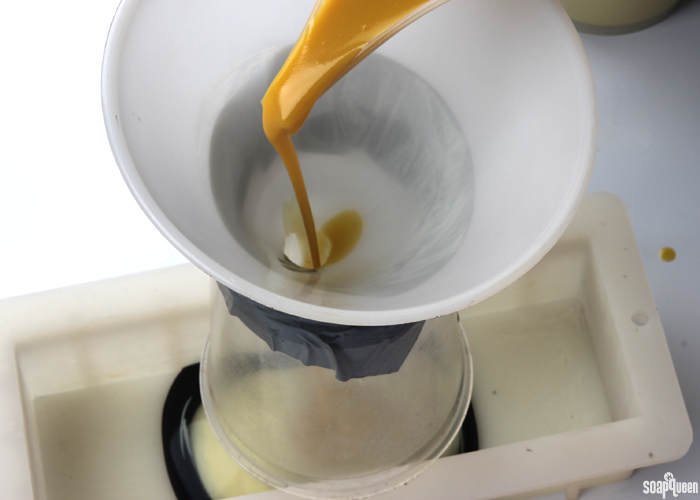
EIGHT: Continue to pour the black, white and orange soap in that order, counting to 3 each time. If you notice the soap starting to pool in the middle, give the mold a shake to even the soap out.
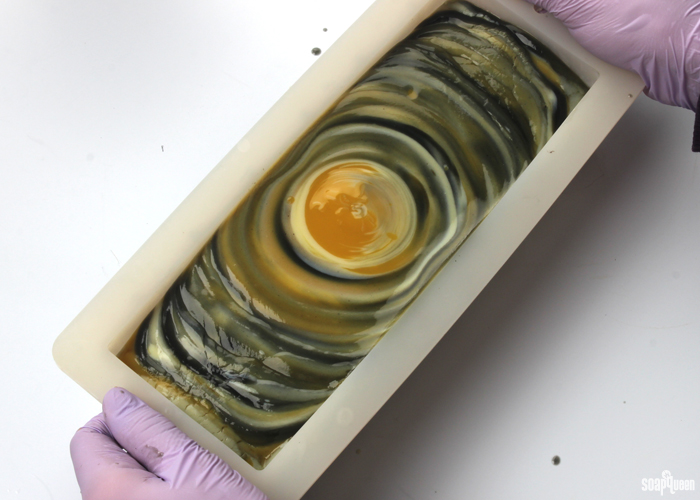
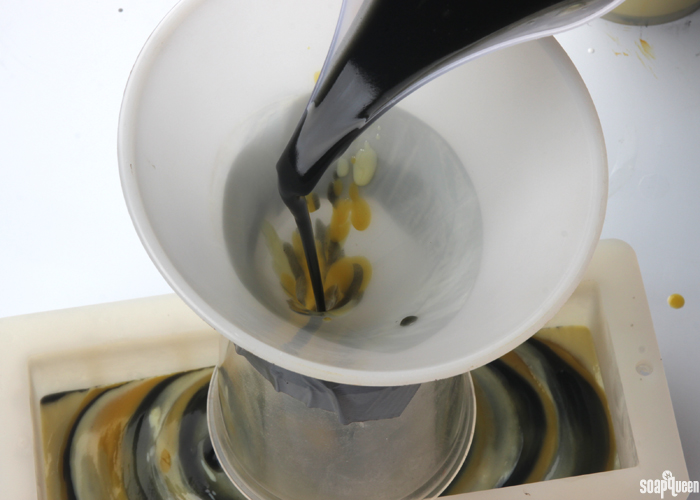 NINE: Once all the soap has been poured in the mold, remove the funnel. Tap the soap on the counter to disperse any air bubbles. Time to make the frosting!
Make Soap Frosting
LYE & OIL PREP: In order to get soapy frosting to actually look like frosting, the lye and oils must be very cold. We recommend making the lye water a full day ahead of time, clearly labeling it (*poison* *danger* *do not drink!*) and keeping it in a refrigerator not used for food. Alternately, you can use frozen water (eh hem: ice) to add your lye flakes to but the lye will still need to cool down. The lye should be around 60 degrees F before adding it to the oils. Additionally, you want your oils to be around 70 degrees F. You can even refrigerate them for several hours too! They should be semi-solid at this temperature. If your oils become completely solid, don’t worry! Soap frosting can be created with solid oils as well.
COLOR PREP: Disperse 2 teaspoons of the Titanium Dioxide into 2 tablespoons of sunflower or sweet almond oil (or any other liquid oil). Use a mini mixer to get the clumps of color worked out smoothly.
ONE: Slowly pour the lye into the whipped oils, and use a spoon to incorporate. Be super careful not to splash any lye at this point before the lye water is fully incorporated into the hardened, slushy, cool oils. Turn the hand mixer or Kitchen Aid Stand Mixer on low, and continue to whip oils until a fluffy, frosting texture is achieved. Scrape any batter that has splattered on the side of the container and then turn the mixer to a medium setting. Continue to whip for another 3-7 minutes.
TWO: Once the oils have begun to harden, add all the Titanium Dioxide. Continue to whip until the mixture is thoroughly mixed.
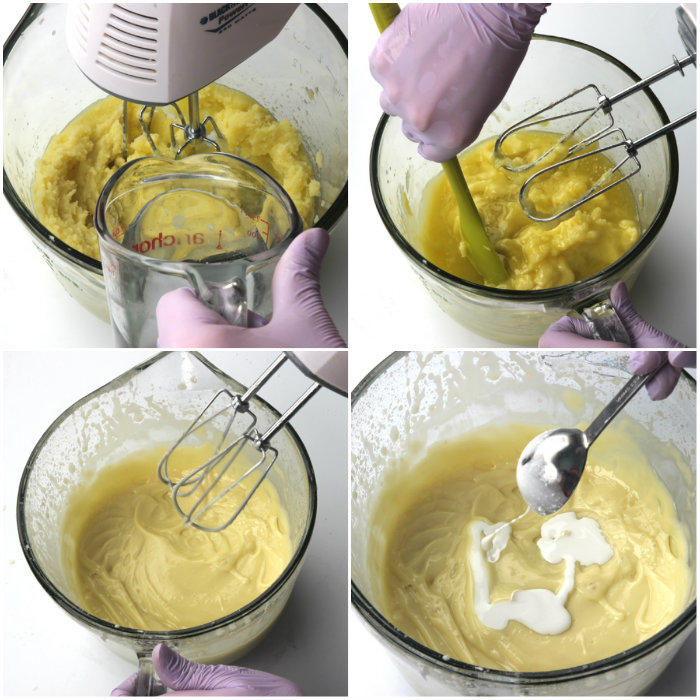
THREE: Once a frosting texture has been achieved, cut off about a half inch from the tip of the frosting bag and push the tip through. Scoop the frosting into the bag until full. You will have some frosting left over, and will need to fill the bag again during the frosting process.
FOUR: Starting at the end of the mold, begin piping dollops of frosting. We got about three dollops per row.
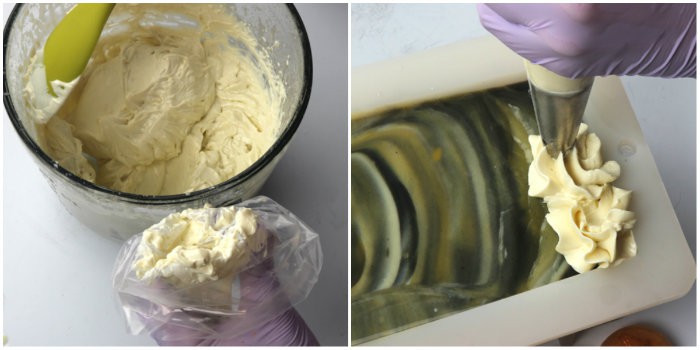
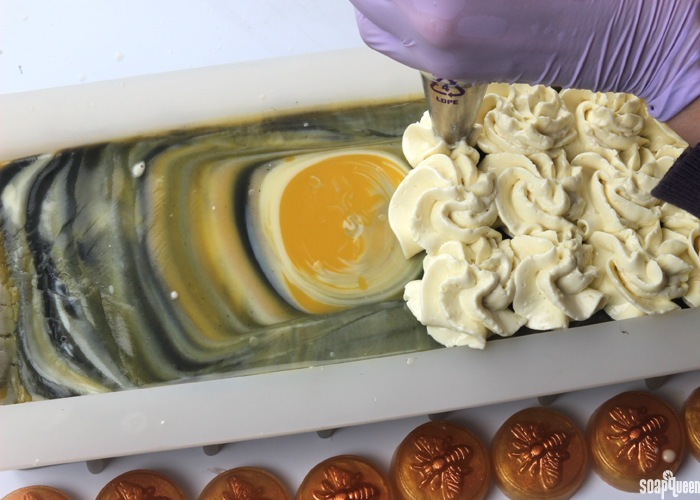
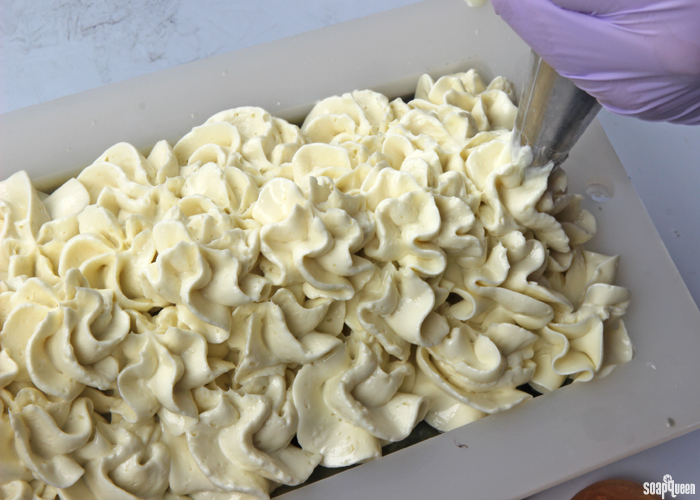
FIVE: Once the bottom layer of frosting is complete, add a row of two dollops in the center, on top of the bottom layer. Then, add one more row of dollops on top of the second layer in the center. That makes the frosting nice and tall.
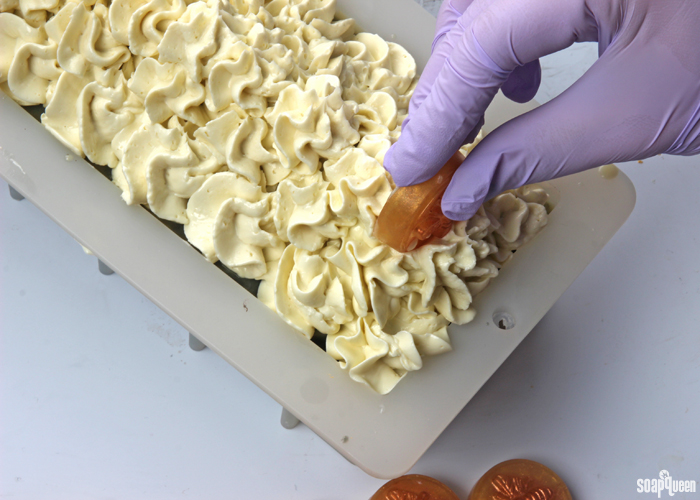
SIX: Line the melt and pour pieces against the side of the mold so you can get an idea of where to place them. You’ll have 8 pieces, making about 8 bars of soap. When you have an idea of where to place the pieces, press them into the frosting. Make sure to press them in far enough so they stick in the cold process soap.
Make the Melt and Pour Honey Drizzle
ONE: Disperse 1 teaspoon of King’s Gold Mica into 1 Tablespoon 99% isopropyl alcohol and 1 teaspoon Copper Sparkle Mica into 1 tablespoon 99% isopropyl alcohol. Mix to combine. In a heat safe container, melt 3 oz. of Clear Melt and Pour base on 5 second bursts. Melting on short bursts ensures the soap doesn’t burn. Read more about burnt melt and pour here.
TWO: Add 2 teaspoons of dispersed King’s Gold Mica and 3/4 tsp. of dispersed Copper Sparkle Mica to the soap and mix well.
THREE: Using a dropper, drizzle the melt and pour on top of the soap until you get your desired honey drizzle effect. You can use as much honey drizzle as you like. There’s no wrong way to do it, so have fun!
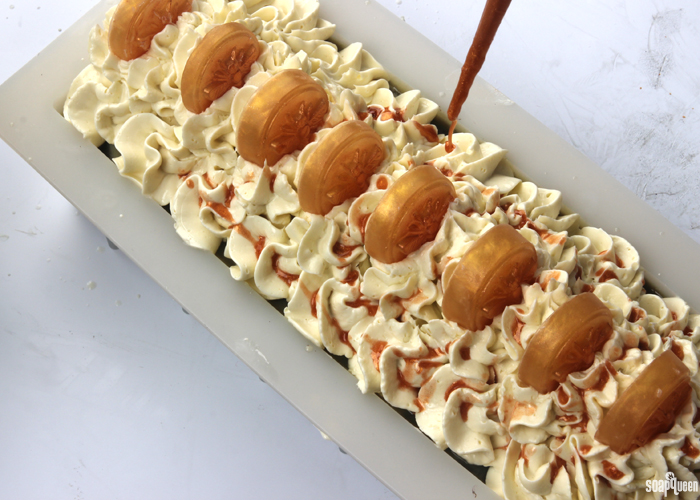
FOUR: Allow the soap to harden for 3-4 days before unmolding. Allow it to cure for 4-6 weeks and enjoy!
Have you tried the funnel pour technique before? What did you think?
- 10 inch Silicone Loaf Mold
- 16 oz. Funnel
- 3.4 oz. Avocado Oil
- .7 oz. Castor Oil
- 1 oz. Cocoa Butter
- 6.8 oz. Coconut Oil
- 11.9 oz. Olive Oil
- 6.8 oz. Palm Oil
- 3.4 oz. Rice Bran Oil
- 4.7 oz. Sodium Hydroxide Lye
- 11.2 oz. Distilled Water
- 2.5 oz. Pure Honey Fragrance Oil
- Titanium Dioxide
- Activated Charcoal
- Yellow Oxide
- Fizzy Lemonade Colorant
- 3 oz. Cocoa Butter
- 3 oz. Olive Oil
- 3 oz. Shea Butter
- 6 oz. Coconut Oil
- 2.2 oz. Sodium Hydroxide Lye
- 4.9 oz. Distilled Water
- Disposable Frosting Bag
- 1M Frosting Tip
- Titanium Dioxide
- Honey Bee Wax Tart Mold
- 6 oz. Honey Melt and Pour Base (3 oz. for the embeds and 3 oz. for the drizzle)
- King’s Gold Mica
- Copper Sparkle Mica
- Disperse 1 teaspoon of King’s Gold Mica into 1 Tablespoon 99% isopropyl alcohol. Mix to combine. Cut 3 oz. of Honey Melt and Pour Base in small chunks and melt in a heat safe container on 5 second bursts. Melting on short bursts ensures the soap doesn’t burn. Add all of the dispersed King’s Gold Mica and stir to combine.
- Carefully pour the melt and pour into the Honey Bee Wax Tart Mold cavities, filling each cavity about half way. Spritz with 99% isopropyl alcohol to disperse any bubbles, and allow to fully cool and harden. Remove from the mold. To really make the embeds pop, use a paintbrush to dust a thin coat of Copper Sparkle Mica on the bee image.
- If you’ve never made Cold Process soap before, stop here! I highly recommend checking out our FREE four part SoapQueen.tv series on Cold Process Soapmaking, especially the episode on lye safety. And if you’d rather do some reading, Bramble Berry carries a wide range of books on the topic, including my newest book, Soap Crafting. You can also checkout the digital downloads for that instant gratification factor.
- SAFETY FIRST: Suit up for safe handling practices! That means goggles, gloves and long sleeves. Make sure kids, pets, and other distractions and tripping hazards are out of the house or don’t have access to your soaping space. Always soap in a well-ventilated area.
- COLOR PREP: Disperse 2 teaspoons of the Titanium Dioxide into 2 tablespoons of sunflower or sweet almond oil (or any other liquid oil). Disperse 1 teaspoon Activated Charcoal into 1 tablespoon of light liquid oil. Then in separate containers, disperse 1 teaspoon Yellow Oxide and 1 teaspoon Fizzy Lemonade Colorant into 1 tablespoon light liquid oil. Use a mini mixer to get the clumps of color worked out smoothly.
- Slowly and carefully add the lye to the water and gently stir until the lye has fully dissolved and the liquid is clear. Set aside to cool.
- Combine the coconut, olive oil, avocado oil, castor oil, rice bran oil, palm oil and cocoa butter (remember to fully melt then mix your entire container of palm oil before portioning). Once the lye water and the oils have cooled to 130 degrees or below (and are ideally within 10 degrees of each other), add the lye water to the oils and stick blend until you reach a very light trace. If you’d like a harder bar of soap that releases faster from the mold, you can add Sodium Lactate to the cooled lye water. Use 1 teaspoon of Sodium Lactate per pound of oils in the recipe. For this recipe, you’d add about 3 tsp. Sodium Lactate.
- Once the batter has reached a very light, split the batch evenly into three separate containers. To each container, add the following dispersed colorants in the amounts below. Use a whisk to fully mix in each colorant. Container A: 2 tsp. dispersed Activated Charcoal; Container B: 2 Tbs. dispersed Titanium Dioxide; Container C: 1 tsp. dispersed Yellow Oxide + 1 tsp. dispersed Fizzy Lemonade Colorant
- Add the Pure Honey Fragrance Oil into each container evenly. It’s okay to eyeball it! Use a whisk to fully mix in the fragrance oil.
- Pour the black soap into the funnel. We like to count to 3 to ensure even pours.
- Pour the white soap in the funnel, again counting to 3. Pour down the side of the funnel to help the color pour on top of the black soap, rather than mixing with it.
- Pour the yellow soap on the side of the funnel and count to 3. If you notice your soap getting grainy, whisk it until smooth.
- Continue to pour the black, white and orange soap in that order, counting to 3 each time. If you notice the soap starting to pool in the middle, give the mold a shake to even the soap out.
- Once all the soap has been poured in the mold, remove the funnel. Tap the soap on the counter to disperse any air bubbles.
- LYE & OIL PREP: In order to get soapy frosting to actually look like frosting, the lye and oils must be very cold. We recommend making the lye water a full day ahead of time, clearly labeling it (*poison* *danger* *do not drink!*) and keeping it in a refrigerator not used for food. Alternately, you can use frozen water (eh hem: ice) to add your lye flakes to but the lye will still need to cool down. The lye should be around 60 degrees F before adding it to the oils. Additionally, you want your oils to be around 70 degrees F. You can even refrigerate them for several hours too! They should be semi-solid at this temperature. If your oils become completely solid, don’t worry! Soap frosting can be created with solid oils as well.
- COLOR PREP: Disperse 2 teaspoons of the Titanium Dioxide into 2 tablespoons of sunflower or sweet almond oil (or any other liquid oil). Use a mini mixer to get the clumps of color worked out smoothly.
- Slowly pour the lye into the whipped oils, and use a spoon to incorporate. Be super careful not to splash any lye at this point before the lye water is fully incorporated into the hardened, slushy, cool oils. Turn the hand mixer or Kitchen Aid Stand Mixer on low, and continue to whip oils until a fluffy, frosting texture is achieved. Scrape any batter that has splattered on the side of the container and then turn the mixer to a medium setting. Continue to whip for another 3-7 minutes.
- Once the oils have begun to harden, add all the titanium dioxide. Continue to whip until the mixture is thoroughly mixed.
- Once a frosting texture has been achieved, cut off about a half inch from the tip of the frosting bag and push the tip through. Scoop the frosting into the bag until full. You will have some frosting left over, and will need to fill the bag again during the frosting process.
- Beginning at the end of the mold, begin piping dollops of frosting. We got about three dollops per row.
- Once the bottom layer of frosting is complete, add a row of two dollops in the center, on top of the bottom layer. Then, add one more row of dollops on top of the second layer in the center. That makes the frosting nice and tall.
- Line the melt and pour pieces against the side of the mold so you can get an idea of where to place them. You’ll have 8 pieces, making about 8 bars of soap. When you have an idea of where to place the pieces, press them into the frosting. Make sure to press them in far enough so they stick in the cold process soap.
- Disperse 1 teaspoon of King’s Gold Mica into 1 Tablespoon 99% isopropyl alcohol and 1 teaspoon Copper Sparkle Mica into 1 tablespoon 99% isopropyl alcohol. Mix to combine. In a heat safe container, melt 3 oz. of Clear Melt and Pour base on 5 second bursts. Melting on short bursts ensures the soap doesn’t burn.
- Add 2 teaspoons of dispersed King’s Gold Mica and ¾ tsp. of dispersed Copper Sparkle Mica to the soap and mix well.
- Using a dropper, drizzle the melt and pour on top of the soap until you get your desired honey drizzle effect. You can use as much honey drizzle as you like. There’s no wrong way to do it, so have fun!
- Allow the soap to harden for 3-4 days before unmolding. Allow it to cure for 4-6 weeks and enjoy!


That looks wonderful!! I’m still learning about CP soap making and I’m wondering when doing this recipe, do you insulate it at all? I’m confused as when to insulate a CP soap.
For this recipe we recommend keeping the soap at cool room temperature. If the frosting on top gets really hot, it can lose its shape. The melt and pour can also melt slightly. A cool place like a garage or basement is ideal.
As for other recipes, it depends on what you add and your personal preference. This post talks more about when to insulate: http://www.soapqueen.com/bath-and-body-tutorials/tips-and-tricks/when-to-insulate-handmade-soap/
-Kelsey with Bramble Berry
I have a question about whipping soap. I have always wanted to try it, so I think I’m going to go ahead and just do it. Can I use my Kitchenaide for this and still use it as a regular kitchen tool, or should I have a separate one for just soap making?
Hi Gail!
Separate tools are best! Even with really thorough washing, lye and fragrance can get stuck in microcracks on your tools. That means you can accidentally ingest it. We recommend one set of tools for soaping and one for food. 🙂
-Kelsey with Bramble Berry
Is there a reason that the frosting isn’t scented?
Hi Kate!
We chose not to scent the frosting because the base on its own is nice and fragrant, and we wanted the frosting to be a bright white color. If you like, you can definitely scent it! You can use Pure Honey Fragrance Oil, or a fun blend. Find some blend ideas for Pure Honey here: https://www.brambleberry.com/Sample-Idea-Sheet-for-May-2015.aspx
Make sure the fragrance you use doesn’t discolor, otherwise it can turn the frosting brown. Read more about that in the Why Did My Soap Turn Brown post: http://www.soapqueen.com/bath-and-body-tutorials/tips-and-tricks/why-did-my-soap-turn-brown/
-Kelsey with Bramble Berry
Hi,
Can I use the swirl quick mix for the base funnel portion?
Thanks,
Kate
Hi Kate!
Absolutely! The Swirl Quick Mix is formulated to give you lots of time to work with swirled designs. It would work well in this recipe. 🙂
You can use the Lye Calculator on the product page to find out how much lye and liquid to add for this tutorial: https://www.brambleberry.com/Swirl-Recipe-Quick-Mix-P5526.aspx
-Kelsey with Bramble Berry
Hi there!
How do I keep the frosting from separating from the base? The other day I piped soap cupcakes and they all fell apart :(. TIA!
Hi Celine!
Oh no, I’m sorry that separated on you! How long did the cupcakes sit before you piped the frosting on? Also, did you add any sodium lactate to the frosting? We tend to frost the cupcakes when the soap is still wet, and have found that works well. Also, when we added sodium lactate to the frosting we noticed it popped off sometimes.
Let me know and we’ll get this figured out! 🙂
-Kelsey with Bramble Berry
Hi there!
I just love this bar! My question is about the cutting. I thought, with a funnel pour, you needed to cut 2 1/8 inch bars then turn them on their side and cut down the middle (forming 2 bars) to get the funnel pour design to look like your does. I don’t see how that’s done with frosting…. Am I missing something? Oh! Maybe it makes two TALL frosted bars… What say you?
No…that wouldn’t work because of the embeds on top. I was going to do this recipe using the infinity design technique and am running into the same problem. I want a pretty swirled soap with frosting but I can’t turn it on its side to cut…..any ideas?
Hi Carrie!
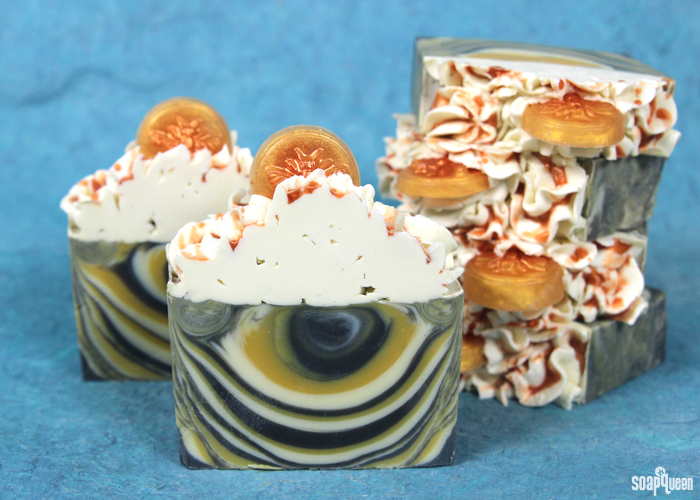
That is actually something we considered before making the bar! Typically, you cut it horizontally to get the interesting lines characteristic of the funnel pour. However, we decided to give it a try and found in this instance the pattern was still gorgeous, even when cut the old fashioned way.
So, I would definitely recommend trying this technique with frosting and cutting the bars vertically. Then, see what you think! If you prefer the cut the other way, you can leave the frosting and embed off and cut horizontally. 🙂
-Kelsey with Bramble Berry
How to Make Funnel Pour Soap: http://www.soapqueen.com/bath-and-body-tutorials/cold-process-soap/how-to-make-funnel-pour-soap-on-soap-queen-tv/
Love love love the top! With the honey drizzle and little bee it looks like a queens soap! I think that if you made this to a simple melt and pour project you could make a whole bar of gold soap maybe with a bit of swirl and use a foaming bath whip frosting and frost the top like this recipe with the honey drizzle and bee it would be a simpler look and recipe!
So glad you love the soap Emmeline! Also, a melt and pour version of this project would be so adorable. Thanks for your great idea. 🙂
-Kelsey with Bramble Berry
Foaming Bath Whip Frosting: http://www.soapqueen.com/bath-and-body-tutorials/melt-and-pour-soap/foaming-bath-whip-frosting/
What a great tutorial. Thanks for sharing. I love the way the real funnel gives you such perfect lines with the different colours.
So glad you like the tutorial Odette! The funnel pour technique is so fun. I love the lines it creates too. Thanks for your kind message. 🙂
-Kelsey with Bramble Berry
I have one more question:
What do you do with extra dispersed colorant?
For example, you usually disperse 1 tsp colorant in 1 Tbs oil, and then use a small amount of that mixture. Like above in this part “Container C: 1 tsp. dispersed Yellow Oxide + 1 tsp. dispersed Fizzy Lemonade Colorant”.
That would mean you still have about 2 tsp each mixture left over. So what do you do with it?
If I know I’m gonna use less, I usually disperse less. But maybe I’m missing something?
I did disperse larger amounts of certain colorants in small bottles (TD, green oxide, black oxide, and red mixture (Merlot mica and Bublegum)), because I use them more often and a little goes a long way, especially with green and black oxides.
Thanks!
Hi Martina!
We prep our colorants in plastic containers, so if we have leftover colorant we put a cap on them and store them in a cool dark place. The shelf life will be the same as the oil they’re mixed in. Just make sure to stir them well before use, as the colorants will settle. Learn more about oil shelf lives here: http://www.soapqueen.com/bath-and-body-tutorials/tips-and-tricks/free-beginners-guide-to-soapmaking-common-soapmaking-oils/
Your system sounds great too! That way you can just add the color straight from the bottle.
You can also just prep less colorant if you prefer! You can do 1/2 tsp. to 1/2 Tbsp., that should be plenty. 🙂
-Kelsey with Bramble Berry
This looks just like a Royalty soap. Piped high tops are her signature, her soaps are always gorgeous.
We love Royalty Soaps, her work is so beautiful! You can check out our interview with her here: http://www.soapqueen.com/business/interview-duchess-suds/
-Kelsey with Bramble Berry
Great project! Question: I’ve seen MP embeds added to CP soap before, but I’ve always wondered how well they “stuck”, especially during usage. What is your experience with that? Do they stay with the soap or do they fall out? Does it make a difference if it’s in soap frosting or regular CP soap? Thanks!
In my experience the MP sticks just fine, though in an embed on the top like this I imagine it would break or come right off before long. My occasional problem is that the MP will sweat, so I usually wrap soaps with MP in it.
So glad you like the project Angie! As long as your embeds are pushed into the soap (frosting or regular soap), they should stick fine. In the shower, I find the embed sticks in the soap and eventually washes down with the soap. They can fall off sometimes, as Michael said. Also, wrapping that soap can help prevent sweating! You may also like our LCP (like cold process) bases. They have less glycerin in them, meaning they have little to no sweating. 🙂
LCP bases: https://www.brambleberry.com/Search.aspx?k=lcp
-Kelsey with Bramble Berry
I agree with Michael. I have done funnel pour, but it’s just as easy to just pour in the center the same way, counting to 3.
That soap looks great!! And I just got my big bottle of Pure Honey FO yesterday and I love it! Not sorry at all that I got 16 oz. But then again, I’m never sorry with your FOs, so I always get 16 oz bottles. 🙂
Question: in the frosting section you say to add lye water to whipped oils. How much do you whip them before you add lye water? And what would you say is your total whipping time then? Including whipping just oils and whipping oils and lye water and TD together?
And I’m just curious about the size of your bars? They are probably pretty big judging by the looks of it. Thanks!
Hi Martina!
That technique works great as well! We used it in the Faux Funnel Pour technique: http://www.soapqueen.com/bath-and-body-tutorials/cold-process-soap/faux-funnel-pour-advanced-cold-process/
So glad you’re loving the Pure Honey Fragrance Oil. It’s definitely an office favorite around here. 🙂
Pure Honey Fragrance Oil: https://www.brambleberry.com/Pure-Honey-Fragrance-Oil-P6218.aspx
We typically whip the oils for 30 seconds to 1 minute before adding the lye. That helps loosen the oils up a little, helping that lye mix in fully. How long you whip the soap depends on how cool it is. We whipped for about 15 minutes total in our Soap Lab, which was very hot that day. Sometimes, it can take as little as 5 minutes. Just whip until the soap is thick enough to hold its shape. 🙂
Also, the bars are about 1 1/4 inches, so they are on the bigger side. We love the way they look!
-Kelsey with Bramble Berry
Anne & Kelsey:
This is by far the most comprehensive and detailed article I have seen in Soap Queen – great job guy! The Honey Bee Funnel CP soap looks so cute – almost eatable.
You guys are doing excellent on the pictures – how did you take them so well with such clear background?
Carlos
So glad you like the tutorial Carlos, thank you! We actually take the pictures standing on a step stool. That way the camera is focused on the soap, rather than the stuff in the background. 🙂
-Kelsey with Bramble Berry
That’s awesome! And the little honey bees and frosting make it special, I’m going to have to make this one. I have used the funnel pour before, but it seemed to be an unnecessary step and one more thing to wash to use the funnel. I now just pour into the middle of my mold using the same technique, I just skip using a funnel. I can choose how lightly or how deeply I want to pour.
So glad you like the soap Michael! Also, that sounds like a great technique! It would still give you the beautiful lines inside. We used that technique in the Faux Funnel Pour tutorial: http://www.soapqueen.com/bath-and-body-tutorials/cold-process-soap/faux-funnel-pour-advanced-cold-process/
-Kelsey with Bramble Berry