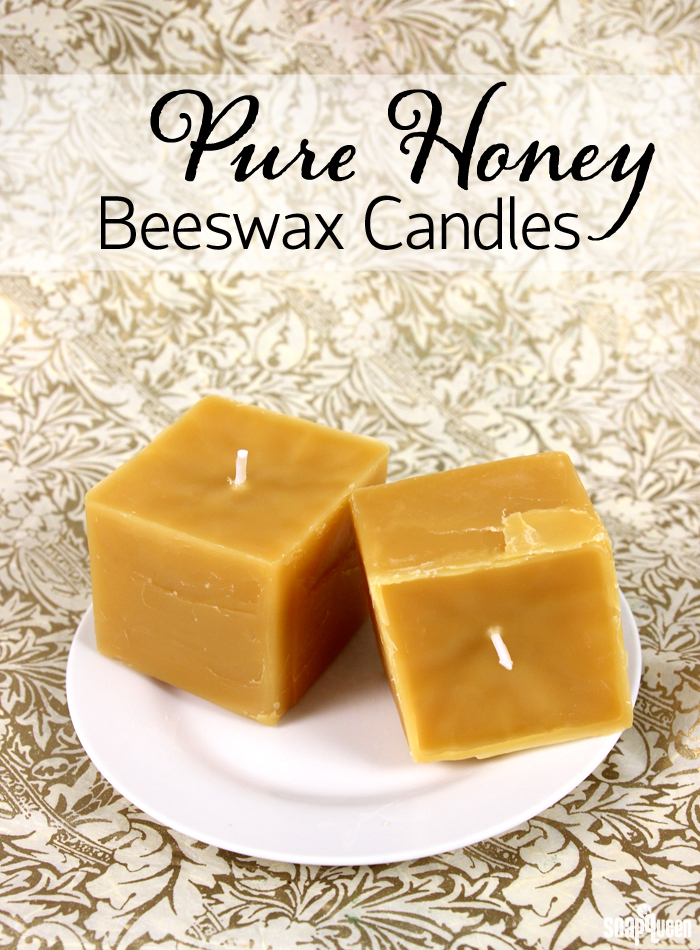
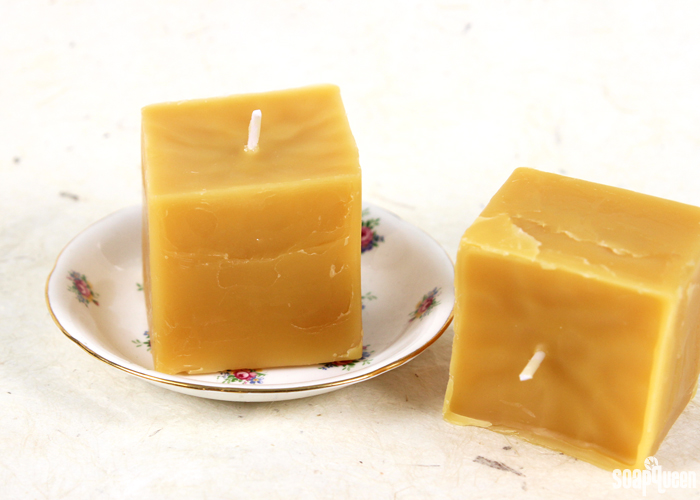
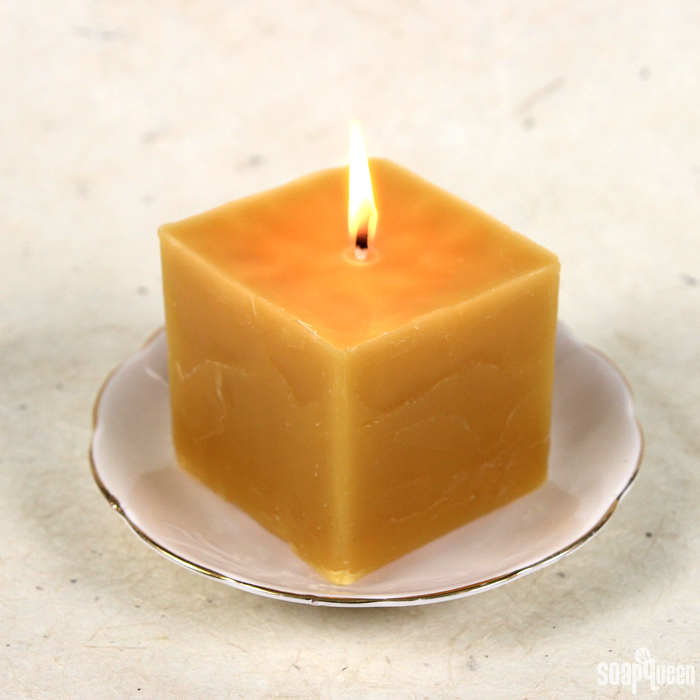
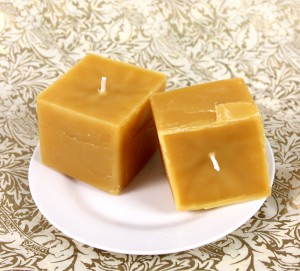
Beeswax is an amazing option for handmade candles. Not only is it natural, but beeswax smells amazing. These Pure Honey Beeswax Candles are made with the sweet and delicious Pure Honey Fragrance Oil. The combination of the fragrance and yellow beeswax creates an incredibly warm and comforting scent. We test a lot of candles here at the Bramble Berry office, and these candles wowed everyone! Just make sure to put them on a plate or other surface to catch the melting wax.
The rustic shape of these candles was created by recycling used milk cartons. Depending on the size of your container, you may need to use a different amount of wax to fill it. Just make sure the container is watertight and won’t melt from the high temperatures of the melted beeswax. If you’re looking for more ways to use recycled containers for your projects, check out the How to Recycle Your Recyclables post for more ideas.
What You’ll Need:
1 lb. Yellow Beeswax
1.3 oz. Pure Honey Fragrance Oil
2 CD-20 Wicks
Droppers
Clean Up Tool
Recycled Milk Cartons (We made two 3″ tall candles with this recipe)

Click here to add everything you need for this project to your Bramble Berry shopping cart!
MILK CARTON PREP: Wash your cartons with dish soap and warm water and let them dry. Then, measure the wick on the side of the container. You want the wick to be taller than the carton so you can center the wick with a straw or pencils. Mark where you want your wick to be and cut off the top of the carton with scissors.
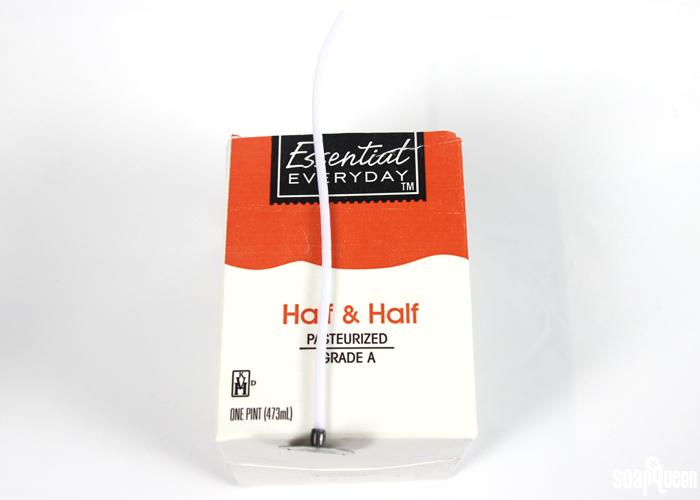
CHOOSING YOUR WICK: The wicks you use will depend on the size of your container. The wick needs to be larger than what you would use in a soy candle. Beeswax is a hard, dense wax and has a high melting point. That means it needs a larger flame for a consistent melt down. It is also important that the wax pool isn’t so big that it drips down the side of the candle. We chose CD-20 wicks for our containers. To find the correct size for your candle, you can use this wick chart.
ONE: Measure out 1 pound of beeswax and melt in a double boiler. You can turn any pot into a double boiler with the double boiler maker. If you don’t have a double boiler, you can melt the beeswax in the microwave. Be careful – because of beeswax’s high melting point, the heat safe container can melt or explode in the microwave if it gets too hot. If you do use a microwave, melt the beeswax in 1 minute bursts and stir frequently.
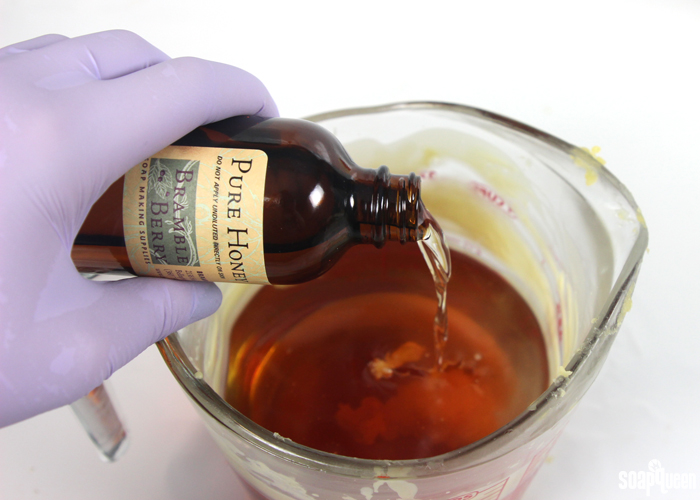
TWO: Add 1.3 oz. of Pure Honey Fragrance Oil to the melted wax and stir well.
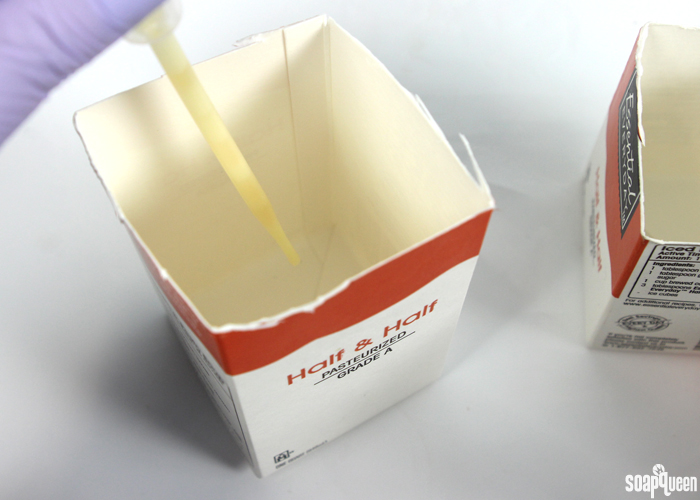
THREE: Put a drop of the hot wax mixture in the center of the cartons. Place the wick in the wax and hold it until the wax sets up (about 10 seconds). Then, center your wick. We used a straw with a slit cut in it to keep the wick centered, but you can also use chopsticks, pencils or dowels.
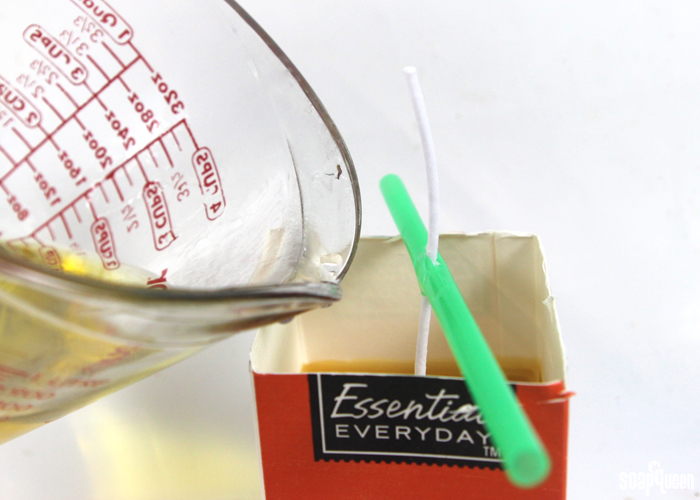
FOUR: Slowly and carefully pour the wax into your containers. Set aside, and allow to fully cool and harden. This can take 3-4 hours, or up to overnight.
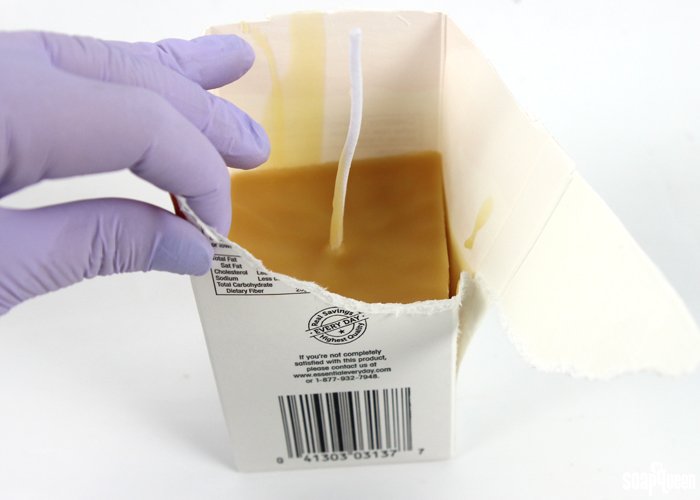
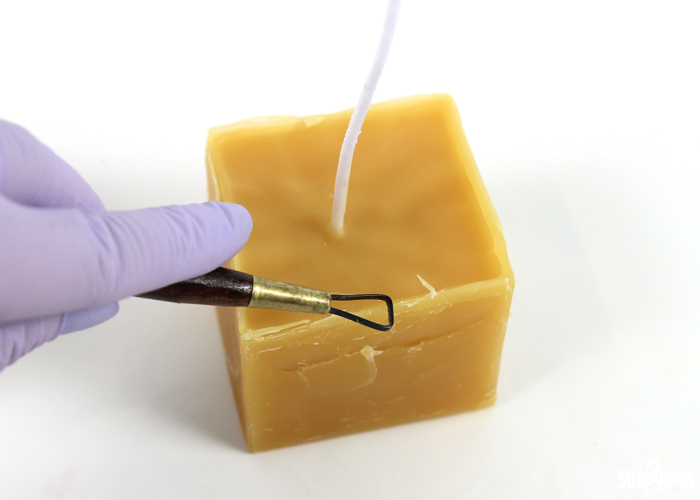
FIVE: Peel the cartons away from the candles slowly. If there uneven parts, clean them off with a clean up tool.
SIX: Light the candle and enjoy the warm scent! We recommend placing your candle on a heat safe surface in case any wax drips down the side. And of course, never leave the candle unattended =)
Have you made beeswax candles before? I just love the natural scent!
- 1 lb. Yellow Beeswax
- 1.3 oz. Pure Honey Fragrance Oil
- 2 WU-150 White Cotton Candle Wicks
- Droppers
- Clean Up Tool
- Recycled Milk Cartons (We made two 3″ tall candles with this recipe)
- Measure out 1 pound of beeswax and melt in a double boiler. You can turn any pot into a double boiler with the double boiler maker. If you don’t have a double boiler, you can melt the beeswax in the microwave. Be careful – because of beeswax’s high melting point, the heat safe container can melt or explode in the microwave if it gets too hot. If you do use a microwave, melt the beeswax in 1 minute bursts and stir frequently.
- Add 1.3 oz. of Pure Honey Fragrance Oil to the melted wax and stir well.
- Put a drop of the hot wax mixture in the center of the cartons. Place the wick in the wax and hold it until the wax sets up (about 10 seconds). Then, center your wick. We used a straw with a slit cut in it to keep the wick centered, but you can also use chopsticks, pencils or dowels.
- Slowly and carefully pour the wax into your containers. Set aside, and allow to fully cool and harden. This can take 3-4 hours, or up to overnight.
- Peel the cartons away from the candles slowly. If there uneven parts, clean them off with a clean up tool.
- Light the candle and enjoy the warm scent! We recommend placing your candle on a heat safe surface in case any wax drips down the side. And of course, never leave the candle unattended =)



This recipe sounds absolutely delicious but my concern is the cost of it. I don’t think I can sell the candles. Just the cost of supplies, including shipping and excluding all overhead costs is $26.60. Thank you though . I will probably make this to gift.
I’m sorry about that Lu! Because this kit comes with 2 pounds of wax, you can make several candles. Having recycled containers cuts costs as well. You can remove the clean up tool from this kit, that is an optional tool. You can also use any fragrance you have on hand to save money too! You can use any of our fragrances in candles (except Pink Grapefruit and Pineapple Cilantro). Read more about that here: https://www.soapqueen.com/bath-and-body-tutorials/tips-and-tricks/can-add-fragrance-oils-candles/
-Kelsey with Bramble Berry
Hi! First time candle maker! I need some guidance please 🙂
I made this beeswax candle, but I poured it into a small bowl (4″ diameter). I used the WU-150 White Cotton Candle Wick. I cut the wick to a length similar to the pictures, about 1/2″. The candle is burning very low and going out. The burn pool is tunneling down instead of expanding out. What did I do wrong so I can avoid it next time?
Thank you!
Hi Molly!
I’m wondering if you may need a bigger wick! Beeswax has a pretty high melting point, and doesn’t melt as easily as soy wax. That means it usually needs a size up so the candle burns more evenly. I would recommend trying the WU-250 wicks! You can also use two of the WU-150 wicks to help the candle burn more evenly. 🙂
WU-250: https://www.brambleberry.com/Wu-250-Brown-Cotton-Candle-Wicks-P3315.aspx
-Kelsey with Bramble Berry
Thank you so much Kelsey! I will try that!
You’re welcome. 🙂
I followed your recipe but my candles cracked, what did I do wrong?
Terrie
I missed this comment Terrie, I’m so sorry for the late response. Cracking happens when the candle cools too slowly. To fix it, try increasing (or decreasing) your pour temperature in increments of +/- 10 degrees. Adjusting the ambient temperature and increasing air flow can also help prevent problems with your candles. To fix that crack, run a heat gun over it for a couple seconds. That will remelt the wax and smooth it out. 🙂
Learn more in this candle FAQ post: https://www.soapqueen.com/bath-and…/home-crafts/candles-q/
-Kelsey with Bramble Berry
Can pure beeswax candles be made in glass jars? I see the question was asked earlier but couldnt find the answer… 🙂
You can make these candles in glass jars! To estimate about how much wax the jar will hold, I would recommend placing the jar on a scale, taring it and filling it in with water. Water and wax do have slightly different densities, but that will give you a rough estimate of how much wax you’ll need for your container. Then, you can melt extra wax just in case. 🙂
Also, the wick size does change a little bit depending on the size of the container you have! This post has more information on how to choose the correct wick for your jar: https://www.soapqueen.com/bath-and-body-tutorials/home-crafts/candles-q/
-Kelsey with Bramble Berry
I’m in love with this candle recipe! I have a question though. Can I put the candle into a container? I was thinking a mason jar. Thanks!
So glad you love the recipe Kennen! You can absolutely make this recipe in a mason jar. That would look really cute. 🙂
To estimate about how much wax the mason jar will hold, I would recommend placing the jar on a scale, zeroing it out and filling it in with water. Water and wax do have different densities, but that will give you a rough estimate of how much wax you’ll need. Then, you can melt extra wax just in case. Also, the wick size does change a little bit depending on the container you use! This post has more information on how to choose the correct wick for your container: https://www.soapqueen.com/bath-and-body-tutorials/home-crafts/candles-q/
-Kelsey with Bramble Berry
I’m a huge fan of beeswax candles and have wanted to learn how to make my own for years. I’ve always bought from a wonderful & talented beekeeper in Canada who makes in my opinion the very best beeswax candles! They have a wonderful strong natural beeswax scent that is so close to a pure honey smell you almost want to take a bite! As much as I love his candles they are understandably pricey which is why I’d like to learn to make a few myself for personal use to supplement the ones I buy.
I burn mostly tea lights, I have small reusable glass tea light cups I found on Amazon (12 for $10) I buy tea lights in bulk and they are less expensive to buy the molded ones vs the ones that come in the disposable tin or plastic cup. Unfortunately I’ve had no luck finding a reusable tea light mold anywhere, I’d even be happy with small shapes as long as they fit the into my small glass tea light holders (basically the same size as the disposable tins) Do you have any suggestions for alternative tea light sized molds?
I really must try the recipe shown above! In my experience burning only small beeswax candles (nothing above a large votive) the wax melts fully. Would the candles as shown above need a similarly sized holder or could they be placed on a flat candle holder and only burn down the center leaving the outside firm enough to hold its shape (and not make a huge mess?) I love the soft glow you get with beeswax candles that only burn down the center of the candle, leaving the sides solid resulting in a lantern type of appereance!
If I were to follow the above recipe only instead of using the milk carton I’d like to use a clear cup or jar instead that I’d leave the candle in while burning. Are there any candle holders sold on BB that you’d recommend, or any other neat ideas to utilize and reuse items I may already have at home? Your clever ideas and the fun neat suggestions you are famous for are just one of the many many reasons why I love Soap Queen and BB and more recently the DIY Handmade Beauty Box subscription, for a newbie like me the monthly projects are EXACTLY what I need! Such a great way to learn to make several different things outside of the three I was routinely making on my own previously.
Thanks for all the great projects and recipes and always providing answers to questions and when possible solutions to those projects that didn’t turn out how we (me) hoped!
Hi Brandy!
I love beeswax candles too! They have such an amazing scent and last a long time. 🙂
For tealight molds, I have a couple suggestions! I think our 4-in-1 Mini Cylinder Silicone Molds would be a good option. You can place the wick on the bottom of the mold and fill it partway: https://www.brambleberry.com/4-in-1-Mini-Cylinder-Silicone-Mold-P6074.aspx
We also have some fun wax tart molds that may work! They do have patterns on them, but could easily be shaved off: https://www.brambleberry.com/For-Bath-Bombs-C608.aspx
The wax tart molds are plastic, so you’ll want to pour the wax when it’s 140F or below so it doesn’t melt or warp the molds. 🙂
With these candles, I placed them on a flat plate and burned them that way! We also have some candle holders that would work well for beeswax: https://www.brambleberry.com/Containers-C132.aspx
You can also use recycled baby food jars, mason jars, etc. We did that in the Eco Chic Candle Tutorial: http://www.soapqueen.com/bath-and-body-tutorials/home-crafts/eco-chic-candles-2/
Have fun making candles Brandy! 🙂
-Kelsey with Bramble Berry
I have a question about packaging sugar and salt scrubs. When you are putting the mixture in the jar, how tightly do you pack it in? I mean, do you push it in a bit so it packs more, or just loosely spoon it in?
I made your Cranberry sugar scrub and I love it just the way it is. I only changed the FO to Cranberry Pomegranate and only 6ml did the trick for the whole batch. But it is very loose and dry scrub, just like in the picture, so I wasn’t sure how much to push it in the jar.
Thanks!
Hi Martina!
You can do whichever way you like! When the scrubs are packed tightly in the jars, it allows you to fit more scrub in there. However, they can be a bit more difficult to scoop out of the jar, especially toward the bottom of the scrub.
To pack it, you can scoop a small amount in and press down with the back of the spoon or a flat surface, like the bottom of a squeeze bottle. We did that for the Minty Layered Bath Salts: http://www.soapqueen.com/bath-and-body-tutorials/soaks-and-scrubs/12-days-christmas-minty-layered-bath-salts/
I think the best way to tell is to pack jars both ways! That way you can see which way you prefer. 🙂
-Kelsey with Bramble Berry
Easy DIY Cranberry Sugar Scrub: http://www.soapqueen.com/bath-and-body-tutorials/soaks-and-scrubs/cranberry-sugar-scrub/
Cranberry Pomegranate Fragrance Oil: https://www.brambleberry.com/Cranberry-Pomegranate-Fragrance-Oil-P4841.aspx
Just so you know some scrubs tend to expand over time in the jar and can pop open or even break. I would weigh them out as close to net weight the jar can fit. For example, my 6 oz jar can fit almost 5.5oz but thats too tight. I do 5 ounces so when it expands its ok. Maybe where its cold this wont happen. But I make scrubs all the time in Florida (hot & humid) & always leave enough room. The oils can get absorbed into the sugar and salts and make them expand. Especially if you add some kind of wax to it. I like cork tops for my scrubs for this reason. Bail jars if not careful leak and pop >.< had ONE bad experience. Never again do i stuff any jars! lol but i am getting ready to make a beeswax candle. Easier then I thought! I think Ill add coconut oil thought to it so it doesnt get brittle and chip & b urns easier. Also, I love using hemp wicks. =)
Thanks so much for the tip Vanessa! We often pack scrubs into jars and haven’t had them pop open. However, we’ve read of incidents of recipes containing salt and baking soda exploding and shattering the glass containers they were packed in. We aren’t sure of the cause and have only been able to find anecdotal evidence. However, we thought we should pass along a warning. To play it safe, you can pack your recipes into plastic bags. 🙂
-Kelsey with Bramble Berry
I have been making beeswax candles for years. They are known for taking impurities out of the air…those little bees are amazing!!
I just love the wax beeswax candles look, and I love the smoky scent from the yellow beeswax! I am definitely a fan. What scents do you like to use for your beeswax candles? 🙂
-Kelsey with Bramble Berry
How can I contact someone from soap queen to ask a question. I have a question in regards to dried flowers in soap.
Hi Sharon!
I’m happy to help you! You can ask your question here, or you can contact us on our Bramble Berry Facebook page: https://www.facebook.com/BrambleBerry/
You can also give us a call at 877-627-7883 between 9 a.m. and 4 p.m. PST, or email [email protected]. 🙂
-Kelsey with Bramble Berry