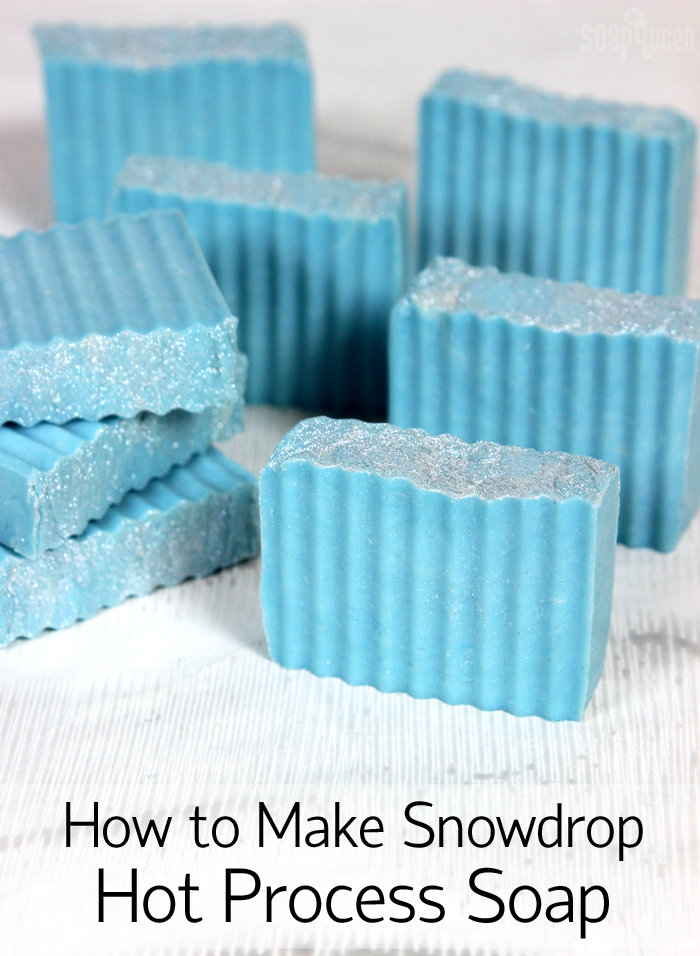
Hot process is a great soapmaking method when you want to enjoy your soap quickly. The main difference between hot process and cold process soap is that hot process soap is “cooked,” which speeds up the saponification process. This results in a loaf of soap that can be cut and enjoyed the same day. That being said, I always recommend a couple weeks of cure time to help water excess water evaporate and create an even firmer and longer lasting bar.
Hot process is usually made in a slow cooker, but can also be done in a double boiler. For this small recipe, I used a two quart Crock-Pot. Your recipe should only fill the cooking vessel halfway or less, because the soap will expand as it cooks. If you’re using a larger recipe, be sure to use a larger pot. If you have a larger sized slow cooker you can still make a smaller batch of soap. Just keep in mind that it may cook faster because it comes in contact with more surface area of the pot.
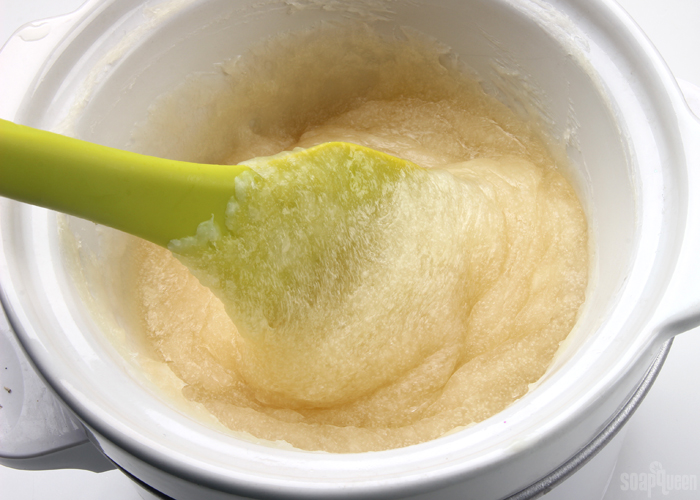
This recipe took about 12-15 minutes total cook time. Once the soap is done cooking, it will have a thick, fluid Vaseline-type texture. If you want to see hot process in action to get a better idea of the texture, check out this video. It can be tricky to know for sure when it’s done. One way is to place a small amount of the soap (just a small spoonful does the trick) into a cup of distilled water. Stir the soap in the water, and dip a pH strip into the water. If the pH is less than 10, it’s done cooking! If not, it’s still a little lye heavy. Cover and let it cook for a few more minutes.
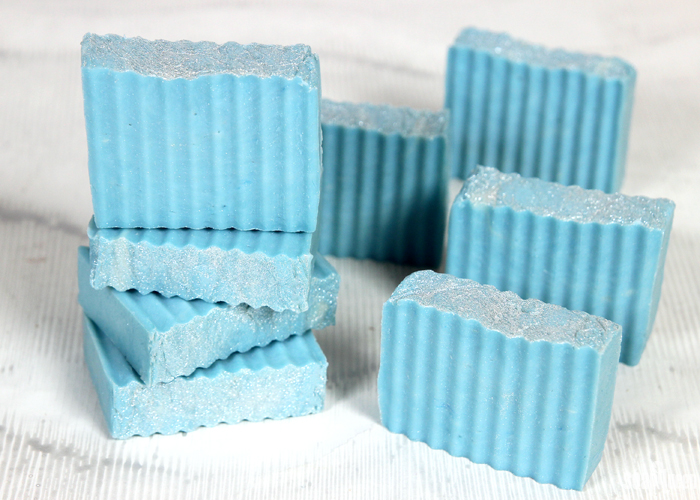
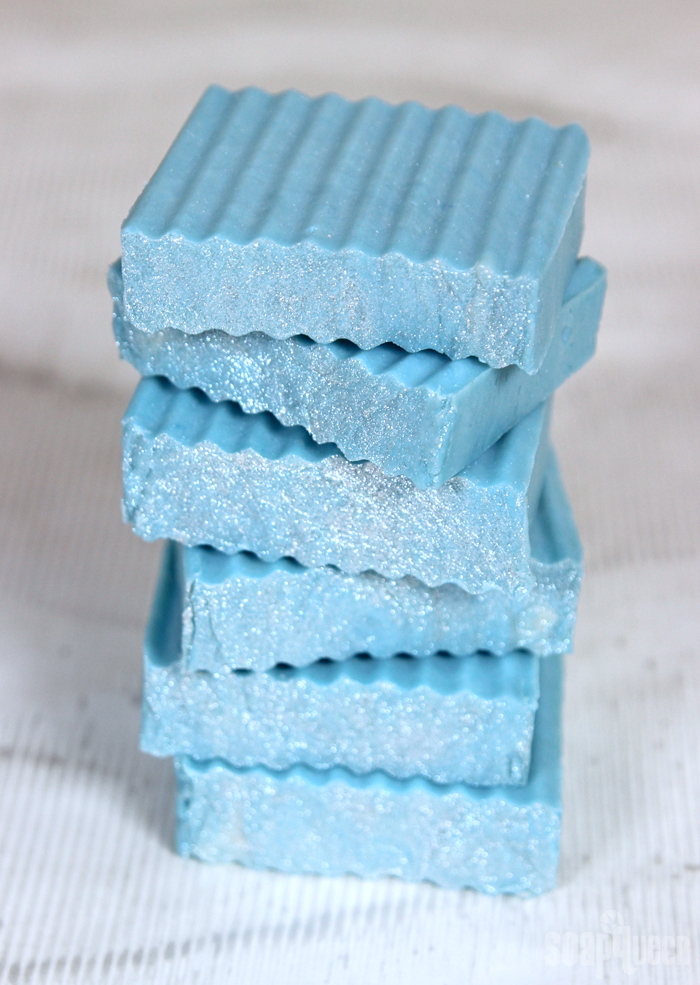
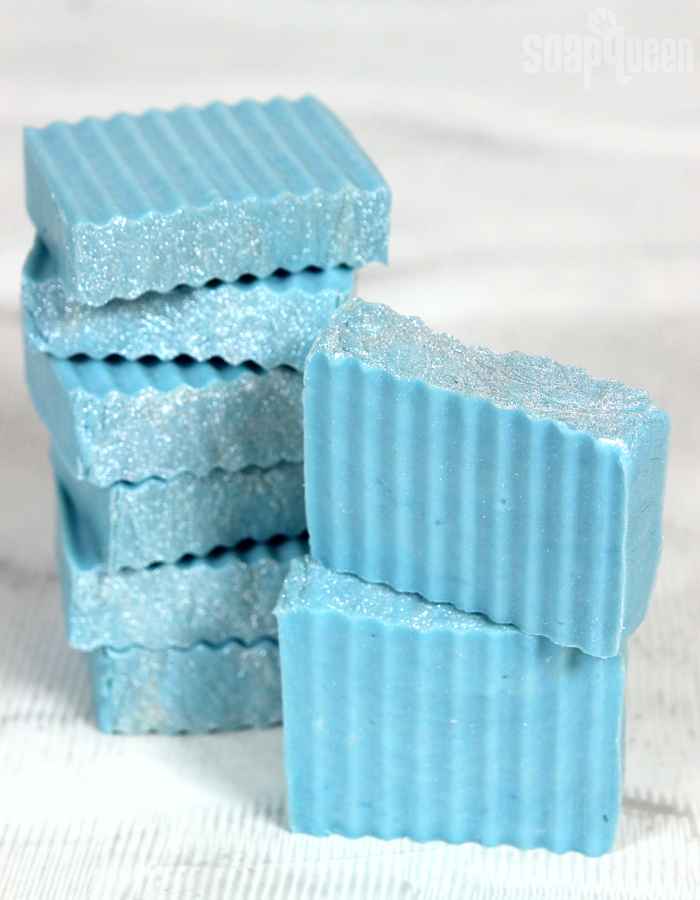
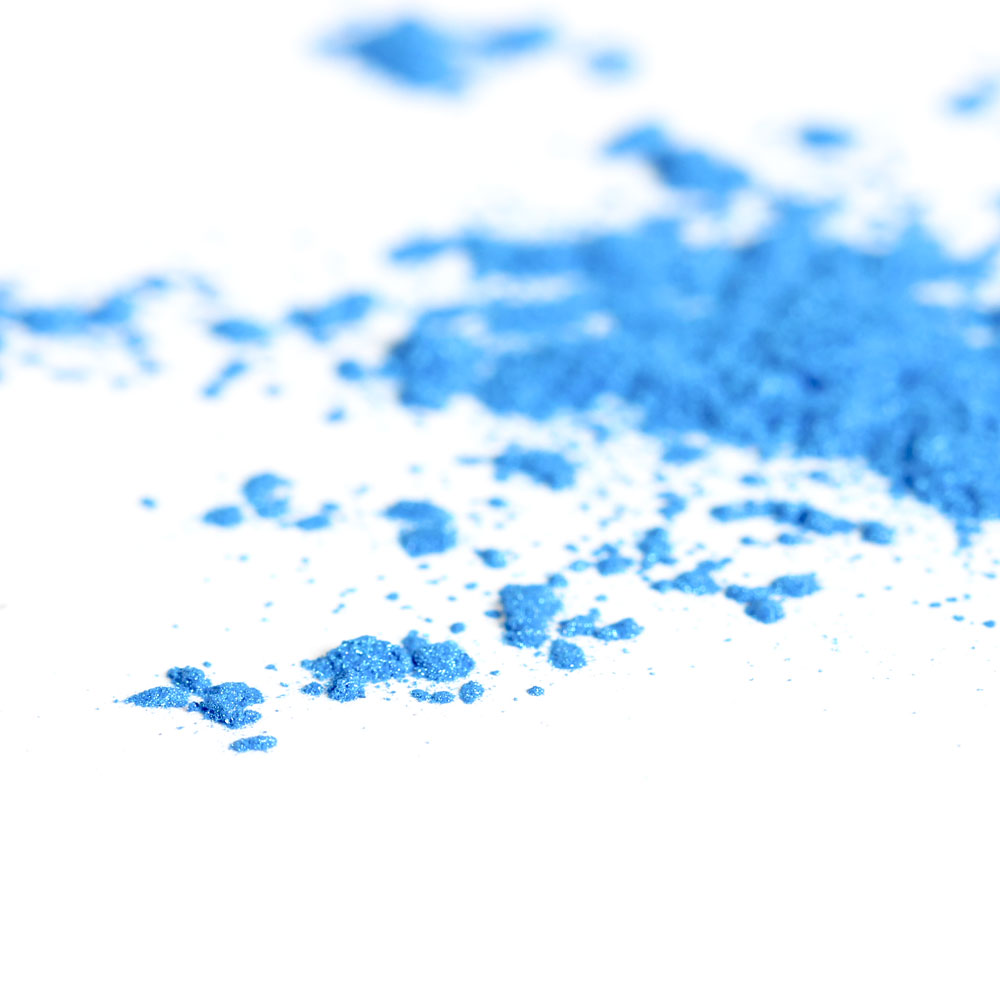
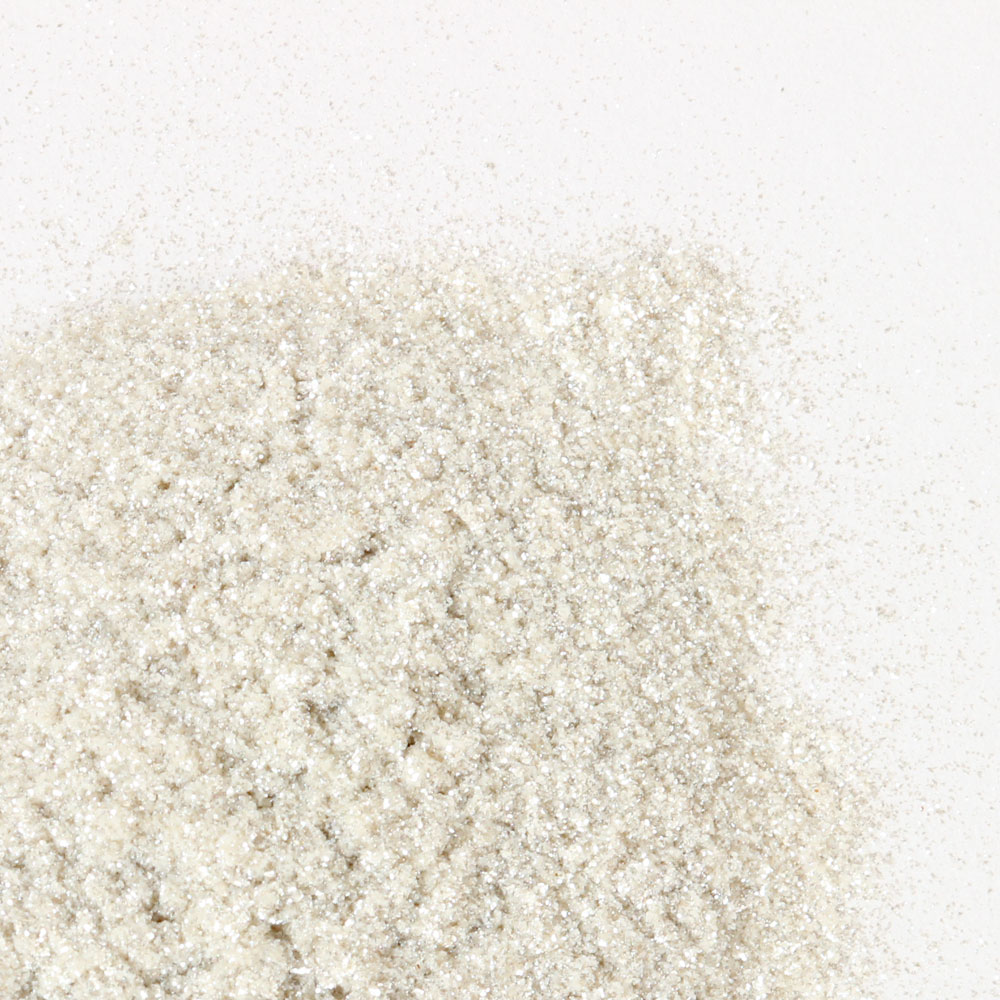
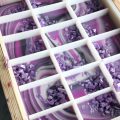
This soap was inspired by icy winters. Caribbean Blue Mica is added once the soap is done cooking. A bit of Snowflake Sparkle Mica is also added. Because the Snowflake Sparkle Mica is a larger particle mica, you can actually see the sparkles in the final bar. I didn’t disperse the Snowflake Sparkle Mica in this tutorial because the original plan was to create “sparkle veins.” However, I ended up stirring a bit too much, then decided to nix that idea. It mixes in well without dispersing, but you can disperse it in a small amount of liquid oil if you’d like. =) The mica on top will wash away after a use or two, but gives a lovely finishing touch.
What You’ll Need:
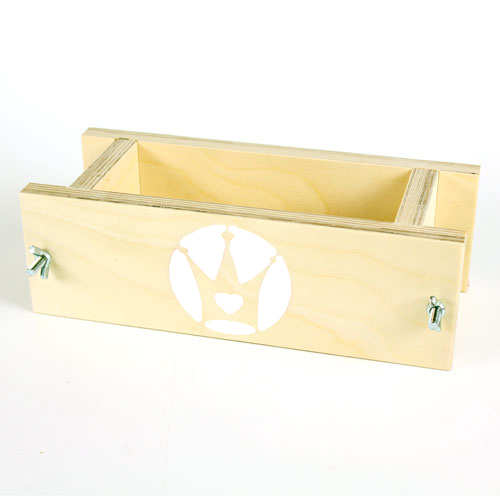
2 lb. Wood Loaf Mold
Silicone Liner for 2 lb. Wood Mold
22 oz. Basic Quick Mix
3.1 oz. Sodium Hydroxide Lye
7.3 oz. Distilled Water
.7 oz. Sodium Lactate
1 oz. Sparkling Snowdrop Fragrance Oil
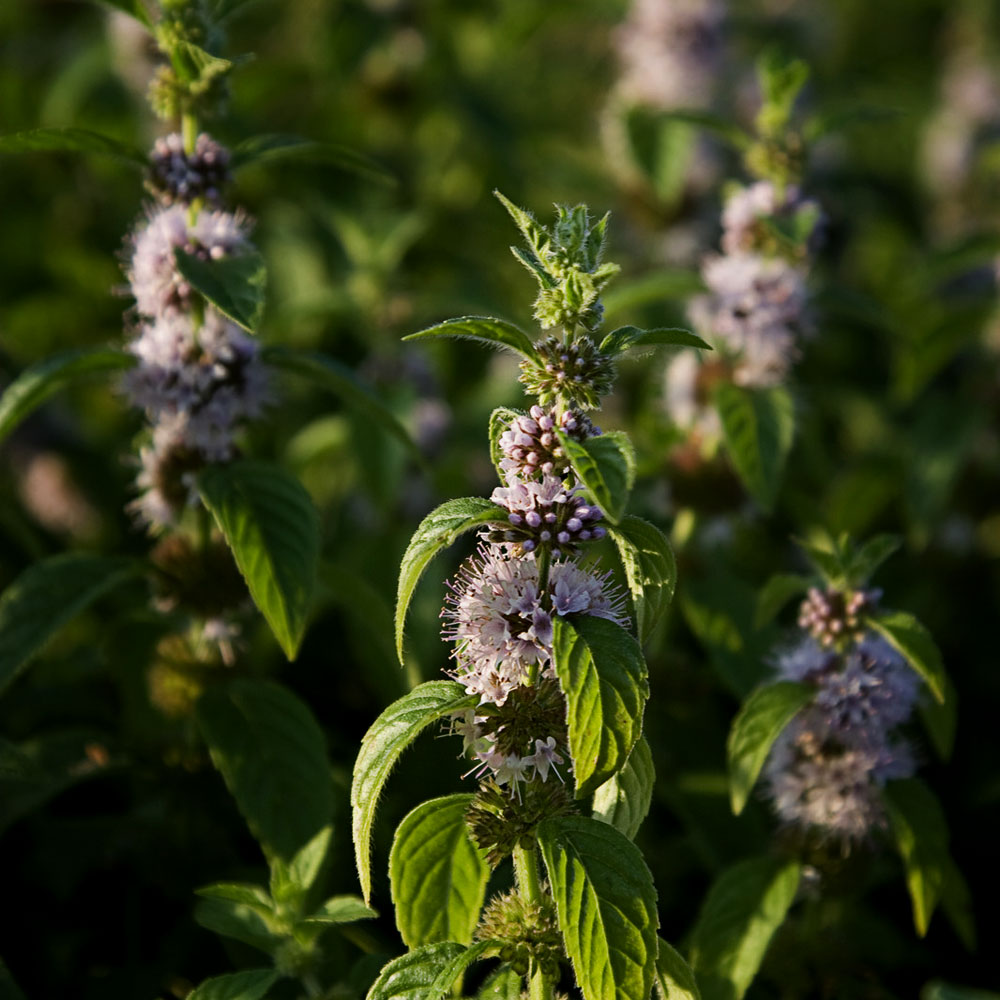
0.2 oz. Peppermint Essential Oil, 2nd Distill
Caribbean Blue Mica
Snowflake Sparkle Mica
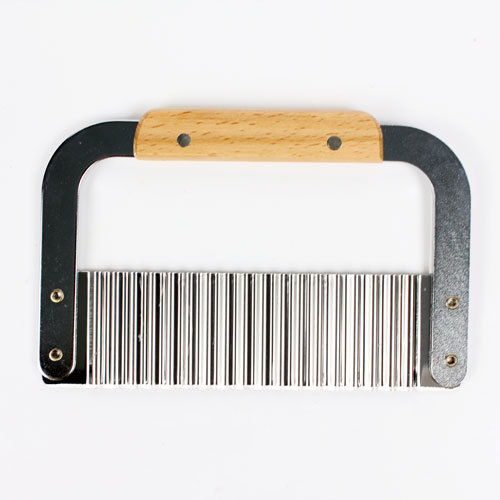
Optional: Crinkle Cutter

Click here to add everything you need for this project to your Bramble Berry shopping cart!
SAFETY FIRST: Suit up for safe handling practices! Goggles, gloves, and long sleeves are your soap making uniform. Be sure that kids and pets are out of the house or unable to access your soaping space, and always soap in a well-ventilated area. Make sure the soap volume will not fill up more than half of your Crock-Pot. If you have never made cold process soap before, I highly recommend you get a couple of basic recipes under your belt before trying out this tutorial. Check out this 4-part series on cold process soap making, especially the episode on lye safety.
COLOR PREP: Disperse 1/2 teaspoon Caribbean Blue Mica in 1/2 tablespoon of sunflower or sweet almond oil (or any other liquid oil). Have the Snowflake Sparkle Mica close by.
FRAGRANCE PREP: Measure 1 ounce of Sparkling Snowdrop Fragrance Oil and 0.2 ounce of Peppermint Essential Oil 2nd Distill into a glass, fragrance oil safe container. Set aside.
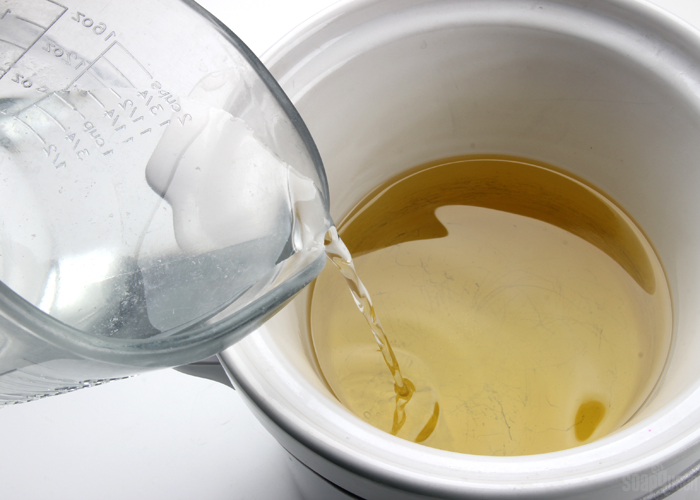
ONE: Slowly and carefully add the lye to the water and gently stir until the lye has fully dissolved and the liquid is clear. Set aside to cool. Once cooled to about 130 °F , add the sodium lactate. Sodium lactate is used in hot process at 3% of the oil weight to help produce a smoother bar.
TWO: Fully melt the entire bag of Basic Recipe Quick mix until completely clear and there is no cloudiness. Shake the bag to mix up all the oils. Measure 22 oz. into your Crock-Pot and turn it on low. Slowly add the lye water to the oils. Make sure the mixture does not fill up more than half of the pot or cooking vessel. Burp the stick blender, and begin to blend.
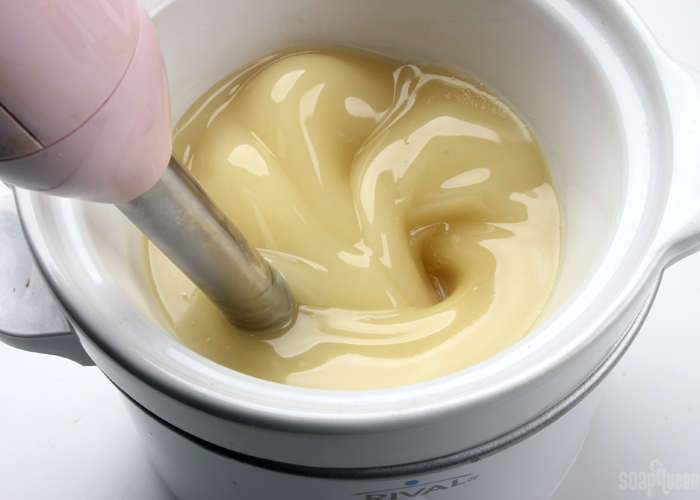 THREE: Mix with a stick blender until a thick trace is achieved.
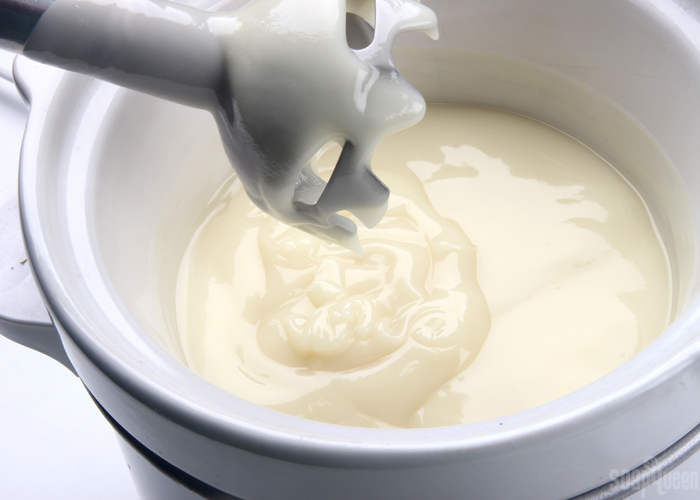 FOUR: Put the lid on the Crock-Pot. After about 10 minutes, check the soap to see the progress made. Starting from the outside, the texture and color of the soap will start to change into a glossy, slightly Vaseline-like texture. If the middle does not appear to be changing, stir the batch to ensure even cooking. Don’t be surprised if the soap starts to grow in volume. Check out how much this soap expanded! Do not leave your soap unattended in the first 30 minutes of cook time for this reason. If the soap gets too high in the pot, wearing gloves, take the pot off heat and stir like crazy.
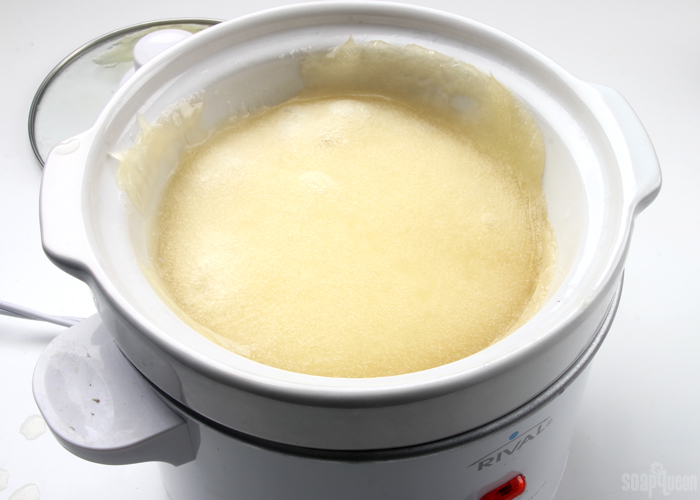
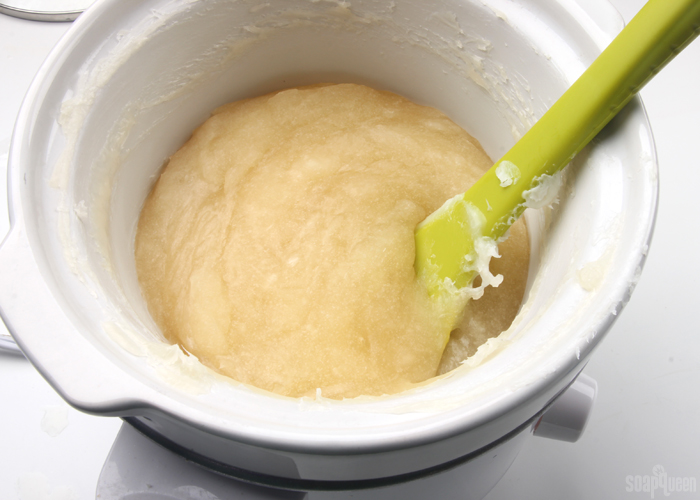 FIVE: The batch will be ready when it’s the texture of glossy, thin mashed potatoes. This may take another 5-10 minute session or even two or three more stir’n’waits. When you think it’s ready, use a pH strip to test the levels. Place a small amount of the soap into a cup of water and stir. Dip the pH strip into the water. It should be below 10. Be sure not to overcook the soap; you don’t want too dry a texture for the next steps!
 NOTE: The amount of time that the soap takes in the Crock-Pot phase can depend on the size and shape of your Crock-Pot. The larger, flatter cooking vessels meant for roasts may go a bit quicker because the soap will be spread out thinner on the heated surface.
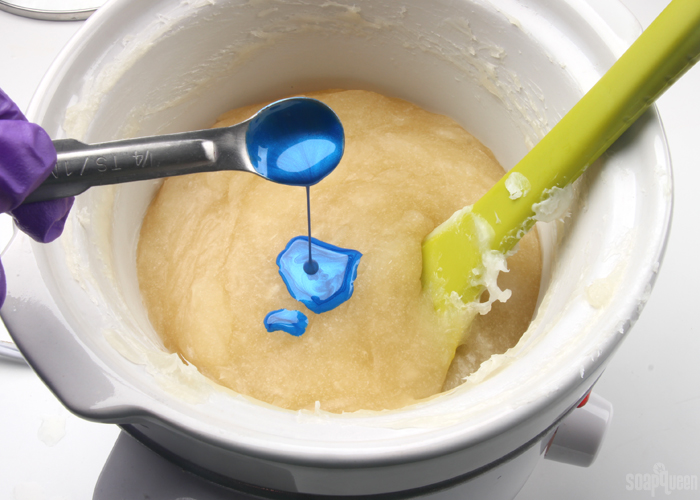
SIX: Add 1 teaspoon of dispersed Caribbean Blue Mica and use a spoon to thoroughly mix in. Add 1/2 tablespoon of Snowflake Sparkle Mica and mix in.
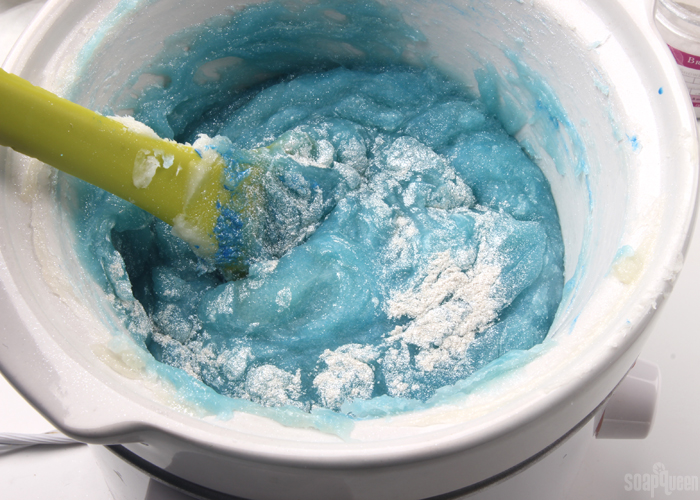 SEVEN: Slowly add the fragrance and essential oil mixture, and stir in.
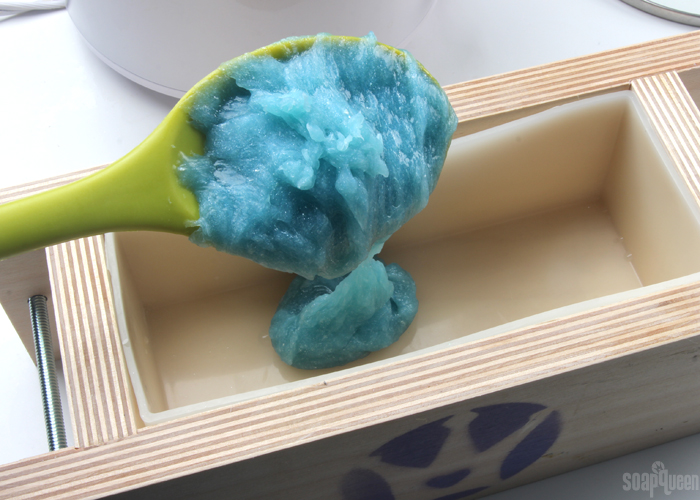
EIGHT: Working quickly, spoon the soap into the mold. Tap the mold on the counter firmly to help it settle. Once all the soap is in the mold use a spoon or gloved hands to smooth the top.
 NINE: Sprinkle the top with Sparkle Snowflake Mica until fully covered. Use gloved hands to gently press the mica into the top; this helps the mica stick a little bit better to the soap. Just be careful, the soap will be hot to the touch.
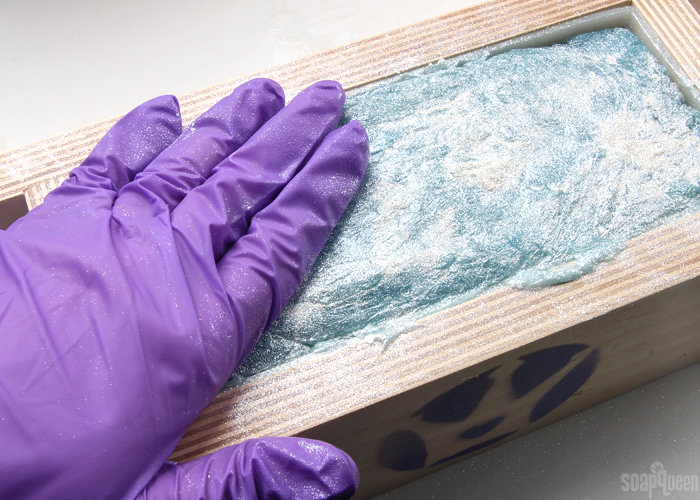 TEN: Allow the soap to cool and harden in the mold for 1-2 days. Remove from the mold and use the Crinkle Cutter or a sharp non-serrated knife to cut into bars. This soap is ready to use right away, but will last longer in the shower after at least a 2 week cure time.
- 2 lb. Wood Loaf Mold
- Silicone Liner for 2 lb. Wood Mold
- 22 oz. Basic Quick Mix
- 3.1 oz. Sodium Hydroxide Lye
- 7.3 oz. Distilled Water
- .7 oz. Sodium Lactate
- 1 oz. Sparkling Snowdrop Fragrance Oil
- 0.2 oz. Peppermint Essential Oil, 2nd Distill
- Caribbean Blue Mica
- Snowflake Sparkle Mica
- Optional: Crinkle Cutter
- SAFETY FIRST: Suit up for safe handling practices! Goggles, gloves, and long sleeves are your soap making uniform. Be sure that kids and pets are out of the house or unable to access your soaping space, and always soap in a well-ventilated area. Make sure the soap volume will not fill up more than half of your crock pot. If you have never made cold process soap before, I highly recommend you get a couple of basic recipes under your belt before trying out this tutorial. Check out this 4-part series on cold process soap making, especially the episode on lye safety.
- Slowly and carefully add the lye to the water and gently stir until the lye has fully dissolved and the liquid is clear. Set aside to cool. Once cooled to about 130 °F , add sodium lactate. Sodium lactate is used in hot process at 3% of the oil weight to help produce a smoother bar.
- Fully melt the entire bag of Basic Recipe Quick mix until completely clear and there is no cloudiness. Shake the bag to mix up all the oils. Measure 22 oz. into your Crock-Pot and turn it on low. Slowly add the lye water to the oils. Make sure the mixture does not fill up more than half of the pot or cooking vessel. Burp the stick blender, and begin to blend.
- Mix with a stick blender until a thick trace is achieved.
- Put the lid on the Crock-Pot. After about 10 minutes, check the soap to see the progress made. Starting from the outside, the texture and color of the soap will start to change into a glossy, slightly Vaseline-like texture. If the middle does not appear to be changing, stir the batch to ensure even cooking. Don’t be surprised if the soap starts to grow in volume. Check out how much this soap expanded! Do not leave your soap unattended in the first 30 minutes of cook time for this reason. If the soap gets too high in the pot, wearing gloves, take the pot off heat and stir like crazy.
- The batch will be ready when it’s the texture of glossy, thin mashed potatoes. This may take another 5-10 minute session or even two or three more stir’n’waits. When you think it’s ready, use a pH strip to test the levels. Place a small amount of the soap into a cup of water and stir. Dip the pH strip into the water. It should be below a 10. Be sure not to overcook the soap; you don’t want too dry a texture for the next steps! NOTE: The amount of time that the soap takes in the Crock-Pot phase can depend on the size and shape of your Crock-Pot. The larger, flatter cooking vessels meant for roasts may go a bit quicker because the soap will be spread out thinner on the heated surface.
- Add 1 teaspoon of dispersed Caribbean Blue Mica and use a spoon to thoroughly mix in. Add ½ tablespoon of Snowflake Sparkle Mica and mix in.
- Slowly add the fragrance and essential oil mixture, and stir in.
- Working quickly, spoon the soap into the mold. Tap the mold on the counter firmly to help it settle. Once all the soap is in the mold use a spoon to smooth the top.
- Sprinkle the top with Sparkle Snowflake Mica until fully covered. Use gloved hands to gently press the mica into the top; this helps the mica stick a little bit better to the soap.
- Allow the soap to cool and harden in the mold for 1-2 days. Remove from the mold, and use the Crinkle Cutter or a sharp non-serrated knife to cut into bars. This soap is ready to use right away, but will last longer in the shower after at least a 2 week cure time.






Hello
Please I have
Castor oil
olive oil
canola oil
Vitamin E oil
Palm oil
And coconut oil
I can not buy
(Lots of Lather Quick Mix)
Please teach me the proportions of these oils to make soap by hot
Thank you
You can make that mix using the oils you have now. Find the percentages of each one in this post: https://www.soapqueen.com/bath-and-body-tutorials/tips-and-tricks/sunday-night-spotlight-quick-mixes/
Is it possible to add goats milk to the hot process method without severely affecting the color? I know that if goats milk is used with the cold process method, the heat from the lye can turn the soap a brown color.
Adding milk to hot process soap can be tricky. If it’s added at trace, the high temperatures can scorch the milk and the soap can discolor a brown hue. You can add milk toward the end of the cooking process instead, just make sure to add it early enough so the milk saponifies fully. You may want to make some small test batches to find the right timing to add that milk.
I had a couple of troubles with this soap (and hot process in general). It took a very long time to cook down to a desirable pH, and I was trying not to let the temp go too high (170f was my limit). Maybe took an hour. Could have something to do with my crockpot, whose only settings are “burn it all” or “barely warm”.
It seized up and began to harden really really quickly once I added my colour and essential oils. I barely had enough time to stir it all in.
Lastly, it was so dry that it fell apart while cutting because I added it in huge scoops and tried to make it all stick, but no go. So I was thinking of putting it all back into the crockpot to melt down and maybe try again. Would this work? Should I add a little bit of water or oil while melting down?
It sounds like the soap may be a bit overcooked. When that happens it will harden really quickly and have a pretty dry texture.
For this batch, I would recommend rebatching the recipe with equal parts of a soft soap. When the two mix together, it will help make a more balanced bar. Learn more about rebatch here: http://www.soapqueen.com/bath-and-body-tutorials/cold-process-soap/soap-queen-tv-presents-how-to-make-rebatch-soap-2/
If you don’t have a soft recipe on hand, this Castile Rebatch is a good option: https://www.brambleberry.com/Grated-Rebatch-Soap-Base-Castile-P5233.aspx
For your next batch, I think leaving it on the “barely warm” setting will be best. It will take longer to cook, but it should prevent burning. Stir that soap frequently (every 15-20 minutes) to get everything mixed nicely. Once the soap looks like clear mashed potatoes, you can pH test it. Even if it’s still a bit high (around 11 pH), go ahead and add your color and fragrance. The soap will finish saponifying in the mold and should be a bit easier to work with.
-Kelsey with Bramble Berry
Can I use the lots of lather quick mix with this recipe?
Absolutely, that will work nicely in this recipe. Remember to run it through the Lye Calculator again to make sure you have the right lye and water amounts: https://www.brambleberry.com/Pages/Lye-Calculator.aspx
-Kelsey with Bramble Berry
Lots of Lather Quick Mix: https://www.brambleberry.com/Lots-of-Lather-Quick-Mix-P5524.aspx
How big of a crockpot do you need for this?
This is a fairly small recipe, so you can use a 2 Quart Crock-Pot (that’s what we used). If you want to make bigger batches in the future, I would recommend a 6 or 8 quart size. It’s important that the soap only fill the Crock-Pot half way. That way there is room for the soap to expand without spilling over. 🙂
-Kelsey with Bramble Berry
Can you Hot process any Cold process recipe? Say maybe a shampoo bar?
You sure can! The main difference is that you’ll want to add color and fragrance at the end of the cook, rather than at trace like you would with cold process. You can definitely hot process a shampoo bar. 🙂
-Kelsey with Bramble Berry
Hi Kelsey, thank you for your response. I didn’t read your response until after I cooked my soap and I added color and fragrance before I cooked in the crock pot. So it only cooked for 10 min before it was so thick that I scooped it into the molds. Now it is crumbly. Is there anything I can do to save it?
How big was your batch? The soap can get crumbly if it cooks too long, but typically 10 minutes isn’t enough to overcook a batch. Was the texture like mashed potatoes, or were there hard chunks of oil still?
-Kelsey with Bramble Berry
It was mashed potatoe consistency but there were chunks in it. It was a small batch. Only made 2 pounds.
Hmm, I’m wondering if it wasn’t quite done cooking. The chunks are usually oils that haven’t finished cooking yet. Once the soap is smooth and there are no chunks, it does need some more time to cook. You want it to have a clear appearance and a thin, spreadable consistency. You can see that here: https://www.youtube.com/watch?v=mxTXwxbpzLM&t=16s
I would recommend rebatching the soap to try and get a softer texture. You can add water as you’re rebatching to help it hold together. You can also add equal amounts of a soft soap. That will mix with the hard soap and create a more balanced bar. 🙂
This Castile Rebatch is nice and soft: https://www.brambleberry.com/Grated-Rebatch-Soap-Base-Castile-P5233.aspx
This video shows you how to rebatch: http://www.soapqueen.com/bath-and-body-tutorials/cold-process-soap/soap-queen-tv-presents-how-to-make-rebatch-soap-2/
-Kelsey with Bramble Berry
Hello,
If I wanted to add a puree, would it be best to leave that till the very end?
You’ll want to add the purees toward the beginning of the process (at trace). If they’re added at the end, they may not saponify, as the soap has already finished. That means they will just mix in with the soap instead of turning into soap. Keep in mind any purees with natural sugars can scorch during the hot process method, which can discolor your batch. You may want to use purees without natural sugar to prevent that discoloration. 🙂
-Kelsey with Bramble Berry
Hi Kelsey, thank you for your response. I didn’t read your response until after I cooked my soap and I added color and fragrance before I cooked in the crock pot. So it only cooked for 10 min before it was so thick that I scooped it into the molds. Now it is crumbly. Is there anything I can do to save it?
If you did add the puree or other additives after the cook and they didn’t saponify would that be a bad thing? I’ve been seeing channels where people add goat’s milk, yogurt etc after the cook to increase fluidity and reduce scorch. Does that just reduce shelf life or is there something inherently bad about not saponifying all the additives? If it’s just the shorter shelf life, how would you go about determining just how long the shelf life is?
If the fresh ingredients don’t fully saponify, it will shorten the shelf life to about 6 weeks or less. After that time, the fresh ingredients will spoil. To extend that shelf life, you can skip the fresh ingredients or add them at the beginning of the process. The shelf life will then be the same as the oils you use: https://www.soapqueen.com/bath-and-body-tutorials/tips-and-tricks/shelf-life-bath-products-ingredients-rancidity-vs-mold/
-Kelsey with Bramble Berry
Hi
What a gorgeous soap, but my question is how is this so smoooooth 😱 Please share your tips and I notice that the time when you mix your color the soap is so liquidy ?? How please help
Mary
The sodium lactate really helps! It makes the soap nice and smooth. It also helps to not overcook the soap, otherwise it can get dry. Once it’s at 9-10 pH and is nice and fluid, mix in your color and fragrance and get it into the mold. 🙂
-Kelsey with Bramble Berry
I made this last night and it is beautiful and smells amazing!
That’s awesome Sur, glad to hear that! It feels fantastic on the skin too. 🙂
-Kelsey with Bramble Berry
I love how even the color is! When I do HP I get more of a marbled look, which is pretty in it’s on way but sometimes I like to have an even solid color. I don’t think I do anything different than what you’ve outlined here, but any additional tips on getting the smooth, even coloring?
I think sodium lactate will really help if you’re not using it already! It helps make the soap more smooth and fluid, which helps the color mix in easily. Mixing the color with a lightweight oil ahead of time helps as well. The color distributes more evenly and can help prevent the marbled look. 🙂
-Kelsey with Bramble Berry
I have found that adding full fat yogurt at 1TBS per pound of oils added at the end stage helps a lot along with sodium lactate. I mix the two together.
Although I do mostly CP, I love hot process soap. My only problem is limited design due to the thick soap batter. HP is an awesome way to use your old soap scraps you may have from other projects, or to simply use some of your CP soaps. Cut them down and add them just prior to molding and the thick soap guarantees they will stay suspended.
Absolutely, I love how quickly hot process soap is ready to use! 🙂
-Kelsey with Bramble Berry
I made my 1st hot process soap a couple of days ago (honey/oatmeal) and was so happy with it I gave it another shot today. I made a huge mistake though and wonder if you have an answer for me. I was trying for hot process beer soap. I mixed my lye (3.7 oz) with distilled water (4 oz) and added 6 oz of prepared stout beer to my oils to prevent scorching (total fluid : 10 oz). I was so worried about scorching that I forgot to add my coconut oil to the whole mix! It wasn’t until an hour later that I realized this. So rather than dump it out I added the coconut oil, mixed, and let it go another hour. I spooned it into my PVC pipe and as of now it has firmed up in the pipe. My fear is that the lye and olive oil/castor oil mix already saponified thus making for a very lye heavy soap and adding the coconut oil will just make it a fatty, lye heavy soap. I don’t have pH strips and I since I can’t even stand static electricity I refuse to touch this with my tongue. What do you think? I still can’t believe I did this!!
Oh I’m sorry about that! I would recommend using cabbage juice to pH test that soap! Cabbage is a pH indicator and will turn a greenish yellow if the soap is lye heavy. Learn how to use cabbage here: https://www.soapqueen.com/bath-and-body-tutorials/tips-and-tricks/test-ph-red-cabbage/
If the soap is balanced, you can use it on the skin! If it’s lye heavy, don’t throw it out. It makes great laundry soap. 🙂
Three DIY Laundry Soap Recipes: http://www.soapqueen.com/bath-and-body-tutorials/home-crafts/three-diy-laundry-soap-recipes/
-Kelsey with Bramble Berry
Thanks! I’m a waitress so I know where to get some! I made another batch today with lemon verbena yankee and this time I remembered all my oils 😊
Oh glad to hear that! I love Lemon Verbena, it’s so nice and fresh. 🙂
-Kelsey with Bramble Berry
Lemon Verbena Yankee Type Fragrance Oil: https://www.brambleberry.com/Lemon-Verbena-Yankee-Type-Fragrance-Oil-P3344.aspx
Update! The soap is fine! So, if anyone else has made this mistake don’t throw your batch out. Actually, this soap has a very rich lather.
That’s awesome, glad to hear that Laura!
Nice! Can I do this using rebatch soap base. I am a little to nervous to use Lye because of my child sinuses.
You can! The process will be very similar, the main difference is that you’ll add grated soap to the Crock-Pot rather than oils and lye. 🙂
-Kelsey
How to Rebatch Soap: http://www.soapqueen.com/bath-and-body-tutorials/cold-process-soap/soap-queen-tv-presents-how-to-make-rebatch-soap-2/