• December 22, 2016

Mermaid Soap Tutorial

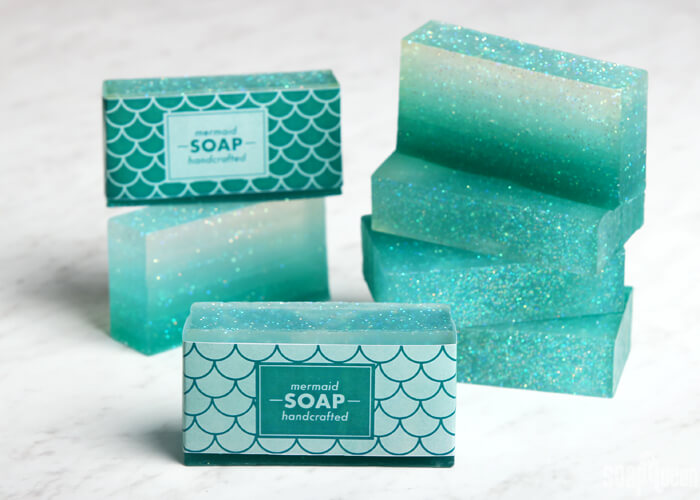
With ombre aqua blue layers and plenty of sparkle, this soap is fit for a mermaid. It’s made with ingredients in the Mermaid Ombre Soap Kit, which includes everything you need to make this project. This recipe is for one batch but the kit comes with enough to make two batches. It has printed instructions and labels to give the bars a finishing touch. The kit also ships free to the lower 48 United States!

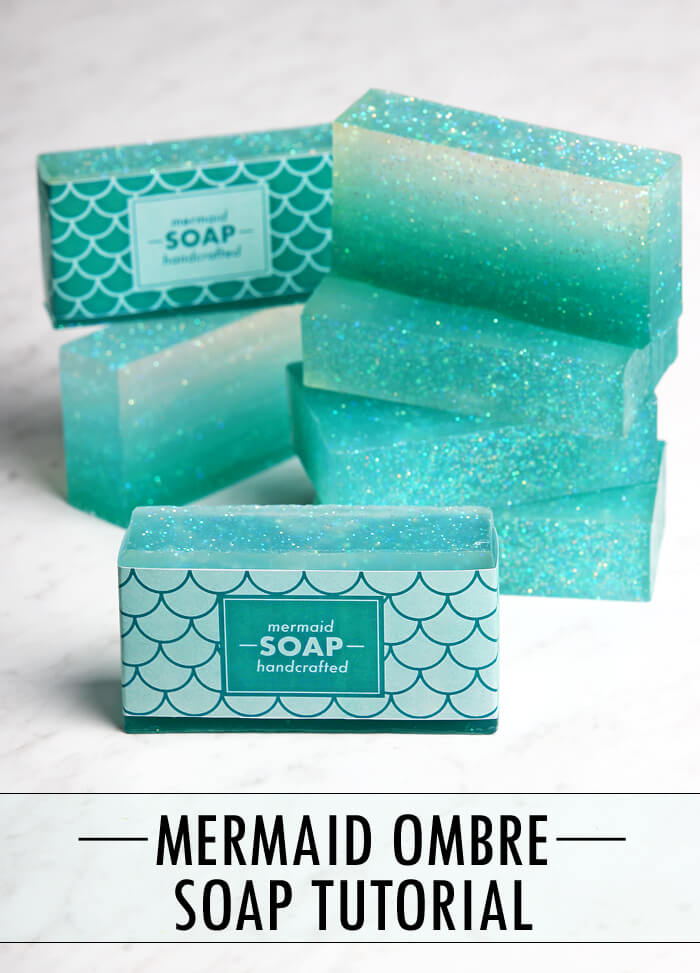
The ombre layers are created by melting down all the soap, pouring a small amount into the mold, then adding shavings of the Hydrated Chrome Green Color Block to the remaining soap. As you continue to pour each layer and add more color, the color becomes increasingly saturated. By the time you pour the last layer, the soap is a deep aqua blue.

Mermaid Soap Tutorial

You can create as many layers as you’d like. The more layers, the more gradual the ombre effect will be. If you want the layers to be perfectly even, I recommend placing the mold on a scale and weighing each layer. This project is suitable for beginners, but keep in mind layers take a little patience. It can be handy to have a thermometer for this project to make sure the soap is not too hot when poured. If the melt and pour is too hot, it can melt the layer below. Read more tips for layering melt and pour soap here. 

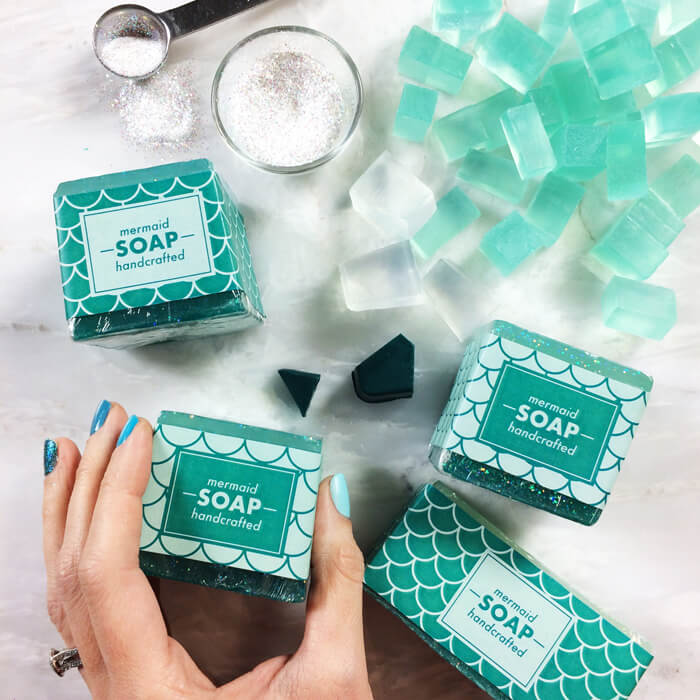
What You’ll Need (Ingredients included in the Mermaid Soap Kit):
4″ Silicone Soap Mold
16 oz. Clear Melt & Pour Soap Base
1 tsp. Iridescent Glitter
10-15 mL Yuzu Cybilla Fragrance Oil
Hydrated Chrome Green Color Block
Spray Bottle filled with 99% Isopropyl Alcohol (Rubbing Alcohol)


Click here
 
to add the Mermaid Soap Kit to your Bramble Berry shopping cart!

Mermaid Soap Tutorial

You may also like these

Become an email subscriber

Enter your email address below and you will receive all our new posts directly in your email inbox.

  1. I’ve got a quick question. The recipe says to use 16 oz of Clear Melt & Pour Soap Base and the link takes you to something you sell. But in the video, she uses Stephensons SFIC Crystal Clear Soap Base. Is there a difference between the two soaps? I had the Stephensons on hand and the soap turned out ok but I just wanted to be sure I use the right thing.

    1. You can use the crystal base for this recipe, that will work just fine. We’ve used both with good results.

  2. absolutely love this. do you by chance have the labels in other colors like pink and/or purple?

  3. I loved it and the layers came out perfect although was making soap for 1st time. My only problem was that my friend said the soap was hard and also my base sweat as I stay in Singapore and it is hot and humid here.
    Otherwise loved making and using it.

    1. There are a few tricks to prevent sweating, find those here: https://soapqueen.com/bath-and-body-tutorials/tips-and-tricks/augh-whats-that-all-over-my-soap-2/

      Your friend may also like bases that are more moisturizing. The Shea and Goat Milk Bases feel great on the skin.

      Shea Melt and Pour: https://www.brambleberry.com/SFIC-Shea-Melt-And-Pour-Soap-Base-P3192.aspx

      Goat Milk Melt and Pour: https://www.brambleberry.com/SFIC-Goat-Milk-Melt-And-Pour-Soap-Base-P3184.aspx

  4. DO you have to buy the kit to get the written instructions or am I missing the link to the recipe?
    Thank you

  5. I am very concerned about what the glitter is made from? Is it some type of plastic or..?
    I’m also concerned about the polluting effect the glitter would have once it goes down the drain. Do you know if this glitter is captured by public water filtration systems?
    Is the glitter similar to the bath beads that some manufacturers were putting in liquid handsoap — the stuff that stays in fish and human organs indefinitely?

  6. I’m a beginner, but I think I would like to try this. There’s one problem though. The Yuzu fragrance oil isn’t available for shipping. Is there a substitute fragrance oil that would have a similar effect or is there another melt and pour soap DIY that you could recommend? One that’s just as beautiful. 🙂

  7. My name is Eden Peters, I want to buy your products, Do you accept credit card .Kindly reply me at your earliest convenience

    1. Because this is a product that gets washed off, we have found that the large majority of the glitter does not cling to the skin. This would be such a fun recipe to make with your granddaughter!

      -Amanda with Bramble Berry

  8. I made this soap with my daughter. We had tons of fun, but the melt and pour was a little tricky to handle. I was pouring on top of the hardened layers at under 130, but by that time the melted soap had become gloopy and unwilling to pour. I dont know whether my thermometer was off or if I wasn’t working fast enough. Is warming the soap in a double boiler better in in the microwave?

    1. The soap will be thick and slightly gloopy when it’s under 130F because it’s starting to harden. You can microwave it for just 5 seconds or so to help make it more fluid. Be careful not to get the soap too hot, otherwise it can burn and become hard to work with: https://soapqueen.com/bath-and-body-tutorials/tips-and-tricks/how-to-avoid-burnt-melt-pour/

      You can use a double boiler if you like – the nice thing about that is it keeps the soap warm at a gentle heat, so you don’t have to keep microwaving it.

      -Kelsey with Bramble Berry

  9. I made this soap and it turned out perfect…HOWEVER…when I went to cut it the layers all separated!!!! It was so pretty before that happened!! What did I do wrong??

    1. I’m sorry those layers separated on you. There are a couple tricks that can help them adhere nicely.

      We recommend spritzing with 99% isopropyl alcohol right before the second layer is poured. If the alcohol is spritzed too early, it can evaporate. You want your layer covered with alcohol, but not completely soaked. Learn more about working with layers in this video: https://www.youtube.com/watch?v=5oyh1Bf3Gxo

      Read more about 99% isopropyl alcohol here: https://soapqueen.com/bramble-berry-news/sunday-night-spotlight-99-isopropyl-alcohol/

      Another way to help the layers stick is a nice sharp knife. I’ve found my layers separated on me when I used a dull knife, even with alcohol. I like using a sharp kitchen knife with a smooth blade.

      For the soap now, you can “glue” those layers back together with melt and pour! To do so, melt 1-2 ounces of clear soap on 5 second bursts. When it’s melted, brush a light layer on and gently press the separated soap on top. Let that harden for 1-2 hours. That should help your soap stick together.

      -Kelsey with Bramble Berry

  10. Hi! can mica be used for the color and shimmers instead of the color block? and if I wanted to fill a 10inch mold, how much of each soap base would I need?

    1. Absolutely. You can add the mica right into the melted soap, or mix it with 99% isopropyl alcohol before adding it to the soap. That helps it mix in a bit more easily. We recommend starting with about 1/8 tsp. of the mica and adding more from there if you like.

      Micas: https://www.brambleberry.com/Micas-C46.aspx

      Isopropyl Alcohol: https://www.brambleberry.com/99-Isopropyl-Alcohol-16-oz-P5682.aspx

      The 10″ Silicone Loaf Mold holds 50 ounces, so that’s how much soap you need. How much of each depends on how many layers you do – you can find that out by dividing by 50. So, if you plan to do 8 layers, 50 divided by 8 is 6.25 oz. of soap.

      10″ Silicone Loaf Mold: https://www.brambleberry.com/10-Silicone-Loaf-Mold–P5199.aspx

      -Kelsey with Bramble Berry

  11. Why glycerine soaps transpired?
    Thank you very much
    Lurdes

  12. Hello,
    I’ve watched all your episodes and it was great !! Do you have any recommendations on which color to use in making layers of honey gold ?
    Btw do you ship to Thailand as well ?

    Thanks alot!!!

    1. We have some great options for a honey gold! We mixed Shimmer Sparkle Gold Color Block and Shimmer Copper Sparkle Color Block to get this rich gold color: https://soapqueen.com/bath-and-body-tutorials/honey-bee-melt-pour-soap-on-soap-queen-tv/

      Shimmer Sparkle Gold Color Block: https://www.brambleberry.com/Color-Block-Shimmer-Sparkle-Gold-P5351.aspx?

      Shimmer Copper Sparkle Color Block: https://www.brambleberry.com/Color-Block-Shimmer-Copper-Sparkle-P5360.aspx?

      Also, we do ship to Thailand! Learn more in our international shipping policies: https://www.brambleberry.com/International-Shipping-Policies.aspx

      -Kelsey with Bramble Berry

  13. I just brought this kit and am so excited to try it. My base cup came cut in two. Does that mean it’s enough in the kit to make 2 batches of the mermaid soap?

  14. Just received this kit and I love it! This is my first time making melt and pour soap and it’s been so fun. I did have a problem with my soap forming a “skin” as my layers were hardening. I popped it back in the microwave but it doesnt fully disolve, I still have little pieces floating around. What can I do to prevent this? What is the highest temperaure I can heat it to before it boils and is no good? Thank you!

    1. So glad you’re loving the kit Linda! The soap can form a skin if it gets a bit too hot. When you’re reheating the soap several times per layer, it helps to microwave in very short bursts – as short as 5-10 seconds. You want the soap hot enough to loosen the soap up. If there are any unmelted chunks, stir with the spoon until they’re dissolved rather than heating it again. It also really helps to adjust your microwave settings to low. 🙂

      Learn more about how to prevent burnt melt and pour here: https://soapqueen.com/bath-and-body-tutorials/tips-and-tricks/how-to-avoid-burnt-melt-pour/

      -Kelsey with Bramble Berry

  15. Hi, I made a soap with clear glycerin soap base, but now it has started to emit something like oil, can you please tell me why that? btw I love you soaps!

    1. It sounds like your soap is sweating! Melt and pour has additional glycerin added during the manufacturing process. That glycerin draws moisture to the skin, but it can also draw moisture to your soap and form glycerin dew. To prevent that, wrap the soap tightly with plastic wrap and store in a cool, dry place. 🙂

      Read more about preventing glycerin dew here: https://soapqueen.com/personal-ramblings/augh-whats-that-all-over-my-soap-2/

      -Kelsey with Bramble Berry

    1. This recipe makes 1 pound of soap. You can get about 3-6 bars depending on how thick they’re cut. We usually get four 1″ bars. 🙂

      -Kelsey with Bramble Berry

  16. Hi. Good day.
    My name is David and i am Indonesian.
    First of all i would like to apologise is my English is not that fluently.
    I hope you can understand what am i going to ask.

    I am confused about how to calculate a soap recipe from water + lye + oil.
    For example if i wanna make a lemon grass soap how do i know about how much water, lye and oil that i have to use?

    Is there anyone can teach me to calculate? Thank you so much.

  17. I loved this project! As a new soaper I started with CP, and this was my first MP project. It was so fun and something I could share the process of making with my young daughter. Love that the kit can make two batches as well, so I can fix my mistakes the next time around 😉

    1. Yay, so glad to hear that Rachel! Crafting with kids is so fun. 🙂

      -Kelsey with Bramble Berry

  18. This soap is beautiful! I think these are going to be the first ones I make. I just have one question: do I have to use 99% isopropyl alcohol, or would 91% work as well?

Comments are closed.

{"email":"Email address invalid","url":"Website address invalid","required":"Required field missing"}

The Latest from Soap Queen TV

Inspired by Gems & Crystals

All About Essential Oils

The Power of Charcoal

Create Your Own Clay Face Mask

DIY Bath Bombs

Cold Process Soap Tips & Tricks

Learn the Basics of Cold Process Soapmaking

Learn the Basics of Melt & Pour Soapmaking

Want to Start Your Own Soap Business?

Soap Business Success Stories

Soap Queen TV Favorites

Ingredient Spotlight

Disclosure

Unless stated otherwise, all images are original material and are copyrighted. If you'd like to use an image, please be a friend and credit the photo and link back to Soap Queen. Feel free to share, tweet and pin to your hearts content.