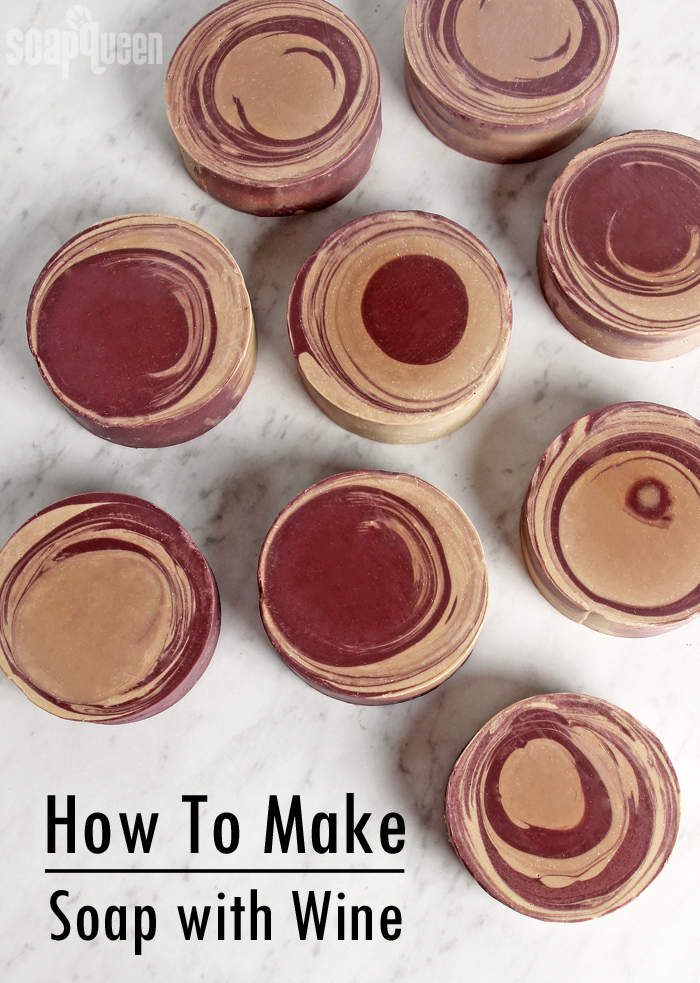
When I think of wine production, my mind immediately jumps to beautiful images of Napa Valley in California. But, you may be surprised to know that Washington state is the 2nd largest wine producer in the United States. Most of the wine is produced in Eastern Washington, where temperatures are warmer. To highlight this ingredient in my local area, the water in this recipe is swapped for wine produced in Washington state.
Working with wine in soap is not particularly difficult, but it does require some extra prep work. Alcohol and cold process soap don’t mix very well. So, when incorporating alcoholic beverages into recipes (such as beer, wine, etc.) the liquid needs to be boiled first to remove the majority of the alcohol. Then, I like to freeze the liquid and add the sodium hydroxide lye to the frozen liquid to keep temperatures cool.
Alternative liquids like wine have extra sugar, which scorches when mixed with lye. If the temperature of the liquid is kept cool, less scorching occurs. This keeps the liquid a slightly lighter color and reduces the unpleasant odor. Red wine is already quite dark, so if you’d like to skip freezing the wine you could. Keep in mind your soap batter might be slightly darker (and stinkier!). If you skip the freezing step, I do recommend allowing the wine to 50 ° F or cooler before adding the sodium hydroxide lye. Learn more about working with alcoholic beverages in soap here.
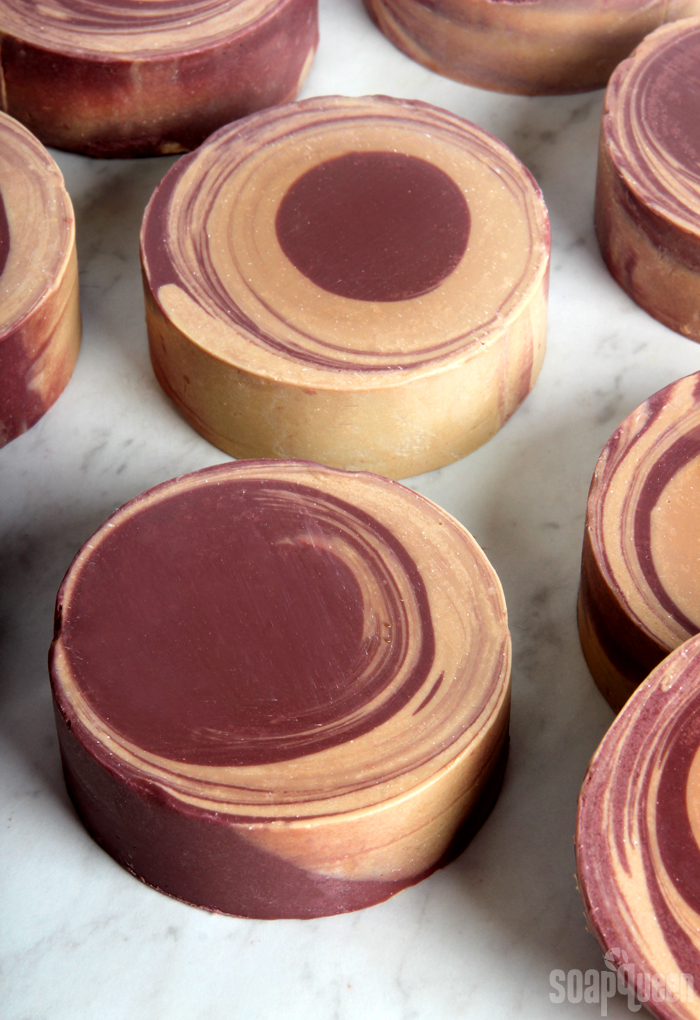
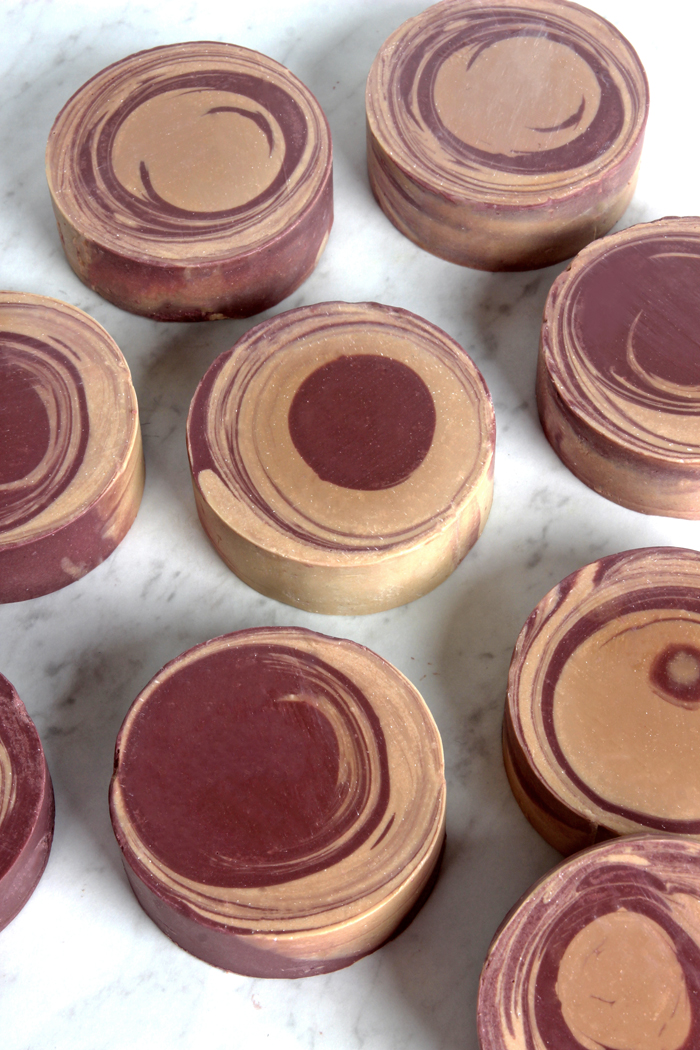
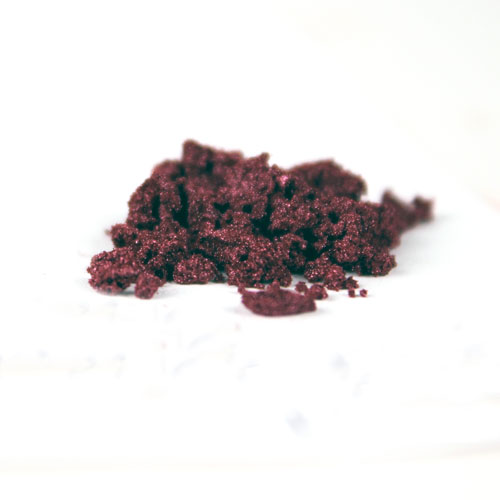
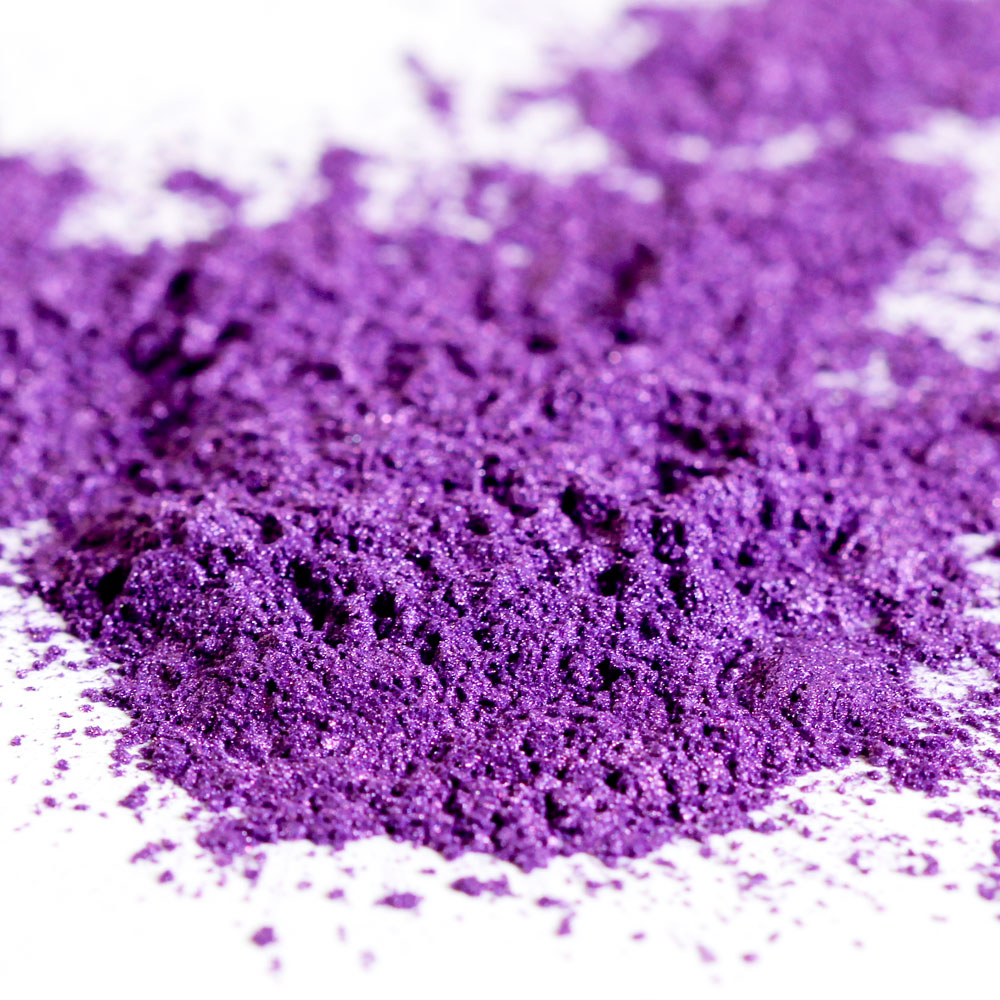
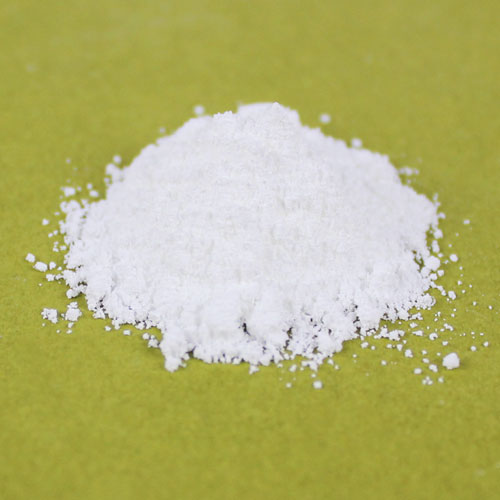
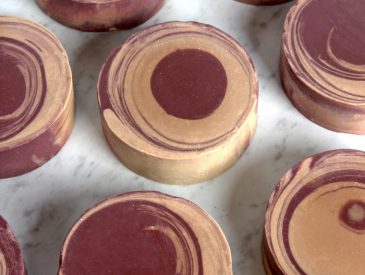
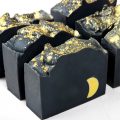
The red wine gives the soap batter a dark tan color. Titanium dioxide combats this a bit, creating a creamier color. A combination of Queen’s Purple Mica and Merlot Sparkle Mica create a rich burgundy-wine color. Berrywine Fragrance Oil gives the soap a realistic and slightly fruity scent. Berrywine Fragrance Oil does not smell great out of the bottle, but it smells good in soap – promise!
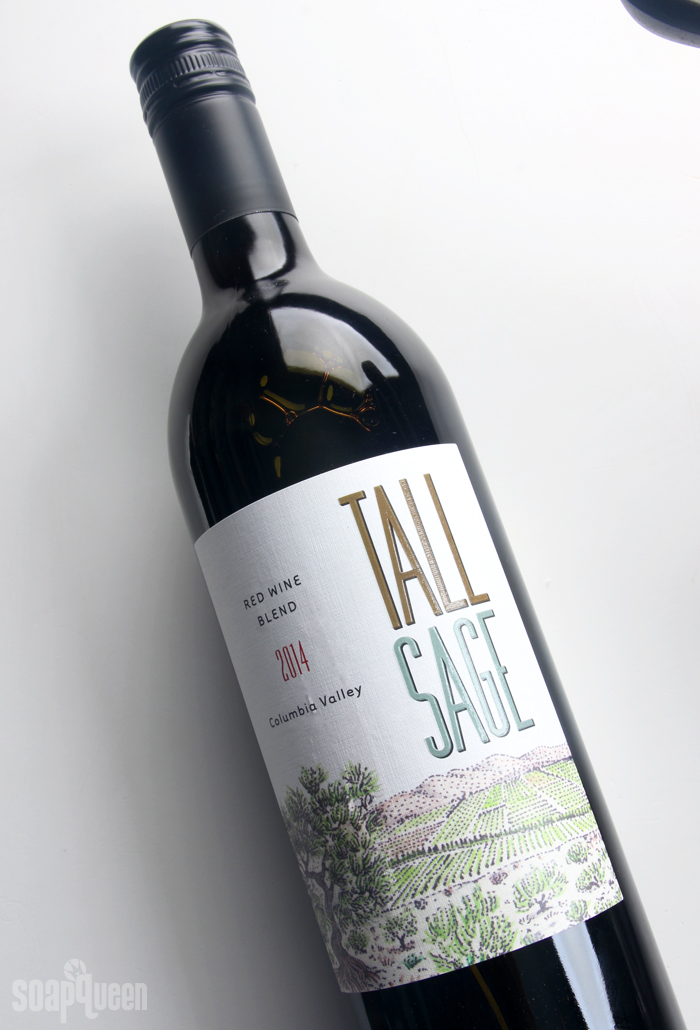 Using a local wine is a great way to highlight local ingredients and show off your hometown pride!
What You’ll Need:
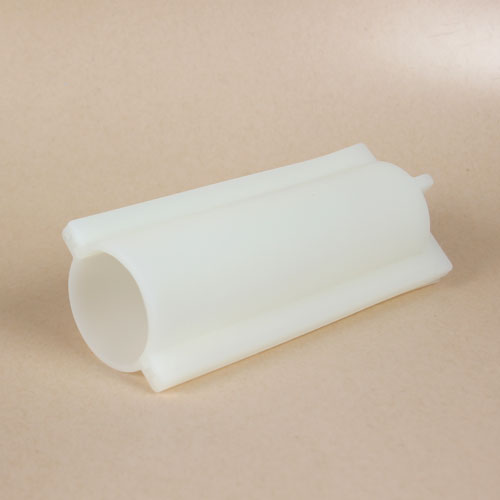
Silicone Column Mold
25 oz. Swirl Quick Mix
7.4 oz. Prepped Wine (10% water discount)
3.5 oz. Sodium Hydroxide Lye
1.5 oz. Berrywine Fragrance Oil
Titanium Dioxide
Queen’s Purple Mica
Merlot Sparkle Mica

Click here to add everything you need for this project to your Bramble Berry shopping cart!
If you’ve never made Cold Process soap before, stop here! I highly recommend checking out our FREE four part SoapQueen.tv series on Cold Process Soapmaking, especially the episode on lye safety. And if you’d rather do some reading, Bramble Berry carries a wide range of books on the topic, including my newest book, Pure Soapmaking. You can also checkout the digital downloads for that instant gratification factor.
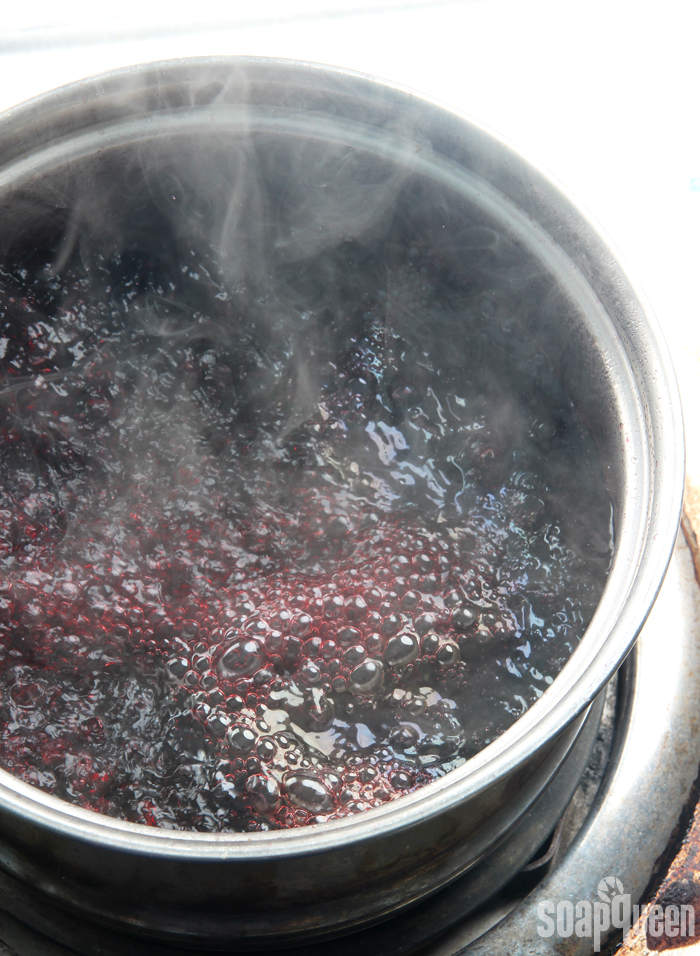
WINE PREP: The first step is to prep the wine for soaping. This should be done the day before you’d like to make soap. Alcohol and soaping don’t mix very well, so the wine needs to boiled to remove the majority of the alcohol. Add the wine to a saucepan. I would recommend adding about 1.5x-2x more than you need, because the wine boils off. For this recipe, I would recommend adding 12 ounces.
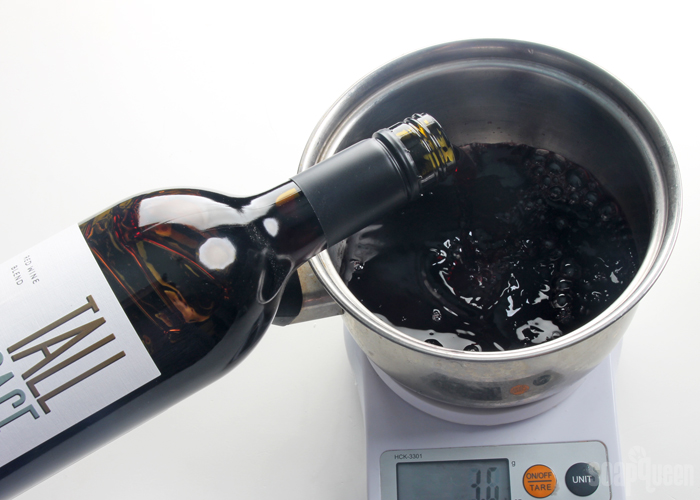
Bring the wine to a steady boil for 5-7 minutes. Do not leave the wine unattended or it could boil over. Once it has boiled, remove from the heat and weigh the amount you need in a separate container. If you have more wine than you need, save it for another batch. If you don’t have enough, don’t worry. Add distilled water to the boiled wine to make up for any amount of liquid that you’re missing.
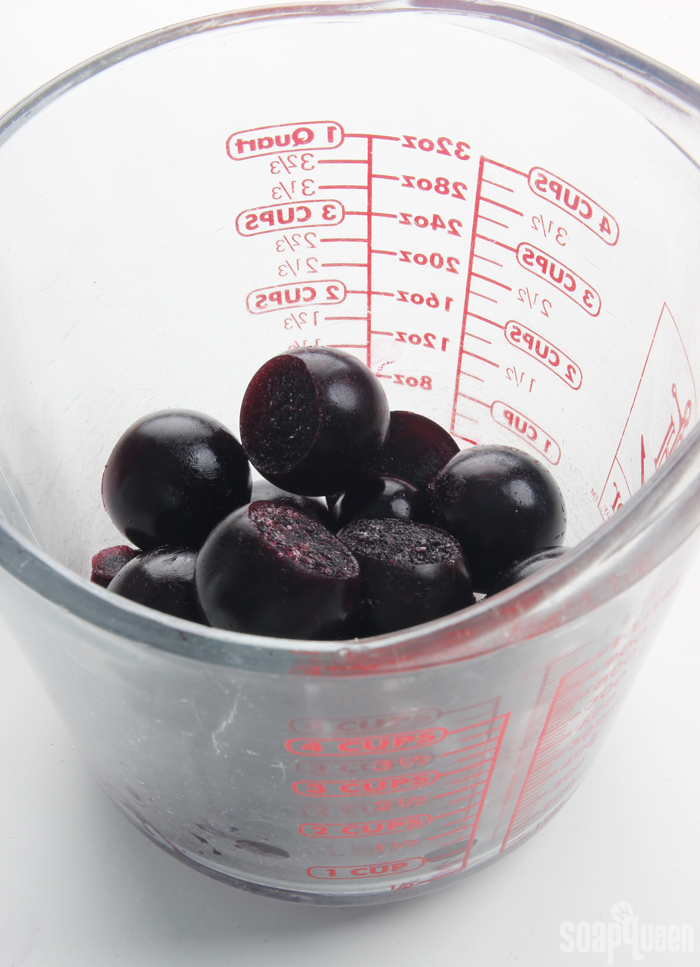
Once you have the correct amount of wine, pour it into ice cube trays (in this case we used Medium 9 Ball Silicone Molds). Place the prepped wine into the freezer and allow it to fully freeze. Once it’s frozen, place the wine ice cubes into a heat safe container suitable for mixing lye.
SAFETY FIRST: Suit up for safe handling practices! That means goggles, gloves and long sleeves. Make sure kids, pets, and other distractions and tripping hazards are out of the house or don’t have access to your soaping space.
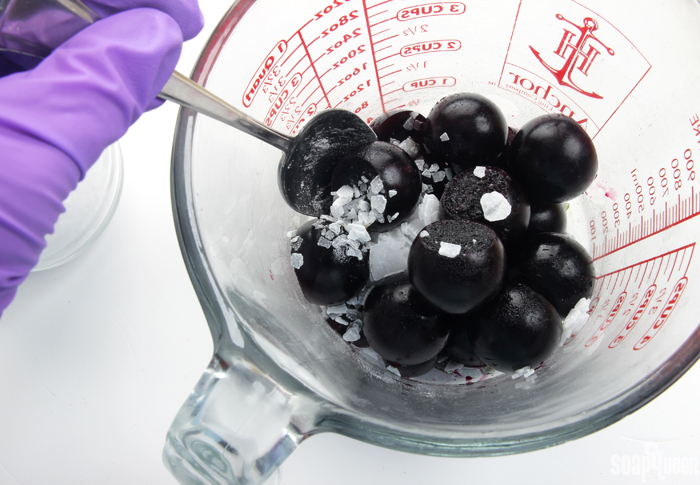
With your safety gear on, measure out the sodium hydroxide lye into a separate container. Then, add about 1/4 of the lye flakes directly to the frozen wine. Slowly, start to mix the two together.
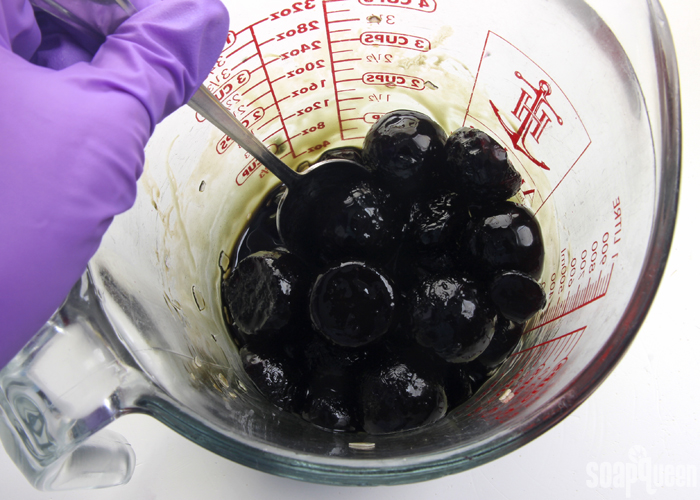
It takes a few minutes to get started, but the lye will begin to warm up the wine ice cubes and they will begin to melt. You will start to notice an unpleasant odor, and the color of the wine will change (notice the green hue in the photo below). Continue adding the lye flakes to the wine cubes. This process can take a while, so patience is key.
Once all the wine-ice has melted, continue to stir for several minutes. Make sure all the lye flakes have completely melted. In the photo below, all the ice is melted but there was still some lye flakes at the bottom of the mixture. Keep stirring until all the flakes are gone. This can take up to 10-15 minutes of stirring (patience is key!). To be extra safe, some soapers like to pour the lye mixture through a non-reactive mesh strainer to make sure all the flakes are gone.
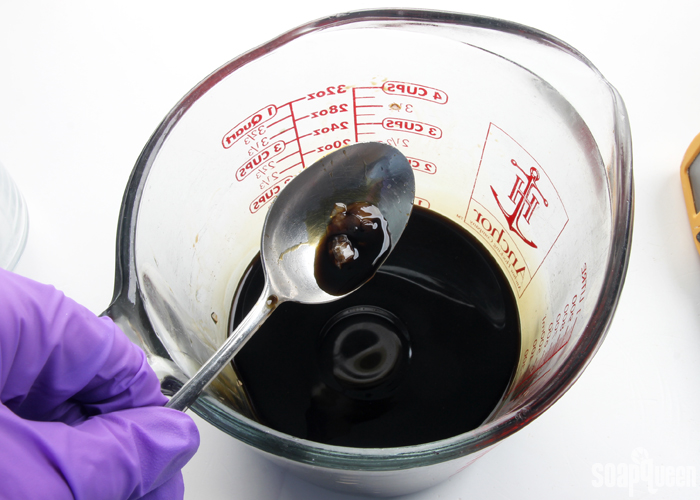
Once the lye and wine are completely incorporated, we are ready to soap! Label the container of lye “DANGER: DO NOT TOUCH” and set it aside. Time to prep the other ingredients.
FRAGRANCE PREP: Measure out 1.5 oz. of Berrywine Fragrance Oil into a glass, fragrance oil safe container. Set aside.
COLOR PREP: To ensure that the Titanium Dioxide blends smoothly into the soap batter, we recommend micronizing it before dispersing it in oil. Please note this is an optional tip but it does help with the titanium dioxide clumping in the soap. To micronize colorant, simply use a coffee grinder to blend the colorant to break up any clumps of color and prevent streaks of white from showing in the final soap. We like to use a coffee grinder that has a removable, stainless steel mixing area for easy cleaning. Then, disperse 4 teaspoons of the colorant into 3 tablespoons of sunflower or sweet almond oil (or any other liquid oil). The color dispersion is slightly more concentrated to avoid adding too much extra oil. Then in separate containers, disperse 1 teaspoon Queen’s Purple Mica and 1 teaspoon Merlot Sparkle Mica into 1 tablespoon lightweight liquid oil. Use a mini mixer to help get rid of any clumps.
ONE: Fully melt the entire bag of Swirl Quick Mix until completely clear and there is no cloudiness. Shake the bag to mix up all the oils. Measure 25 oz. into your soaping bowl. Add 2 tablespoons of the dispersed titanium dioxide directly to the oils. Stick blend the colorant into the oils until they are completely combined. Adding the titanium dioxide to the oils helps get rid of more chunks in the colorant, and can be stick blended thoroughly without accelerating trace.
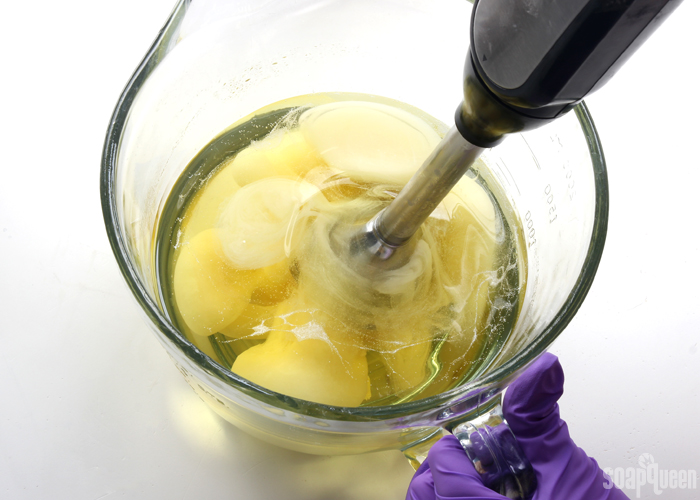 TWO: Add the lye water to the oils and stick blend until thin trace. If you’d like a harder bar of soap that releases faster from the mold, you can add sodium lactate to the cooled lye water. Use 1 teaspoon of sodium lactate per pound of oils in the recipe. For this recipe, you’d add about 1.5 tsp. sodium lactate. Notice the color change of the soap batter!
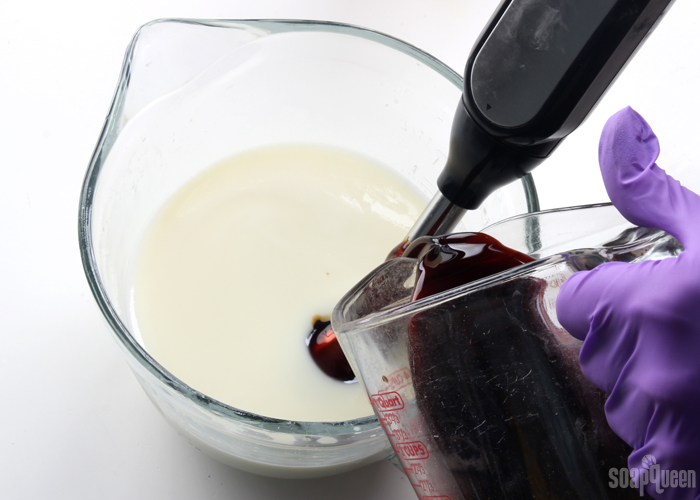
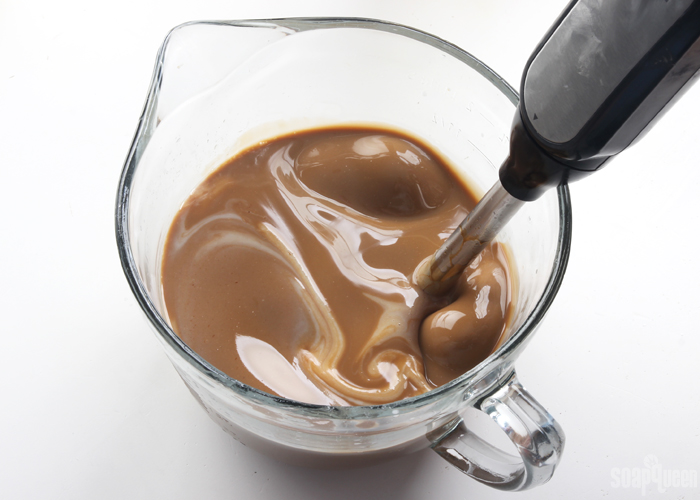
THREE: Once you have reached a thin trace, split the batch in half. Each container should have about 500 mL of soap. To one container, add all the dispersed Merlot Sparkle Mica and all the dispersed Queen’s Purple Mica. To the other container of soap, add the remaining dispersed titanium dioxide. Use a whisk to thoroughly mix in the colorants.
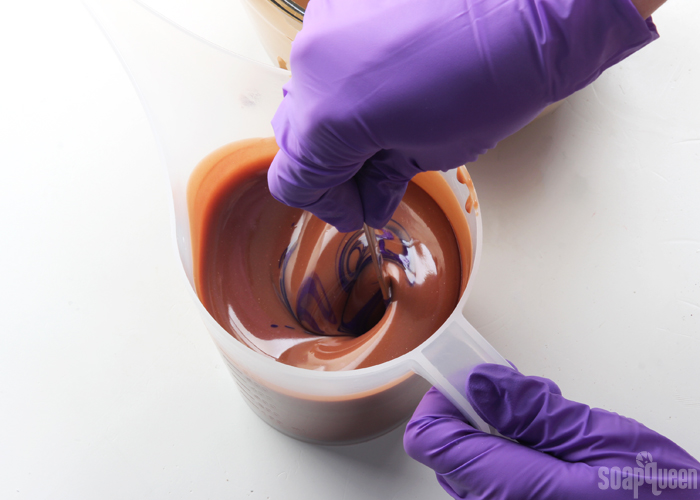 FOUR: Add half of the Berrywine Fragrance Oil to one container of soap, and the other half of the fragrance oil to the other container (it’s okay to eyeball it). Use a whisk to thoroughly mix in the fragrance oil.
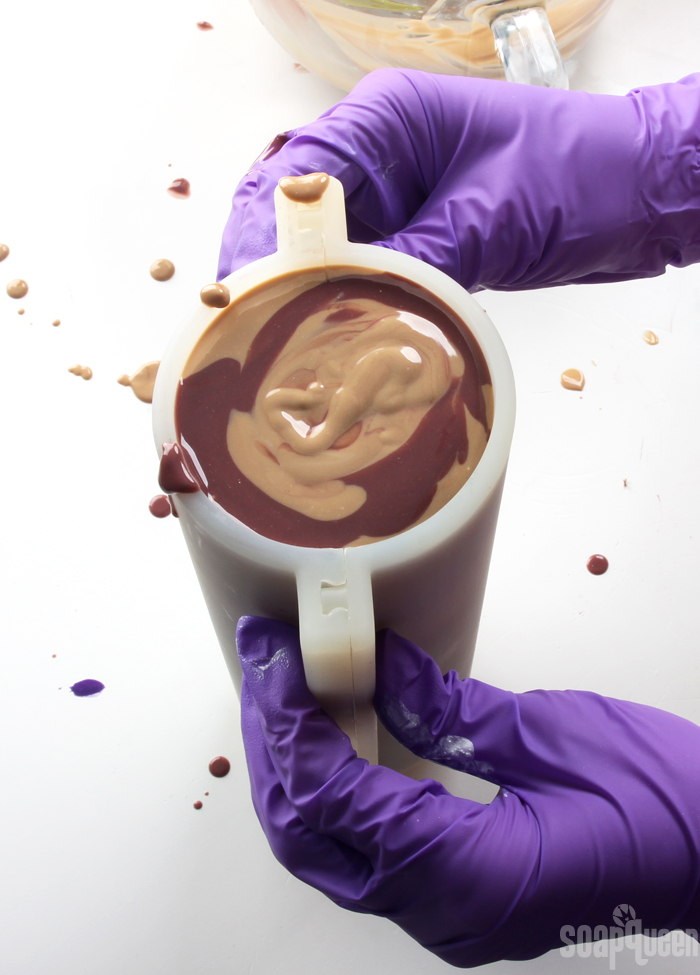
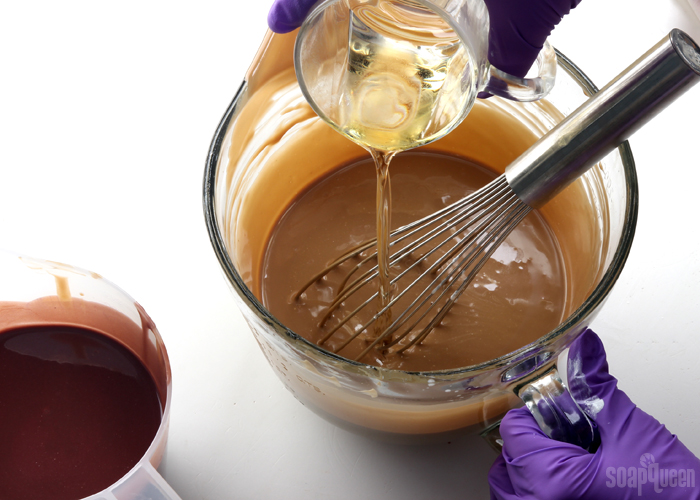 FIVE: Pour some of tan soap into the mold, while counting to “1,2,3.” Then, pour the wine colored soap into the cream, directly in the center of the mold while counting to “1,2,3.” Counting helps keep the pours consistent. The colors should break through to the layer below.
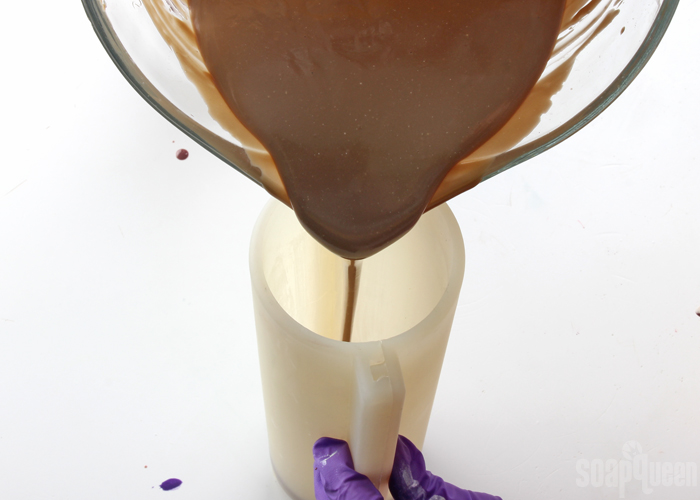 SIX: Continue pouring each color into the mold, directly in the center. Continue pouring until the mold is completely full.
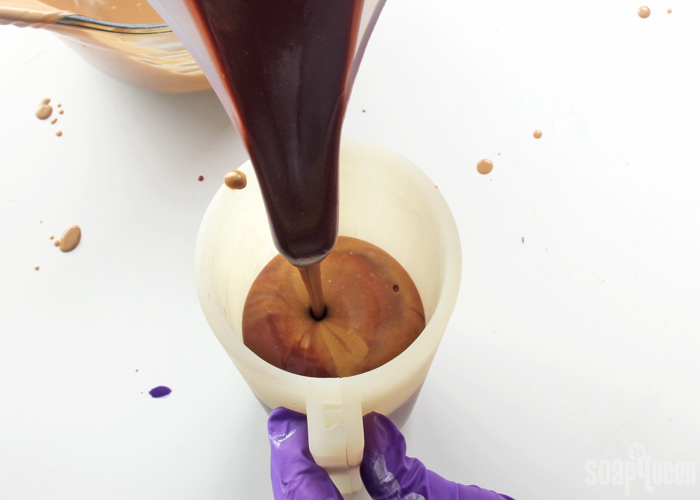 SEVEN: While firmly holding on to the seals on the sides of the mold, very lightly tap the mold on the counter. Don’t tap too firmly, or the seal of the mold can unlock and your soap will spill everywhere! Set the mold aside in a safe area where it will not topple over.
Because of the extra sugar in the wine, this soap does have a tendency to warm up. Our soaping area is pretty cold this time of year, so we left the soap at room temperature for 3-4 days before unmolding. If you live in a hot climate, you may want to place the soap into the fridge for the first 3-4 hours to prevent overheating. Allow the soap to stay in the mold for 3-4 days. Because of the amount of colorant/extra oil in the recipe, we found it took a little longer to unmold. Once unmolded, slice into bars and allow to cure for 4-6 weeks. Enjoy!
- Silicone Column Mold
- 25 oz. Swirl Quick Mix
- 7.4 oz. Prepped Wine (10% water discount)
- 3.5 oz. Sodium Hydroxide Lye
- 1.5 oz. Berrywine Fragrance Oil
- Titanium Dioxide
- Queen’s Purple Mica
- Merlot Sparkle Mica
Bring the wine to a steady boil for 5-7 minutes. Do not leave the wine unattended or it could boil over. Once it has boiled, remove from the heat and weigh the amount you need in a separate container. If you have more wine than you need, save it for another batch. If you don’t have enough, don’t worry. Add distilled water to the boiled wine to make up for any amount of liquid that you’re missing.
Once you have the correct amount of wine, pour it into ice cube trays (in this case we used Medium 9 Ball Silicone Molds). Place the prepped wine into the freezer and allow it to fully freeze. Once it’s frozen, place the wine ice cubes into a heat safe container suitable for mixing lye.
With your safety gear on, measure out the sodium hydroxide lye into a separate container. Then, add about ¼ of the lye flakes directly to the frozen wine. Slowly, start to mix the two together.
It takes a few minutes to get started, but the lye will begin to warm up the wine ice cubes and they will begin to melt. You will start to notice an unpleasant odor, and the color of the wine will change (notice the green hue in the photo below). Continue adding the lye flakes to the wine cubes and continue to stir. This process can take a while, so patience is key.
Once all the wine-ice has melted, continue to stir for several minutes. You need to make sure all the lye flakes have completely melted. In the photo below, all the ice is melted but there was still some lye flakes at the bottom of the mixture. Keep stirring until all the flakes are gone. This can take up to 10-15 minutes. To be extra safe, some soapers like to pour their lye mixture through a non-reactive mesh strainer to make sure all the flakes are gone.Once the lye and wine are completely incorporated, we are ready to soap! Label the container of lye “DANGER: DO NOT TOUCH” and set it aside. Time to prep the other ingredients.
- Fully melt the entire bag of Swirl Quick Mix until completely clear and there is no cloudiness. Shake the bag to mix up all the oils. Measure 25 oz. into your soaping bowl. Add 2 tablespoons of the dispersed titanium dioxide and add it directly to the oils. Stick blend the colorant into the oils until they are completely combined. Adding the titanium dioxide to the oils helps get rid of more chunks in the colorant, and can be stick blended thoroughly without accelerating trace.
- Add the lye water to the oils and stick blend until thin trace. If you’d like a harder bar of soap that releases faster from the mold, you can add sodium lactate to the cooled lye water. Use 1 teaspoon of sodium lactate per pound of oils in the recipe. For this recipe, you’d add about 1.5 tsp. sodium lactate. Notice the color change of the soap batter!
- Once you have reached a thin trace, split the batch in half. Each container should have about 500 mL of soap. To one container, add all the dispersed Merlot Sparkle Mica and all the dispersed Queen’s Purple Mica. To the other container of soap, add the remaining dispersed titanium dioxide. Use a whisk to thoroughly mix in the colorants.
- Add half of the Berrywine Fragrance Oil to one container of soap, and the other half of the fragrance oil to the other container (it’s okay to eyeball it). Use a whisk to thoroughly mix in the fragrance oil.
- Pour some of tan soap into the mold, while counting to “1,2,3.” Then, pour the wine colored soap into the cream, directly in the center of the mold while counting to “1,2,3.” Counting helps keep the pours consistent. The colors should break through to the layer below.
- Continue pouring each color into the mold, directly in the center. Continue pouring until the mold is completely full.
- While firmly holding on to the seals on the sides of the mold, very lightly tap the mold on the counter. Don’t tap too firmly, or the seal of the mold can unlock and your soap will spill everywhere! Set the mold aside in a safe area where it will not topple over. Because of the extra sugar in the wine, this soap does have a tendency to warm up. Our soaping area is pretty cold this time of year, so we left the soap at room temperature for 3-4 days before unmolding. If you live in a hot climate, you may want to place the soap into the fridge for the first 3-4 hours to prevent overheating. Allow the soap to stay in the mold for 3-4 days. Because of the amount of colorant/extra oil in the recipe, we found it took a little longer to unmold. Once unmolded, slice into bars and allow to cure for 4-6 weeks. Enjoy!

Is it possible to add wine to melt and pour soap
No, we do not recommend it because it will not mix into the soap base.
Is it possible to boil and cool the wine and add a few ounces at trace like you would milk ?
You’ll want to use wine or milk as part of your base lye water before you begin the soaping process; this will get you the best results.
I’m hoping someone will reply to this even though it’s nearly a year later! I live in Oregon, and want to make and sell wine soap. I’m having a tough time finding any information about legal issues or requirements to sell soap made with wine. Any help would be great! I’m wanting to approach a winery to see if they are interested in a Wholesale agreement with me making soap from their wine!
That soap should be just fine to sell. The alcohol is boiled out and it is essentially turned into soap, so you’re not selling wine. You can contact your local Department of Revenue for more information I believe.
This sounds amazing and I really want to try it but I’m wondering if none of the natural smell of the wine is retained? I know you said it smells bad when you first mix the lye in but does that bad smell stay even after its done curing?
No, the unpleasant smell will fade as the soap cures for 4-6 weeks. We added Berrywine to this recipe to get the wine scent, as there is little to no scent in the final bars without it.
Berrywine Fragrance Oil: https://www.brambleberry.com/Berrywine-Fragrance-Oil-P3914.aspx
I finally got around to trying this one and it is very similar to yours. I did a small trial batch (10 oz oils), but did the design/coloring and wine prep based on this tutorial. I used my free sample (thank you Brambleberry!) of spiced red tea in the red part only and left the tan unscented and the red is strong enough. My first attempt at wine soap was a scorched, DISGUSTING SMELLING, batch of dark brown soap that even I could not shower with. Thanks for showing me how to do it the proper way! I’ve learned SO MUCH here over the years!
It’s on youtube under the soap man with no ads.
You’re welcome Eric, happy this post was helpful. Scorched wine smell is definitely distinct – freezing it is the way to go.
Spiced Red Tea Fragrance Oil: https://www.brambleberry.com/Spiced-Red-Tea-Fragrance-Oil-P6759.aspx
How do you include the Wine as an ingredient in your soap on your ingredient label?
According to Marie Gale, FDA regulations state the label should have the common name. In this case, just “wine” will work. You can list the type/brand if you like. You don’t need to list the ingredients in the wine because they’re not available on the bottle. Placement on the list should be based on the percentage of wine in the total formulation. Learn more here: http://www.mariegale.com/ingredient-labels-soap/
I would highly recommend Marie’s book, Soap and Cosmetic Labeling. It has more information on labeling your products: https://www.brambleberry.com/Soap-And-Cosmetic-Labeling-Book-1-Book-P3663.aspx
-Kelsey with Bramble Berry
Made two batches of this soap and both failed….traced extremely fast…didn’t have time to stir in colorant and fragrance oil….not able to pour into mold. What could be the cause of this?
It may be a few factors, like temperature or the wine. How long did you boil the wine, and what temperatures were your lye and oils?
-Kelsey with Bramble Berry
I gently boiled the wine for 10 minutes and froze in ice cube trays…..wine lye solution and oils were under 100 degrees when I combined them.
Hmm, that sounds just right so I’m not sure why it accelerated so quickly. Was the wine on the sweeter side?
-Kelsey with Bramble Berry
Figured out that you cannot use sweet wine for this recipe……use dry wine. After several failures and trying to figure out what happen I finally got it. Guess most people must like dry instead of sweet wine!
I’m thinking the sweeter wines have more sugar, so they accelerate and heat the soap more. Using dry wine is a great idea.
-Kelsey with Bramble Berry
Hello! This is really cool, I am thinking of giving this a try. The precautions are very helpful too; now I know I should be very careful. Just one question – what is the appeal of soaping with alcohol? I have seen liqueur and beer soaps before, but I am clueless as to why alcohol is used in soaping. Does it have specific qualities that, say, grape juice wouldn’t have? Or is it a nifty selling point? I am veeery curious about it!
Wine soaps are definitely great from a selling standpoint – they help set your product apart and appeal to wine lovers. Alcohol also has natural sugar that creates nice lather in the bars. It’s definitely worth a try, even if it’s just to experiment a bit.
-Kelsey with Bramble Berry
Hello,
I started making goat milk soap a couple months ago and have used your blog as a guide. I just added the ingredients to this soap to my cart but I am too new to stray off the recipe. I would like to do a goat milk wine soap with this recipe. How do I add/substitute goat milk in there? Thank you.
You can use the same amount of liquid recommend for this recipe, but replace some or all of it with milk. You’ll want to keep both nice and cold to prevent overheating. So, after boiling the wine, you can freeze it into cubes with the milk. Then, when the soap is in the mold, pop it in the freezer for 5 to 24 hours.
-Kelsey with Bramble Berry
Hi,
Canw e use non-alcoholic wines? That we wouldnt have to boil…
Or even non alcoholic wines need to be boiled?
Usually, even non-alcoholic wines have a small amount of alcohol, so you may want to boil the wine just in case. That will help prevent acceleration and overheating. 🙂
-Kelsey with Bramble Berry
I love making wine soap (and beer, tea, coffee, etc.). I made a soap with Prosecco and one with chardonnay just a few days ago. I boiled off the alcohol, but I didn’t bother to freeze it, just refrigerated overnight. It was fine. Both soaps stayed very light colored with no added titanium dioxide. I can’t comment on the smell because I’m very sensitive to lye so that I can’t even open the container without choking and wear a mask most of the time. I agree with another commenter that the lye must be added slowly. I usually add a little and stir, then a little more and stir. I also find that using liquids other than water can produce a sort of scum on top, similar looking to curdled milk, but if I stir it periodically during the cooling phase it combats it a little. It might be a little extra work, but the lather these bars produce is completely worth it.
That’s awesome, thanks for sharing your tips! We agree, the lather with wine is fantastic. 🙂
-Kelsey with Bramble Berry
I just made my first batch of wine hot process the other day. I mixed my wine in with my oils and then added my cooled lye water (1:1 ratio of water and lye). I let my lye water and oils cool to room temp which these days is about 75 F. I added titanium dioxide to the whole thing and then dumped in the crock pot. Before plopping into my mold I added color (merlot mica) and FO (surplus cherry almond). I wanted some swirls so I just blended it a bit. The lighter parts are darker than I’d like but it’s still nice. BTW, I’m doing all this on a sail boat in a mooring field. A bit challenging but I love making soap!
Oh that’s awesome, soaping on a sail boat! Glad it turned out well Laura. 🙂
-Kelsey with Bramble Berry
Merlot Sparkle Mica: https://www.brambleberry.com/Merlot-Sparkle-Mica-P3064.aspx
Surplus Cherry Almond Fragrance Oil: https://www.brambleberry.com/Surplus-Cherry-Almond-Fragrance-Oil-P4168.aspx
Can’t wait to try and soap with wine! I have this on my “must try” list. I bought the Berrywine fragrance a few months ago and have been sitting on it, not thrilled with the scent. At all. Now I am excited to use it in my very next batch and happy to hear it gets better in soap~!
While it doesn’t smell great out of the bottle, it smells awesome in soap! It’s a lovely mix of wine and berries. 🙂
-Kelsey with Bramble Berry
I love this design too. I’ve been meaning to make red wine soap for the longest time. I have your Red Wine FO I’d like to use. Do you know how badly that FO discolors? I’ve been postponing it, because I wasn’t sure what design I wanted to do, but I might do this one now. Thank you! 🙂
It has very little discoloration! The finished soap is a slight ivory/yellow hue. 🙂
-Kelsey with Bramble Berry
Hi, everybody: please learn from my one bad experience with wine soap. I boiled it, but did not freeze it and I dumped all the lye in quickly, just like I do with water. Expecting a possible reaction, I put it into a tall container and I had a major lye/wine volcano! This is why we wear gloves because I would have had singed fingers otherwise. The scorched wine smelled AWFUL and it did not disappear in the final dark brown soap. Even I could not stand to use it so it became laundry soap. FREEZE it and add your lye VERY SLOWLY!.
p.s.: use 4 large binder clips on your column mold (toward the bottom and middle) and it won’t come apart at the seems. I forgot this weekend and FORTUNATELY, it was hot process soap so the loss was minimal.
Freezing the lye beforehand is definitely an important step! 🙂
-Kelsey with Bramble Berry
Just a heads up, if you used a superfat, it won’t make very good laundry soap. Laundry soap works best at 0 or -1 superfat, so the oils don’t cling to your fabrics. You may want to rebatch it and add a bit more lye water.
Lower superfat is a good suggestion for laundry soap! However, we don’t recommend adding lye water to rebatch. The recipe has mostly finished saponification, so that lye may not react with the oils the way it should. That means you can have active lye in the laundry soap, which can irritate or burn the skin. You can rebatch the soap with equal or double of a hard, non-superfatted recipe to help balance it out though. 🙂
-Kelsey with Bramble Berry
Yes, i have made wine soap using the fragrance and micas that you used in this post. It was one of my best soaps.
That’s awesome, glad to hear that Shay! 🙂
-Kelsey with Bramble Berry
Thanks, i used hot process. It turned out perfectly.
Annie Marie my mentor, whao this is beautiful I love it.all what I need is ur support, d first soap I make and d second I didn’t succeed on it, today I just want to give it a try,whao I succeed I and my husband was very very happy ,thank God, thank you Annie Marie, I love u. Please can I sell my soap
Aisha, congratulations on 1 successful batch of soap. Please, do not sell your soap, until you have made MANY successful batches of soap and you have spent a long time in careful studying of soap making and safety. You will be doing yourself and your customers a huge disservice (or worse) if you rush. Good luck.
That’s awesome, congrats on your first batch! We have some great resources if you want to sell your soap, including a three-part series on how to get started. I’ll link that below. 🙂
So You Want to Sell Your Soap (Part One): http://www.soapqueen.com/business/so-you-want-to-sell-your-soap-part-one/
Part Two: http://www.soapqueen.com/business/so-you-want-to-sell-your-soap-part-2/
Part Three: http://www.soapqueen.com/business/so-you-want-to-sell-your-soap-part-3/
Find more business advice here: https://www.soapqueen.com/category/business/
-Kelsey with Bramble Berry