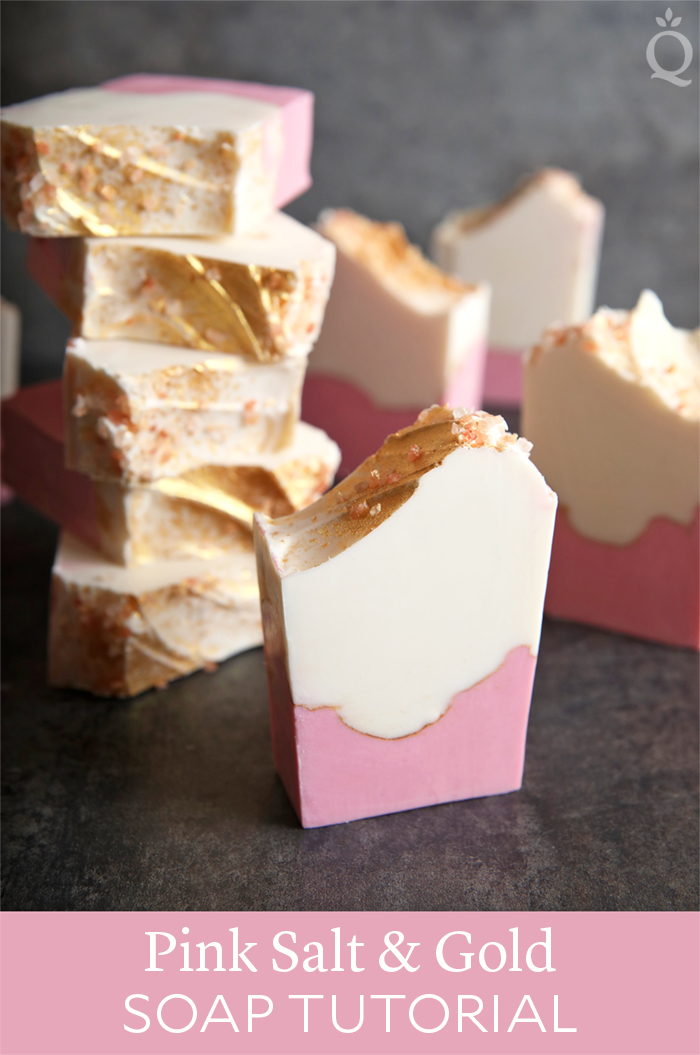
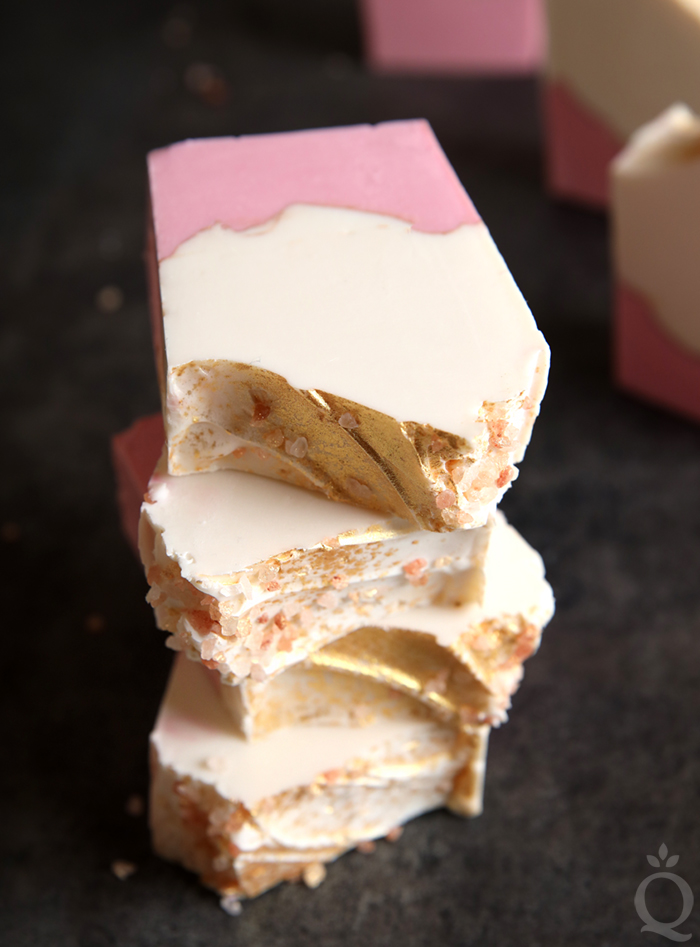
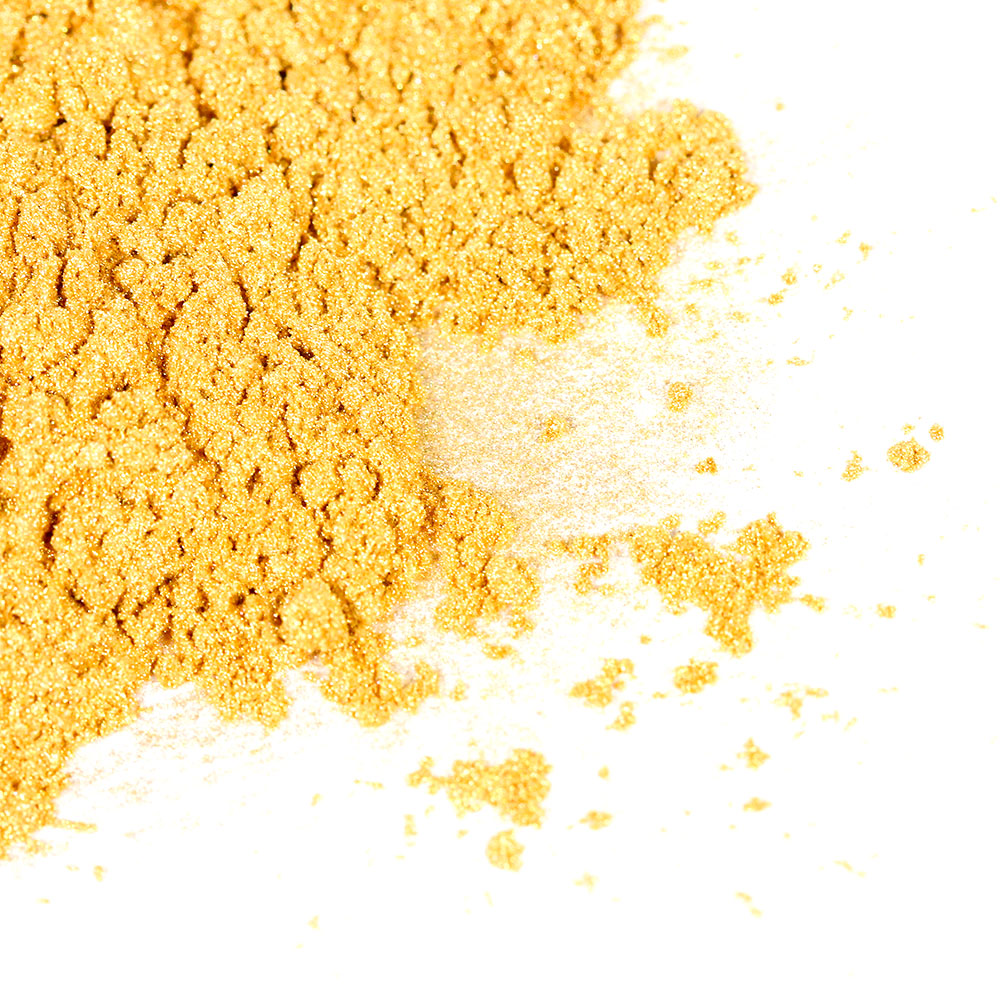
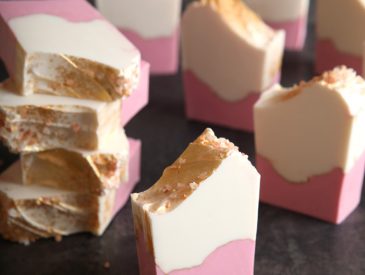
Gold and pink is a sophisticated color combination. It feels appropriate for the holidays, but also shines for Valentine’s Day and spring. That color combination inspired this soap, which is topped with Gold Sparkle Mica and pink sea salt. The colors also make an appearance inside the bar with a pink layer and gold mica line.
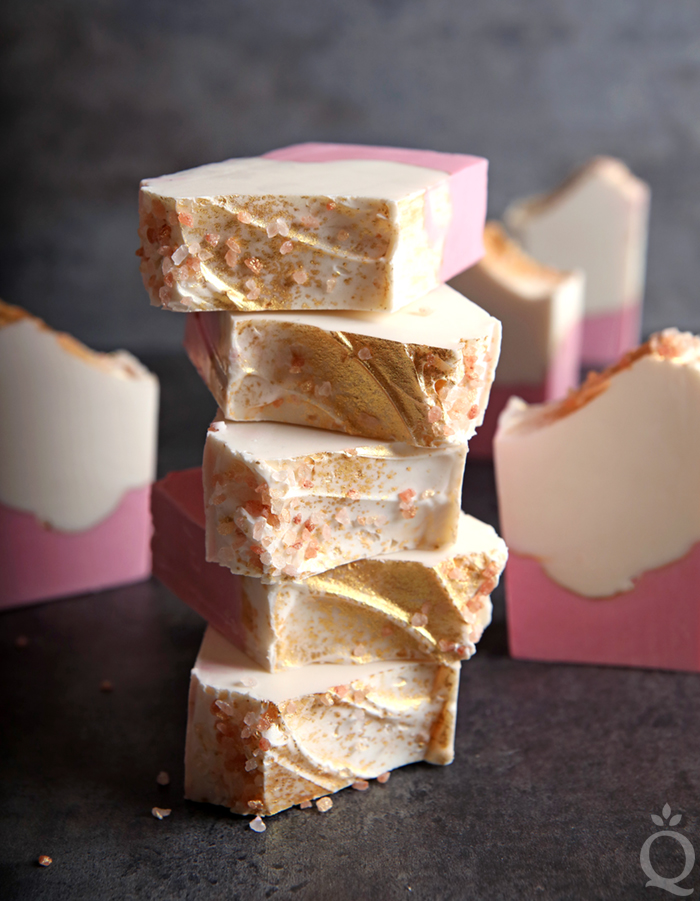
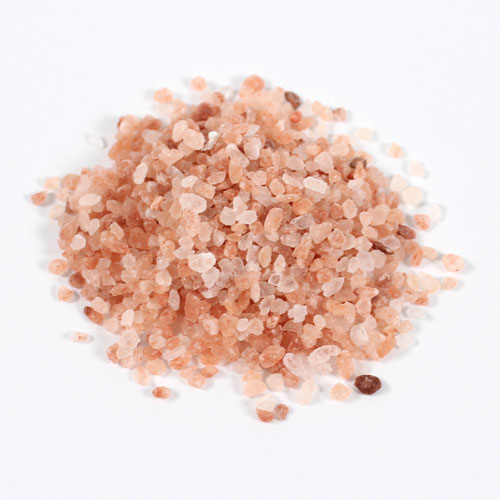
We scented the batch with Rose Quartz Fragrance Oil. It’s a bright combination of grapefruit, jasmine, and traditional rose notes. It does slightly accelerate, but that works well for the layered design and textured top. The pink sea salt is sprinkled on top for texture and color. Gently pressing the salt into the soap helps the salt stick, but some will fall off when cut.
To achieve a nice white color, we added plenty of titanium dioxide. When a large amount of titanium dioxide is used it can lead to glycerin rivers – learn more about them here. One of the best ways to prevent glycerin rivers is to use a water discount. That can lead to trace thickening more quickly, so use your stick blender sparingly for this recipe.
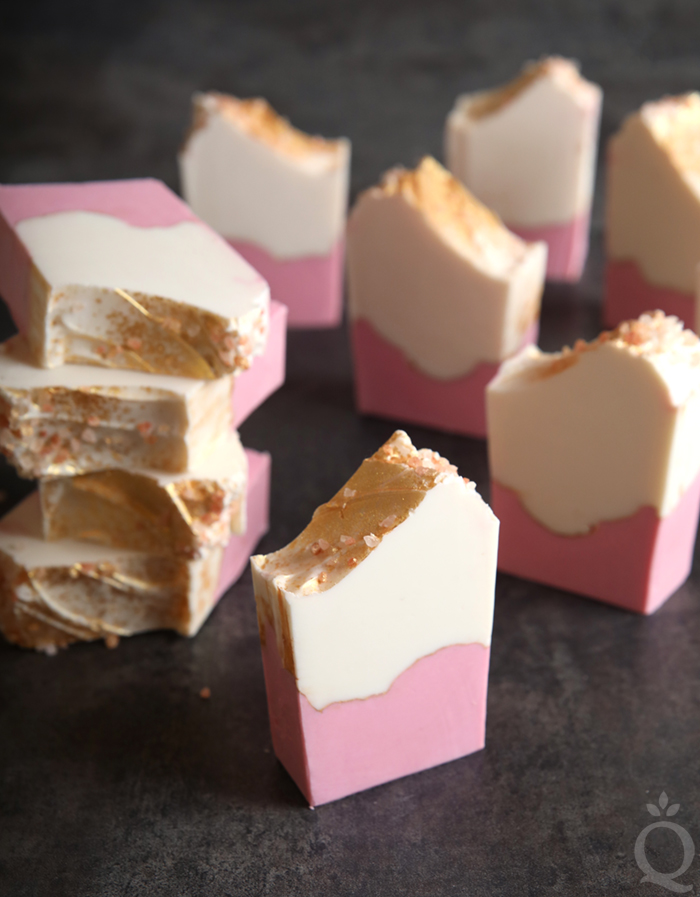
What You Need: Click below to add everything you need for this project to your Bramble Berry shopping cart!Pink Salt & Gold Cold Process Soap DIY
Tall 12″ Silicone Loaf Mold
Powder Duster
1.8 oz. Cocoa Butter (5%)
11.6 oz. Coconut Oil (33%)
3.2 oz. Meadowfoam Oil (9.1%)
11.6 oz. Palm Oil (33%)
7 oz. Rice Bran Oil (19.9%)
5 oz. Sodium Hydroxide Lye
10 oz. Distilled Water (13% water discount)
1.75 oz. Rose Quartz Fragrance Oil
Titanium Dioxide
Magenta Mica
Gold Sparkle Mica
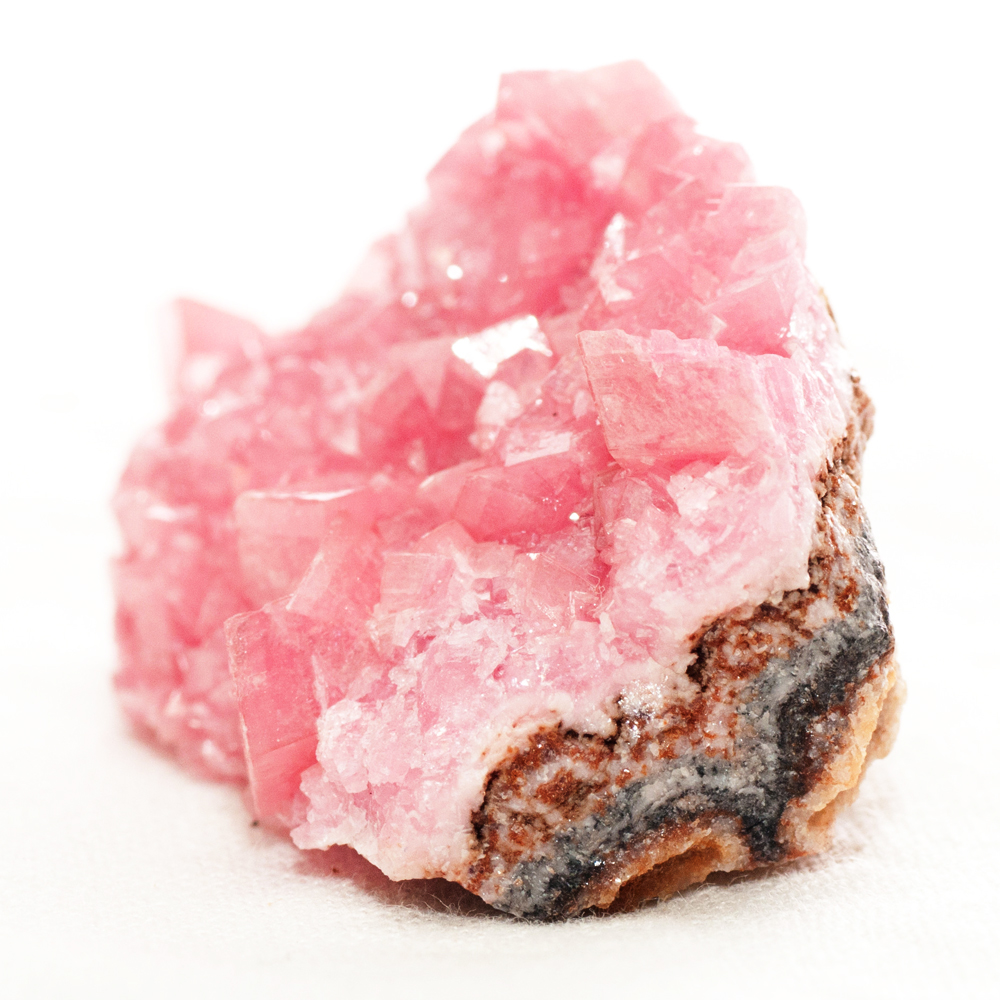
Pink Sea Salt, Medium
If you’ve never made cold process soap before, stop here. We highly recommend checking out our FREE four part SoapQueen.tv series on cold process soapmaking, especially the episode on lye safety. And if you’d rather do some reading, Bramble Berry carries a wide range of books on the topic, including Pure Soapmaking. You can also check out the digital downloads for that instant gratification factor.
FRAGRANCE PREP: Measure 1.75 ounces of Rose Quartz Fragrance Oil into a small glass container and set aside.
COLORANT PREP: Disperse 4 teaspoons of the titanium dioxide into 4 tablespoons of sunflower or sweet almond oil (or any other liquid oil). Use a mini mixer to get rid of any clumps. In a separate container, mix 1/2 teaspoon of Magenta Mica into 1/2 tablespoon lightweight liquid oil. Use a mini mixer to get rid of any clumps. Have the Gold Sparkle Mica and pink sea salt nearby.
Optional: To ensure that the titanium dioxide blends smoothly into the soap batter, we recommend micronizing it before dispersing it in oil. This is an optional tip but it does help with the titanium dioxide clumping in the soap. To micronize the colorant, simply use a coffee grinder to break up any clumps of color and prevent streaks of white from showing in the final soap. We like to use a coffee grinder that has a removable stainless steel mixing area for easy cleaning.
SAFETY FIRST: Suit up for safe handling practices. That means goggles, gloves, and long sleeves. Make sure kids, pets, other distractions, and tripping hazards are out of the house or don’t have access to your soaping space. Always soap in a well-ventilated area.
ONE: Slowly and carefully add 5 ounces of lye to 10 ounces of water and gently stir until the lye has fully dissolved and the liquid is clear. Set aside to cool. If you’d like a harder bar of soap that releases faster from the mold, you can add sodium lactate to the cooled lye water. Use 1 teaspoon of sodium lactate per pound of oils in the recipe. For this recipe, you’d add 2 teaspoons sodium lactate.
TWO: In a large glass bowl, combine and melt the coconut oil, cocoa butter, rice bran oil, meadowfoam oil, and palm oil (remember to fully melt then mix your entire container of palm oil before portioning). Add all of the dispersed titanium dioxide to the oils and use a stick blender to fully mix in. This helps get rid of any chunks without thickening trace.
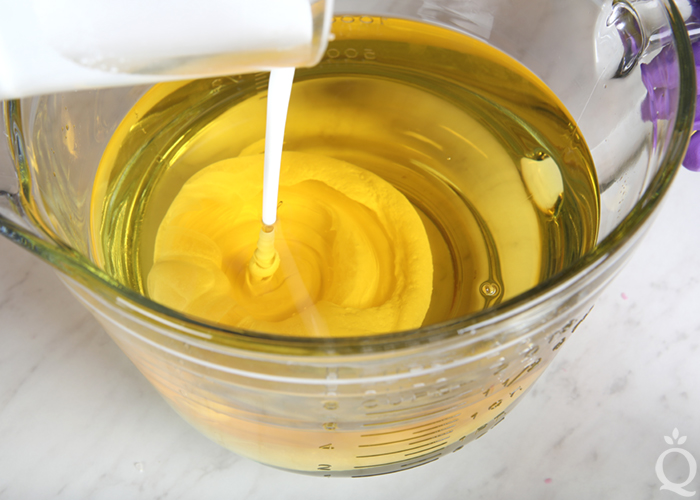 THREE: Once the lye water and the oils have cooled to 130 degrees F or below (and are ideally within 10 degrees of each other), add the lye water to the oils and stick blend until a very thin trace.
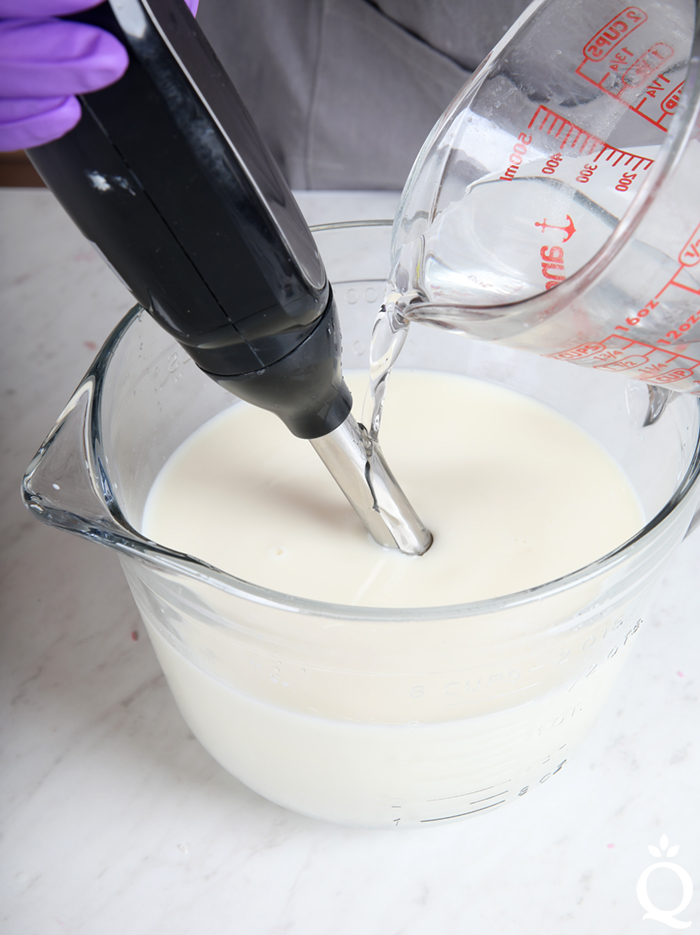 FOUR: Pour 600 mL of the soap batter into a separate container.
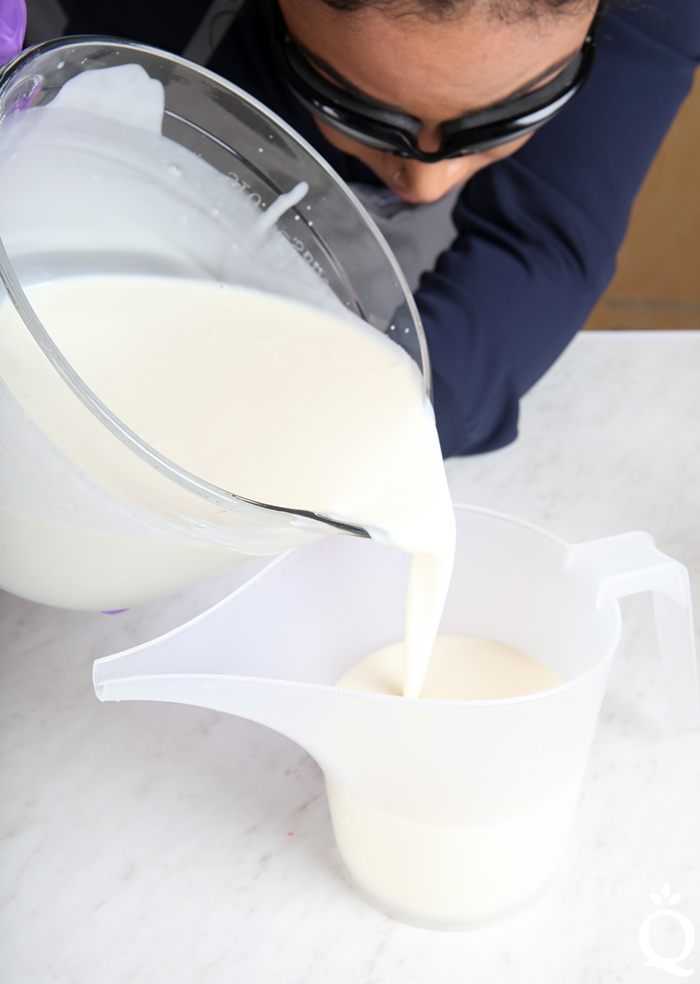 FIVE: Add 1 teaspoon of the dispersed Magenta Mica into the smaller container of soap and use a whisk to fully incorporate.
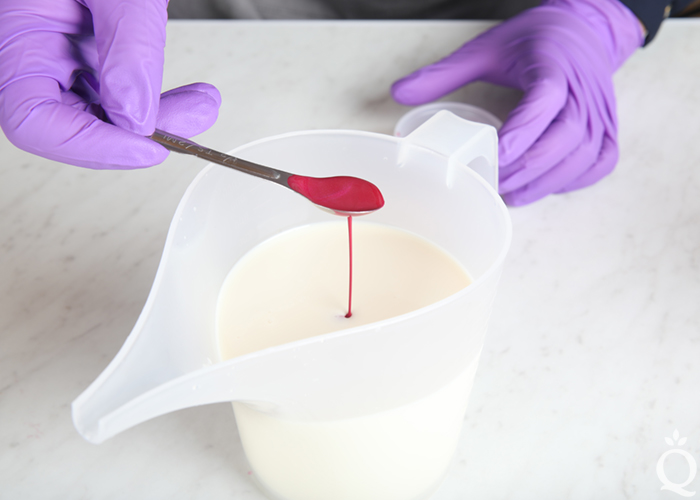 SIX: Add the Rose Quartz Fragrance Oil proportionally to each container of soap – it’s okay to eyeball it. Whisk in the fragrance oil thoroughly.
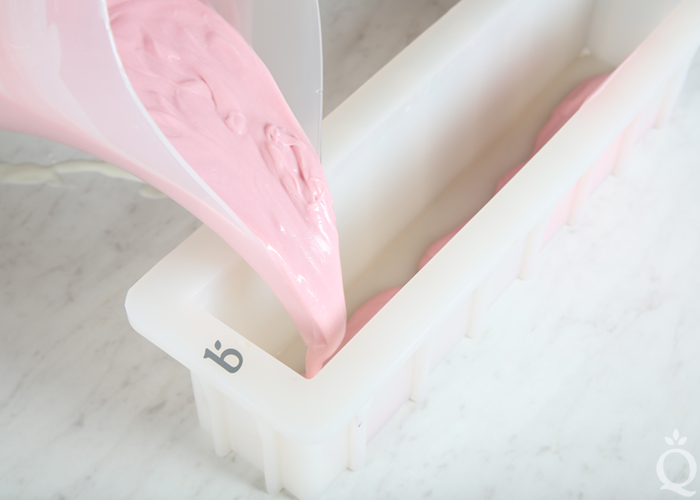
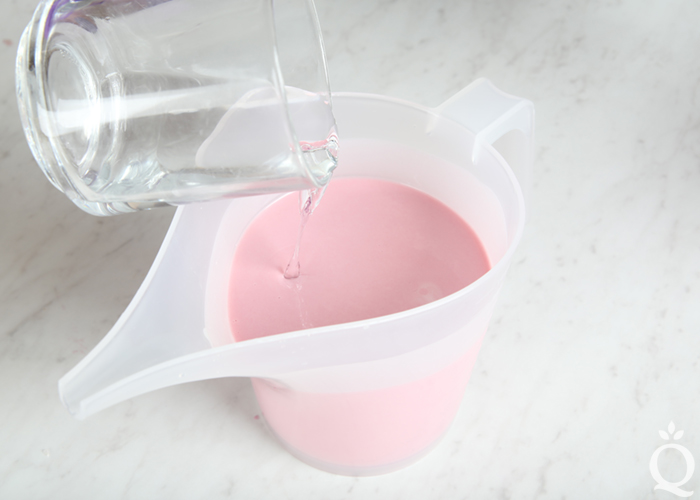 SEVEN: If the pink soap is still thin, use the stick blender to thicken trace. Once it’s a medium to thick trace, pour all of the pink soap into the mold and tap it on the counter to remove air bubbles. Use a spoon to create texture.
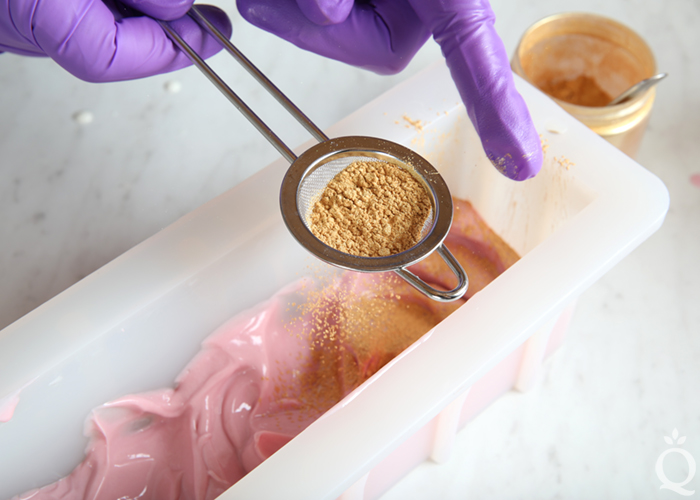
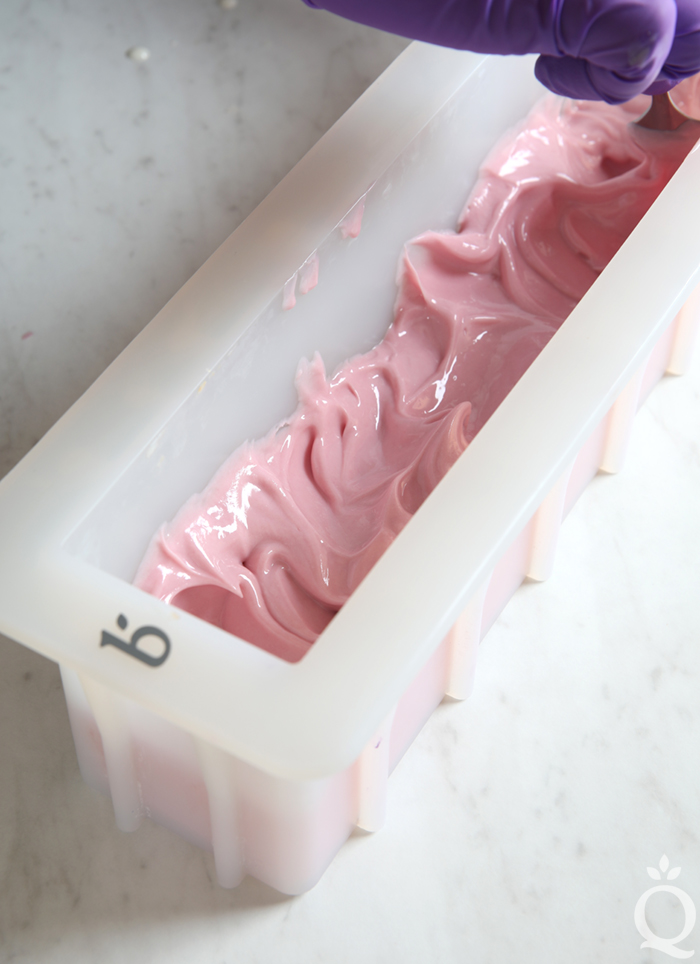 EIGHT: Place a few teaspoons of the Gold Sparkle Mica into the Powder Duster. Sprinkle a layer of the mica on top of the pink soap, making sure to cover as much of the pink as possible. Be careful to not create too thick of a layer or the soap may separate when cut.
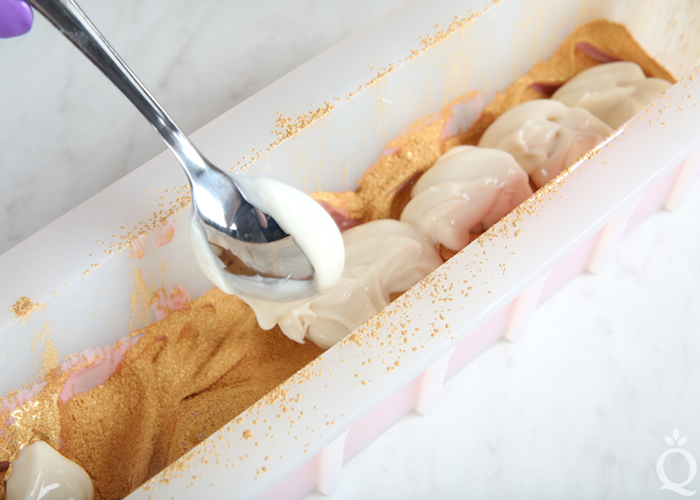
 NINE: By now, the white soap will be thick. Use a spoon to “plop” small amounts of it onto the pink until it’s completely covered. Then, gently transfer the rest of the white soap into the mold. Firmly tap the mold on the counter to help settle the soap and get rid of bubbles.
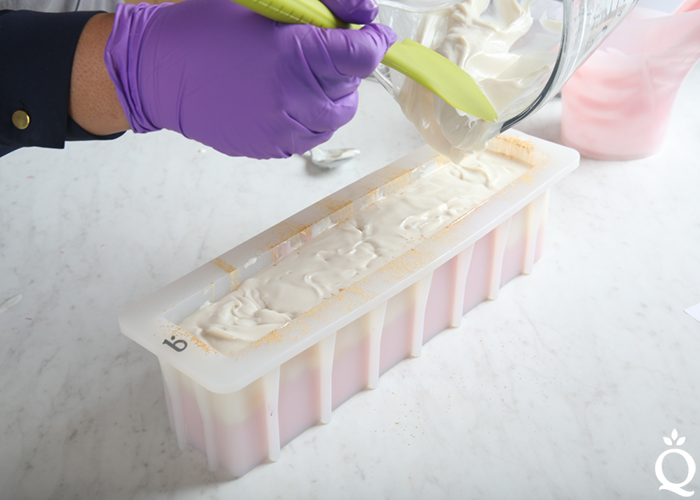 TEN: Use a small spoon to create texture on top. If you find the soap is not holding its shape, let it sit in the mold for several minutes to allow it to thicken and harden. We created a “wave” look by pushing the white soap toward one side. Feel free to create whatever top you like – there is no right or wrong way to create texture.
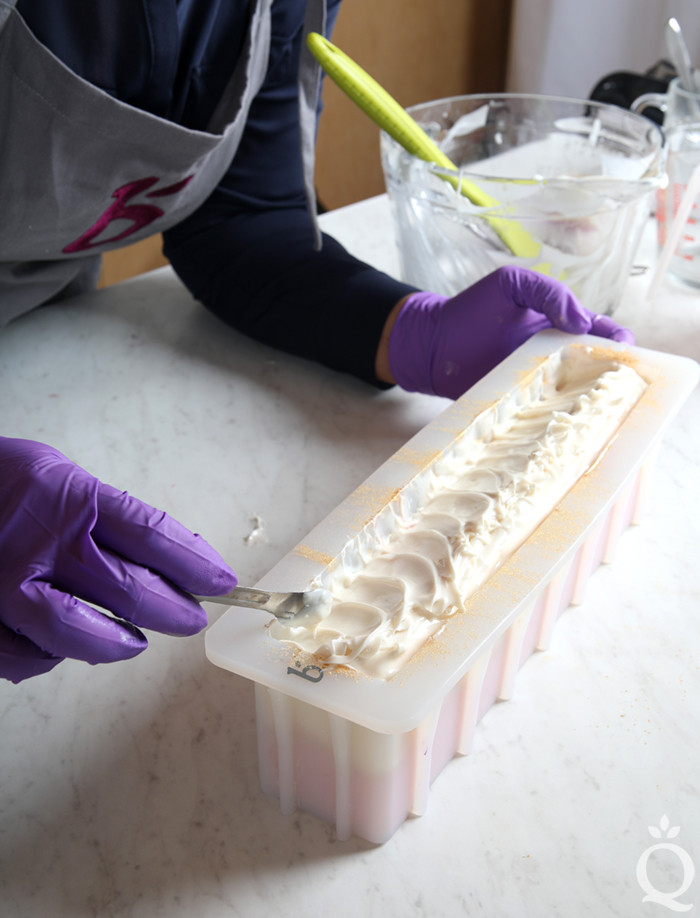 ELEVEN: Once you’re happy with the top, lightly sprinkle more Gold Sparkle Mica on the top of the soap using the Powder Duster.
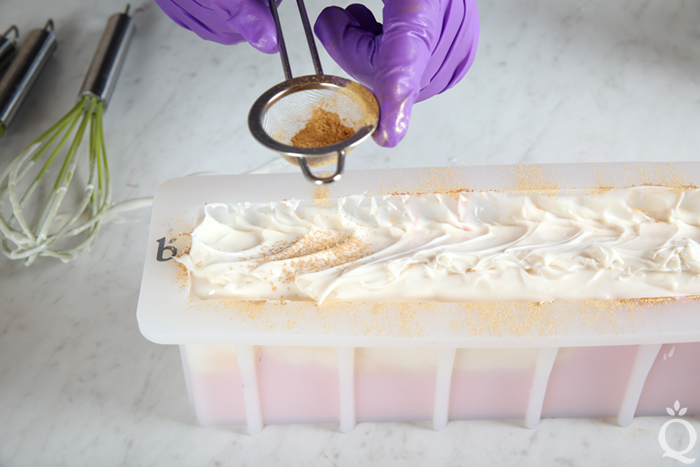 TWELVE: Sprinkle the pink sea salt onto the soap. We concentrated the pink sea salt on the peak. Some of the salt will fall off when the soap is cut, so we like to use a little more salt to account for this.
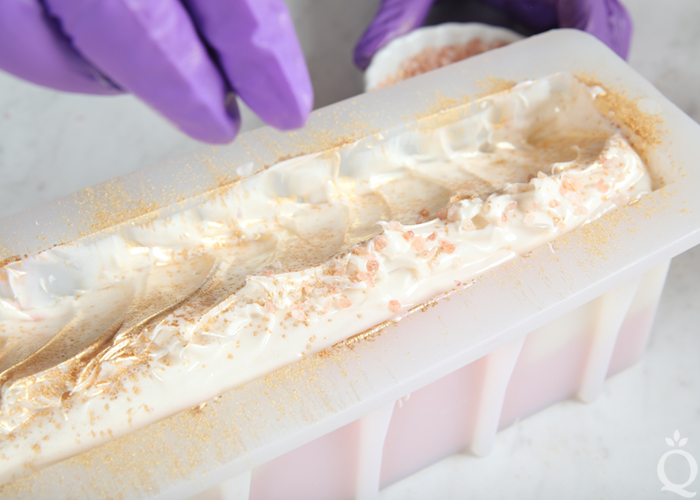 THIRTEEN: Spritz the soap with 99% isopropyl alcohol to help prevent soda ash. To very lightly insulate the soap, we placed the loaf into a large drawer uncovered at room temperature. Allow the soap to stay in the mold for about 2-3 days.
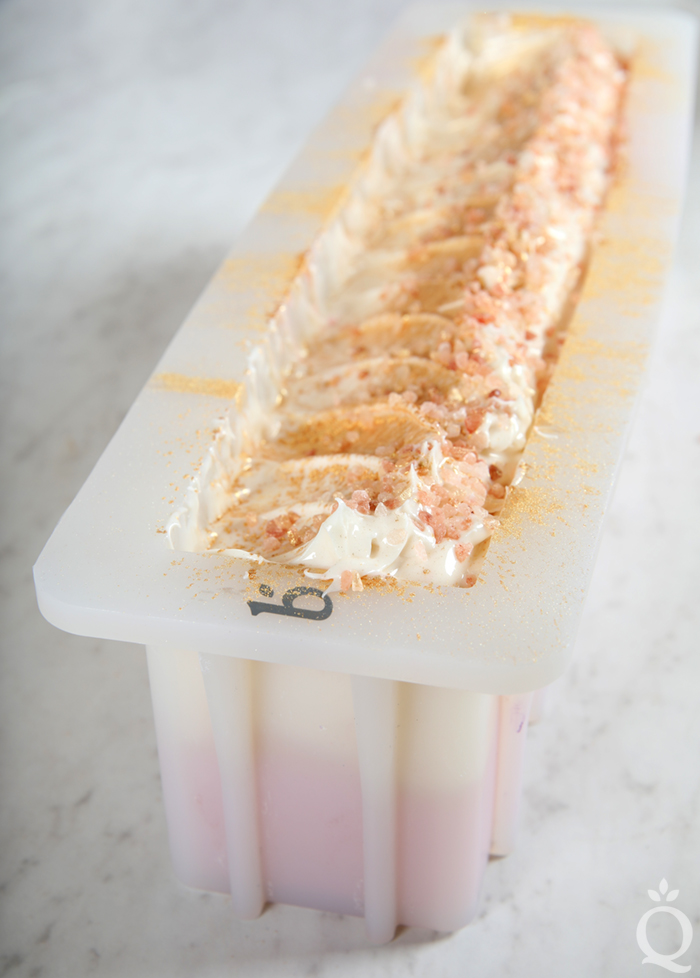
Pull the silicone mold away from the soap, and push it out from the bottom to release the airlock. To avoid drag marks from the salt, place the soap on its side and cut. Allow the bars to cure for 4-6 weeks and enjoy.
- Tall 12″ Silicone Loaf Mold
- Powder Duster
- 1.8 oz. Cocoa Butter (5%)
- 11.6 oz. Coconut Oil (33%)
- 3.2 oz. Meadowfoam Oil (9.1%)
- 11.6 oz. Palm Oil (33%)
- 7 oz. Rice Bran Oil (19.9%)
- 5 oz. Sodium Hydroxide Lye
- 10 oz. Distilled Water (13% water discount)
- 1.75 oz. Rose Quartz Fragrance Oil
- Titanium Dioxide
- Magenta Mica
- Gold Sparkle Mica
- Pink Sea Salt, Medium
- Slowly and carefully add 5 ounces of lye to 10 ounces of water and gently stir until the lye has fully dissolved and the liquid is clear. Set aside to cool. If you’d like a harder bar of soap that releases faster from the mold, you can add sodium lactate to the cooled lye water. Use 1 teaspoon of sodium lactate per pound of oils in the recipe. For this recipe, you’d add 2 teaspoons sodium lactate.
- In a large glass bowl, combine and melt the coconut oil, cocoa butter, rice bran oil, meadowfoam oil, and palm oil (remember to fully melt then mix your entire container of palm oil before portioning). Add all of the dispersed titanium dioxide to the oils and use a stick blender to fully mix in. This helps get rid of any chunks without thickening trace.
- Once the lye water and the oils have cooled to 130 degrees F or below (and are ideally within 10 degrees of each other), add the lye water to the oils and stick blend until a very thin trace.
- Pour 600 mL of the soap batter into a separate container.
- Add 1 teaspoon of the dispersed Magenta Mica into the smaller container of soap and use a whisk to fully incorporate.
- Add the Rose Quartz Fragrance Oil proportionally to each container of soap – it’s okay to eyeball it. Whisk in the fragrance oil thoroughly.
- If the pink soap is still thin, use the stick blender to thicken trace. Once it’s a medium to thick trace, pour all of the pink soap into the mold and tap it on the counter to remove air bubbles. Use a spoon to create texture.
- Place a few teaspoons of the Gold Sparkle Mica into the Powder Duster. Sprinkle a layer of the mica on top of the pink soap, making sure to cover as much of the pink as possible. Be careful to not create too thick of a layer or the soap may separate when cut.
- By now, the white soap will be thick. Use a spoon to “plop” small amounts of it onto the pink until it’s completely covered. Then, gently transfer the rest of the white soap into the mold. Firmly tap the mold on the counter to help settle the soap and get rid of bubbles.
- Use a small spoon to create texture on top. If you find the soap is not holding its shape, let it sit in the mold for several minutes to allow it to thicken and harden. We created a “wave” look by pushing the white soap toward one side. Feel free to create whatever top you like – there is no right or wrong way to create texture.
- Once you’re happy with the top, lightly sprinkle more Gold Sparkle Mica on the top of the soap using the Powder Duster.
- Sprinkle the pink sea salt onto the soap. We concentrated the pink sea salt on the peak. Some of the salt will fall off when the soap is cut, so we like to use a little more salt to account for this.
- Spritz the soap with 99% isopropyl alcohol to help prevent soda ash. To very lightly insulate the soap, we placed the loaf into a large drawer uncovered at room temperature. Allow the soap to stay in the mold for about 2-3 days.
- Pull the silicone mold away from the soap, and push it out from the bottom to release the airlock. To avoid drag marks from the salt, place the soap on its side and cut. Allow the bars to cure for 4-6 weeks and enjoy.



I was too lazy to go through all the comments to see if this was asked (sorry) but with the gold mica being put into the soap does it make the skin glittery when it is used?
The soap is a wash off product so it will not leave your skin very glittery but you may notice a few left behind pieces of sparkle.
I made this soap with no problem at all. It is beautiful. I have learned over time to take my time to a certain percent. Be ready, have everything within reach, and most important of all is to have a partner to help as you go and have the plan down. I tend to yell at my neighbor who helps me at times, but she says it’s worth it to share in the bounty. Lol. Just can’t help it. We had no problem with this soap. I’m a perfectionist and she isn’t , the perfect match. She even yells at me to slow down at times. We did this soap exactly as written, but I would love to try it at a room tempature method. So much easier and less time consuming. We can actually make two different soaps in one day and still befriends when we are done. Thank you so very much for this recipe. We are fairly new at this. At least she is. I’m a little longer doing this and she will catch almost any potential mistakes. We work so well together.
Would like to make this soap. You no longer carry meadowfoam oil .What would be a good replacement?
The closest substitute would be Jojoba Oil. You will want to run the recipe through the Lye Calculator with your new oil amounts to make sure the Lye / Water amounts don’t change too much.
Jojoba Oil: https://www.brambleberry.com/Jojoba-Oil-Golden-P3219.aspx
I followed this recipe to the tee, and for some reason I went to cut my soap and it started to crumble? I’ve never had this issue before and am wondering what could have caused this? I read your piece on “why soap crumbles” but i felt like nothing I did contributed to this “crumbling”. I’m kind of at a loss for words and explanations right now, just sad to waste such a beautiful loaf and time.
Usually, crumbling is temperature related. What temperatures were your lye and oils, and did you insulate that soap? I would also recommend pH testing the soap just to make sure it has the correct amount of lye: https://www.soapqueen.com/bath-and-body-tutorials/tips-and-tricks/troubleshooting-lye-heavy-soap/
Let me know and I can offer some tips, including how you can still use that soap.
Hi,
I’m looking to replace palm oil but I don’t want to use lard. What is another oil that I can use?
Babassu oil can be used in place of palm oil: https://www.brambleberry.com/Babassu-Oil–P6807.aspx
You can also add a hard oil like cocoa butter up to 15% to add firmness like palm oil does. Coconut oil or tallow up to 33% work as well. Read more about common oils and what properties they add to soap here: http://www.soapqueen.com/bath-and-body-tutorials/tips-and-tricks/free-beginners-guide-to-soapmaking-common-soapmaking-oils/
This post on substituting oils has some great information too: http://www.soapqueen.com/bath-and-body-tutorials/tips-and-tricks/how-to-substitute-oil-in-cold-process-recipes/
I love this beautiful design so I gave it a try. I’m very new to soaping…. Not sure whether I can pull if off , I resized the recipe for a 4″ silicone mold. I did the 13% water discount, and lightly covered the loaf. My soap has light glycerin rivers on both parts and is partially gelled, but they’re still pretty! I want to do it again and try to get rid of partial gel and glycerin river, so I wonder what did I do to cause those. Did the soap in this tutorial go through gel phase? I love their color and I want to achieve the same effect. Also, shall I not insulate it at all or even leave it in the fridge to get rid of the glycerin rivers? Mine isn’t that bad, but the surface isn’t as smooth. Thanks!
Typically glycerin rivers are caused by heat. Water discounts really help, but you can also leave the soap at room temperature instead of insulating it. Both of those techniques will help prevent them.
Hi, everybody, I finally tried it with a few minor changes. I used black oxide as the mica vein, poppy seeds on top and heavenly honeysuckle as the scent, all from brambleberry.com. This is absolutely NOT my best, but it is not worst. My trace was too thick I think. It still looks nice and smells great thanks to brambleberry’s awesome heavenly honeysuckle. Thanks for the idea. It is on youtube.com under theorgelmeister with no advertisements.
You’re welcome, glad you enjoyed the recipe.
Heavenly Honeysuckle Fragrance Oil: https://www.brambleberry.com/Heavenly-Honeysuckle-Fragrance-Oil-P5928.aspx
I used this recipe yesterday and the soap was absolutely beautiful until I cut it. I cut two bars after 12 hours, and it didn’t look right. This morning it was clear the soap was brittle and crumbled when sliced. It’s so disappointing on many levels to ruin such a pretty batch. When is the best time to check the ph?
Thank you!
Oh I’m sorry to hear that. Fresh soap can have a slightly higher pH than fully cured bars, as the saponification may not be complete. Soap that is safe to use will have a pH of anywhere from 9-10. You can certainly go ahead and test the soap right away, just to get an idea of where it is. If it’s within that range, the pH level will not increase with time. After about 3 days of curing, the test will be slightly more accurate.
This design is gorgeous. I still have a bag of the quick swirl mix on hand. Could I use that to create this design and get similar results?
Yes, that Quick Mix will work for this recipe. You can find the lye and water amounts with our Lye Calculator: https://www.brambleberry.com/Pages/Lye-Calculator.aspx
Swirl Quick Mix: https://www.brambleberry.com/Swirl-Recipe-Quick-Mix-P5526.aspx
The directions left out putting the titanium mixture in. I am going to color the whole mix and then pour off the smaller portion and add the Magenta to make pink.
The titanium dioxide is added in step 2. Instead of adding the color at trace like we normally do, we added it to the oils before adding the lye. That way the entire batch is lighter.
What happens if the soap is left in the mold for more than a week? I assume it gets a lot harder to cut but is there anything else to consider?
It will firm up more but otherwise that it will be fine. We recommend leaving the soap in the mold longer rather than unmolding too early, as it helps prevent drag marks and dents. You don’t want to leave it much longer than a week, otherwise it may be tricky to cut.
I am anxiously awaiting the arrival of my products so I can began making this soap! If it’s pink I must have it! Outside of this soap looking sophisticated what motivational properties does it have? Does it exfoliate? How does it make your hands/ body feel? I hope this makes sense. Is it a bath/shower bar or just a hands bar? Just in case someone asks..
The best part about handmade soap is it feels as good as it looks. The oils have amazing benefits for the skin. Coconut oil helps cleanse and adds great lather, while cocoa butter, meadowfoam, and rice bran oil help moisturize. You’ll definitely start noticing a difference once you switch to handmade soap.
This post has more information on common oils and what they do for you: http://www.soapqueen.com/bath-and-body-tutorials/tips-and-tricks/free-beginners-guide-to-soapmaking-common-soapmaking-oils/
thanks so much! you’re so knowledgeable!! this is a great selling point too-deb.
You’re welcome Deb!
This recipe makes beautiful soaps!
Thanks Lindsey, glad you like it.
It looks beautiful! I need to take my time and let the batter thicken more to get this effect.
You can get really lovely texture with the thicker batter, it’s definitely worth a try. Plus it’s nice not having to worry about keeping your trace thin.
Pls let me know no Lye recipe for natural soap..
100% chemical free..
Sodium hydroxide lye is necessary to make soap. It chemically reacts with the oils to create soap – that process is called saponification. The lye gets used up during that process and the resulting bars are gentle and skin loving. Learn more about saponification here: https://www.soapqueen.com/bath-and-body-tutorials/cold-process-soap/wheres-the-lye-2/
If you’re not comfortable working with lye, you may like our melt and pour bases. They’ve already gone through that saponification process so all you need to do is customize them with color and scent.
Melt and pour bases: https://www.brambleberry.com/SFIC-Soap-C647.aspx
hi, I’m new to all of this and I was wondering after making this or any of the soap recipes on here can we sell them?
Absolutely. You can use any of our recipes/designs to make, sell, or give away.
I’m always looking for the next design to try and I’ve been wanting to try the simpler, thick trace soap like this. Since I don’t have gold mica, I may try black oxide for the mica vein and lightly sprinkle the top with poppy seeds. Is there a good substitute for meadowfoam oil? I have a lot of oils and butters, but not that one. As always, thanks a million for the idea and instructions. I’ll note it here and post it on youtube when it is completed and cut.
You can swap meadowfoam for any lightweight oil you have on hand – argan, avocado, or sweet almond are good options. Have fun making this one Eric, you can get really interesting texture with thicker soap.
Argan oil: https://www.brambleberry.com/Argan-Oil-P5574.aspx
Avocado oil: https://www.brambleberry.com/Avocado-Oil-P3198.aspx
Sweet almond oil: https://www.brambleberry.com/Sweet-Almond-Oil-P3205.aspx