Emulsifying Wax (generic – lower price point than name brand)
I’ve had a super fun weekend so far (holiday parties, college football games and soapmaking!) and hope you are as well.
Tutorials on soapmaking, bath fizzies, lotions and more
Filed Under: Bramble Berry News
Emulsifying Wax (generic – lower price point than name brand)
I’ve had a super fun weekend so far (holiday parties, college football games and soapmaking!) and hope you are as well.
Filed Under: Melt & Pour Soap
In this episode of Soap Queen TV, I show you how to make Erin Pikor’s (of Naiad Soap Arts) wildly popular solid sugar scrub soap. The original post on how to make these solid sugar scrubs is a classic project that our readers keep coming back to.
In the video, I put my own little twist on this project by taking inspiration from Neopolitan ice cream. I made cubes of Strawberry, Chocolate and Vanilla. Yum!
Make Solid Sugar Soap Scrub from Soap Queen on Vimeo.
.
Here’s what you’ll need to make this project!
NOTE: The Soapylove fragrance oils used in this video have been discontinued. The kits now include Vanilla Select Fragrance Oil, Dark Rich Chocolate Fragrance Oil and Strawberry Fragrance Oil.
For Strawberry scrubs:
3 oz Shea Melt & Pour Base
2 oz Sweet Almond Oil
6 oz White Granulated Sugar
Strawberry Fragrance Oil
1 drop Tropical Hot Pink LabColor (undiluted)
For the Chocolate Scrub:
3 oz Clear Melt & Pour Base
2 oz Sweet Almond Oil
6 oz White Granulated Sugar
Dark Rich Chocolate Fragrance Oil
2 mini scoops Cappuccino Mica
For the Vanilla Scrub:
3 oz Shea Melt & Pour Base
2 oz Sweet Almond Oil
6 oz White Granulated Sugar
Vanilla Select Fragrance Oil
Heavy Duty Slim Rectangle Mold
(Note: This mold has been discontinued. It has been substituted with the 12 Cavity Rectangle Silicone Mold.)
Click hereto get everything you need added to your Bramble Berry shopping cart.
Filed Under: Personal Ramblings
Filed Under: Cold Process Soap
Two days ahead of time, make your cranberry embeds This is an unscented batch of soft soap that is almost play dough like in its consistency. The batch is a small 45 oz. size and is meant to fit into our Silicone Pans.
Wearing full safety gear and following basic CP principles (unsure about CP soap? Watch the FREE SoapQueen.TV tutorials on CP soap here), make your soap.
Add Burgundy Oxide and Merlot mica at thin trace and stick blend in. If you want to ensure no clumps at all, pre-mix color with 2 tsp of oil. Pour your soap and do not insulate. To keep the soap softer and more pliable, not going through gel phase is essential.
After the soap has set-up for just one day, use a melon baller, a cookie dough batter tool or just cut into squares and round off the corners and form with your hands. If the soap is too sticky, mix a little flour with Merlot Mica and apply to your hands to keep your hands from getting sticking to the soap.
Next make layers 1, 2 and 3: Get your soap to thin trace then, separate it into three batches. This recipe is designed to give a good amount of working time for multiple swirls and layers.
Green Soap: 20 oz soap batter with Emerald Labcolor and Green Chrome Oxide. Add approximately 1 oz fragrance.
White Soap Mix: 20 oz soap batter with Super Pearly White. Add approximately 1 oz fragrance.
Black Soap Mix: 12 oz soap batter with Black Iron Oxide and Vintage Gray Mica. Add approximately 3/4 oz fragrance.
Add the fragrance right before you pour so that if your fragrance accelerates trace you will still have time to embed your cranberry inclusions.
Fragrance the white layer of soap. Pour a thin layer of white soap over the black/green mixture. Add the Cranberry Inclusions, two by two, spacing evenly along projected bar cut lines. Pour the rest of the white soap.
Spoon or pour the remainder of the black and green swirl over the Cranberry Inclusions/White layer.
For the last layer: Split the batch into two containers.
Red Soap: 7 oz soap batter blended with Burgundy Oxide and Merlot Mica. Approximately 1/2 oz fragrance blend.
Uncolored Soap: 11 oz soap batter with approximately 3/4 oz fragrance oil.
Swirl the colored soap and white soap together. Pour over the Green/Black layer.
Insulate well and allow to harden for a minimum of 2 days before cutting. To ensure your soap is mild and hard, be sure to make your soap by November 15th so it can dry for a full 4-6 weeks before the big day!
Filed Under: Personal Ramblings
Filed Under: Soap Queen Cuisine
Ever since Bramble Berry was a wee thing, I’ve celebrated employees’ Bramble’versaries by baking something that they would like. Some things are a hit (Choco Salted Caramel Beer Cupcakes), some things were just a ‘nice attempt’ (Bacon Caramel Cupcakes). In this case, Kelsei has been with Bramble Berry for a year as a fulltime Puller. This means that she walks up to 3 miles a day in our warehouse pulling your orders. Her favorite dessert is Key Lime Pie so I decided to make a Key Lime Cupcake (which falls strongly into the ‘Hit’ category).
This recipe is a bit complicated but totally worth it. There are graham crackers ground up into the cupcake batter and a key lime pie filling swirled in throughout the cupcake. If that’s not enough craziness in a cupcake, you pop the cupcake tops off and fill them with a lime pudding! Whooosh!
Makes 30+ cupcakes.
Step 1 – Make the Cupcake Batter
•1/2 Cup butter (room temperature)
•1 Cup sugar
•3 eggs
•1 Cup milk
•1 Cup flour
•1 1/2 Cup graham cracker crumbs
•1 tsp baking soda
•1 tsp baking powder
•1/8 tsp salt
•5 egg yolks
•14oz sweetened condensed milk
•1/2 Cup lime or key lime juice
Preheat your oven to 350; line your cupcake pans with cupcake liners.
Beat the butter until creamy (about 30 seconds). Add the sugar and mix for approximately three minutes until it is lighter and more fluffy. Add the eggs and mix on medium for an additional 3 minutes.
Grind the graham crackers up into tiny bits (they’re headed into the batter). I used a food processor but you could smoosh ’em with a rolling pin or a meat masher thingy.
Sift the dry ingredients (flour, baking soda, baking powder, salt) if you’re really into absolute precision baking. I’m not (I figure this much sugar and butter in a recipe is enough to make anyone overlook a few mini lumps).
Add a bit of this into the butter mixture, mix up, add some milk, add some more dry, add some milk and keep this up until it’s all in there. Mix until it’s all combined.
Now it’s time to make the traditional tart and amazing Key Lime filling (yum yum!). In a separate bowl, mix the egg yolks (only the yolks!), sweetened condensed milk and lime juice. Whip this. It gets to be a beautiful pudding like consistency.
Add this Key Lime filing into the graham batter and stir just a bit. You don’t want to mix in the Key Lime filling all the way. You’ll want chunks of it throughout your cupcake.
Fill your cupcake liners up about 2/3 full. These cupcakes don’t puff out like a normal cupcake. They sort of end up a bit like a sponge cake. Be sure to that each cupcake as a good mix of Key Lime pie filling and graham cracker cupcake batter.
Fill cupcake liners 3/4 full. Make sure each liner has a nice distribution of key lime liquid and graham clumps. Bake at 350 for approximately 20 minutes or until you can put a knife or knitting needle into the cupcake and it comes out clean.
Step Two – Lime Cream Cheese Frosting Recipe
•8 oz package of cream cheese (room temperature)
•1/4 Cup butter (room temperature)
•4 Cup powdered sugar
•1 tsp lime extract
(True Confessions: I couldn’t find Lime Extract but I did find Lime Juice so I used that instead)
Mix the cream cheese and butter. Whip in the powdered sugar and lime extract/juice. Take a huge finger swipe. Isn’t that good?
Step Three – Filling
1box (4-serving size) Lime instant pudding and pie filling mix
1 1/2 Cups whipping cream
1/4 Cup Key lime or regular lime juice
4drops green food color
1 1/2 Cups powdered sugar
Make the pudding mix; whip in everything else and get ready to fill your cupcakes.
You’re almost done! Almost there! Just take a knife and carve out a little upside down rounded triangle out of your cupcake. Cut the ‘point’ off the cupcake. Eat it. Isn’t that insanely yummy? Now, fill up a baggie with your Filling. Cut off a very small tip. You want to be able to control the flow. Fill up the cupcake holes.
Then top the filling with your little cupcake hats.
Now, you’re ready to frost. Fill up a baggie with all of your frosting and snip a teensy tip off the frosting bag and frost your cupakes in a circular fashion.
Are they all frosted? Have a bite. You’ve earned it.
Filed Under: Personal Ramblings
 |
| Now can you guess? |
 |
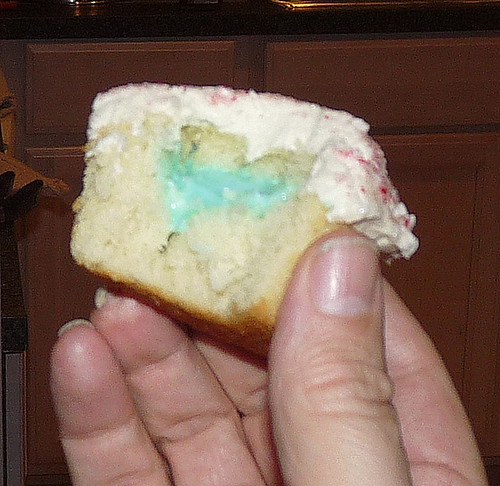
| Blue Cupcake for BOY! |
Filed Under: Personal Ramblings
Happy Thanksgiving from our family to yours. I hope you spent today with family or friends, laughing and reminsicing about fun adventures and memories.
The best gift was that my husband made it home from his business trip to Saudi Arabia with one hour to spare before dinner. We’re reading ‘Parenting’ Magazine. Note our ‘Team Baby Girl or Boy’ shirts. =)
My sister-in-law and I baked up a storm – portabella mushroom lasagna (recipe here), mashed potatoes, two kinds of vegetarian faux-loaf, homemade rolls, and an amazing decadent butterscotch butterscotch dessert (recipe here).
We didn’t go hungry, that’s for sure!
We made cupcakes out of our stuffing. They were perfectly sized for perfectly filling carb loading.
But of course, the real show stopper was the ‘Guess the Baby Sex’ cupcakes. You’ll be in suspense for just one more day and then we’re telling the world what’s kicking up a storm in my belly.
Of course, no family gathering would be complete without the original grandchildren, Samantha and Toby.
Look how big Toby has gotten! Our little puppy has grown into a big 8 month old. Remember how little Toby was when Erik first got him?
Filed Under: Lotion
Wondering why I chose all the ingredients I did? I wrote an explanation here. Curious about how to infuse oils? Tutorial here.
Weigh out all of your ingredients (volume doesn’t provide the same. This is a photo of the German Chamomile. It is a dark beautiful blue.
Filed Under: Bramble Berry News
Even though I’m only 18 weeks along, my belly is stretched tight and it’s itchy and peeling. It’s really not all that attractive. Given that I make yummy products for a living, I took this on as a personal challenge! Stay tuned for the recipe later today. The oils I used:
Cocoa Butter – Long used for centuries for stretch marks, cocoa butter has proven to be no better than a placebo for actually preventing stretch marks (NYTimes article). So, why did I put it into my formula? Cocoa Butter has a compound called CMP (cocoa mass polyphenol), a substance that helps with dermatitis.
Vitamin E – Vitamin E beat out Cocoa Butter for stretch mark relief (citation here). Vitamin E is a an anxi-oxidant that helps to defend skin from free-radicals. Free-radicals attack the skin structure leading to aging, wrinkles and generally unhealthy skin.
Jojoba Oil infused with Calendula Petals – Jojoba oil is a liquid wax. Out of all the oils (or in this case, liquid waxes!), it is closest to the human skin in its make up. Calendula is incredibly nourishing to skin, especially irritated skin. For infusion directions, click here.
Hemp Seed Oil, Unrefined: Hemp Seed Oil is fantastic to use in skin care products because of its lipid profile; it has over 80% Essential Fatty Acids. Additionally, Hemp Seed Oil has been found to help with eczema.
Shea Butter: If there was only one butter I could be stranded on a desert island with, this would be it. High in unsaponifiables, this butter is extremely emollient, making it a key ingredient in many body butters and lotions.
Essential Oils:
Carrot Seed: Carrot Seed Essential Oil is well known for its help with aging skin and to protect skin against wrinkles. Carrot Seed has a very earthy smell.
Frankincense: Used by some of the large cosmetic companies in their anti-aging skincare, Frankincense is known to be soothing and skin-loving.
Helicrhrysum: This essential oil has almost a magical lore about it for healing bruises and soothing dry skin.
German Chamomile: One of my favorite essential oils for skin care, German Chamomile helps calm itchy, irritated skin because of its high azulene content. German Chamomile smells herbal-y and not sweet at all.
Filed Under: Bramble Berry News
Q: What exactly is a fragrance oil made out of? I went to buy some today and noticed there was no ingredients listed.
A: Fragrance Oils do not have full ingredient disclosure; they fall under ‘Trade Secret’ status with the FDA and so simply putting “Fragrance” on an ingredient list will suffice.
Filed Under: Personal Ramblings
Wow! Where did the day go? All of a sudden I look up and it’s past 9 p.m. and I haven’t even written my blog. Whoops! I’ve got some exciting projects underway for this week – a Belly Balm recipe to share with you, the Cranberry Fig soap instructions and (eeeek!) the sex of the baby. It’s going to be a jam-packed week. Yay! But in the meantime, I’ve been doing a little shopping on Etsy and here’s my latest finds and purchases:
A Butter Caramel sampler for my family at Thanksgiving. With flavors like Matcha Green Tea, Rose, and French Lavender, not buying from Fusion Sweets was a virtual impossibility. My family is excited to try the veritable sugar feast. And I’m just excited to see my family, caramels or not! =)
For some reason, I am an absolute sucker for necklaces with sayings and whimsical things on them. I was looking for a pendant that actually said “Be Happy” but out of all of Etsy, I couldn’t find one but I did find this adorable one from Always A Memory and I couldn’t help but make it mine.
Etsy is always my shopping downfall but in this case, there’s no buyer’s remorse. =)
Filed Under: Personal Ramblings
Filed Under: Melt & Pour Soap
Melt and Pour Tools *really* make a world of difference for Melt and Pour soap designs, especially intricate patterns like the Thanksgiving Mold.
Tip! I always keep warm boiling water on hand to rinse my syringe out in between each use.
Tip 2: I prepare ALL of my soap colors for these projects at once and then let them sit, covered, so I can work quickly.
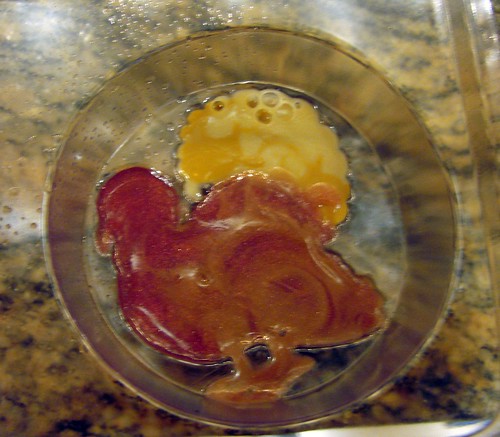
Follow this same process for the Turkey Soap EXCEPT fill in the feather plume first. You can use the scraper/pick to scrape away any of the parts that spilled over. I used different gradients of yellow to make it look more varied and interesting.
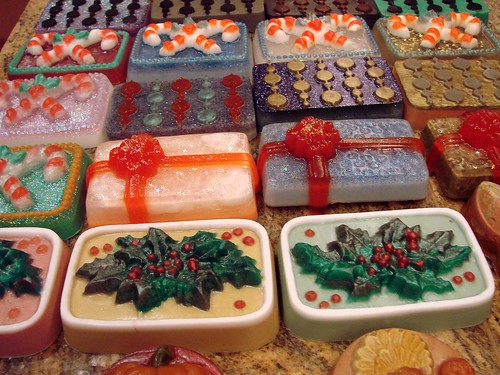
 These very basic scrape/layering techniques produced all of these bars of soap below. I love how versatile Melt and Pour can be with the Melt and Pour Tool Kit.