Rules for a Turnaround
Money Wi$e Honorable Mentions
Yesterday, I announced the winner of the Money Wi$e contest. It was a totally random contest so I didn’t get to play favorites with the answers. I had asked participants to leave a comment on the blog and share their best money saving tips (for our current eh hem, challenging economic situation). There were so many great money saving tips that I had to share a couple of my favorites…
Denette: Budgeting and money management has been a topic on my mind a lot lately and was so excited to see your post about it!! Here are a few tips that have really helped me:
1 – I will echo a few others here and suggest making your own meals including lunch for work. When my husband was in grad school we went 9 months without eating out! This was difficult in the beginning with our “date nights” but once a week I made a special dinner and ate by candlelight. It was really fun to try new cooking techniques and it was quite romantic to boot! Taking the time to develop my skills in cooking/baking not only helped my family during a financial crunch time, I also have these skills that I can teach to my children to help prepare them for the future and help them become more self-sufficient!
2 – Pay yourself first! When pay day rolls around, we take 10% of our net pay and split it into 2 different savings accounts. Two-thirds of that amount goes into one savings account that we don’t dip into unless it is an emergency or until we have enough saved up for our large purchase we are saving up for (right now that would be a down payment on a house!), and one-third of the amount goes into a second savings account that we use for unexpected or less often purchases like car repairs. Most people don’t need to split them up, but this helps us out because we can see the progress we are making on saving up for our home while we still have money set aside that we can use for other purchases.
3 – Save your change! It is a rare occasion that I pay in cash, so I am talking about saving your change from your debit card/checking account. Now, some banks will do this for you, but mine doesn’t so I keep track of it on my own. I have actually been doing this for about 10 years now and it is crazy how fast it all adds up! What I do is I document in my checkbook registry the purchase I made and then in the balance column I put down the amount I spent rounded up to the nearest dollar and then I write down the difference in the deposit column. I write my whole registry in pen and the change in pencil so I can keep it strait. For example: I just paid my cell phone bill which was $56.45, so in the balance column I deduct $57.00 from my balance and I added 55 cents to my running total of change! Over the past month I have saved up almost $17 just in change! Every six months we take the saved up change and make an extra payment towards our debt. If you don’t have any debt you could use that change to treat yourself to something nice like a vacation or extra holiday/birthday money! My parents have been doing this for years and have used this money to build a new deck, take a trip to Europe, and just recently bought two new wave runners!
Financial freedom has really been on my mind a lot lately and I loved reading all the fantastic advice and comments, a few of which I will be implementing into my routine so thanks everyone!
Donna Maria Coles Johnson: Use coupons and cash.
Coupons. Contrary to popular belief, there are coupons out there for healthful food items. You just have to keep an eye out for them. Sometimes, grocers have coupon stickers on items that offer discounts on the spot. For example, yesterday, I purchased two quarts of Organic Valley Farms milk. Each container had a .75¢ coupon stuck to it. The regular price of each was $2.50. Since it was triple coupon weekend at the store, I paid 50¢ for $5.00 worth of organic milk! That’s $4.50 more in my pocket, without even trying — just being on the lookout for the bargain. As you shop, keep an eye out for opportunities to use coupons. If you’re more industrious, clip them in the Sunday paper and in inserts that come in the mail. By clipping coupons, I save hundreds of dollars a year!
Cash. Another tip is to use cash for non-business purchases. Forget using credit cards — we ditched ours years ago and are debt free, except for the mortgage. (No car payments either.)
When I say use cash, I don’t mean a debit card either. I mean green dollar bills. You’ll be amazed at how many more of them you will hold onto if they actually have to slip through your fingers with each purchase. It’s easy to swipe a card, and when we do, it doesn’t feel like we are spending that much, when we really are. But when you have to actually count out the dollar bills, you’ll think twice before putting them in someone else’s hands!
I withdraw a certain amount of money from our checking account each Sunday or Monday. I use it for all of that week’s home-related purchases — food, toiletries, personal items, clothing — everything except home repairs and maintenance. I always take out less than I think I’ll need to really challenge myself. I am rarely out of cash at the end of the week, and I have not even touched the ATM. I hold onto a lot of money this way.
There are only 4 things you can do with money: spend it, save it, invest it or donate it. Because I spend with coupons and cash, I have more left to save, invest and donate!!
Thanks for the opportunity to share, and I hope these tips are helpful. dM
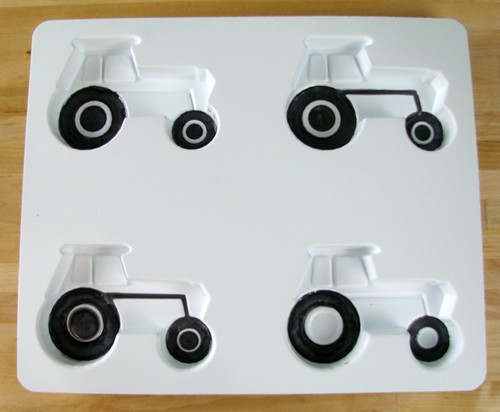
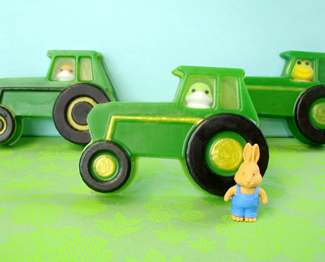
Pedal to the Metal, the Hamster is Driving!
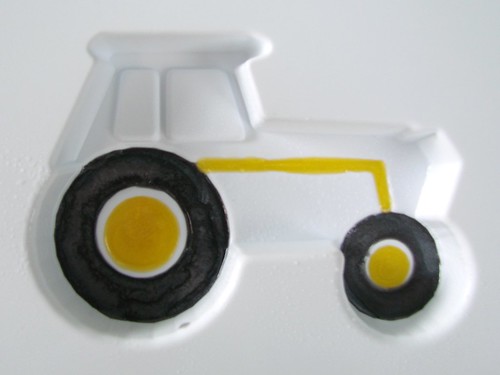
TWO: Melt one ounce of clear soap base and mix in one heaping scoop of Yellow Mica. Then fill in the inside of the tires and stripe on the side of the tractor (the details are up to you).
Money Wi$e Winner!
 Thank you to all who entered the Money Wi$e blog contest. I loved reading all of your in depth money saving tips, tricks and resources. Check out the post and read all of the fabulous money saving tips here, if you haven’t already.
 Random.org picked a number between 1 and 94: Comment number 55 was the big winner! Woo hoo! Congratulations, Megan (From Metropolis Soap Co.) and thanks for your money saving tip! Email me at info(at)brambleberry(dot)com with your shipping address and I’ll get The Money Therapist out the door!
Megan’s Money Saving Tip: “My best money saving tip would be the Snowball philosophy…Start with a list of your debt in order from smallest to biggest. Make minimum payments on all of the debts except your smallest one, continue sending in bigger payments until you knock it out! Then move onto the next debt. It’s really helped me and I can’t believe I couldn’t think to do it before!”
New Video Release: Emulsified Scrub
This online video tutorial is all about how to make an emulsified scrub. Clocking in at over 7 minutes, this is a longer, more detailed version of SoapQueen.TV than you’ve seen before. In this video, Anne-Marie shows how to make a unique scrub using our fine grain dead sea salt although you could easily use sugar as a substitute.
What’s an Emulsified scrub? It’s like a lotion, liquid soap, and body scrub all in one! No more oily scrubs that leak in transit and leave a film in your tub when you make this innovative recipe. In addition, you will receive a PDF of the label designs you see pictured with the full INCI listing printed out. One page for salt and a separate page for sugar, so you can choose whichever exfoliant you prefer. Just download, print on label stock, trim down to size, and apply to our 4 ounce plastic jars.
When you purchase this video and your payment is processed (usually takes 24 hours) you will receive an email with a link to the PDF of the label design and a password to unlock the online video tutorial.
Neroli Gone Wild
Soap Weekend Intensive Project Preview
We’re so excited to announce Erin Pikor’s second melt and pour project she’ll be teaching at this years Soap Weekend Intensive: Apple Pie! How cute is that? We’re throwing around the idea of making it into a Strawberry Rhubarb Pie for summer. What do you think? Check out the other project Erin will be teaching at SWI 2010, here.
Dates are set for August 13th, 14th and 15th in Bellingham, Washington. Space is limited so sign up today and read more about your teachers HERE.
Dyeing for that Marbled Look
Easter is this Sunday. Have you dyed your eggs yet? Check out how you can use your soapmaking LabColors to dye your eggs, too! I got the marbled idea from the fabulous and creative Martha Stewart (I heart her). What are your great egg dying techniques?
Soapylove Jewelry Box Colorant Set
(LabColors or food coloring will work too)
12 eggs
Sweet Almond Oil
Vinegar
Skewers, spoons and forks
Small mixing bowls
Plenty of paper towels (trust me)
One: Hard boil your eggs anyway you like. I put my eggs in a pot, cover them with cold water and turn the heat to high. Once the water starts to a boil, I let the eggs cook for about 10 minutes. Then I immediately submerge the cooked eggs into cold water to stop the cooking. Set your eggs aside while you make your dye.
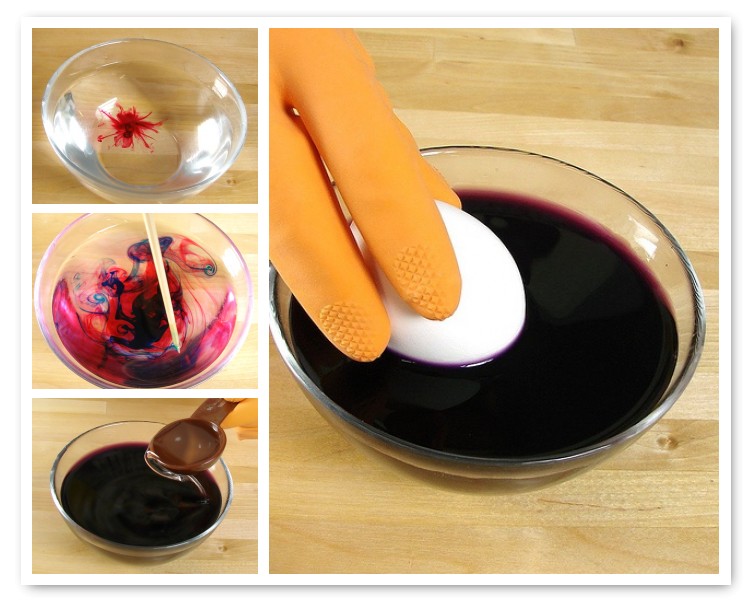
Two: In a small bowl, use your Soapylove Jewelry Box Colorant set to make your egg dyes. In 8 ounces of water add your Jewelry Box Colorants and 1 tablespoon of Vinegar. Mix well and pop your egg(s) into the dye for 1-2 minutes, until you get a nice solid base color.
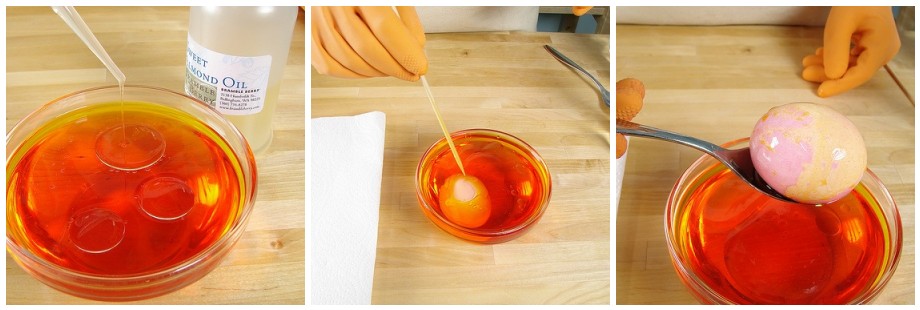
Three: After all of your eggs are colored, it’s time to create the marbled look. Add 1 tablespoon of Sweet Almond Oil to the remaining colors and give it a whisk with a fork. Carefully drop your egg in the mixture and use your skewer to roll the egg around in the bowl (the egg will only need to be in the colorant for about 10-15 seconds).
Four: Remove the egg from the dye with a spoon and let it dry on a paper towel (or in your old egg carton). Pat it dry with a paper towel.
Tip: Remember to pick colors are going to pair well together. I love how my pink and orange combination turned out. The white and blue looks great too because it’s such a dramatic contrast.
“Eggcellent” Colorant Recipes
Yellow
25 ml Sunshine Yellow
8 ounce of water
1 Tablespoon of Vinegar
Orange
9 ml Sunshine Yellow
2 drops of Ruby Red
8 ounce of water
1 Tablespoon of Vinegar
Purple
4 ml Fiery Fuchsia
5 drops of Turquoise Blue
8 ounce of water
1 Tablespoon of Vinegar
Neon Green
3 ml of Sunshine Yellow
1 drop of Turquoise Blue
8 ounce of water
1 Tablespoon of Vinegar
Red
4 ml of Ruby Red
8 ounce of water
1 Tablespoon of Vinegar
Blue
5 ml of Turquoise Blue
8 ounce of water
1 Tablespoon of Vinegar
Money Wi$e Women + a Contest Too!
Last Saturday, I spoke at the Money Wi$e Women Conference in my hometown of Bellingham, WA. It was so empowering. My speech was well-received and it was awe-inspiring to hear the other speakers at the conference. Everyone was great. My blog post about the day is here.
I think we all know (at this point) that our current economical situation isn’t going to change overnight. So I need to be the one that makes a change to create my “new normal” (see blog post here on my “new normal”). It was an honor to hear Marcia Brixey, author of The Money Therapi$t, speak at the conference too. Motivating, to say the least and, of course, I picked up a couple copies of her book.
The Money Therapi$t: A Woman’s Guide to Creating a Healthy Financial Life offers women of every financial strata the advice, tips, and solutions they need to get out of debt, create a budget, spend wisely, and save money. Marcia’s empowering, you-can-do-it attitude and helpful tools and resources encourage and inspire women to achieve financial fitness. With information on organizing financial records, getting out of credit card debt, safeguarding against identity theft, and taking advantage of interest through automatic deductions, The Money Therapist is the first step to achieving financial peace of mind.
You can purchase the book here or WIN THE BOOK! Whoo hoo!Just post a comment below and tell what your best money saving tip is! I am so excited to read all of your comments. I’ll randomly pick a lucky winner on Wednesday, March 31st.
Tweeting, Blogging, Posting & Poking
I just finished my talk to the Social Media Conference NW attendees on practical strategies for fitting social media into your life if you’re a busy parent, entrepreneur or student. It all boils down to having a plan. These are my SACRED rules for social media engagement (based on the school of hard knocks and learning from some great teachers along the way):
Strategy – This is the most important rule. Before jumping into social media, it’s important to look at all the social media options out there and decide where to best focus your attention and energy. At Bramble Berry, our five pillars for social media are our YouTube channel, our Teach Soap instructional forum, our blog, Twitter and our Facebook Fan page. While we have a small presence on several other social media outlets, we put the bulk of our efforts into our top five prospects because that’s where we’ve determined more of our customers and potential customers are most likely to interact with us on.
Note: Since this blog post was written, we’ve added our Tumblr page, Instagram, Google+ page and commenting on other blogs as part of our efforts to be in our amazing soaping community.
Authenticity – Social media platforms are all about engagement and to engage, you’ve got to be yourself. It’s like when you go to a business meeting. You dress up. You put your best foot forward but your personality will eventually shine through, no matter who slicked back your hair is and how buttoned up your outfit. After you’ve figured out what your strategy is around social media, say it with your voice, your personality. Be authentic. People can smell fakes a mile away. People crave authentic connection so be real, be yourself, and don’t be fake.
Content – This dovetails with strategy. I developed a simple formula for Bramble Berry for how I wanted my blog and twitter stream to work. For example, my blog is 50% product and project related, 25% personal and 25% business advice. Once you figure out what mediums to engage in, the next step is determine what you are going to say. And different mediums have different levels of engagement and messages. For example, I can tweet 12 times a day easily but if I updated my Facebook account that much, I’d be overwhelming people for sure.
Routine – Like raising children, consistency is everything with social media platforms. It doesn’t matter if you’re going to tweet 1 time per day and blog 1 time per week. Do it faithfully, week in and week out. Small amounts of consistent effort produce regular readers, fans and customers.
Etiquette – This is the internet. It lives forever. Don’t tweet about inside jokes. Don’t use slang. Refrain from LOL language. You want every single person, no matter how ‘in the know’, to read your streams and understand them No swearing. No drunk tweeting. Don’t get in fights over the internet. It’s not worth it.
Dialogue – Remember, this is a conversation. This is you enjoying talking to people, sharing what you’re an expert in and hoping that they want to talk to you in return. It’s you monitoring the conversation through BufferApp and Google Alerts and responding back as well as you proactively seeking out customer’s blogs and other industry blogs to read and comment on.
Whatever you’re doing, at whatever stage, just add one more tweet, blog or an additional medium to your social media repertoire. Keep it consistent and you’ll be amazed at how your traffic and traction grows over the next year.
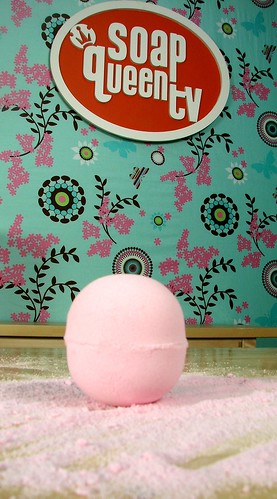
Mondo Bath Bombs
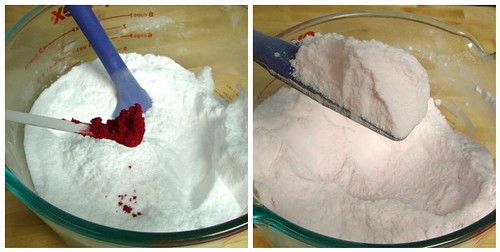
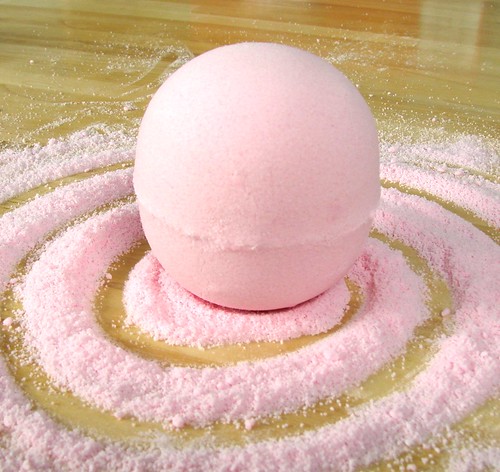
ONE: Combine the 16 oz of citric acid and 32 oz baking soda in a large bowl and mix well. Use your fingers to break up any clumps.
TWO: Once the mixture is smooth, add a heaping scoop of the red mica and mix well until you have a soft pink color. Again, you can use your hands if you prefer.
THREE: Once the color is mixed in, add your fragrance oil.
Tip: Make sure there are no clumps in your mixture. Clumps can result in wart like protrusions on your bath fizzy. Not attractive.
FOUR: Spritz with witch hazel until the mixture seems like it is staying together when you squeeze a handful in the palm of your hands (about 5 or 6 spritzes). Is it saying together? Then you’re ready for the mold.
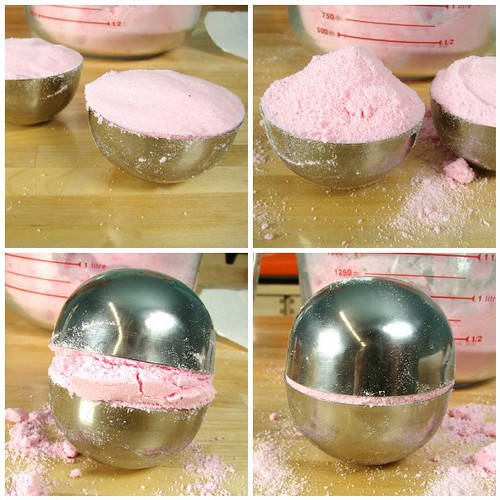
FIVE: Fill each half of the mondo mold and pack the mixture as tight as you can. Then sprinkle on a little extra and place the second half of the mold on top. Squeeze the two halves together as hard as you can. If they are not packed hard enough, they could crack when drying. Trust me, it’s very disappointing.
SIX: Let the mixture rest in the mold for about 30 seconds then carefully slide it out of the mold onto a flat surface. Let it dry, undisturbed. You’ll be tempted to poke it, hold it or move it. Please don’t mess with it until it’s fully hardened, you’ll thank me later. This recipe yields 5 bath bombs.
Mini Bath Bomb Cupcakes
The original Bath Bomb Cupcakes in a smaller size. The benefit of small? It’s a lower price point for sale (good idea) and because the full Bath Bomb or Bath Fizzy Cupcake might seem a little large to put into a tub.
Water Soluble Paper – Using a Silicone Baking Tray
I was going through my old photos, cleaning out my sadly overstuffed Flickr account, and found these photos. While this was one soap that didn’t make the final taping for the Microsoft Small Business Summit (didn’t see this series back in 2008? Check it out here), I wanted to share the technique with you. This is a good way to embed larger photos using Water Soluble Paper.
Step One: Pour a thin layer of Clear Melt and Pour Soap down. Don’t spray alcohol. Alcohol makes the ink bleed. When the Clear Melt and Pour has slightly set up, gently set the photo down. The goal is to not allow the soap to get the water soluble paper wet. Wet paper = bleeding paper.
Optional Step: 24 hours before embedding your Water Soluble Paper page, lightly spray with a very fine drizzle of hairspray to help set the color on the paper.
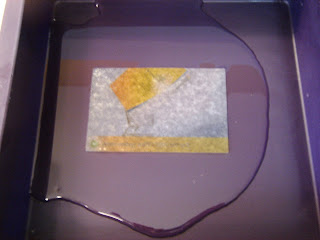 Step Two: When the Clear Layer is fully set, gently pour cool temperature opaque soap on the back of the paper. Why cool temperature? The cooler the soap, the more viscous and thick the soap is. The thicker soap doesn’t make the ink bleed as much as freshly poured, very wet soap. You don’t have to keep the soap totally straight white either! You can lightly color the soap base to make a light pastel. Blue based tones look best. Warm tones seem to enhance the natural yellow of the clear soap base and yellow out the photo.
 Step Three: When the soap has fully set up, gently peel away from the mold.
 Step Four: Use a sharp large butcher knife to cut the soap into the shape you want.
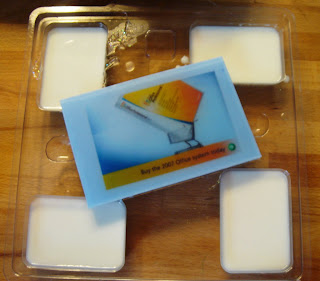 The photo I was able to embed using the Jelly Roll Pan is double the size of a standard soap mold. It’s just one more use for this amazing, versatile product.


