It’s been a while since I got an Etsy soap fix and I was delighted to see Sweet Anthem on the home page! You may remember I blogged about Sweet Anthem after meeting her in person at Sweet Petula in Seattle.

Tutorials on soapmaking, bath fizzies, lotions and more
Filed Under: Personal Ramblings
It’s been a while since I got an Etsy soap fix and I was delighted to see Sweet Anthem on the home page! You may remember I blogged about Sweet Anthem after meeting her in person at Sweet Petula in Seattle.

Filed Under: Business Musings
I got to take a behind-the-scenes tour at Starbucks Headquarters with their Vice President in charge of e-commerce. That’s us in front of the original Starbucks sign. How cool is that?
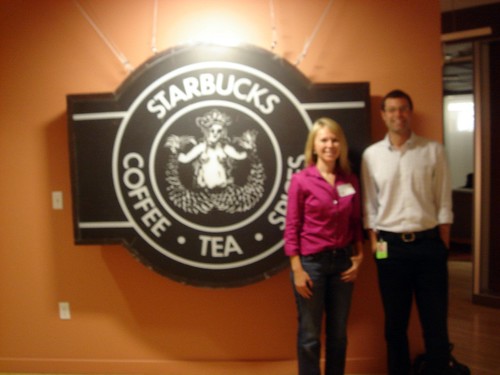
I learned some very practical sales application practices for Bramble Berry but what I was most excited about was Starbucks emphasis on communication, internal brand messaging and the atmosphere of quiet collaboration.
Every meeting at Starbucks starts with a coffee tasting. It’s a way of bringing everyone together, grounding everyone and educating team members about product lines.
Starbucks also had their values and mission visible, everywhere. It was inspiring to see how well they’ve integrated their values into their practices – their product design, their marketing messaging and their on-site amenities. Seeing how well they publicized their values inside their company gave me some ideas on how we can integrate our values better into Bramble Berry’s daily routine.
I also got the scoop about some of the uber cool, limited edition, small batch coffees coming to Starbucks in the next few quarters and they sound delicious. By far my favorite part was the Clover. It is basically the next big thing for the coffee connoisseur. There are a handful of the Clover machines in Seattle for you to try. It’s a single-cup brew cofee machine that brews limited edition, rare coffee, one cup at a time. It is so specialized that there’s a Clover certification at Starbucks, above and beyond regular barista training. To learn more about the Clover or find a location near you that’s brewing with the Clover, click here. I can’t wait to try my next cup of Clover-brewed coffee. It was so good that I didn’t have any urge for cream or sugar – just the straight coffee. If you get a chance, try it. As for me, I’m already angling for another visit so I can get some more of that delicious Clover-brewed coffee.
Filed Under: Cold Process Soap
Cold Process Soap is amazing and produces a better bar of soap than most store-bought soaps. It does require research before diving in. If you are not familiar with sodium hydroxide or CP soapmaking, please watch the Soap Queen TV Video on lye and how to use lye properly, or read the lye safety section in the Soap Crafting book. These are my favorite 3 Cold Process soap recipes that I tend to stick to when making soap for classes, family and friends.
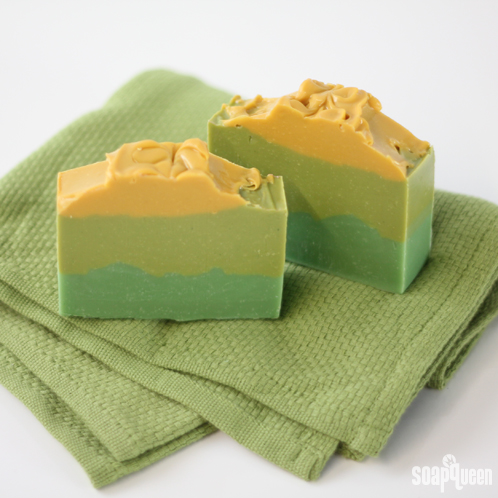
The Avocado Moisturizing Bars from the Soap Crafting Book.
Lots of Lather
(my most favorite, tried and true, teach this in every class, really, really hard soap bar)
16 oz. Coconut Oil
16 oz. Palm Oil
16 oz. Olive Oil
2 oz. Castor Oil
16.5 oz. water
7.3 oz. lye
Recommend 3% superfat for best bubbles
Moisturizing
4 oz. Avocado Oil
8 oz. Coconut Oil
1 oz. Jojoba Oil
16 oz. Olive Oil
8 oz. Palm Oil
4 oz. Shea Butter
13.5 oz. water
5.6 oz. lye
Nourishing
2 oz. Sweet Almond Oil
2 oz. Avocado Oil
8 oz. Coconut Oil
2 oz. Hempseed Oil
16 oz. Olive Oil
8 oz. Palm Oil
4 oz. Shea Butter
2 oz. Wheatgerm Oil
2 oz. Vitamin E
14.5 oz. water
6 oz. lye

If you’ve never made Cold Process soap before, stop here! I highly recommend checking out our FREE four part SoapQueen.tv series on Cold Process Soapmaking, especially the episode on lye safety. And if you’d rather do some reading, Bramble Berry carries a wide range of books on the topic, including my newest book, Soap Crafting. You can also checkout the digital downloads for that instant gratification factor.
For more on Cold Process soaping, check out the following resources:
Have a question about this blog post? Come join us at Bramble Berry’s Facebook page and we can help you out with any of your soapy questions!
Filed Under: Cold Process Soap
 While there are many different ways to make soap, the two major methods are Melt and Pour (basic instructions here) and Cold Process. One major component of making cold process soap from scratch is lye (also called caustic soda or sodium hydroxide). To make beautiful cold process soap, you need to start with the basics – water, lye and fats. If you’re unsure of the scientific method to making soap, this site has the best, most understandable way to explain it that I’ve seen.
Soapmaking is like many other activities – like for example, driving a car. Driving a car is inherantly dangerous. So, we go to school to learn how to drive a car, and now, when used properly, our cars are a wonderful and safe tool. When you learn to use lye safely, it is a snap to make all kinds of soap recipes from scratch.
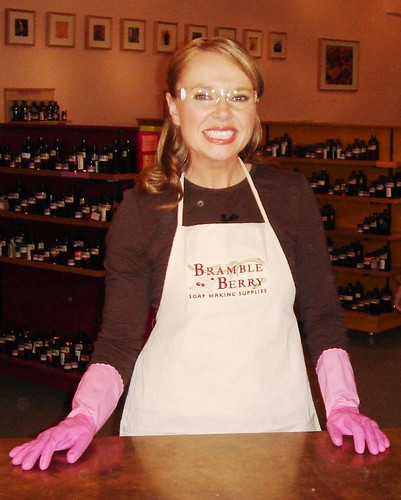 Lye is a poison and needs to be treated with care. It is a corrosive alkaline substance that reacts with the molecules in fat to combine and turn into soap. Lye comes in flakes, pellets, micro beads, and coarse powder. It is also available as solution, often dissolved in water. It is used in everything from food production (brining olives and making lutefisk) to making bio diesel to drain cleaner. Despite is varied uses and the fact that you can often purchase lye (or a form of lye) in grocery stores and hardware stores, there are still safety considerations to take into account when working with lye. Both dry and wet lye solutions are corrosive and will degrade organic tissue.
While working with sodium hydroxide, always use safety glasses, heat and chemical resistant gloves and mix the lye in a room with adequate ventilation. Lye can cause chemical burns, blindness and may be fatal if swallowed.
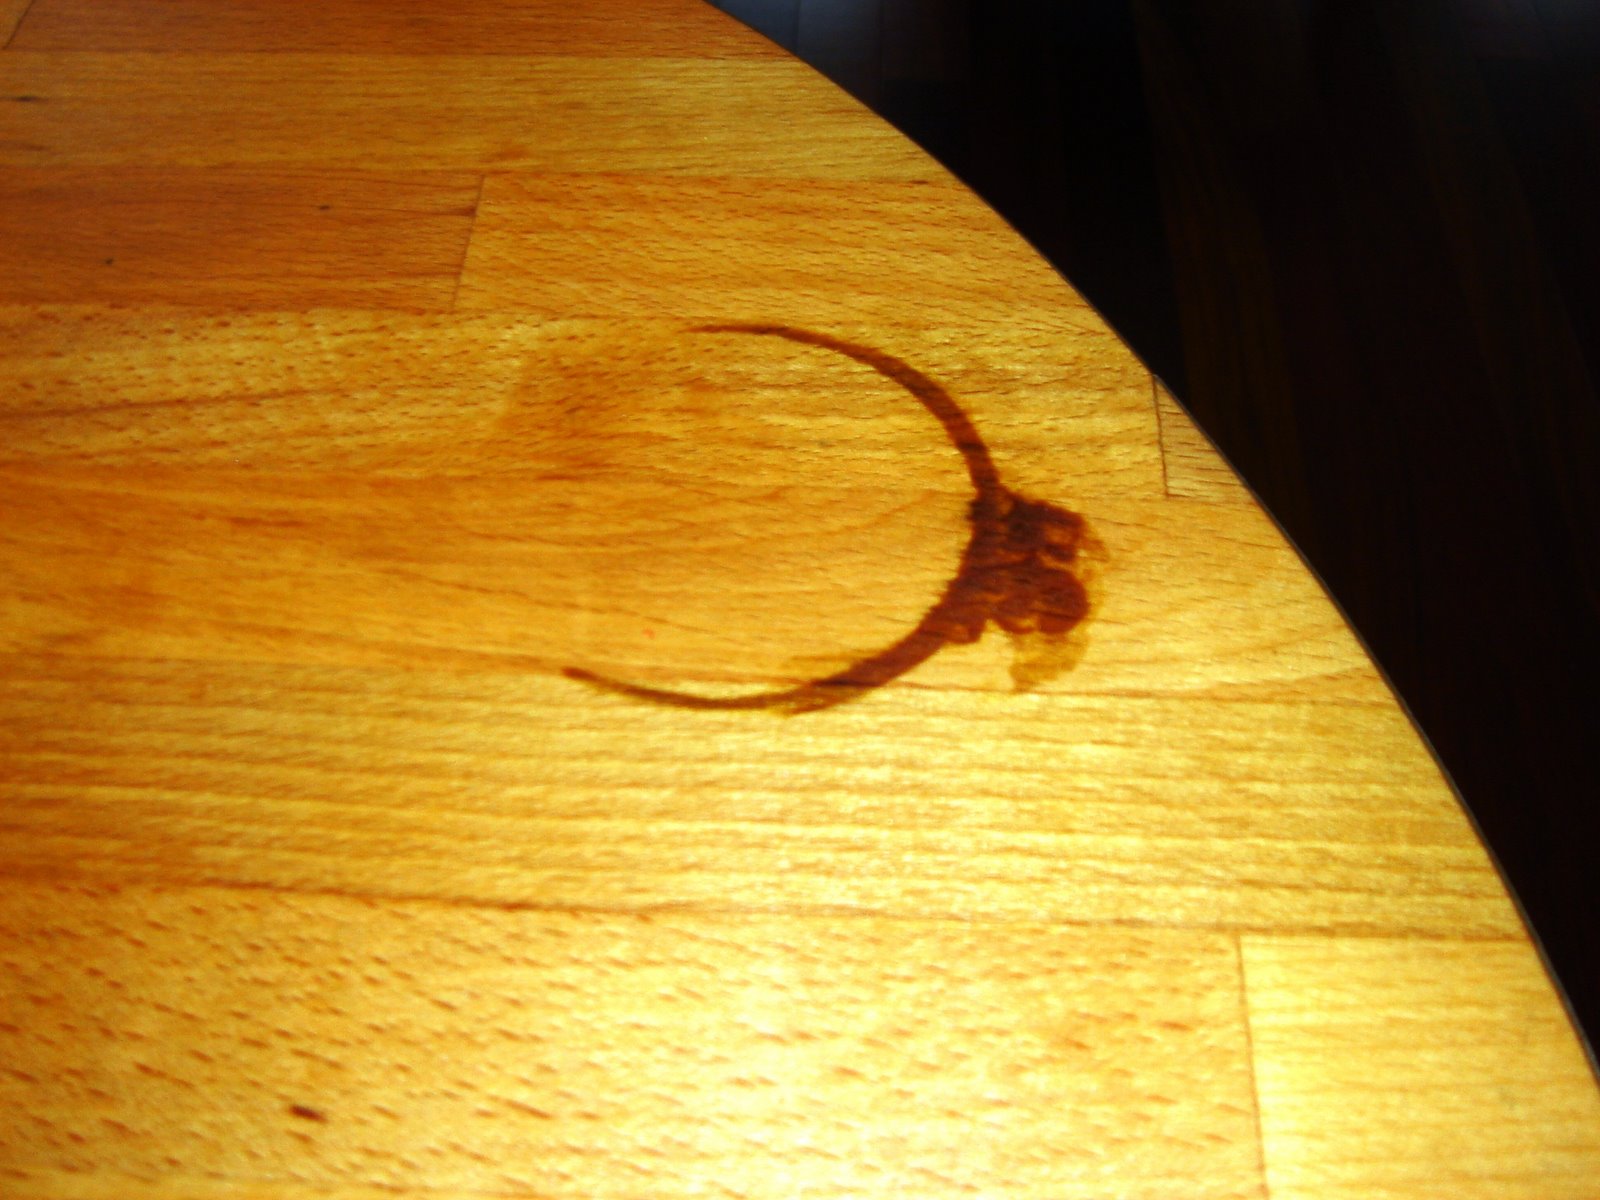
When working with lye, keep in mind that when mixed with water, it produces an exothermic heat reaction and heats up to 200 degrees. You need to mix your lye water solution in a fully heat safe container with plenty of head space. Ideally, you will always mix over a sink to prevent any unfortunate accidents, like the one below. Lye stains wood and eats away furniture varnish.
Always add your lye to your water. Doing it the opposite way can cause an overflowing, volcanic type of reaction.
Avoid all contact with aluminum. It will ruin your soap and also produce hydrogen as a by product. Hydrogen is highly flammable and explosive.
Lye should be stored in airtight containers. Because of its propensity to draw moisture from the air, air tight plastic containers work best. Lye is highly corrosive and can eat away at glass material over time. Old lye sometimes acts as though it is not working. This is often because the lye has taken on so much moisture that when it is weighed out, it is significantly heavier with water weight than lye weight.
Always wear gloves & goggles (glasses are not enough, goggles)
Measure out distilled water & slowly pour and stir lye into water
Do not breathe in lye fumes; work in a well ventilated room
Keep small children and animals out and away from your soapmaking
Protect your workspaces with newspaper or cardboard
Lye corrodes metal so remove jewelry before making soap
Lye in the eys = trip to emergency room
Lye on your skin = flush with water. Some soapmakers swear by vingear instead of water.
Soap utensils are for soap. Food utensils are for food. Never the twain should meet.
Soap needs to cure, undisturbed, from either pets or small children
Soap molds need to be either lined with wax paper or be made from a flexible plastic. Never make soap in glass or aluminum.
From the MSDS sheet:
Remember, just like any ‘dangerous’ tool, lye can be used safely to make amazing and wonderful soap. Use it wisely and responsibly.
Filed Under: Melt & Pour Soap
I got a little carried away in this episode of Soap Queen TV. I show how to make two adorable projects, pinwheels and fortune cookies – out of soap of course! Make your Fourth of July really exciting with Pinwheel Soap Favors for all of your guests.
Soap Queen TV: 4th of July Special Edition from Soap Queen on Vimeo.
For the Pinwheel soap:
Clear Soap base
White Soap base
Liquid ultramarine blue
Pineapple Cilantro fragrance
Liquid Glycerin
tools:
Flexible brownie tray
Craft knife
Heat safe containers
Spoon or stir stick
For the Fortune Cookies:
Clear Soap base
White Soap Base
Sparkle Gold mica
Peach Shimmer mica
Butter Cream and Snickerdoodle fragrance
Vanilla Color Stabilizer
Liquid Glycerin
tools:
Flexible brownie tray
Round cookie cutter or craft knife
Paper fortunes
Filed Under: Melt & Pour Soap
 To see the full tutorial on how make the Flexy Fast ‘texture sheet’ for the seaweed, click here.
Tools:
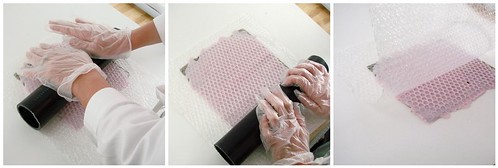
Directions: This the process is very similar to our Jelly Roll soap project. The first step is to make all of your parts; make a thin seaweed sheet (utilizing Flexy Fast and following the instructions here), use different colors of soap cut up into sticks, and grated white soap for the rice. To see the full tutorial on how make the Flexy Fast ‘texture sheet’ for the seaweed, click here.
To make the ‘seaweed’ the perfect texture we actually rolled out a sheet of our Flexy Fast molding putty onto a sheet of real nori. After the putty had completely hardened, we ran it under warm water and rubbed off the nori. It left behind a few scraps of seaweed – but that just added authenticity to our sushi soap! Trim down this textured sheet so that it fits perfectly in the bottom of your flexible tray mold. The actual ‘nori’ soap is three different colors of melt and pour base, each one a slightly varied green to add texture and character to the soap ‘nori’ wrap. Notice the drizzle pattern in the third photo above? Try and drizzle in alternating patterns for the different colors of green. We used Green Chrome Oxide, Patina Sheen Mica and a small, teensy amount of Heavy Metal Gold colors to get our perfect ‘nori’ color. And, of course, the fragrance oil we chose for the project is Wasabi but another good one would be Lettuce.
It’s important to have all of your components ready as soon as the ‘seaweed’ soap sheet is set-up. The fresher the soap, the easier it is to roll.
Make the ‘rice’ by grating white melt and pour soap and mixing it with a little glycerin. How much is ‘a little’? For 16 ounces of grated soap, drizzle 2 teaspoons of liquid glycerin over the soap and mix well. The glycerin is the ‘glue’ that helps to hold the sticky rice together. Make your ‘vegetables’ by pouring realistic food colored soap into sheets and cutting in circular, triangular and square strips for authenticity.
Once all the materials are ready, lay down the seaweed sheet *textured presentation-side down) and sprinkle a little grated soap along the longer edge on the inside. Next, lay strips of the various colored soaps on top of the ‘rice’ and then sprinkle a little more grated soap on top. You can sprinkle some melted soap on your ‘vegetables’ to help keep the vegetables in place. Gently but firmly, roll up the soap pressing down the shredded soap. If you wait too long after making the ‘nori’, the soap will not be as flexible and forgiving for rolling. Cut into pieces and you’re done! Buy some sushi take out boxes and wow your customers, friends and family with your authentic looking sushi soap. We’ve been using our sushi soap for over a month now and the entire thing has stayed intact perfectly!
Filed Under: Bath & Body Tutorials, Melt & Pour Soap


Filed Under: Business Musings
A very wise friend of mine (Ms. Erin Baker from Baker’s Breakfast Cookies) recently shared one of her secrets to keeping on track and on target with goals.

Filed Under: Personal Ramblings
Filed Under: Bramble Berry News
Not signed-up for our newsletter? Thursday morning, we sent out instructions on how to make these adorable pinwheel soaps! Sign-up here if you’re not on the list to get the Bramble Berry newsletter. And if yours went into your spam box, let me know and I’ll forward you a copy so you don’t miss out on this fun project.
 What’s that you say? You are signed up and you still aren’t receiving our newsletters?
Here are are some specific suggestions for Yahoo, Hotmail, AOL, & Earthlink.
AOL:
1. Open a Bramble Berry newsletter email if you haven’t already.
2. Click on the “Add Address” icon.
3. Your Bramble Berry newsletter email address should automatically appear in the name and email fields in the “Add Contact” pop-up box. Verify the information was entered correctly.
4. Click the “Save” button.
5. Your Bramble Berry newsletter email address will be entered into your AOL Address Book.
Hotmail:
1. Open your latest Bramble Berry newsletter email if you haven’t already.
2. Click “Save Address(es)” at the top of the message.
3. Your Bramble Berry newsletter email address should automatically appear in the email field on the Add to Address Book page. Verify the information was entered correctly.
4. Your Bramble Berry newsletter email address will be entered into your Hotmail address book.
Yahoo:
1. Open your latest Bramble Berry newsletter email.
2. Click the “Add to Address Book” link next to the icon on the far right.
3. Your Bramble Berry newsletter email address should automatically appear
4. The email field on the “Add to Address Book” page. Verify the information was entered correctly.
5. Click “Add to Address Book.”
6. Your Bramble Berry newsletter email address will be entered into your Yahoo! address book.
Earthlink:
1. Open your latest Bramble Berry newsletter email if you haven’t already.
2. Click your mailbox’s “Message” menu and choose “Add Senders.”
3. Your Bramble Berry newsletter email address will be entered into your EarthLink address book.
And of course, if this doesn’t work for you feel free to email us at [email protected]!
Filed Under: Melt & Pour Soap
 Project designed & written by Debbie from SoapyLove. Check out her blog here, her soaplab site here & her soapy ezine here.
To make this realistic toy car, first I bought a die cast metal toy car at Rite Aid. It had open windows so I had to make new plastic windows (cut from some packaging) and taped them in. I pushed a whole bunch of play-doh and packing peanuts inside the car to make sure the windows wouldn’t just push in when I made my mold.
I got some silicone molding clay to make the mold, pressing into the wheel wells and a little under the car. You can use something from a craft store or get the Flexy Fast Molding Putty from Bramble Berry (if you got a copy of any of my eZines, there’s a coupon in the back for BB! ![]() ).
).
Then I poured white soap to fill the roof. I unmolded it and cut it into stripes for the final roof.
I mixed my minty body color by combining 3/4 clear soap and 1/4 white, then green shimmery mica and BrambleBerry’s iridescent glitter, scented with 1/4 teaspoon of Apple fragrance. I poured a bit into the roof then placed in my white stripes. I let it harden.
Then I made clear soap mixed with BrambleBerry’s silver mica for the windows. I poured this in until the windows were filled up (spraying my roof layer with alcohol of course!).
After that was hard, I topped off my mold with minty soap and let harden.
I unmolded the whole car, then used a sharp knife to cut out the wheels. I put the car back in the mold and made some dark grey soap, and filled the wheel areas with that. Let cool, unmold, yadda yadda.
I used an exacto knife to trim up my soap car since it had some lumps and bumps.
Now it was time for painting the details. I mixed the silver mica with a touch of black oxide to make metallic silver. I stirred in a few drops of liquid glycerin to make a paint consistency. I painted on my details with a little brush. I used white colorant for the license plate. All painted areas dried in my window for 2 hours. I used a pen to etch in my license plate (SOPYLUV). ![]()
Oh – I misted my soap with rubbing alcohol right before taking the picture to get that shiny wet look.
Voila! It took me 3 cars to figure out what worked and what didn’t.
What didn’t work:
Filed Under: Bramble Berry News
 Our bad inventory luck is your gain! We’ve had a spate of products arrive in that aren’t ideal (Relaxing fragrance that is too dark to sell, Oatmeal, Milk & Honey that is slightly more sweet than usual, Spearmint that didn’t pass our color test and a few special order double shipments). All of this ends up being your good fortune.
Country of Origin: USA
Botanical Name: Mentha Spicata
Part: Leaves (& Kosher)
Filed Under: Bramble Berry News

I’m a huge fan of Jessie at CakeSpy (see my fawning posts here, here and here) and have been following Kathy from CraftyChica‘s crafting journey for years. This week was a trifecta for Soap Queen press as Jessie and Kathy both interviewed me for their blogs and Mas Kes Ke Fee listed The Soap Queen blogas one of her Top Ten Foreign blogs. Why foreign? Because Ka Fairy is in France! Yippee – world renown is one stop closer to world domination through soap.
Filed Under: Melt & Pour Soap
This week I’m teaching one of my favorite projects – candy soap! You may recognize these from my project last year. I think that the video really helps the project to come to life and make more sense.
Soap Queen TV Episode 8: Candy Soap from Soap Queen on Vimeo.
Ingredients:
Clear melt & pour base
White melt & pour base
Hello Sweet Thang! fragrance
Vanilla Color Stabilizer
Red-Blue Mica
Tools:
Round soap mold
Utility knife (like an exact-o)
Spray bottle with rubbing alcohol
Spoon
Droppers
Heat safe containers