Soap Wish Interview, Day One

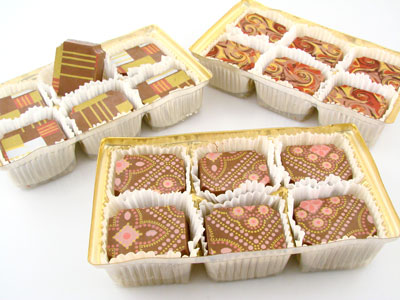
 Sheila and her husband own the up and coming soap company called Soap Wish. They currently sell their soaps on Etsy and you won’t believe your eyes when you see what they make.Sheila was kind enough to send us a soapy goody bag (you shouldn’t have, Sheila, but we’re SO glad you did). The whole office was abuzz with anticipation and we opened the soapy surprise! See her wares for yourself on the Soap Wish Etsy Site and her Soap Wish Blogwhere Sheila shares her thoughts on soap, life, love and laughter.
 Generous Sheila was kind enough to let us drill her with questions in hopes of finding out everything we could about her new business. Sit back, relax and enjoy the interview…
Soap Wish: We’d like it to grow into a full time business in the future, but for now we’re doing it part-time while we continue to learn the craft.
Anne-Marie: I love your Etsy site! Do you have any other outlets for selling? Farmers Markets, craft shows, etc?
Soap Wish: Thank you again! We’ve done a few small craft shows and we’ve also sold quite a bit through word of mouth. We love to have people come back to us or send their friends, it really makes our day.
Anne-Marie: Your soaps are so creative and detailed. How do you have the time to put so much detail into all of your soaps? What type of things do you outsource?
Soap Wish: I wrote this description of creativity in our house awhile ago and it pretty much sums it up:
The Man: “I finally finished my scale model of the Taj Mahal made out of 4 toothpicks and two pieces of tape”
The Boy: “Do you think it’s okay the dog ate my experiment? You know- the one I had growing in the sink?”
Now, who do you think makes the intricate soap designs? As for outsourcing, I’m pretty much focused on exploiting my husband’s talent at this point.
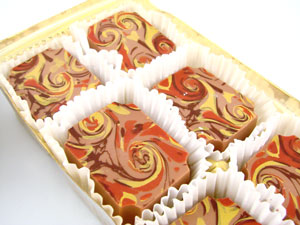
Anne-Marie: Your chocolate soaps look so realistic (and delicious). How much practice did it take to perfect these tiny pieces of art?
Soap Wish: We tried quite a few different techniques before we hit on one that gave us the look we wanted. The next step was getting it to the point where we could count on the same result each time. Let’s just say there was some waste involved.
Anne-Marie: Your chocolate soap is so convincing that one would think you’ve actually made chocolate before. Where did you get your inspiration for your fabulous chocolate creations?
Soap Wish: There is a really great bakery not far from us that carries fabulous chocolates as well as baked goods. We (okay, I) love stopping in there to look at all the great things they come up with. One day we decided to see what we could do using soap instead of chocolate. We had never made chocolate before, but now that we’ve made chocolate soap we’d really like to try making the real thing one day. Of course, that’s the day I start on the road to weighing 1,000 pounds…not enough willpower.
Want to hear more about Soap Wish? Check back in Monday for another round of Q & A with Sheila.
Soap Splurge
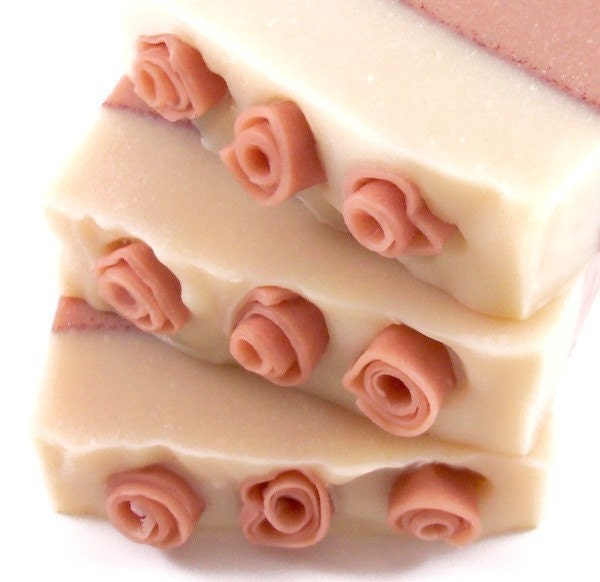
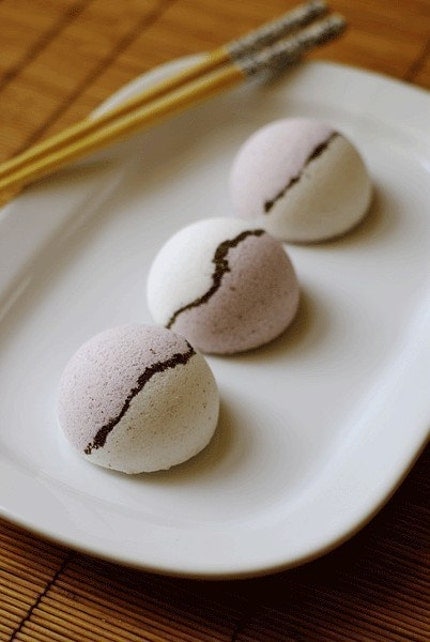
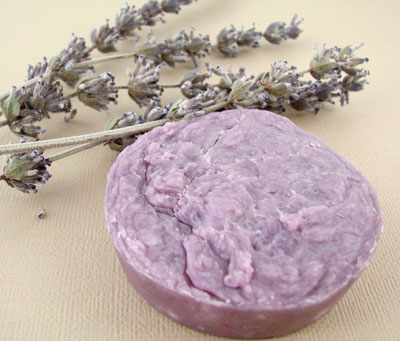
I just bought some awesome soap (well, at least it looks awesome from the photos!) from Alchemic Muse (above) and some yummy bath bombs and soap from Mooka (below). I’m excited for postal delivery next week.
Rebatch – Double Boiler Method
Rebatching Soap Base (make it yourself or buy a premade base)
Fragrance or Essential Oil
Mold (the less detail, the better)
Optional: Herbs
Colorant (liquid works best)
Double Boiler
Grater
Large Bowl
Spoon
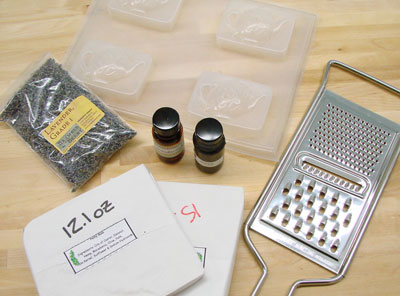 Step One: Grate down the soap. katwOman recommended a SaladMaster so if you have one of these, you could try that as well. The key is to have small pieces of the soap. They mix in and soften up nicely (compared to trying to melt down an entire block).
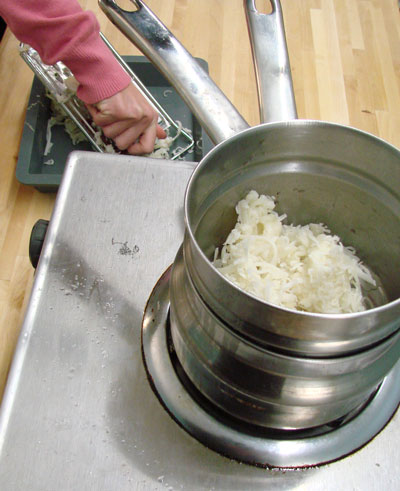 Step Two: With the water in the double boiler burbling gently, place approximately 1 Tablespoon of liquid (water, tea, beer, wine) and the grated soap in the top pan of the double boiler.
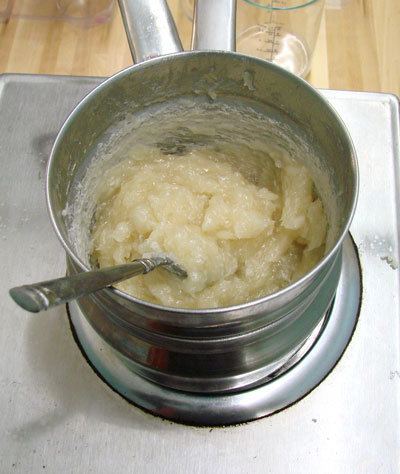 Step Three: Stirring occasionally (every few minutes) for approximately 20 minutes, wait for the soap to soften into a gelatinous mass. Once it gets to a gloppy, thick oatmeal phases and looks sort of translucent, you know you’re ready. You can add more liquid but the more water or liquid you add, the softer the soap and more difficult to pop out of the molds.
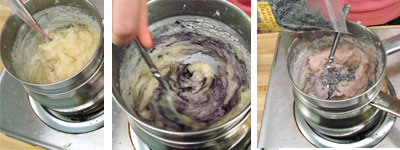 Step Four: Stir in fragrance and color. I like to use approximately 1/2 ounce of fragrance or essential oil per pound of soap. Labcolors work best to color rebatch soap because they are easy to incorporate.
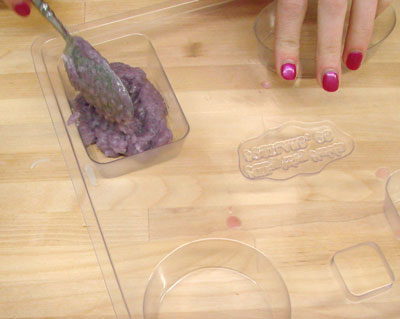 Step Five: Use a large spoon and glop the soap into any plain mold and gently tap the mold on the counter to get rid of any air pockets. The more detailed the mold, the more difficult it is to get the soap to easily release. You can freeze the soap if you’re in a hurry but it’s best to just wait it out if you can stand it. If you don’t like a more natural “back” of the soap bar, you can use saran wrap (below, right) to smooth out the backs of the soap.
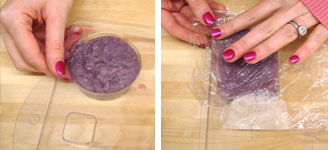
That’s it – you’re done. You’ve completed a soap project in under one hour that can be totally natural and has a rustic and country chic look.
Boost Your Business with Education
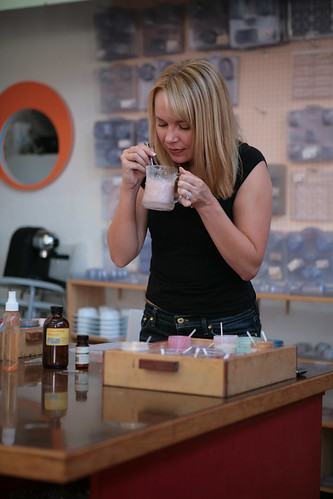 Are you waffling on attending the 2009 Handcrafted Soap Guild’s Annual Conference? Investing in yourself and your business is the best place to put your money right now. Lay the foundation for a successful business, learn from others and network with other soapers from all over the nation at The Handcrafted Soap Guild’s conference.
With speakers like Erin Brokovich, Donna Maria Coles Johnson, Kelly Bloom, Kevin Dunn and Linda Stevens, there will be more than enough quality information to keep you energized, focused and absolutely delighted. (My posts from last year about the 2008 Conference are here, here, here and here.)
I’ll be there, teaching an Advanced Lotion Class and would love to see you there. I’ve allocated a % of the Bramble Berry budget for the last 12 years to Continuing Education and strongly feel that it’s a good use of business funds, year after year.
Early Bird discounts end Saturday sosign up now. I hope to see you there.
Rebatch soap – Plastic Baggie Technique
Rebatching Soap – What is it and why would I do it? – Rebatching is another form of cold process soapmaking. You can either make cold process soap from scratch or buy a premade base, grate it up, place it over a heat source, either in a double boiler or in a freezer baggie as shown below, with a little liquid (water, beer, milk, teas all work well). This mixture “melts” down into a mushy mess that you add colorant and fragrance too. The reason people normally rebatch is to preserve the delicate scent or the healing properties of some essential oils.
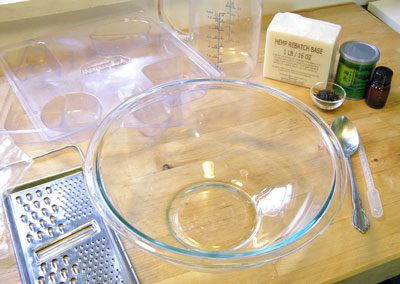
Rebatching Soap (make it yourself or buy a premade base)
Fragrance or Essential Oil
Mold (the less detail, the better)
Optional: Herbs
Colorant (liquid works best)
Freezer Bags (must must must be heat safe)
Grater
Large Bowl
Spoon
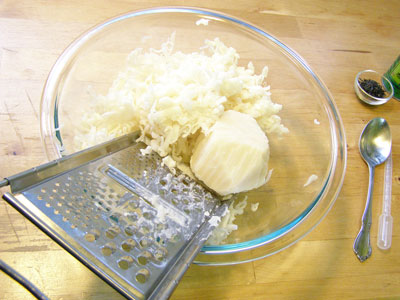
Step One: Grate the soap. I’ve tried a variety of things (food processor, meat grinder, deli meat slicer) and all of the cutters have gummed up on me and not worked after a few ounces worth of soap grinding. If you have any great tips, please post them here and save us some time and arm soreage.
Step Two: Bring a large pot of water to boil. Fill a freezer bag (heat safe) with the grated soap and approximately 1/2 to 1 ounce of liquid. Submerge the freezer bag of soap in the boiling water. Be sure to use a large enough pot that the freezer baggie will not be squished up against the side of the pot. You don’t want to accidentally melt the plastic baggie.
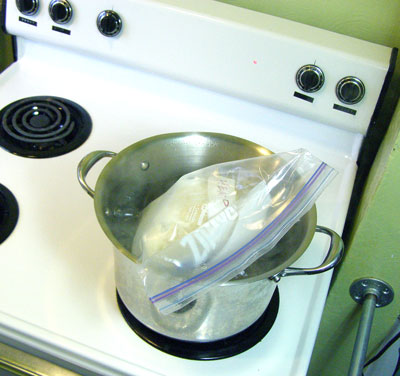
Step Three: Once the soap has boiled in the large pan for approximately 20 minutes, the soap should be gelatinous and gloppy, sort of like mashed potatoes or thick soupy oatmeal. It will never “melt” and become water like.
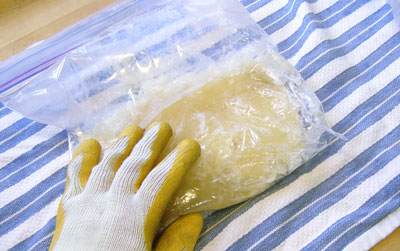
Step Four: Using heat safe gloves (that soap is hot! wear gloves!), pull the soap out of the water. Knead it around to make sure the liquid is fully mixed into the soapy gloppy glory. Is it too thick? Add another 1 Tablespoon of liquid if needed and knead this into the soap. The key is to not use very much liquid. The more liquid you add to this process, the thinner the soap gets (true) but the longer it will take to dry and harden.
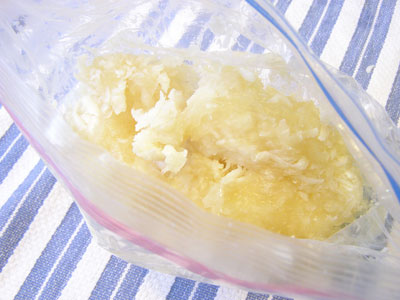
Step Five: The photo above shows the soap midway through the softening process. It’s not perfect yet. Put that soap back into the boiling water.
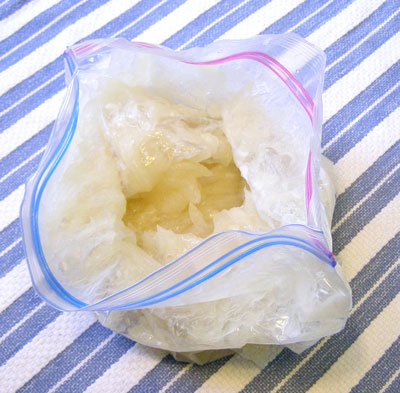
Step Six: The photo above is perfect texture. It looks like thick Vaseline. It is now ready for the color and fragrance.
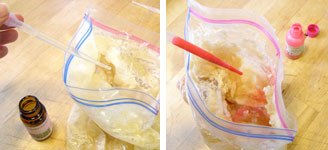
Step Seven: Add fragrance and color. Liquid color is ideal (mixing pigments into the gloppy soap is difficult). I use approximately .5 ounces of fragrance or essential oil per pound of soap. The colorant usage varies based on the color but start sparingly. You can always put more color in but taking it out is difficult. If the soap starts to harden up at any point because it is cooling, reseal the bag and toss it all back into the hot water. Make sure you wear heat safe gloves through this entire process. The soap is hot.
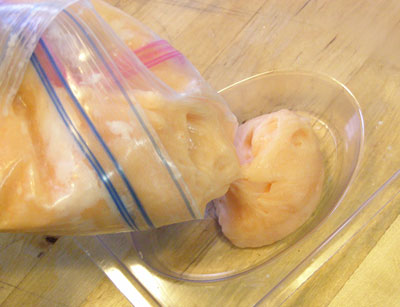
Step Eight: You can either spoon the soap into the molds or pour/push/squeeze the soap out of the baggie. Unless you are an experienced rebatch soaper, I would not recommend cutting off a corner of the bag to squeeze the soap out like frosting. It’s tempting but if the soap starts to cool too quickly, the open hole will not allow you to remelt the soap in the boiling water.
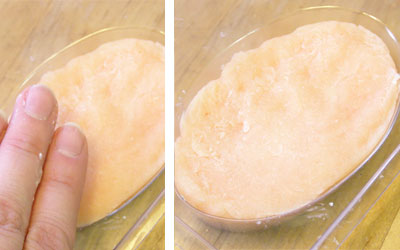
Step Nine: Take the mold you are using, close your eyes and give it a good wack on the counter to settle the soap and get all the air bubbles to the surface of the bar. When the soap starts to cool, feel free to use your hands and fingers to smooth out any bumps on the surface.
Wait for 2 to 7 days before popping the soap out. The key is to wait for all the liquid to evaporate. Yes, you can become impatient and freeze the soap but make sure the soap is entirely frozen (overnight at least) before trying to pop the soap out and remember that plastic is more brittle after it is frozen so be gentle on your molds.
Check back in the next few days for a tutorial on how to do rebatching soap via the double boiler method. This is my favorite way to do rebatch and you can do larger batches with the double boiler method.
Rebatching Soap Tutorials x2!
This week, we’ll be working with rebatching soap and doing step by step photographs and instructions to make your rebatching soap a super-duper success.
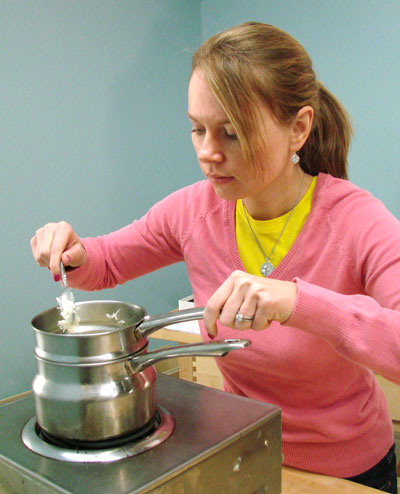 I’ll be going over two methods – the double boiler method and the baggie method. They both have their positives and I’m looking forward to sharing the tutorials with you this week.
The Year of Redecorating
Supposedly, 2009 is the year of redecorating. With the economy prompting a rise in “staycations” and frugality, homeowners are getting into the DIY Trend and redoing their living spaces. You may remember my disastrous repainting project (click here to be reminded of the pink shell house)? Well, I repainted but just a little bit. Only enough to make the house bearable so now, I’m on the painting hunt again.
Some things I’m really liking:
 Shiny Paints at Modern Masters

Vellum and Night Train from Benjamin Moore
 Color blocking
Billie’s Soap and Spa Products
 A few months ago, I had the great joy of talking to Billie (yes, the “Billie” of Billie’s Soap and Spa Products) on the phone with some challenging but solvable soapy tech support questions. She was absolutely sweet as pie with a giving spirit and a passion for making absolutely luxurious, decadent and insanely complicated recipes in pursuit of the best soap.
 After our conversation, she was kind enough to send me a few bars of her products with a sweet thank you note for our help. I am positive I came out with the better deal on this one. Some of the cool things about Billie’s Soap and Spa Products line: 1. They source their products organically whenever possible for their cold process soaps and salves. 2. They source their ingredients as close to their home as possible, generally within a 400 mile radius to lower their ecological footprint.
They even have a pet line if you’d like to pamper your sweet little dog. I personally liked their hair shampoo bar. It’s a solid bar of soft, sort of squishy soap that has good lathering and cleaning abilities. The bar left my hair shiny and soft with less conditioner than I normally use.
Check out Billie’s Etsy store here.
I want, I want! Vivienne Tam HP Mini
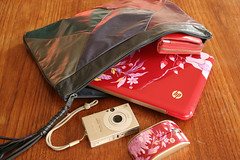
 Thanks to The Coveted Blog I now know what I am absolutely begging Norman (the official gatekeeper and Chief Operating Officer of Bramble Berry) for this year – the mini teensy weensy HP Clutch Computer.
Given that I travel about 1/4th of my work year and lug a computer through airport after airport, to hotel to hotel, a small little powerhouse of a computer is just what I need to save my already-aching shoulders and back.
Norm, are you listening?
Top photo of Vivianne Tam Clutch originally uploaded by The Coveted.
TV Dinners Revisited for 2009
I’m not sure if I think this idea is super cool or super dorky. I’m leaning towards super cool. These TV Dinner Trays have silicone cut outs where the plate and the cup go to ensure no slippage as you traverse from kitchen to couch with your meal.  $25 at Give Simple here.
Jovia Soap – The Checkboard Trifecta
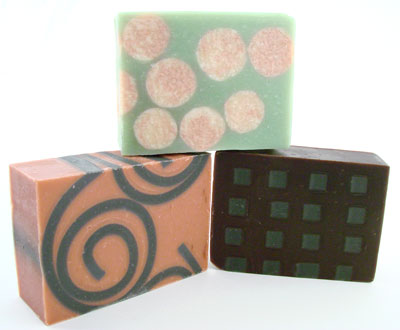
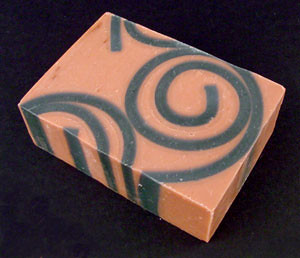 Still can’t get enough of Jovia? Brows her photos on Jovia Flickr read her tips and tutorials on Soap Making Essentials
Got Unused Dolls?
Not sure what to do with the dolls lying around from your daughter used to play with them? This is an edgy, sort of gross/sort of fun, soap project utilizing old plastic dolls. Perhaps it’s a perfect transition for your teen to say good bye to her younger years and herald a new era. Or perhaps, it’s just a creepy project I dreamed up as a second-date activity with my now-husband (true story. He didn’t even bat an eye). Craft Lab (the HGTV show) asked me to design an edgy soap project to pitch to their producers. This is what I came up with:
What you need:
Dismembered plastic doll
1 pound (16 ounces) Bramble Berry melt and pour soap, clear
1 ounce Pearberry Fragrance Oil
Soap mold (or Tupperware or anything you find like an empty yogurt
container)
Rubbing Alcohol
1. Dismember your doll. They come apart surprisingly easy. And, once you get over the slightly creepy factor of dismembering a doll, it’s also satisfying to say goodbye to your past and hello to your teen and adult years.
2. Cut the melt and pour blocks into 1 x 1″ cubes.
3. Melt the soap in 30-second increments until the soap is fully melted. Stir if there are any big chunks.
4. Add .25 ounces to .50 ounces of fragrance or essential oil. Remember, if you use a yellow or orange colored fragrance, your soap base will look less clear and look more yellow/orange. That’s why I suggested Pearberry. It stays completely clear.
5. Pour the soap base halfway up into your mold.
6. Spritz your dismembered doll part with rubbing alcohol.
7. Embed your doll head, limb or torso into the soap.
8. Pour the rest of the soap all the way up.
9. Do one final rubbing alcohol spritz to make sure there are no stray bubbles on the top of the soap.
Wait for the soap to harden, wrap with saran wrap, label and watch for the varied reactions your dismembered soap creations get.
On a personal note, I’m in San Diego for a long weekend for my brother-in-law’s wedding. Hair and make up starts at 5 a.m. on Saturday morning (eek!). I’m hoping to have a bit of time to sneak away to post photos of our fun. My hubby and I are thinking we might go on a roller coaster later today. Neither of us have been on one in over a decade so if you listen hard around noon, you just might hear us screaming.


