Today the Back to Basics series wraps up with the final tutorial, this Crisp Cotton Swirl Cold Process Soap. Swirls in cold process soap require a thin trace, so it’s important to not over stick blend the batter. It helps to have a recipe with a large percentage of slow moving oils, like olive or canola. If you missed the previous three Back to Basic tutorials, be sure to check them out! The tutorials are accompanied by the Back to Basic Soapmaking Kit, which includes all the ingredients (except lye) you need to make the four projects. Now, let’s get swirling!
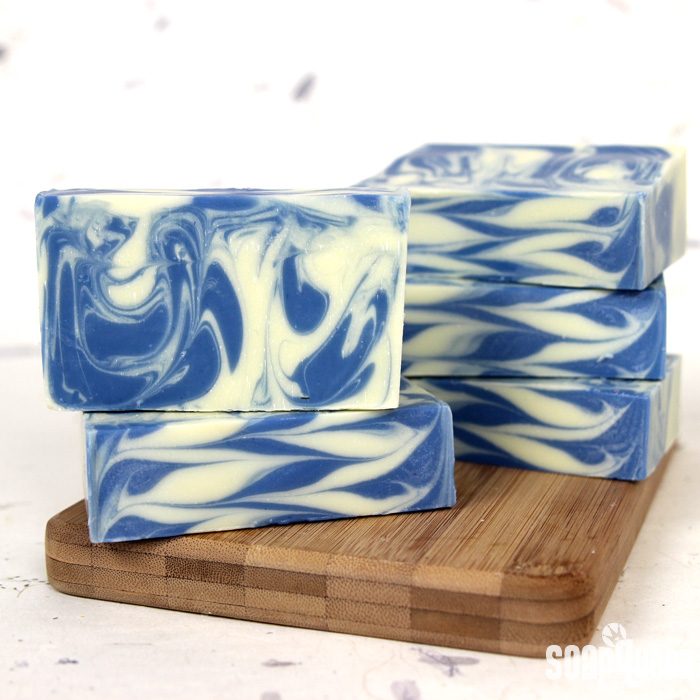
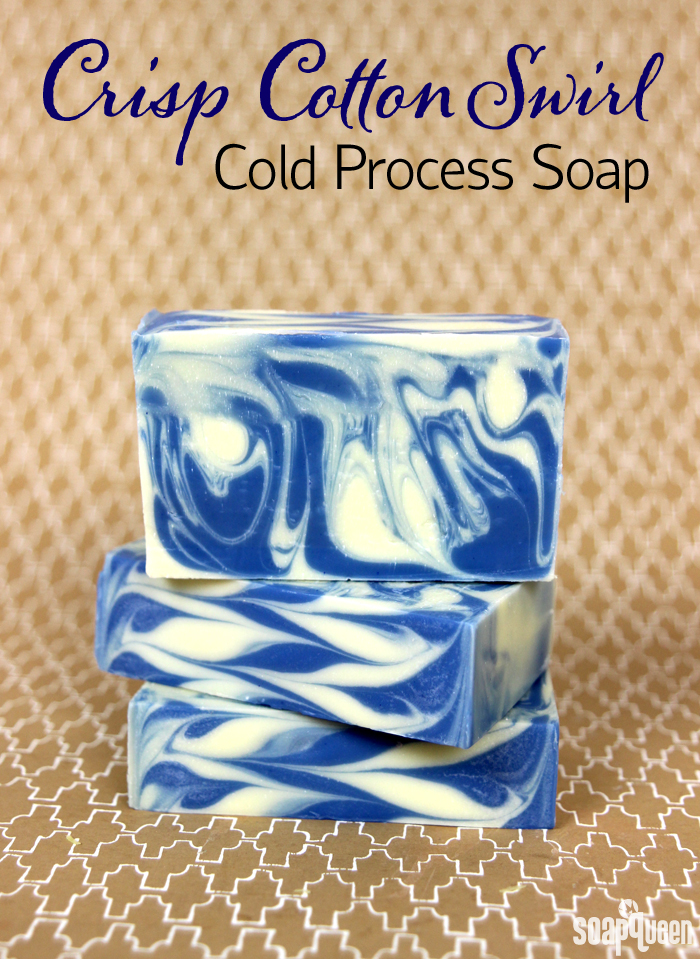 Creating swirls in cold process soap takes a little bit of practice. Swirls require a good understanding of trace; it’s crucial that the soap does not become too thick or the soap will not swirl together. On the flip side, the soap cannot be too thin or the colors may muddle together. Learn more about trace here. The key is a recipe that contains plenty of slow moving oils, like canola or olive oil. It’s also important to choose a fragrance oil that behaves well in cold process soap, and does not cause the soap to accelerate. This recipe contains 30% olive oil and 25% canola oil to make sure you have plenty of time to work. It also uses Crisp Cotton Fragrance Oil, which does not accelerate trace.
The type of swirl used in this bar is referred to as a “drop swirl.” This means the colors are poured, or “dropped,” into the mold from varying heights. As the soap is poured, it will begin to swirl inside the mold. For this project, we also used the Hanger Swirl Tool to give the soap extra movement. This project is colored with Titanium Dioxide and Ultramarine Blue pigments. These colorants do not bleed into each other, which is the key to crisp and clean swirls. If you have never prepped colorants for cold process soap before, check out this Soap Queen TV video to learn how.
Crisp Cotton Swirl Cold Process Recipe (5% superfat)
10″ Silicone Loaf Mold
10.2 oz. Olive Oil (30%)
6.8 oz. Coconut Oil (20%)
8.5 oz. Palm Oil (25%)
8.5 oz. Canola Oil (25%)
4.7 oz. Sodium Hydroxide Lye
11.2 oz. Distilled Water
Ultramarine Blue Pigment
Titanium Dioxide
3 oz. Crisp Cotton Fragrance Oil
This tutorial is the fourth and final in the Back to Basics Cold Process Series. This series of tutorials includes four cold process recipes that are perfect for beginning soapers. The Back to Basics Soapmaking Kit includes all the soaping ingredients you need to create all four recipes, including the 10″ Silicone Mold. The only ingredient you need to buy separately is lye, and any tools you may need. A great way to receive the basic soaping tools is with the Beginner’s Soaping Tool Kit, or click the “Buy it Now” button for the tools necessary for this project, lye and kit to your cart to your cart separately.

Click here to add everything you need for this project to your Bramble Berry shopping cart!
If you’ve never made Cold Process soap before, stop here! I highly recommend checking out our FREE four part SoapQueen.tv series on Cold Process Soapmaking, especially the episode on lye safety. And if you’d rather do some reading, Bramble Berry carries a wide range of books on the topic, including my newest book, Soap Crafting. You can also checkout the digital downloads for that instant gratification factor. I also recommend reviewing the first blog post in this series, which is all about how to handle lye safely.
FRAGRANCE PREP: In a glass, fragrance safe container, measure 3 oz. Crisp Cotton Fragrance Oil. Set aside.
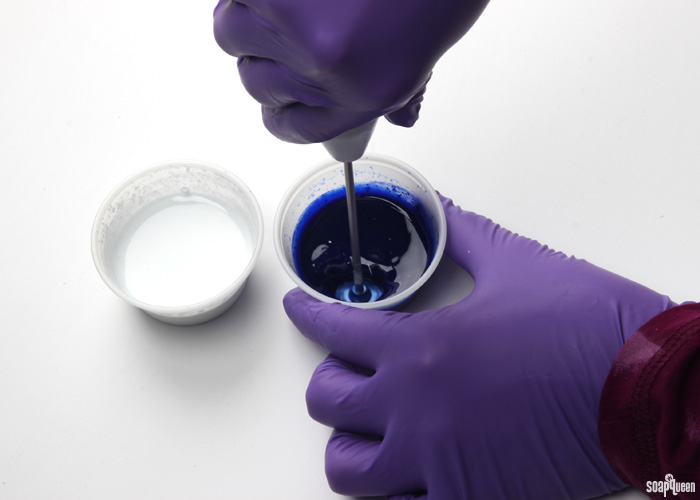
COLOR PREP: To ensure that the Titanium Dioxide blends smoothly into the soap batter, we recommend micronizing it before dispersing it in oil. Please note this is an optional tip but it does help with the titanium dioxide clumping in the soap =) To micronize colorant, simply use a coffee grinder to blend the colorant to break up any clumps of color and prevent streaks of white from showing in the final soap. We like to use a coffee grinder that has a removable, stainless steel mixing area for easy cleaning. Then, disperse 1 teaspoon of the colorant into 1 tablespoon of sunflower or sweet almond oil (or any other liquid oil). In a separate container, disperse 1 teaspoon of the Ultramarine Blue Oxide in 1 tablespoon lightweight liquid oil. Use a mini mixer to get the clumps of color worked out smoothly. Check out this video to learn how to disperse colorants.
Set Up Your Area: Before soaping, it’s helpful to have your soaping area prepared before you start. While soaping, you don’t want to be running around looking for a spatula or whisk! This recipe requires a few whisks, and separate containers for the three colors. You will need your mold, prepared lye water, pre-mixed oils, stick blender, and a spatula. Check out the Soapy Session Preparation and Setup Guide for tips.
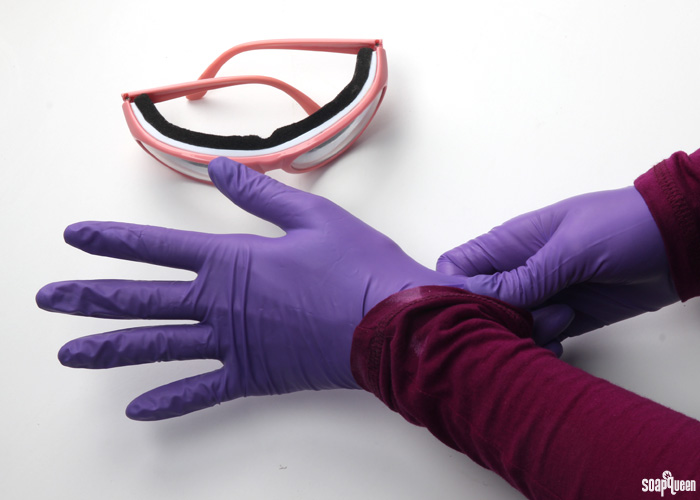
SAFETY FIRST: Suit up for safe handling practices! That means goggles, gloves and long sleeves. Make sure kids, pets, and other distractions and tripping hazards are out of the house or don’t have access to your soaping space. Always soap in a well-ventilated area.
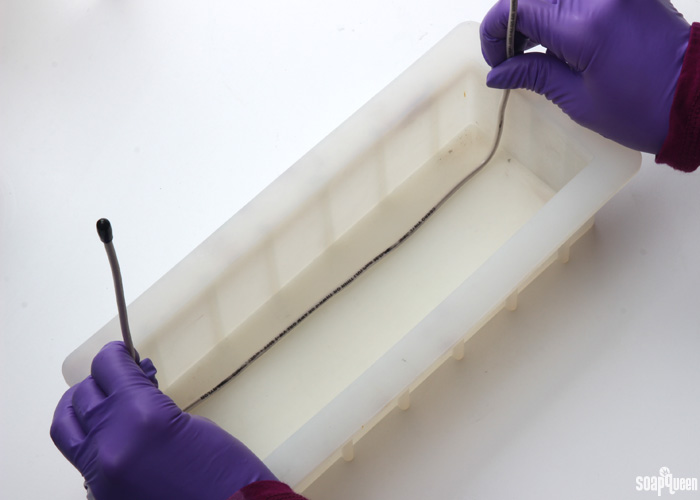
 TOOL PREP: Bend the Hanger Tool to fit in the mold lengthwise. It’s okay if it’s a little short, but you want it to fit comfortably within the mold.
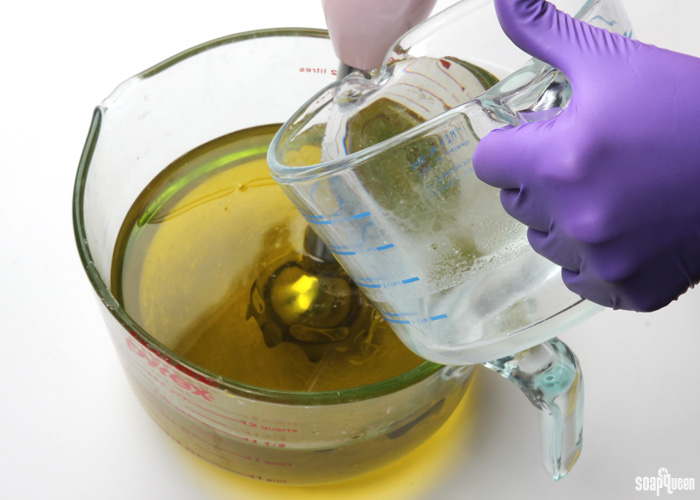
ONE: Slowly and carefully add the lye to the water and gently stir until the lye has fully dissolved and the liquid is clear. Set aside to cool.
TWO: Melt the coconut oil, olive oil, palm oil and canola oil completely (remember to fully melt then mix your entire container of palm oil before portioning). Once the lye water and the oils have cooled to 130 degrees or below (and are ideally within 10 degrees of each other), add the lye water to the oils and begin pulsing with the stick blender. If you’d like a harder bar of soap that releases faster from the mold, you can add sodium lactate to the cooled lye water. Use 1 teaspoon of sodium lactate per pound of oils in the recipe. For this recipe, you’d add about 2 tsp. sodium lactate.
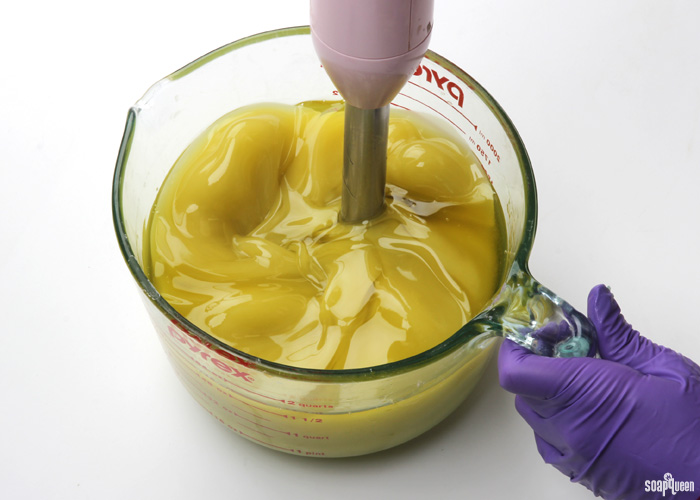 THREE: Alternate between using the stick blender to stir the mixture, and pulsing the stick blender. After about 20-30 seconds, test for trace. Because this project involves swirls, you don’t want it to become too thick, so don’t over stick blend! When a stick blender, whisk or spatula is pulled from the mixture, the trailings should not yet suspend on the top of the soap. Below is a great example of very thin trace; you can see that the trailings fall right back into the batter and do not sit on top.
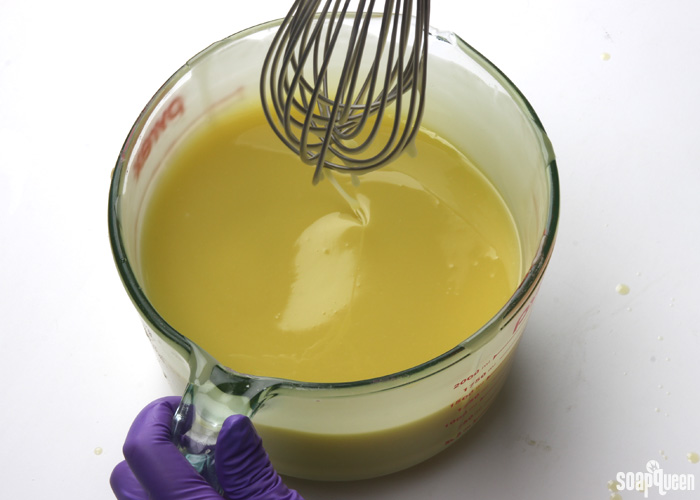 FOUR: Once you reach a thin trace, add the 3 oz. of Crisp Cotton Fragrance Oil and use a whisk to stir in. Do not use a stick blender to mix in the fragrance, or the batter may become too thick. Crisp Cotton Fragrance Oil does not accelerate trace in cold process soap. If you are working with a different fragrance oil that does accelerate trace, add the fragrance oil after adding the colorants.
 FIVE: Split the soap batter into two even containers; it’s okay to eyeball it! There will be about 3 cups in each container.
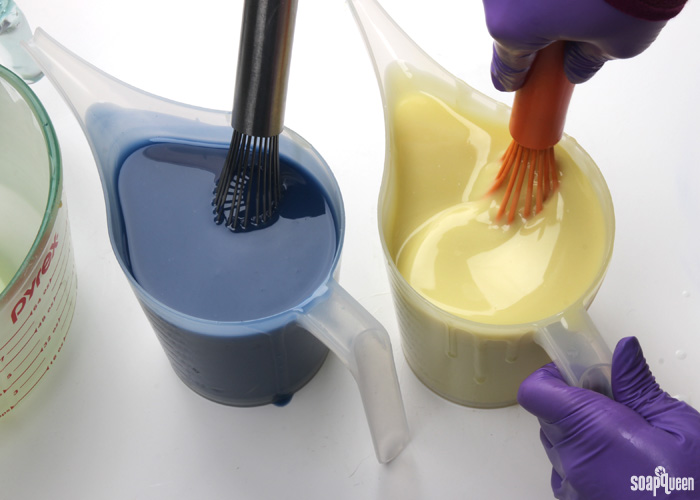
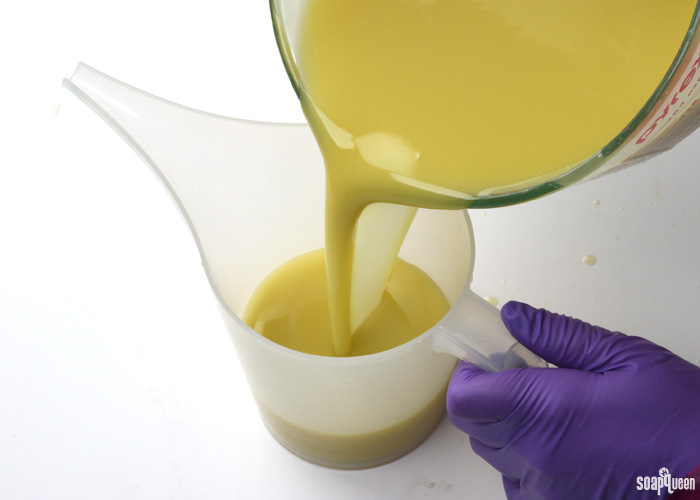 SIX: To one container, add all the dispersed Ultramarine Blue Oxide and use a whisk to mix in. To the other container, add all the dispersed Titanium Dioxide and use a whisk to thoroughly mix in.
 SEVEN: Pour about 1/4 of the white soap into the mold. Tap the mold on the counter gently to release any bubbles.
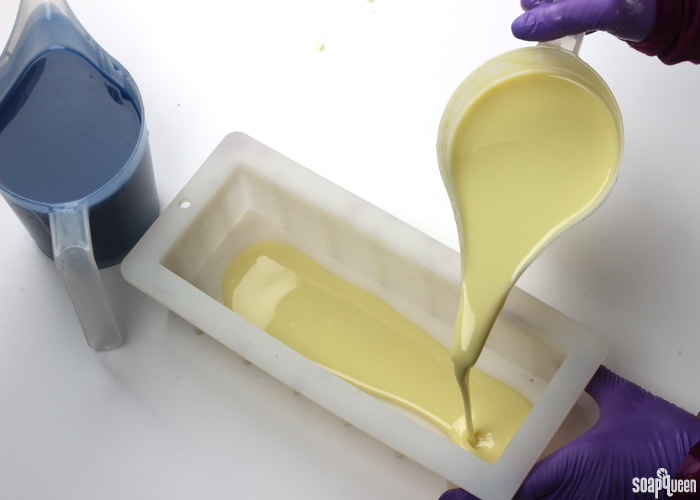 EIGHT: Pour about 1/4 of the blue soap into the layer of white, moving the soap throughout the mold. Pour from a few inches above the mold to cause the soap to “break through” into the white. Don’t worry about making your pour “perfect.”
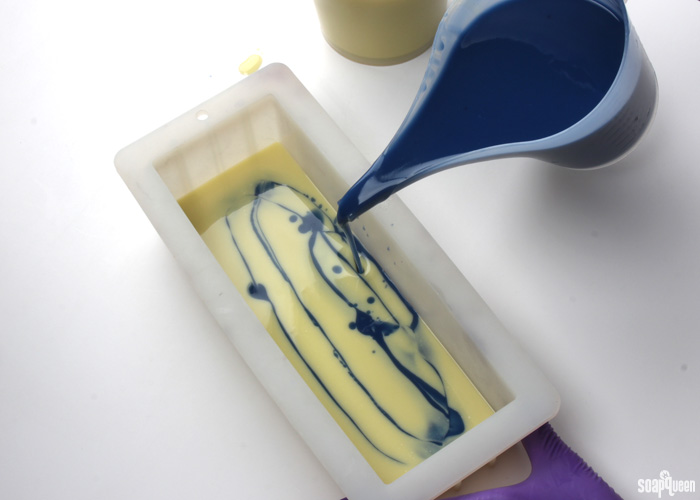 NINE: Continue to pour the white and blue soap into the mold from various heights. As you continue to pour, the soap will begin to swirl itself naturally.
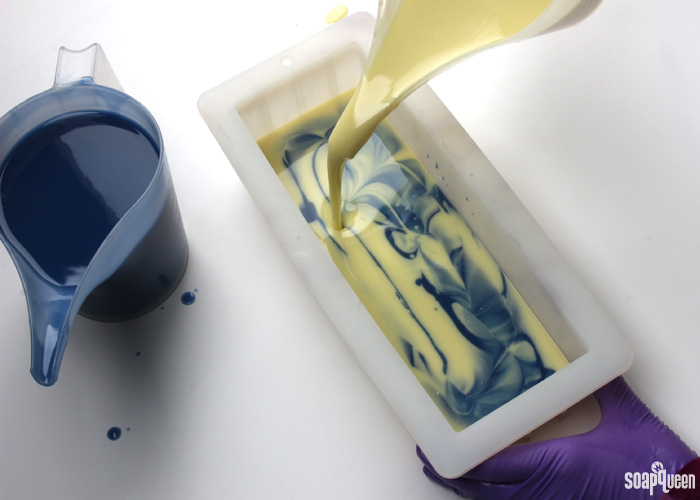
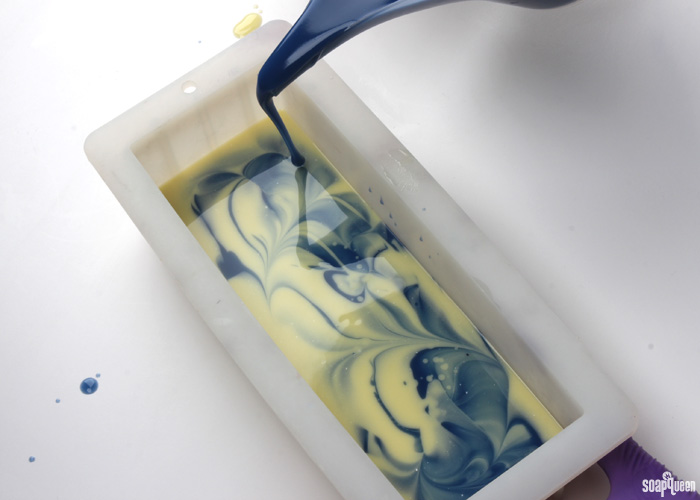 TEN: Continue to pour until you have a very small amount of blue and white soap. This remaining soap will be used to create the swirl top. Gently tap the soap on the counter to help release any bubbles.
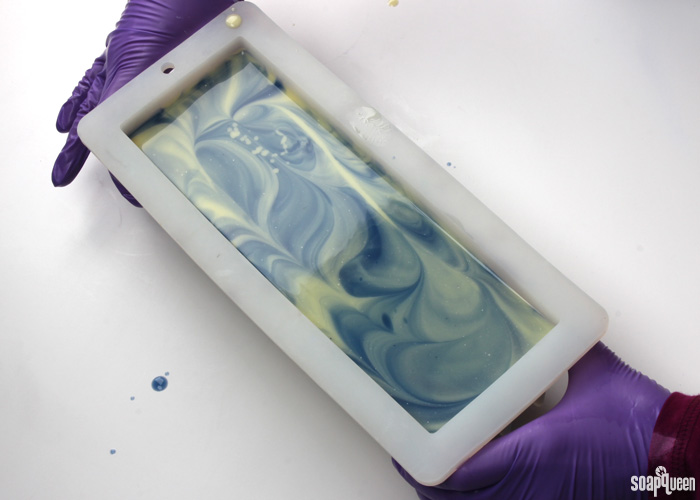 ELEVEN: Line the hanger tool up alongside the length of the mold on the side farthest from you. Insert it all the way to the bottom of the mold. Then, move the hanger in circular motions toward yourself starting at the bottom and spiraling towards the top. After you have completed about 2-3 circles, pull the hanger toward you and out of the mold.
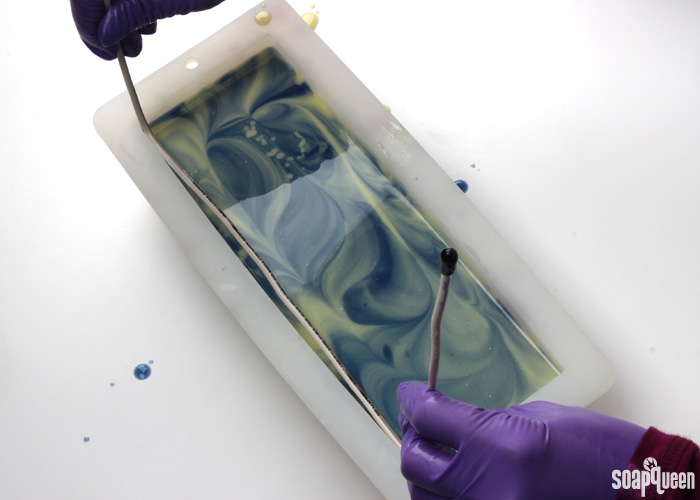 TWELVE: Carefully pour two lines of white soap down the length of the mold. Don’t worry about the line looking perfect. Then, create three lines of blue soap in between the white lines. Tap the mold on the counter to help settle and smooth the lines of white and blue soap.
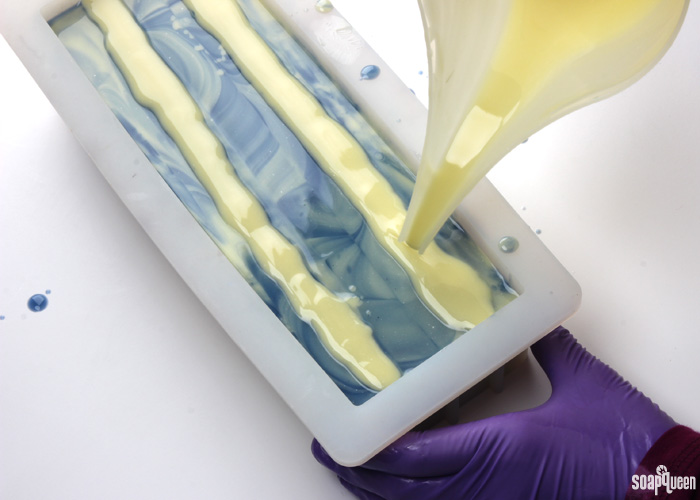
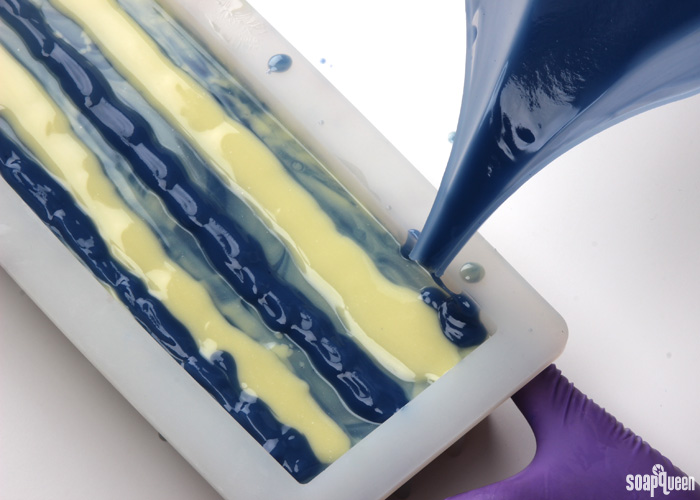
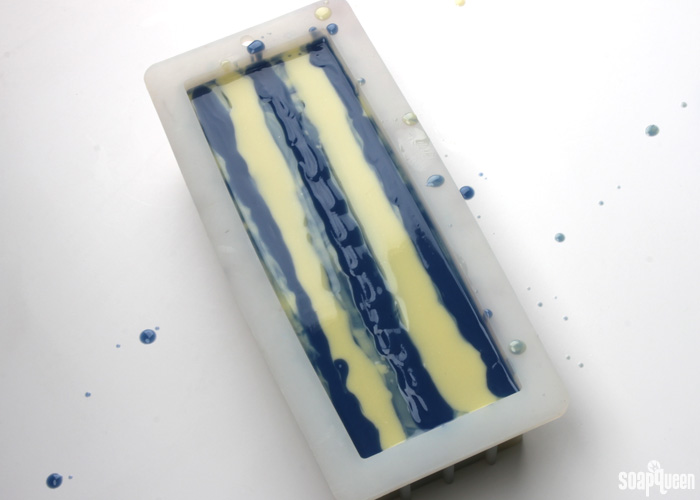 THIRTEEN: Insert a dowel or chopstick into the very top of the soap. You only want to swirl the lines of white and blue soap, not the already swirled soap underneath. Drag the chopstick back and forth down the length of the mold. Continue this pattern until you reach the other side of the mold.
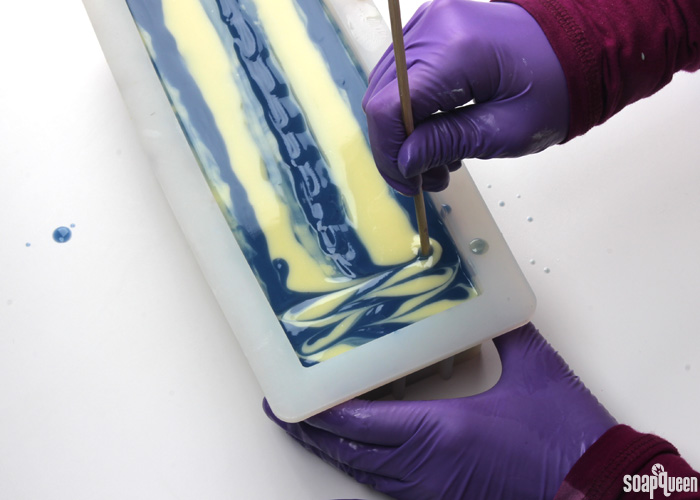
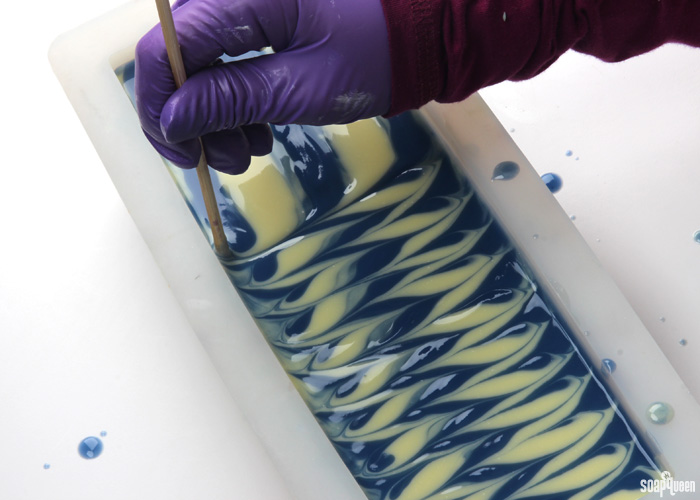 FOURTEEN: Drag the chopstick around the outside of the entire mold. This step is optional, but it gives the swirl a nice finished look.
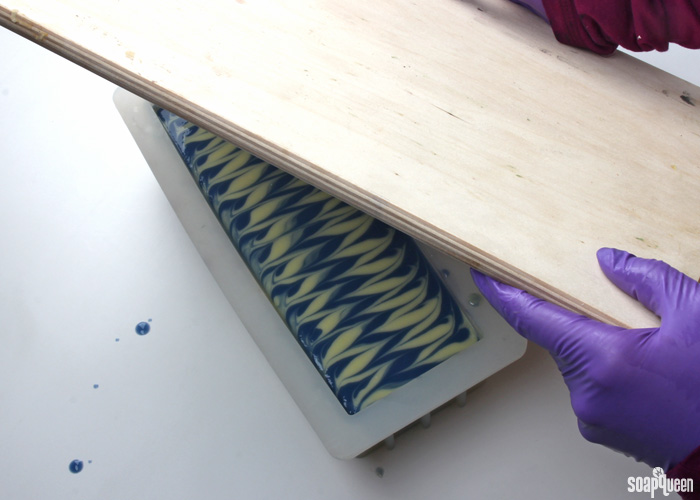
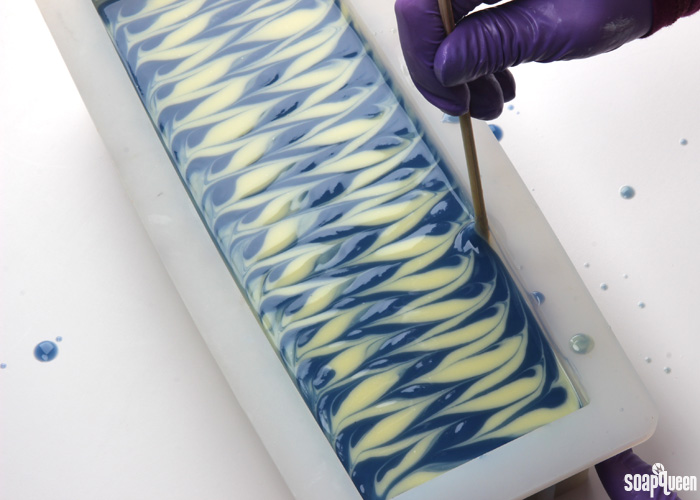 FIFTEEN: Spray the top of the soap with 99% isopropyl alcohol to prevent soda ash. Cover the mold with a lid or piece of cardboard to insulate. Insulate for 24 hours. Allow to sit in the mold for 2-3 days before unmolding. Cut into bars, and allow them to cure for 4-6 weeks. Enjoy!
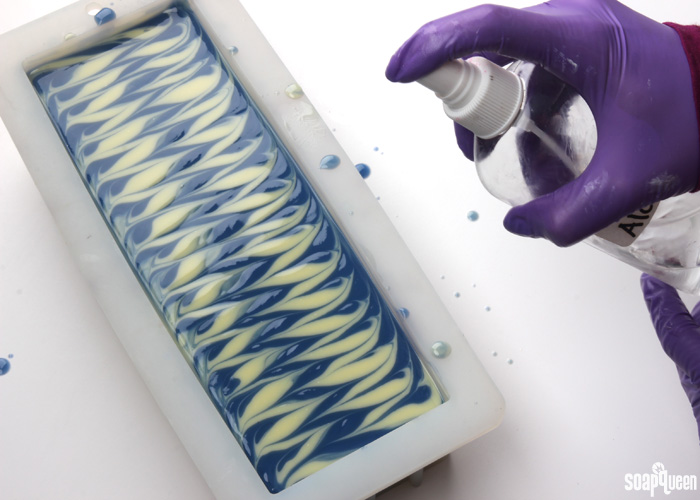
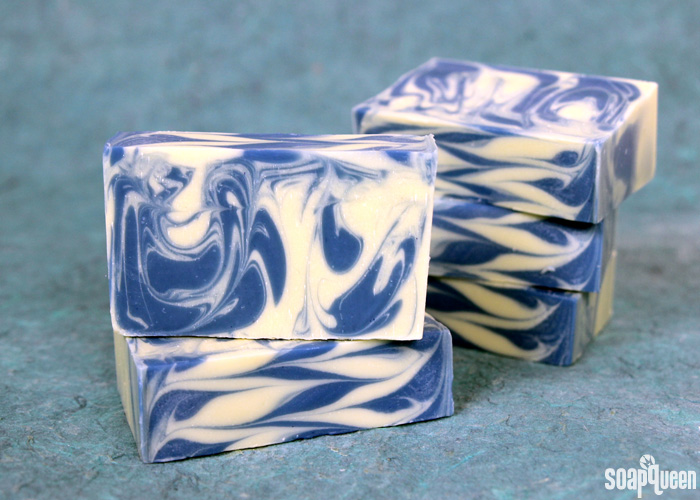
What was the first swirl technique you ever tried? The “In-the-Pot” swirl is another great swirling technique for beginners!
- 10″ Silicone Loaf Mold
- 10.2 oz. Olive Oil (30%)
- 6.8 oz. Coconut Oil (20%)
- 8.5 oz. Palm Oil (25%)
- 8.5 oz. Canola Oil (25%)
- 4.7 oz. Sodium Hydroxide Lye
- 11.2 oz. Distilled Water
- Ultramarine Blue Pigment
- Titanium Dioxide
- 3 oz. Crisp Cotton Fragrance Oil
- Slowly and carefully add the lye to the water and gently stir until the lye has fully dissolved and the liquid is clear. Set aside to cool.
- Melt the coconut oil, olive oil, palm oil and canola oil completely (remember to fully melt then mix your entire container of palm oil before portioning). Once the lye water and the oils have cooled to 130 degrees or below (and are ideally within 10 degrees of each other), add the lye water to the oils and begin pulsing with the stick blender. If you’d like a harder bar of soap that releases faster from the mold, you can add sodium lactate to the cooled lye water. Use 1 teaspoon of sodium lactate per pound of oils in the recipe. For this recipe, you’d add about 2 tsp. sodium lactate.
- Alternate between using the stick blender to stir the mixture, and pulsing the stick blender. After about 20-30 seconds, test for trace. Because this project involves swirls, you don’t want it to become too thick, so don’t over stick blend! When a stick blender, whisk or spatula is pulled from the mixture, the trailings should not yet suspend on the top of the soap. Below is a great example of very thin trace; you can see that the trailings fall right back into the batter and do not sit on top.
- Once you reach a thin trace, add the 3 oz. of Crisp Cotton Fragrance Oil and use a whisk to stir in. Do not use a stick blender to mix in the fragrance, or the batter may become too thick. Crisp Cotton Fragrance Oil does not accelerate trace in cold process soap. If you are working with a different fragrance oil that does accelerate trace, add the fragrance oil after adding the colorants.
- Split the soap batter into two even containers; it’s okay to eyeball it! There will be about 3 cups in each container.
- To one container, add all the dispersed Ultramarine Blue Oxide and use a whisk to mix in. To the other container, add all the dispersed Titanium Dioxide and use a whisk to thoroughly mix in.
- Pour about ¼ of the white soap into the mold. Tap the mold on the counter gently to release any bubbles.
- Pour about ¼ of the blue soap into the layer of white, moving the soap throughout the mold. Pour from a few inches above the mold to cause the soap to “break through” into the white. Don’t worry about making your pour “perfect.”
- Continue to pour the white and blue soap into the mold from various heights. As you continue to pour, the soap will begin to swirl itself naturally.
- Continue to pour until you have a very small amount of blue and white soap. This remaining soap will be used to create the swirl top. Gently tap the soap on the counter to help release any bubbles.
- Line the hanger tool up alongside the length of the mold on the side farthest from you. Insert it all the way to the bottom of the mold. Then, move the hanger in circular motions toward yourself starting at the bottom and spiraling towards the top. After you have completed about 2-3 circles, pull the hanger toward you and out of the mold.
- Carefully pour two lines of white soap down the length of the mold. Don’t worry about the line looking perfect. Then, create three lines of blue soap in between the white lines. Tap the mold on the counter to help settle and smooth the lines of white and blue soap.
- Insert a dowel or chopstick into the very top of the soap. You only want to swirl the lines of white and blue soap, not the already swirled soap underneath. Drag the chopstick back and forth down the length of the mold. Continue this pattern until you reach the other side of the mold.
- Drag the chopstick around the outside of the entire mold. This step is optional, but it gives the swirl a nice finished look.
- Spray the top of the soap with 99% isopropyl alcohol to prevent soda ash. Cover the mold with a lid or piece of cardboard to insulate. Insulate for 24 hours. Allow to sit in the mold for 2-3 days before unmolding. Cut into bars, and allow them to cure for 4-6 weeks. Enjoy!



I am a beginner to soaping, and this is my first disappointment. I unmolded my soap after 72+ hours and started cutting. I used a sharp knife. Unfortunately, the soap did not cut cleanly and is breaking off into chunks and sticking to the knife. It is sort of crumbly, but the soap is still very soft, if that makes sense. I stopped cutting and am letting the unmolded soap sit for a bit longer before I try to cut the rest. Any thoughts on what went wrong? I did add the recommended amount of sodium lactate.
I am sorry about that Emily. I’m wondering if the soap may have soda ash. That can make the soap crumbly. Do you have a photo you can send to our Facebook page?
Bramble Berry Facebook page: https://www.facebook.com/BrambleBerry/
-Kelsey with Bramble Berry
I am having the same problem with the soap. It is too soft in the middle to cut, but some of the outside ends of the loaf broke off and are crumbly. I’m upset.
Oh I’m sorry about that Natalie. Does it have an ashy appearance on the outside? How long did you stick blend it for? Let me know and I’ll help you troubleshoot.
-Kelsey with Bramble Berry
I think I know what i did wrong Kelsey. When i got to the part of pouring the lines on the top of the soap i found that my soap was too thin to make the line stay, so i waited until the soap got thicker and able to stay in place. I’m thinking I waitied way too long and the soap got very cool, and now I have soda ash all the way through. I cut the whole loaf today and I believe that is the case. I will try to steam them once they get harder and see how they turn out. Guess I have a lot of personal soap now!! Bummed. Maybe I will try the soap again today. HMMM
When the soap is cooler and thinner, it is more likely to form soda ash. It can help to pour the soap when it’s just slightly thicker, and it also helps to increase your temperatures to around 120-125F. The good news is you can steam that ash off! Learn how here: http://www.soapqueen.com/bath-and-body-tutorials/tips-and-tricks/explaining-and-preventing-soda-ash/
-Kelsey with Bramble Berry
Kelsey, I’ve nticed that this is a slow moving recipe, which is good for swirling. I know it’s a beginner swirling recipe, but maybe if the recipe was modified to have more of a water discount, the bars would be harder? I notice that the BB lye calculator comes down right in the middle in terms of water percentages.
You can definitely use a water discount if you like! That will help the bars harden and cure more quickly. Water discounts do accelerate trace slightly, so be prepared to move quickly. A good place to start is about 10%. 🙂
Learn more here: http://www.soapqueen.com/bath-and-body-tutorials/tips-and-tricks/water-discounting-cold-process-soap-how-why/
-Kelsey with Bramble Berry
I used a liquid lab blue and it went green and then grey 🙁 Why???
Hi Ange!
The LabColors can morph at first, but should turn the right color after a few days! You can see that in the Layered Lavender Soap Tutorial: https://www.soapqueen.com/bath-and-body-tutorials/back-to-basics-layered-lavender-cold-process-tutorial/
What LabColor were you using? Also, were you making cold process or melt and pour soap? If it was cold process, did it go through gel phase? Let me know and I’ll help you troubleshoot. 🙂
-Kelsey with Bramble Berry
Hi! Did the ”Crisp Cotton Swirl Cold Process Recipe”. This was my very first batch of soap and I am quite satisfied with it except for one little issue. The blue on top of the soap was nice and bright when I was finished but as it dried up the following days, it became pale and lost all its shine. I did spray the top of the soap with 99% isopropyl alcohol. The blue inside the soap remained perfect. I am hoping there is a simple explanation for this….
Many thanks for your help and this wonderful web site.
Hi Claire!
I think it may be a bit of soda ash on top of the bars. Soda ash forms when unsaponified lye reacts with naturally occurring carbon dioxide in the air. It can give the bars an ashy or pale appearance. It’s harmless, and only affects the bars aesthetically.
You can also get rid of soda ash! To do so, you can steam the top of the bars, or scrub them with an old nylon. Find more tips to get rid of soda ash here: http://www.soapqueen.com/bath-and-body-tutorials/tips-and-tricks/explaining-and-preventing-soda-ash/
To prevent ash from forming, it can help to pour the soap when it’s a bit thicker. We also like to spray the soap with alcohol every 15 minutes for the first hour. That creates a barrier to help prevent soda ash. 🙂
-Kelsey with Bramble Berry
When you say you like to spray the soap with alchohol every 15 minutes- Does this mean you remove the lid every 15 minutes? Won’t this create a bad reaction?
Or do you mean you leave the lid off for the first hour so you can keep spraying it?
You can cover the soap in between sprays! Just lift the corner of the lid, spritz and cover again. If you don’t have too many issues with soda ash you can just spray the top really well once, cover and let it gel. 🙂
-Kelsey with Bramble Berry
Hello. You said Are you wanting to work with a more intricate design, like swirls or layers? If so, I can offer some advice for recipe and fragrances that will give you lots of time to work. Let me know. :). THAT WOULD BE GREAT. I attend to make soap with swirls, two color only, I need more time then 5 minutes, couse I m new. Thank you
Hey Ervin!
Absolutely! If you’re working with swirls, a recipe with a lot of soft oils is a great option. The soft oils will reach trace more slowly, giving you more time to swirl your soap. 🙂
Our Beautiful Swirls Recipe is a great one to use. It has soft oils like canola, hazelnut and rice bran. You can find that recipe, as well as tips for formulating soap recipes, here: http://www.soapqueen.com/bath-and-body-tutorials/tips-and-tricks/formulating-cold-process-recipes/
You may also like our Swirl Quick Mix! It has oils that are already mixed and ready to use. All you have to do is melt the oils and measure them out. Read more about how to use our Quick Mixes here: http://www.soapqueen.com/bath-and-body-tutorials/tips-and-tricks/sunday-night-spotlight-quick-mixes/
This post on common soapmaking oils is helpful too: http://www.soapqueen.com/bath-and-body-tutorials/tips-and-tricks/free-beginners-guide-to-soapmaking-common-soapmaking-oils/
Another trick to having a lot of time to work is a well-behaved fragrance oil. You want one that doesn’t accelerate. Energy Fragrance Oil is one of our favorites! It works like a dream in cold process soap: https://www.brambleberry.com/Energy-Fragrance-Oil-P3861.aspx
Cranberry Fig Fragrance Oil and Kumquat Fragrance Oil work really well in cold process soap too. 🙂
Cranberry Fig: https://www.brambleberry.com/Cranberry-Fig-Fragrance-Oil-P3933.aspx
Kumquat: https://www.brambleberry.com/Kumquat-Fragrance-Oil-P3335.aspx
-Kelsey with Bramble Berry
Thank you for all the wonderful information and advice that you offer to us. This was the second soap recipe that I made. When I poured the mixture into the mold (I bought the one that is listed with this recipe), I had more than 2 cups of soap left over. I ended up pouring it into an empty milk container. Did I really make a huge mistake in measuring my oils or does this recipe make more than what fits in your mold?
Hi Sarah!
You’re welcome, thanks for your sweet comment!
I’m not entirely sure why there was so much soap leftover! This recipe is about 50 ounces. The mold holds 48 ounces, but we had enough room to fit those leftover 2 ounces.
Can you tell me a bit more about your process, including any substitutions? What scale are you using to measure ingredients? We’ll get this figured out. 🙂
-Kelsey with Bramble Berry
I figured out the mystery! For some reason, I thought you had used the 2 lb soap mold for this recipe. I must have clicked on the wrong link when I went to buy the mold that went with this recipe. No wonder I had so much soap left over!
Oh that makes sense! Mystery solved! You can resize the recipe for the 2 lb. Wood Mold if you like. We have a post that shows you how. I’ll include a link below. 🙂
How to Resize Cold Process Soap Recipes: http://www.soapqueen.com/bath-and-body-tutorials/tips-and-tricks/how-to-resize-cold-process-soap-recipes/
-Kelsey with Bramble Berry
2 lb. Wood Loaf Mold: https://www.brambleberry.com/2-lb-Wood-Loaf-Mold-P5239.aspx
Hello. I m not shure I understand. You said to prevent soda ash to spray with isopropyl alcohol . BUT isopropyl alcohol is highly flammable and the conditions we must avoid when using it are The heat / heat, flames and sparks. And the soap is warm when resting. Can you explain. thank you
Hi Ervin!
You are correct, isopropyl alcohol is flammable! However, even if the soap gets quite warm, it shouldn’t ignite on the soap. Alcohol typically needs an open flame or a spark to ignite. Also, the alcohol evaporates quickly, meaning the soap will be safe. 🙂
Read more about 99% isopropyl alcohol here: http://www.soapqueen.com/bramble-berry-news/sunday-night-spotlight-99-isopropyl-alcohol/
Get more tips for preventing soda ash here: http://www.soapqueen.com/bath-and-body-tutorials/tips-and-tricks/explaining-and-preventing-soda-ash/
-Kelsey with Bramble Berry
Thank you. Just a question, what is the open time for work, before soap solidification.
How long you have to work with your design depends on several factors, including the recipe, temperatures, fragrance oil, etc. If your recipe has lots of soft oils, your temperatures are around 120F and you have a well behaved fragrance oil, you should have around 10 minutes (maybe more) to work with your design! For this recipe, we had around 5-10 minutes to work, as it had a well-behaved fragrance oil but some some harder oils.
Read more about different types of trace here and how to work with each: http://www.soapqueen.com/bath-and-body-tutorials/tips-and-tricks/trace/
And more about misbehaving fragrances here: http://www.soapqueen.com/bath-and-body-tutorials/tips-and-tricks/soap-behaving-badly/
Are you wanting to work with a more intricate design, like swirls or layers? If so, I can offer some advice for recipe and fragrances that will give you lots of time to work. Let me know. 🙂
-Kelsey with Bramble Berry
I just un-molded and cut this project. The design is pretty cool (nothing like the pics above but its still beutiful!) but it seem very soft compared to other batches I’ve made. I purchased the “back to basic” kit last month and this was the last batch I made. It sat in the mold for almost a full 72 hours as I made it Sunday morning. when I pulled it out of the mold the four corners actually stayed in the mold and when i was putting it into the cutter my fingers were actually pulling small peices off the bottom as if it were a putty. I used the sodium lactate hoping for a stronger bar but it seems much more “mushy” that others. Is it the oil mix?
Hi Tanya!
So glad the design looks cool! Cutting swirly soap is so fun. 🙂
I’m sorry that recipe is still quite soft! Recipes with a lot of soft oil will take longer to harden. Because this recipe has 55% soft oil, it will need a couple extra days before it’s ready to cut. However, it will continue to harden as it cures for 4-6 weeks!
Let me know how those bars feel after another week or so. I’m thinking it’s just the recipe that makes it a little softer, but if it’s still very soft after a week or so it may be something else. Let me know if that’s the case and I’ll help you troubleshoot. 🙂
-Kelsey with Bramble Berry
Hi BrambleBerry Team!
Last week I’ve made your Black, White and Gold All Over CP and put this one, as recommended, in the freezer for several hours to prevent possible glycerin rivers due to the high titanium dioxide content. This week I want to make this Crisp Cotton recipe, which uses even more titanium dioxide, but is recommended to cover and insulate??? This seems conflicting information to me, or am I missing something? Thanks for your feedback!
Hi Zala!
That’s a great question! In this recipe, we really wanted the blue colors to pop. Insulating the soap and forcing it through gel phase helps the colors stand out. However, you are correct – if the soap gets too hot, it can still get glycerin rivers. Because we wanted the strong colors, we decided to insulate, knowing those glycerin rivers may form. We didn’t get them this time!
Read more about gel phase here: http://www.soapqueen.com/bath-and-body-tutorials/tips-and-tricks/gel-phase/
Glycerin rivers are fairly uncommon. If you’d like, you can definitely freeze this soap to be on the safe side! You can also mix your colorants really well or water discount by 10% or so. Keep in mind that water discounting will cause the soap to thicken a bit faster, so be prepared to work fast!
Learn more about glycerin rivers and how to prevent them here: http://www.soapqueen.com/bath-and-body-tutorials/tips-and-tricks/river-runs-deep-explanation-glycerin-rivers/
Temperatures definitely play a role in soaping, and will differ based on how hot you soap, what fragrance you use, how how it is in your house , etc. For instance, if you insulate your soap during the summer, that soap may get overheated and form glycerin rivers. If you insulate it during the winter, it may not. It will take a bit of practice to find the perfect way to store your soap. 🙂
Learn more about how temperature affects soaping here: http://www.soapqueen.com/bath-and-body-tutorials/tips-and-tricks/back-to-basics-how-temperature-affects-cold-process-soap/
And when to insulate soap here: http://www.soapqueen.com/bath-and-body-tutorials/tips-and-tricks/when-to-insulate-handmade-soap/
-Kelsey with Bramble Berry
Thank you so much for your extensive and thorough reply, Kelsey! So many factors play their role in the soapmaking process. It can be dazzling sometimes, but at the same time I think this complexity is the main reason soaping never gets boring to me! Each batch is a new adventure 🙂
You’re welcome Zala! Also, you are so right – each time you make soap is a learning experience! I have been soaping for about two years now and am still learning things all the time. It definitely keeps it fresh and interesting. 🙂
-Kelsey with Bramble Berry
How do you determine how much fragrance to put in soap? Is 3oz based on a factor, or just the recipe creator’s preference? Thanks.
Hi Kate!
You can find out how much fragrance to add with our Fragrance Calculator! Just plug in how much soap you’re making and select the fragrance. 🙂
Using the Bramble Berry Fragrance Calculator: http://www.soapqueen.com/bath-and-body-tutorials/tips-and-tricks/use-fragrance-calculator/
There are light, medium and strong recommendations on our calculator. You can add whichever one of those levels you prefer!
-Kelsey with Bramble Berry
I just experienced the most perfect trace ever! I hope the swirl works out. Even if it doesn’t I am on cloud nine. Please thank your team for this recipe. I appreciate YOU!
Isn’t perfect trace such a great feeling? You’re very welcome Kate, so glad you like the recipe! If you get any pictures of the soap we’d love to see it on our Facebook page. 🙂
-Kelsey with Bramble Berry
Bramble Berry Facebook: https://www.facebook.com/BrambleBerry
I wish there was a list of essential/fragrance oils that indicated what they do to trace rate.
Like “does not accelerate”, “accelerates massively”, etc. Or maybe it depends more on the
oil(s) you are using? If so, that would be a pretty huge matrix given the number of different
oils that can be used. Such a matrix might just be wishful thinking on my part.
Hi Tom!
That’s a great suggestion, thank you so much Tom!
A number of factors can cause acceleration in your soap, including oils, temperature, fragrance, etc. We have a couple of blog posts on how to avoid acceleration, and how to work with it in your soap! I’ll include those posts below. 🙂
Soap Behaving Badly: http://www.soapqueen.com/bath-and-body-tutorials/tips-and-tricks/soap-behaving-badly/
All About the Trace: http://www.soapqueen.com/bath-and-body-tutorials/tips-and-tricks/trace/
We also test our fragrances thoroughly. If they accelerate or discolor, we say so in the description on BrambleBerry.com. 🙂
Fragrance oils: https://www.brambleberry.com/Fragrance-Oils-C161.aspx
Essentials oils: https://www.brambleberry.com/All-Oils-C23.aspx
-Kelsey with Bramble Berry
Can anyone please let me know what are the advantages of adding citric acid to CP soap and liquid soap, and how should it be added?
One more thing, I have a bottle full of sand and I’d like to put it to good use. Is this a good exfoliant? Can it be added to CP soap in the same way as salt?
Thanks so much !!
Hi Rosy!
In cold process, citric acid helps lower the pH level. That makes the soap more gentle. We used citric acid in our Sudsy Shampoo Bars to make them nice and gentle on hair. Learn how to use citric acid in that tutorial: http://www.soapqueen.com/bath-and-body-tutorials/cold-process-soap/sudsy-shampoo-bars/
In liquid soap, I believe citric acid is used for the same purpose! We haven’t used it a lot in our liquid soap recipes. From a quick internet search, it looks like you use about 5 grams of citric acid per 50 ounces of liquid soap paste. Measure that out in a cup and pour 1-2 ounces of boiling distilled water over it to dissolve. Then, add that to the warm paste and stir. We haven’t personally tested that method, so I would definitely recommend a small test batch!
As for adding sand, it can be tricky. Sand typically has a lot of extra particles in it, which may do weird things in your soap. Again, a small test batch would be helpful. 🙂
We also have some great exfoliant options for soap. Learn all about them here: http://www.soapqueen.com/bath-and-body-tutorials/tips-and-tricks/all-about-exfoliants/
-Kelsey with Bramble Berry
Citric acid: https://www.brambleberry.com/Citric-Acid-P3753.aspx
Awesome ! Thank you again for helping me so much Kelsey : )
You’re welcome! Happy to help. 🙂
-Kelsey with Bramble Berry
I’d just like to comment on how much I appreciate you having a clean printable version of your recipes available.
Usually I have to do a lot of editing of fluff, cutting, pasting, removing links and photos so recipes are easy to follow while I’m actually in the middle of the project.
Here, I love being able to just click print, and get into my project rather than dealing with all that.
Thank you so much for simplifying the pre-soaping process.
You are very welcome! We recently got the recipe cards after an update and we are in love with them. It’s so nice and easy to print! So glad to hear you’re loving them as well. 🙂
-Kelsey with Bramble Berry
My first ‘swirl technique’…? I actually don’t know what name to give to it :). After 5 uni-coloured soaps I thought I was ready for some playing with colour and thought I could handle a vertical mold. I choose a recipe from AM’s book with one uncoloured half and a discolouring half. I discovered it is very important to put equal parts of soapbatter in both sides of the mold at the same time :). Since I did not, I decided that if it was not going to be a nice crisp vertical line between the two colours, I might better swirl it. I made some S-curves with a very long stick. I am very happy I did, the soap turned out very nice.
Two more tries later my intended vertical pour turned out perfect…
With kind regards,
Annemieke
That is so cool! Sometimes you have to think on your feet and switch up your design at the last second. I love when you get to cut it and see the beautiful design you made. 🙂
-Kelsey with Bramble Berry
Soap Crafting book: https://www.brambleberry.com/Soap-Crafting-Book.aspx