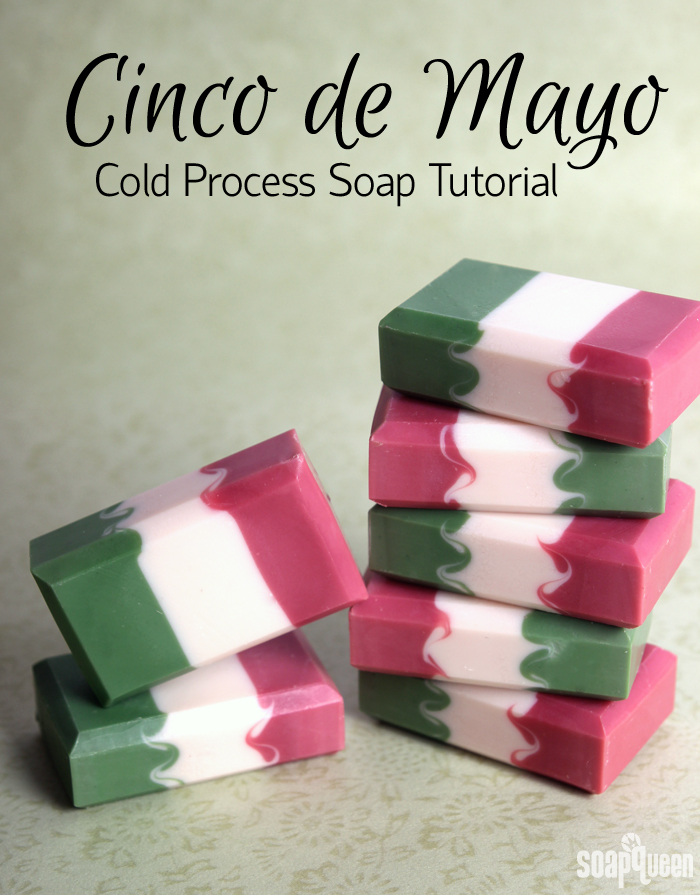
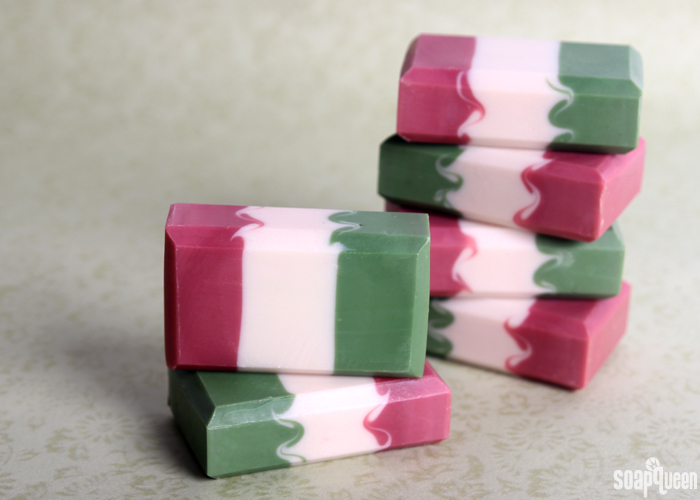
Soap inspiration can come from many places, including historical events! This soap was inspired by the Mexican flag to commemorate Cinco de Mayo. Cinco de Mayo celebrates the Mexican army’s victory over French Forces at the Battle of Puebla on May 5th, 1862. This design could also work as an Italian flag soap, or even a Christmas soap. Last year I made an American flag inspired soap, and it was much (much!) more difficult. =)
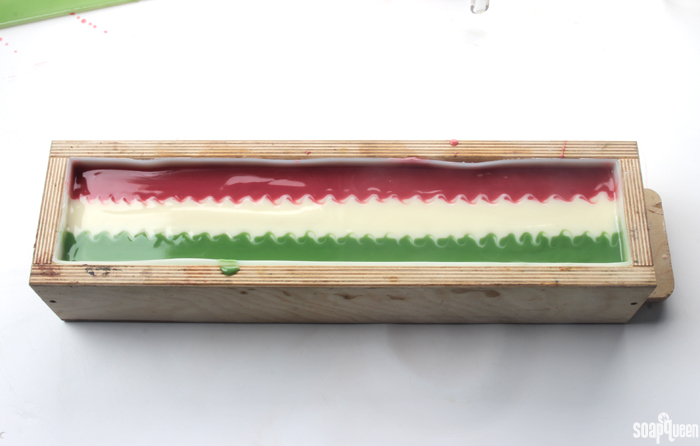
I used the Multi-Pour Sectioning Tool to create the white, red and green sections of soap. Then, I carefully swirled the very top to create more interest. This soap is scented with an amazing combination of Lime Fragrance Oil and Tobacco and Bay Leaf Fragrance Oil. The two fragrances blend together for a scent that’s bright and citrusy with sophisticated earthy notes. I’m always amazed at how well Tobacco and Bay Leaf Fragrance Oil blends with other fragrances! See more blend ideas here.
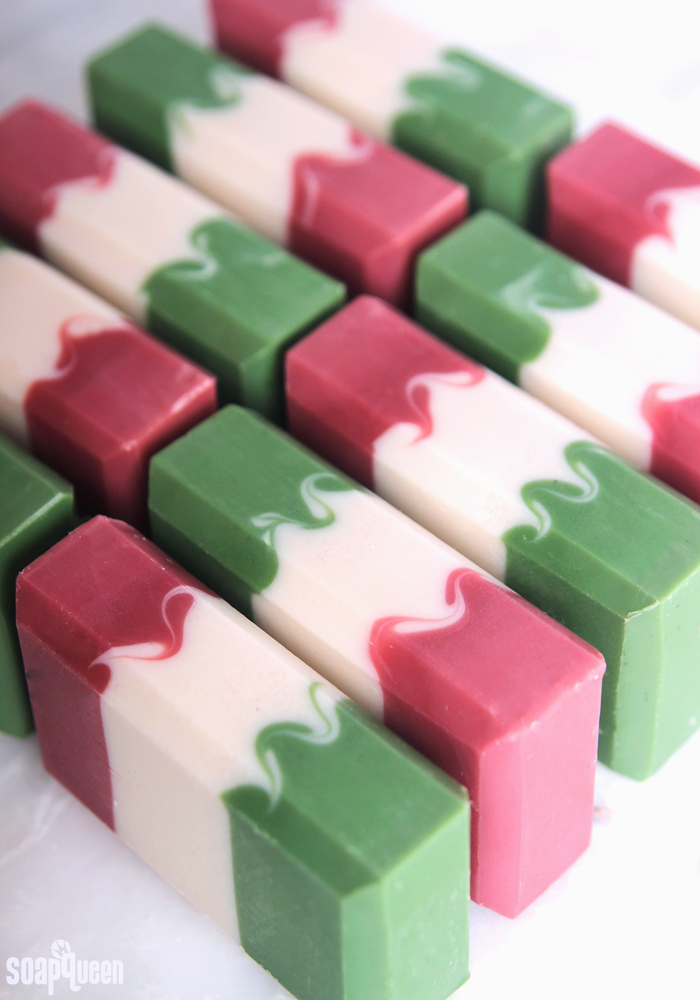
Recently, the Silicone Liner for the 5 lb Wood Mold was redesigned to be sturdier and easier to use. The redesign made it thicker. Because of this, the Multi-Pour Sectioning Tool will not work with the new Silicone Liner for the 5 lb Wood Mold; it only fits with the older, thinner version. If you only have the new, thicker version you can still use the Multi-Pour Sectioning Tool if you line your mold with freezer paper instead. See how to line the mold in this post.
What You’ll Need:
5 Pound Mold with Sliding Bottom
Silicone Liner for 5 lb Wood Mold (old version)
Multi-Pour Sectioning Tool
5.5 oz. Avocado Oil (10%)
8.3 oz. Canola Oil (15%)
13.8 oz. Coconut Oil (25%)
13.8 oz. Olive Oil (25%)
13.8 oz. Palm Oil (25%)
7.7 oz. Sodium Hydroxide Lye
18.2 oz. Distilled Water
Titanium Dioxide
Merlot Sparkle Mica
Electric Bubble Gum Colorant
Green Chrome Oxide Pigment
1.4 oz. Lime Fragrance Oil
1.6 oz. Tobacco & Bay Leaf Fragrance Oil

Click here to add everything you need for this project to your Bramble Berry shopping cart!
If you’ve never made Cold Process soap before, stop here! I highly recommend checking out our FREE four part SoapQueen.tv series on Cold Process Soapmaking, especially the episode on lye safety. And if you’d rather do some reading, Bramble Berry carries a wide range of books on the topic, including my newest book, Pure Soapmaking. You can also checkout the digital downloads for that instant gratification factor.
SAFETY FIRST: Suit up for safe handling practices! That means goggles, gloves and long sleeves. Make sure kids, pets, and other distractions and tripping hazards are out of the house or don’t have access to your soaping space. Always soap in a well-ventilated area.
COLOR PREP: To ensure that the Titanium Dioxide blends smoothly into the soap batter, we recommend micronizing it before dispersing it in oil. Please note this is an optional tip but it does help with the titanium dioxide clumping in the soap. =) To micronize colorant, simply use a coffee grinder to blend the colorant to break up any clumps of color and prevent streaks of white from showing in the final soap. We like to use a coffee grinder that has a removable, stainless steel mixing area for easy cleaning. Then, disperse 1 teaspoon of the colorant into 1 tablespoon of sunflower or sweet almond oil (or any other liquid oil). Then in separate containers, disperse 1 teaspoon of the Merlot Sparkle Mica, Electric Bubble Gum Colorant and Green Chrome Oxide into 1 tablespoon of lightweight liquid oil. Use a mini mixer to get rid of any clumps.
FRAGRANCE PREP: Measure 1.6 ounces of Tobacco & Bay Leaf Fragrance Oil and 1.4 ounces of the Lime Fragrance Oil into a glass, fragrance oil safe container.
MOLD PREP: This project requires the old version of the Silicone Liner for the 5 lb Wood Mold. If you have the new, thicker version of the liner (created in March 2016), the Multi-Pour Sectioning Tool will not fit in the mold. It only fits with the old, thinner version of the mold. If you have the new mold, good news! The Multi-Pour Sectioning Tool still fits great when this mold is lined with freezer paper. For tips on lining your mold, check out this blog post.
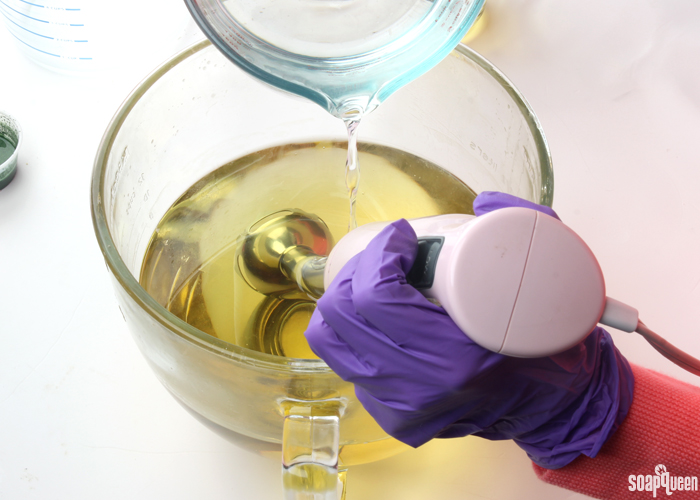
ONE: Slowly and carefully add the lye to the water and gently stir until the lye has fully dissolved and the liquid is clear. Set aside to cool.
TWO: Melt and combine the coconut oil, canola oil, avocado oil, olive oil, palm oils (remember to fully melt then mix your entire container of palm oil before portioning). Once the lye water and the oils have cooled to 130 degrees or below (and are ideally within 10 degrees of each other), add the lye water to the oils and stick blend until a very thin trace. If you’d like a harder bar of soap that releases faster from the mold, you can add sodium lactate to the cooled lye water. Use 1 teaspoon of sodium lactate per pound of oils in the recipe. For this recipe, you’d add about 3.5 teaspoons sodium lactate.
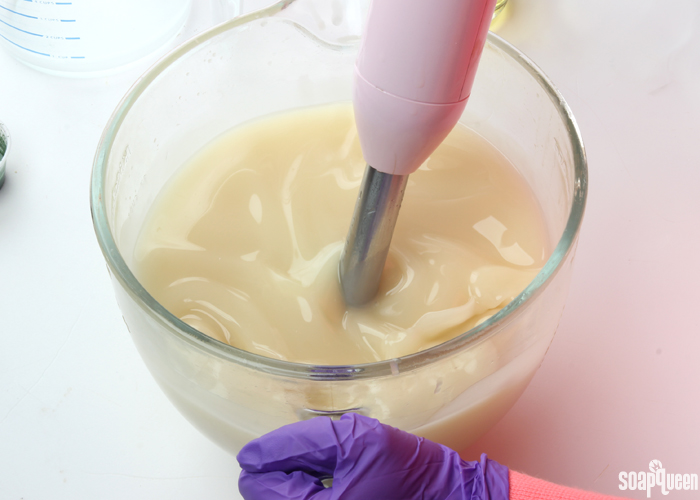
THREE: Once the batter has reached a thin trace, split the batch into three even containers.
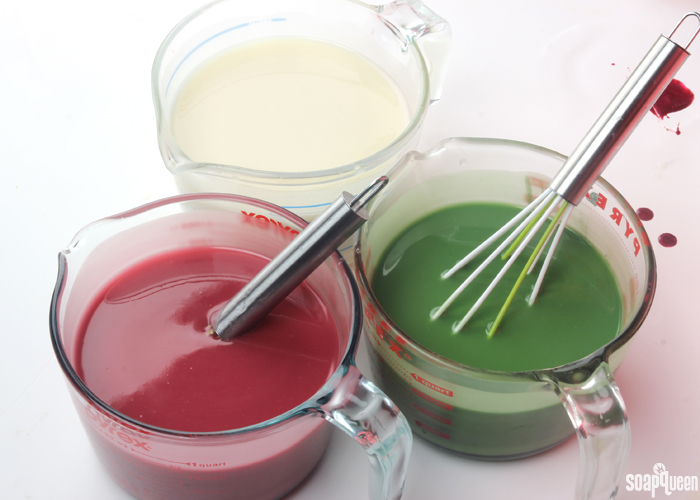
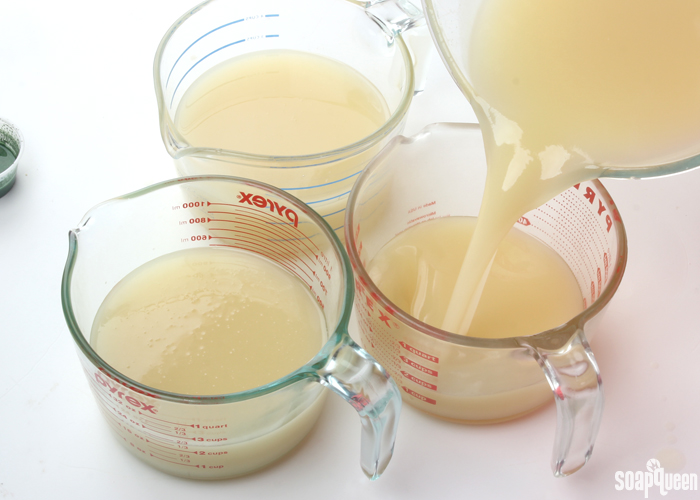 FOUR: Add the dispersed colorants in the following amounts to each container. Use a whisk to thoroughly mix in the colorants.
- Container A (White): All the dispersed titanium dioxide.
- Container B (Red): 2 tsp. dispersed Merlot Sparkle Mica + 1 tsp. Electric Bubble Gum Colorant
- Container C (Green): 1 tsp. dispersed Green Chrome Oxide.
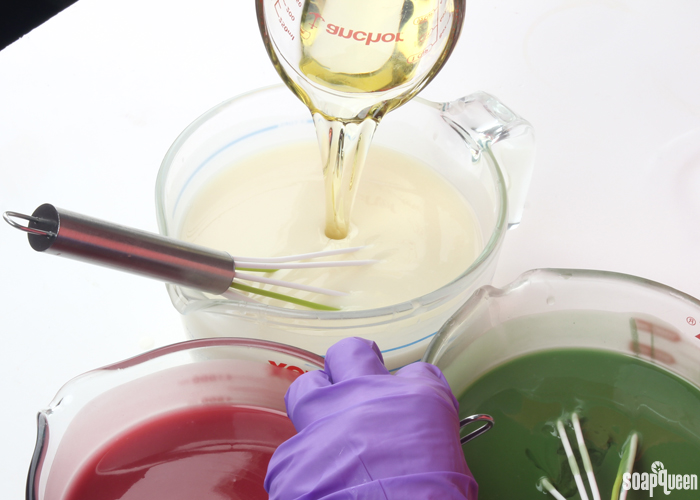
FIVE: Add the fragrance oil blend to each container equally, it’s okay to eyeball it. Use a whisk to thoroughly mix the fragrance.
SIX: If the soap is still very thin, give each container a few short bursts with the stick blender to thicken slightly. The mixture should be thin enough to pour and swirl, but having a little bit of thickness prevents the soap from seeping under the Multi Pour Sectioning Tool dividers. Begin pouring the various colors into the three sections. I like to pour a small amount of each color into each section, then move onto the next color to evenly fill up the sections. Be careful to not overfill any sections; you want each to have an equal amount of soap in each before you pull out the dividers to prevent on color from covering the color next to it.
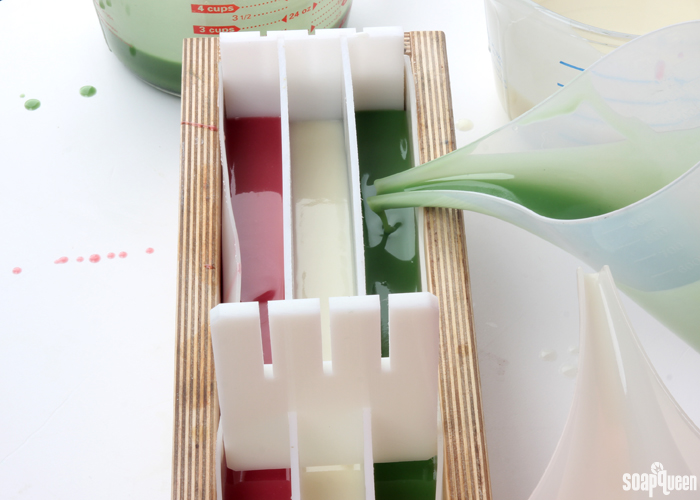
SEVEN: Once each section is full and level, remove the center piece up and out. Then, slowly and carefully pull the long center dividers up and out. Set aside. Finally, pull the small end liners straight out and set aside.
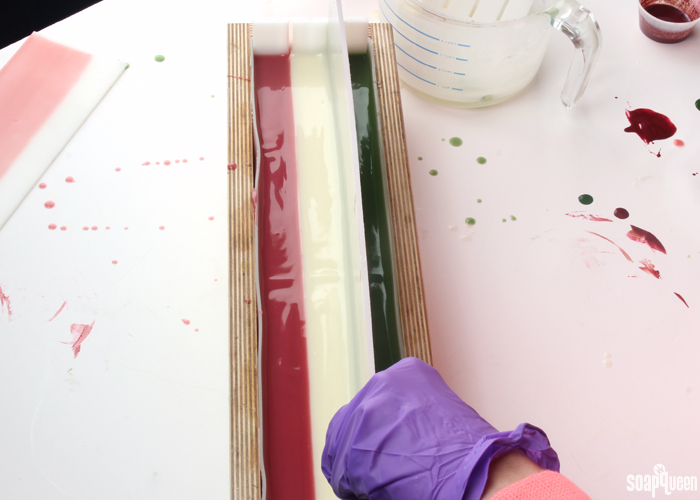
EIGHT: Insert a dowel or chopstick into the very top of the soap between the red and white stripes. Use a small “S” shaped curve to swirl the colors together all the way down the length of the mold. Repeat this swirl between the white and green stripes of soap.
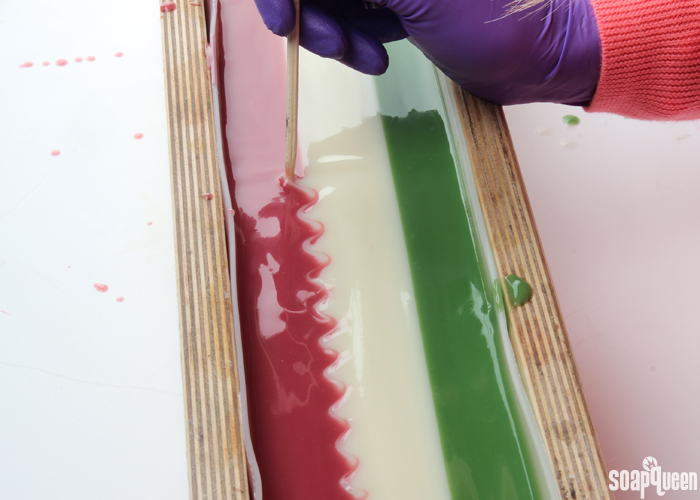
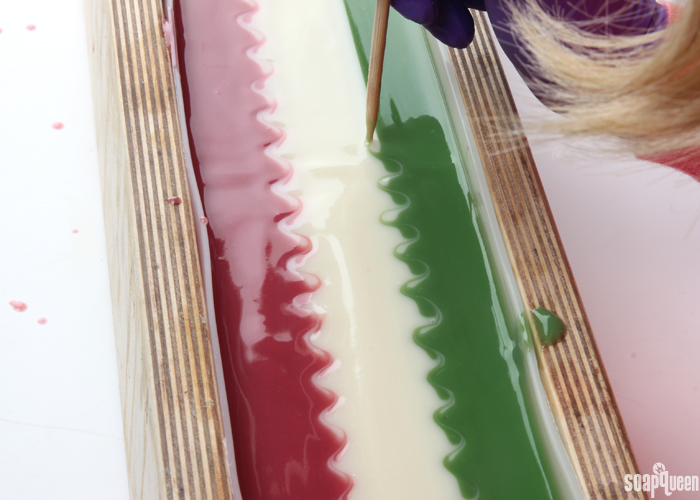
NINE: Spritz the top of the soap with 99% isopropyl alcohol to help prevent soda ash. To help the colors in this soap pop, I recommend promoting gel phase. Since my soaping area was on the cool side, I covered the soap with a lid and placed the mold on a heating pad set to medium for about 30 minutes. Then, I turned off the heating pad and let the soap sit covered overnight. Allow the soap to stay in the mold for 3-4 days. Remove from the mold, and cut into bars. Allow the bars to cure for 4-6 weeks to allow them to fully cure. Enjoy!
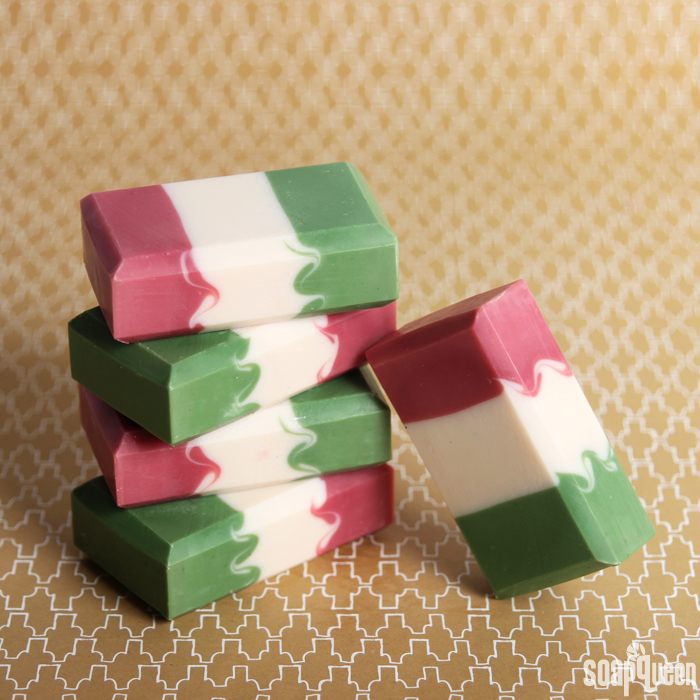
If you make this soap now, it will be fully cured for Cinco de Mayo. Have you ever made a flag inspired soap? I made the American flag last year, and it was quite tricky!
- 5 Pound Mold with Sliding Bottom
- Silicone Liner for 5 lb Wood Mold (old version)
- Multi-Pour Sectioning Tool
- 5.5 oz. Avocado Oil (10%)
- 8.3 oz. Canola Oil (15%)
- 13.8 oz. Coconut Oil (25%)
- 13.8 oz. Olive Oil (25%)
- 13.8 oz. Palm Oil (25%)
- 7.7 oz. Sodium Hydroxide Lye
- 18.2 oz. Distilled Water
- Titanium Dioxide
- Merlot Sparkle Mica
- Electric Bubble Gum Colorant
- Green Chrome Oxide Pigment
- 1.4 oz. Lime Fragrance Oil
- 1.6 oz. Tobacco & Bay Leaf Fragrance Oil
- Slowly and carefully add the lye to the water and gently stir until the lye has fully dissolved and the liquid is clear. Set aside to cool.
- Melt and combine the coconut oil, canola oil, avocado oil, olive oil, palm oils (remember to fully melt then mix your entire container of palm oil before portioning). Once the lye water and the oils have cooled to 130 degrees or below (and are ideally within 10 degrees of each other), add the lye water to the oils and stick blend until a very thin trace. If you’d like a harder bar of soap that releases faster from the mold, you can add sodium lactate to the cooled lye water. Use 1 teaspoon of sodium lactate per pound of oils in the recipe. For this recipe, you’d add about 3.5 teaspoons sodium lactate.
- Once the batter has reached a thin trace, split the batch into three even containers.
- Add the dispersed colorants in the following amounts to each container. Use a whisk to thoroughly mix in the colorants.
Container A (White): All the dispersed titanium dioxide.
Container B (Red): 2 tsp. dispersed Merlot Sparkle Mica + 1 tsp. Electric Bubble Gum Colorant
Container C (Green): 1 tsp. dispersed Green Chrome Oxide. - Add the fragrance oil blend to each container equally, it’s okay to eyeball it. Use a whisk to thoroughly mix the fragrance.
- f the soap is still very thin, give each container a few short bursts with the stick blender to thicken slightly. The mixture should be thin enough to pour and swirl, but having a little bit of thickness prevents the soap from seeping under the Multi Pour Sectioning Tool dividers. Begin pouring the various colors into the three sections. I like to pour a small amount of each color into each section, then move onto the next color to evenly fill up the sections. Be careful to not overfill any sections; you want each to have an equal amount of soap in each before you pull out the dividers to prevent on color from covering the color next to it.
- Once each section is full and level, remove the center piece up and out. Then, slowly and carefully pull the long center dividers up and out. Set aside. Finally, pull the small end liners straight out and set aside.
- Insert a dowel or chopstick into the very top of the soap between the red and white stripes. Use a small “S” shaped curve to swirl the colors together all the way down the length of the mold. Repeat this swirl between the white and green stripes of soap.
- Spritz the top of the soap with 99% isopropyl alcohol to help prevent soda ash. To help the colors in this soap pop, I recommend promoting gel phase. Since my soaping area was on the cool side, I covered the soap with a lid and placed the mold on a heating pad set to medium for about 30 minutes. Then, I turned off the heating pad and let the soap sit covered overnight. Allow the soap to stay in the mold for 3-4 days. Remove from the mold, and cut into bars. Allow the bars to cure for 4-6 weeks to allow them to fully cure. Enjoy!



Sharing this to give folks a visual giggle. I just purchased the multi-pour sectioning tool and since we are past Cinco de Mayo I thought I would change this up and use your lovely Clover and Aloe scent and go with a green (chrome green), white, and yellow (fizzy lemonade) color combo. All went just wonderful and the Clover and Aloe behaved SOOOO nicely – no acceleration. My log molds are handmade by my hubby to save me a penny or two so we had to modify the braces of the tool to fit – but that was easy as well. Everything went great until I needed to pull out the long dividers. Then, my gloves REFUSED to let me get a grip. I could not, for the life of me, get them to pull straight up without slipping. Since I’m not yet a very advanced soaper, and having already experienced a “soap on a stick” event when my soap accelerated too fast, I was terrified I was going to suddenly have everything stuck together! Long story short, I ended up having to grab a couple of terry cloth rags I keep handy and use those to get a grip on the edges to pull them out. (One more reason to be very sure to wear safety equipment because my gloves were COVERED with soap batter before I was done.) Though I got a few drips and drops across the top of the soap, the lines were FABULOUS! I quickly did the swirl and put the soap to bed. Thank GOODNESS for the low acceleration!!! I cannot WAIT to do this again. It was SUCH A RUSH to see those beautiful lines and so EASILY be able to make an interesting swirl!! Next time I’ll just be sure I keep my set of surgical clamps nearby so I can quickly snip them onto the edges to pull out the liners. I LOVE this tool and this recipe is WONDERFUL!
Oh my gosh, that is so funny! Gloves can get pretty covered and slippery during the soapmaking process so that can definitely happen. I’m glad the lines turned out perfectly though! Just took a little bit of thinking on your feet. 😉
-Kelsey with Bramble Berry
Clover and Aloe Fragrance Oil: https://www.brambleberry.com/clover-and-aloe-fragrance-oil-p6493.aspx
Green Chrome Oxide: https://www.brambleberry.com/Green-Chrome-Oxide-Pigment-P4042.aspx
Fizzy Lemonade Colorant: https://www.brambleberry.com/Fizzy-Lemonade-Colorant-P4965.aspx
I ordered this kit as soon as I saw it but it won’t arrive until Monday, which doesn’t give me time to make the soap and let it cure before May 5, so I am planning to do CPOP. I have the older silicon liner for my 5 lb wood mold but I think I’ll line with freezer paper to be safe. My oven tends to run a little hot, so I will set it t 160 instead of 170. (I’ve used 170 for an hour to force gel stage without problems, but if 160 will do the job, I’d rather not take chances.) I’ve read the CPOP tutorial an I think this will work. Is there anything you can think of, that I could be forgetting?
Hi Sandra!
It sounds like you have all the bases covered! We recommend using freezer paper instead of the silicone liner, as silicone can cause air bubbles in the soap. Also, the 160F temperature setting sounds perfect! The only thing I would recommend is checking the soap after 30 minutes just to make sure it’s not getting too hot. 🙂
Get more CPOP tips here: https://www.soapqueen.com/bath-and-body-tutorials/cold-process-soap/hot-process-series-cpop-swirls/
And this post is really helpful for lining molds: https://www.soapqueen.com/bath-and-body-tutorials/cold-process-soap/how-to-line-any-mold/
-Kelsey with Bramble Berry
Hi! I have just started soaping (made 1 batch so far), and am very excited about it but trying to take it slowly. I have read your book Pure Soap Making and many of your tutorials. My question is, for recipes like this, in which the focus seems to be the color or design of the soap, can you just use the basic soap recipe? Or do the colors and layering techniques that you show require the specific oils that you use in that recipe? I understand that all of the oils contribute different properties to the soap, but am curious if the basic recipe can be substituted, at least while I am learning. Thank you!
Hi Sarah!
That’s a great question! We formulate our recipes for the color and fragrance we’re using. For instance, if we’re doing a swirled design, we like to make a recipe with softer oils. Softer oils don’t thicken as quickly, so we have more time to work. If the fragrance oil accelerates at all, we can work that into our design.
That being said, you can use these recipes as is without any color or fragrance! The color and fragrance are additives and not necessary to the recipe. That’s a great way to start out soaping. You can get familiar with the process before trying out scents and color. 🙂
Read more about Formulating Cold Process Recipes here: http://www.soapqueen.com/bath-and-body-tutorials/tips-and-tricks/formulating-cold-process-recipes/
Have fun trying out some new recipes Sarah! Soapmaking is such a blast. If you have any other questions, definitely let us know. We’re happy to help!
-Kelsey with Bramble Berry
Pure Soapmaking: https://www.brambleberry.com/Pure-Soap-Making-How-to-Create-Nourishing-Natural-Skin-Care-Soaps-P6298.aspx
Thank you!
You’re welcome! 🙂
Very nice, yet simple. I love it! Do you have a tutorial on the American flag you did? I was going to attempt one in Mid May and I have an idea how to layer the red and white and even the dark blue and even an idea for the stars, but it is just an idea and a complex one at that. I’ve not attempted a soaping project as seemingly difficult as the American flag.
Thanks!
Thanks James, so glad you love the soap! The American flag soap was a tutorial in our newsletter. I will go ahead and forward that to you. I would definitely recommend signing up for our newsletter. It has exclusive tutorials, and lets you know about sales ahead of time. 🙂
Newsletter sign up: http://brambleberry.us8.list-manage2.com/subscribe?u=5f458c38151804741776ae8de&id=4130d6c9f1
-Kelsey with Bramble Berry