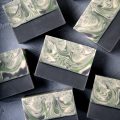
We are so excited about our new swirl tools that we went on a bit of a soaping spree with them (and by ‘spree‘, I mean I made well over 90 pounds of soap in three weeks with them just to try out new techniques). We started with the Frog Foot, continued with the Butterfly Swirl and now we’re bringing you this fabulous French Curl. Inspired by a paper marbling technique, this pattern translates beautifully in soap. This soap also has scent blend reminiscent of a gourmet meal: a savory blend of Litsea, Black Pepper and Basil essential oil is a sprightly, uplifting somewhat masculine scent.

What You’ll Need:
24 oz. Coconut Oil
16 oz. Palm Oil
16 oz. Olive Oil
4 oz. Sesame Oil
12 oz. Sweet Almond Oil
8 oz. Meadowfoam Oil
11.2 oz. Sodium Hydroxide
26.4 oz. distilled water
18-Bar Unfinished Birchwood Mold with Liner
Fragrance Blend of: 2.55 oz. Litsea Essential Oil, 1.7 oz. Pure Basil Essential Oil and .8 oz. Black Pepper Pure Essential Oil
Click here to add everything you need for this project to your Bramble Berry shopping cart! And remember, you can always edit the cart to take out things you already own.
If you’ve never made Cold Process soap before, stop here! I highly recommend checking out our FREE four part SoapQueen.tv series on Cold Process Soapmaking, especially the episode on lye safety. And if you’d rather do some reading, Bramble Berry carries a wide range of books on the topic, including my newest book, Soap Crafting. You can also checkout the digital downloads for that instant gratification factor.
SAFETY FIRST: Suit up for safe handling practices! That means goggles, gloves and long sleeves. Make sure kids, pets, and other distractions and tripping hazards are out of the house or don’t have access to your soaping space. Always soap in a well-ventilated area.
COLOR PREP: Disperse 1 teaspoon of each pigment into 1 tablespoon of Sweet Almond or Sunflower Oil. Prepping your colors in the beginning will allow you to work quickly and give you more time to work with your soap. Use the mini mixer to get all those clumps worked out smoothly.
FRAGRANCE PREP: In a glass container, combine the Litea, Basil and Black Pepper Essential Oils. Give the mixture a good stir, and then set it aside.
ONE: Slowly and carefully add the lye to the water, and stir until clear. Set aside to cool. If you’d like a harder bar of soap that lasts longer in the shower, you can add Sodium Lactate to the cooled lye water. Use 1 teaspoon of Sodium Lactate per pound of oils in the recipe.
TWO: Melt and combine the Coconut, Olive, Sesame, Sweet Almond, Meadowfoam and Palm oils in a large glass container. Once the lye water and the oils have cooled to 130 degrees or below (and are ideally within 10 degrees of each other), add the lye water to the oils and stick blend until thin trace.
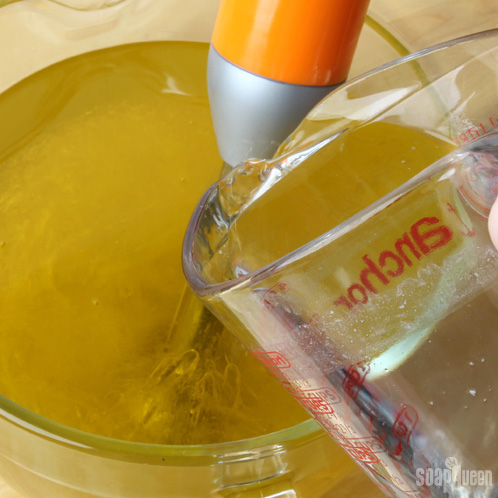
THREE: Once you’ve reached an extremely thin trace, split the batter equally into five separate containers.
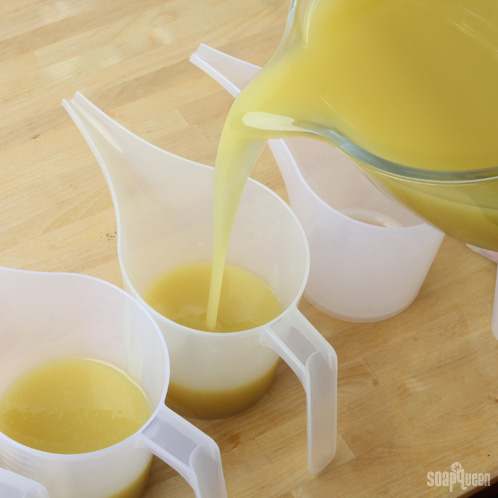
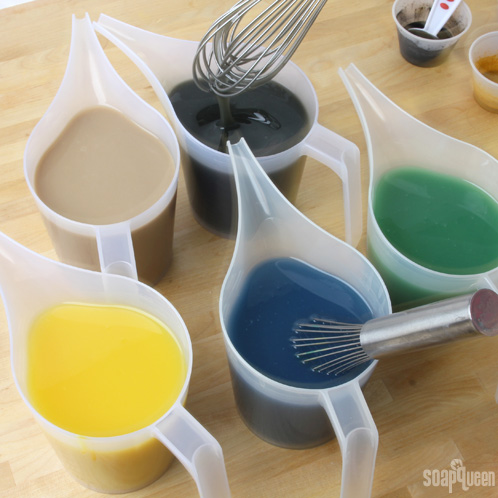
FOUR: Add one color per container in the following amounts. Stir in with a wire whisk or spatula:
- 2 teaspoons dispersed Fizzy Lemonade
- 1/2 teaspoon dispersed Ultramarine Blue
- 1 teaspoon dispersed Hydrated Chrome Green
- 1 1/2 teaspoons dispersed Activated Charcoal
- 1/2 teaspoon dispersed Cappuccino Mica, 1 1/4 teaspoons Titanium Dioxide, 1/4 teaspoon dispersed Yellow Oxide
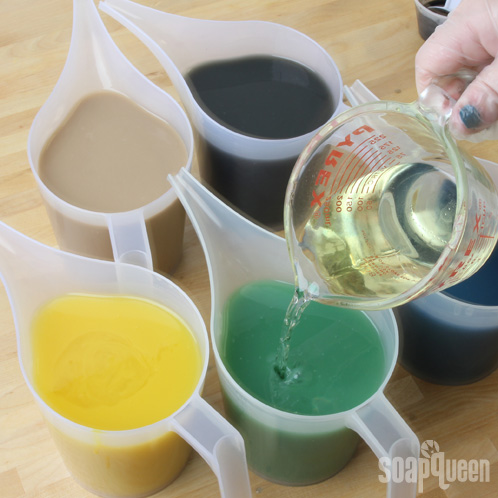
FIVE: Split the fragrance blend equally between the 5 containers. Mix in the blend with a wire whisk or spatula, and note that the blend may thin the trace. If you need to, you can lightly stick blend the batters.
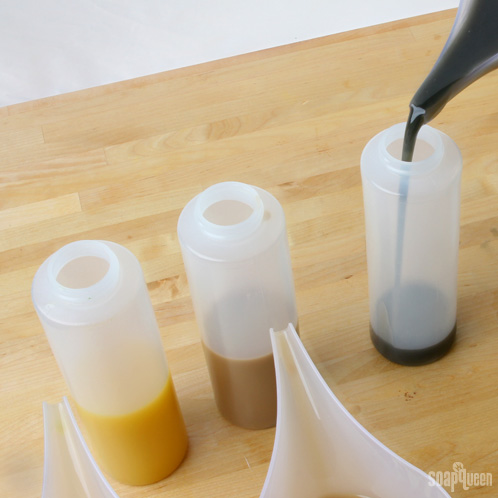
SIX: Fill 5 condiment bottles about 6 oz. of soap batter. Pour one color per bottle and then set them aside.
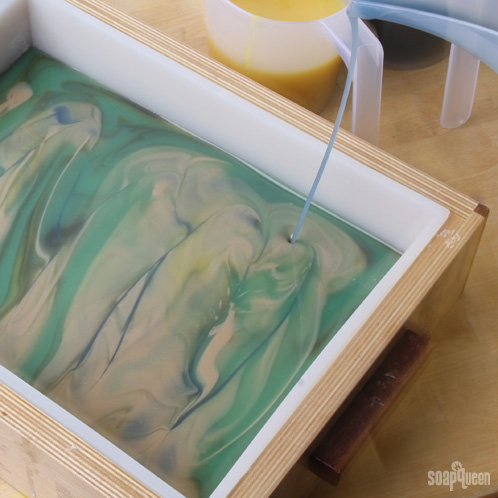
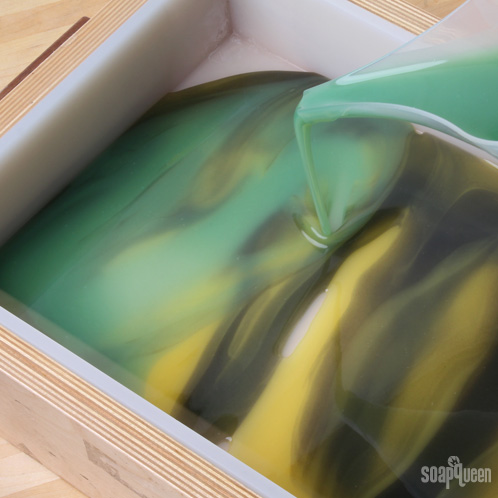
SEVEN: Pour soap from the 5 container one by one into the mold. We poured in a zig-zag pattern down the length of the mold, starting in the top left-hand corner and working our way down to the bottom right-hand corner. Repeat this pattern with all the colors in the same order until you’ve emptied the containers.
EIGHT: Now turn the mold horizontally and begin pouring your squirt bottle colors. Squirt a layer of each color into the mold in the same order until you’ve emptied all the bottles.
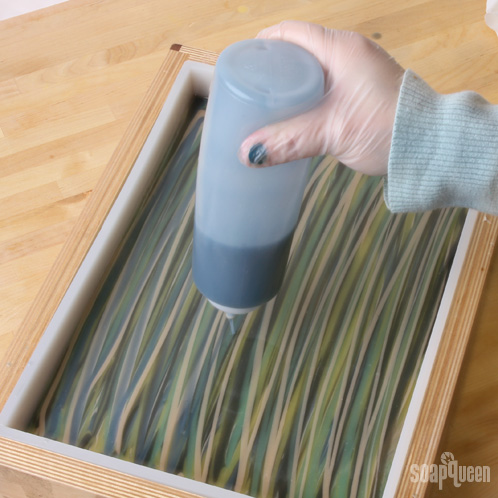
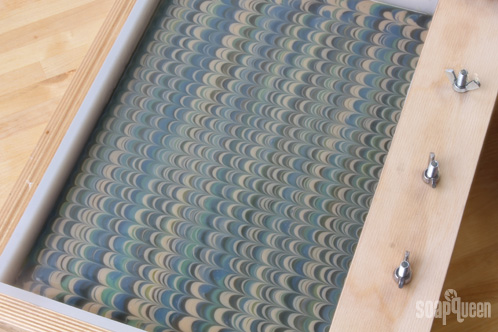
NINE: Use the Comb Swirl Tool to create the initial pareil pattern in the soap by dragging once down through the soap lines.
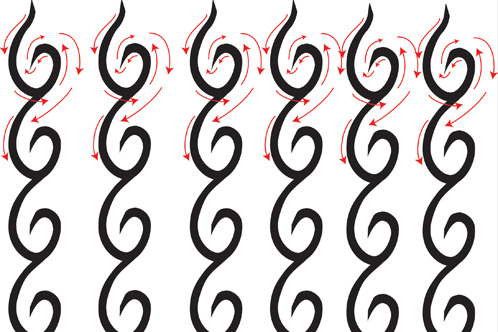
TEN: Next, use the Easy Swirl Tool to make a looping 6 pattern from the top to the bottom of the mold. See the diagram below.
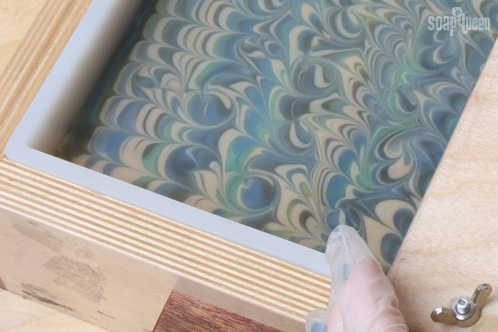
Spray with Isopropyl Alcohol to reduce soda ash and then cover and insulate for 24 hours. Unmold after 3 – 4 days and then allow to cure for 4 – 6 weeks. You can see from the photo below that the ‘side cut’ of the bars looks amazing too. Enjoy!




How much activated charcoal should you use to get black soap without black bubbles?
Thanks!
Heather
Hi Heather!
The amount of charcoal we used in this recipe was 1 1/2 teaspoons dispersed in one tablespoon Sweet Almond Oil. We found this amount did not result in a colored lather. In general, the recommended usage rate is 1/2 tsp. of colorant per pound of cold process soap. I hope this helps!
You may find these blog posts about natural colorants helpful!
Sunday night Spotlight: Natural Colorants:
http://www.soapqueen.com/bramble-berry-news/sunday-night-spotlight-natural-colorants/
-Amanda with Bramble Berry
thanks!!!! 🙂
I love the long spouted containers that you mixed your color in. Where did you get them? I would like to purchase some. Thanks!
Hi Anna! You’re in luck, we actually sell them at Bramble Berry! 🙂
Easy Pour Mixing and Measuring Container: https://www.brambleberry.com/Easy-Pour-Mixing-and-Measuring-Container-P5428.aspx
Happy Soaping!
-Amanda with Bramble Berry
I love this blog and all the tutorials. But I would love to see more easy-intermediate cold process tutorials. Being that I am new to soap making (and love it thanks to Anne Marie and BB.com) I dont have all the gadgets yet and really only comfortable making 2lb batches right now. Would also love to see some new Soap Queen TV videos too, I think Ive watched them all 3 times now. LOL 🙂
Hi Sabrina!
Thank you so much for the suggestion, it is actually something that we are trying to do, and if you are interested in finding more intermediate type bath-and-body recipes, check this link out:
http://www.soapqueen.com/tag/intermediate/
While most of those recipes are not cold-process, we are working to get some easier ones for those just starting out and appreciate your suggestion!
Be sure to subscribe to the Soap Queen TV channel so you know when the next video is released.
http://www.youtube.com/user/soapqueentv
Thank you again for being an amazing part of our soapmaking community and if you are able to get any fun photos of your projects, we’d love for you to share them on Bramble Berry’s Facebook page.
https://www.facebook.com/BrambleBerry
Happy Soaping!
-Becky with Bramble Berry
I just gave my new swirl tool kit a spin on Sunday and had not-so-great results (all my fault). So I have a half-filled 9-bar mold (problem#1 – batch size too small) with overly-pigmented soap (problem#2 – got a bit too enthusiastic with the colors). If I made another batch and poured it over the first, would there potentially be issues with cohesion between the layers? Or would it be better to slice up the batch and use the pieces as embeds in another batch? I think the bright colors might be pretty fun as embedded pieces in a white soap.
Next chance I get, I’m going to give it another try; the swirl tools performed well but I unfortunately didn’t! 🙂
Good morning, Elizabeth!
We have actually poured two layers of cold process soap at different times, so there shouldn’t be too much issue with cohesion in your batch. But, you can totally cut up this batch and use it as festive embeds! We are here to help you out, and if you have any questions, don’t hesitate to ask. =)
-Becky with Bramble Berry
What for a gorgeous swirl! I love it 🙂
Hi Claudia!
Thank you so much for dropping by and taking a look at our French Curl Cold Process Tutorial. We’d love to hear more about your soaping adventures and if you have any pictures of your soapy projects, be sure to share them with us on Bramble Berry’s Facebook page. =)
-Becky with Bramble Berry
https://www.facebook.com/BrambleBerry
Thanks for the great tutorial! The swirling tools are on my wish list. Thanks for all of the fun ideas for using them. I still haven’t tried the Peacock Swirl yet, and now I can add the Frog Foot and the French Curl swirls to my to-do list, too!
Hi Jenny!
We can’t wait for you to get the swirling tools, they are just so much fun and can make all your swirling designs a breeze! =)
-Becky with Bramble Berry
Wow! That soap looks amazing! This maybe the impetus I need to start making my own soap finally. Can you recommend a good recipe for a beginner that’s not completely boring. I’ve been making bath and body products for awhile, but am new to cold process.
Thanks a ton,
Amanda
Hi Amanda!
You can do it! We are here to help you out on every step of the way, and if you have any questions, don’t hesitate to ask. Here are a couple of beginning cold process recipes that you can play around with:
Free Beginner’s Guide To Soapmaking: Cold Process: http://www.soapqueen.com/bath-and-body-tutorials/cold-process-soap/free-beginners-guide-to-soapmaking-cold-process/
Fall Sweater Stripes (Tutorial): http://www.soapqueen.com/bath-and-body-tutorials/cold-process-soap/fall-sweater-stripes-tutorial/
Easy Cold Process Soap Rocks – Palm Free!: http://www.soapqueen.com/bath-and-body-tutorials/cold-process-soap/easy-cold-process-soap-rocks-palm-free/
Holiday Soap Cubes: http://www.soapqueen.com/bath-and-body-tutorials/cold-process-soap/holiday-soap-cubes/
I hope this helps! =)
-Becky with Bramble Berry
never mind I see…drag it across the lines
Thanks 🙂
Hi Joan!
We were glad you were able to figure it out and hope you get a chance to use the new swirling tools. If so, be sure to give us your feedback. =)
-Becky with Bramble Berry
how do I use the tool?
Good morning, Joan!
In each recipe, we show how to use the new swirl tools in different ways, so be sure to check out the tutorials in our cold process section for more information on these new tools.
Cold Process Recipes: http://www.soapqueen.com/category/bath-and-body-tutorials/cold-process-soap/
-Becky with Bramble Berry
That tool is fantastic! Once the holidays are over may just ahve to buy one 🙂
Hi Pam!
We just love our new swirling tools and hope you get a chance to try them out. =)
-Becky with Bramble Berry