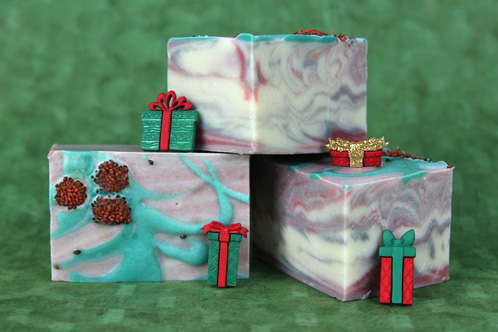
We’re continuing our Christmas-y cold process kick because of the 4-6 week cure time required for cold process recipes. On Tuesday we showed you the absolutely delectable Holiday Cookie Bar recipe and today we’re introducing the festive Holly Berry design. For this project we used squirt bottles to make fun holly leaf designs on top of a two color in-the-pot-swirl, and then we garnished it with real cranberry seeds to mimic plump holly berries. We fragranced with Fresh Snow Fragrance Oil, which performed beautifully in our recipe and smells airy and clean — just like freshly fallen snow!
What You’ll Need:
Silicone Square Tray Mold
2 oz. Avocado Butter
8 oz. Coconut Oil
10 oz. Olive Oil
8 oz. Palm Oil
2 oz. Palm Kernel Flakes
6 oz. Rice Bran Oil
4 oz. Sweet Almond Oil
5.5 oz. Sodium Hydroxide
13.2 oz. distilled water
Cranberry Seeds
Hydrated Chrome Green
Titanium Dioxide
Merlot Sparkle Mica
Electric Bubblegum
Super Pearly White
Activated Charcoal
1.8 oz. Fresh Snow Fragrance Oil
Click here to add everything you need for this project to your Bramble Berry shopping cart!
If you’ve never made Cold Process soap before, stop here! I highly recommend checking out our FREE four part SoapQueen.tv series on Cold Process Soapmaking, especially the episode on lye safety. And if you’d rather do some reading, Bramble Berry carries a wide range of books on the topic, including my newest book, Soap Crafting. You can also checkout the digital downloads for that instant gratification factor.
SAFETY FIRST: Suit up for safe handling practices! That means goggles, gloves and long sleeves. Make sure kids, pets, and other distractions and tripping hazards are out of the house or don’t have access to your soaping space. Always soap in a well-ventilated area.
COLOR PREP: To ensure that the Titanium Dioxide blends smoothly into the soap batter, we recommend micronizing it before dispersing it in oil. Please note this is an optional tip but it does help with the titanium dioxide clumping in the soap =) To micronize colorant, simply use a coffee grinder to blend the colorant to break up any clumps of color and prevent streaks of white from showing in the final soap. We like to use a coffee grinder that has a removable, stainless steel mixing area for easy cleaning. Disperse 1 teaspoon all colorants except the Super Pearly White into 1 tablespoon of liquid oil (we like Sweet Almond or Sunflower). Make a double batch of the Super Pearly White by mixing two teaspoons of colorant into 2 tablespoons of oil. Prepping your colors in the beginning will allow you to work quickly and give you more time to work with your soap. Use the mini mixer to get all those clumps worked out smoothly.
ONE: Slowly and carefully add the lye to the water, and stir until clear. Set aside to cool. If you’d like a harder bar of soap that lasts longer in the shower, you can add Sodium Lactate to the cooled lye water. Use 1 teaspoon of Sodium Lactate per pound of oils in the recipe.
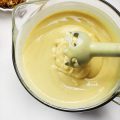
TWO: Begin by melting down the Palm Kernel Flakes in the microwave on 30 second bursts. Then, combine the melted Palm Kernel Flakes with the melted Avocado Butter, Coconut Oil, Olive Oil, Palm Oil, Rice Bran Oil and Sweet Almond Oil in a large glass container. Once the lye water and the oils have cooled to 130 degrees or below (and are ideally within 10 degrees of each other), add the lye water to the oils and stick blend until thin trace.
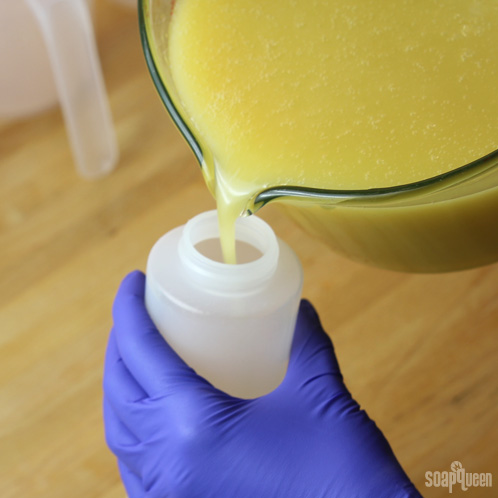
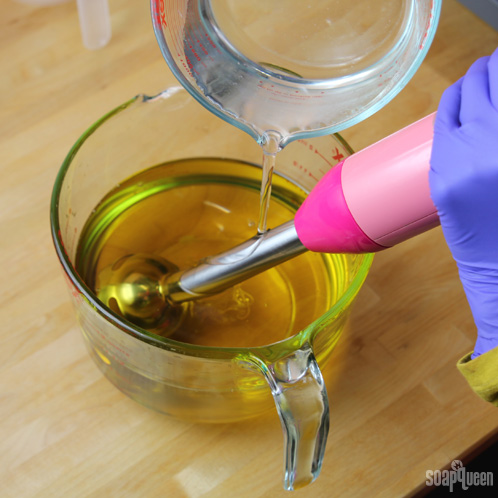 THREE: Pour approximately 2 – 3 oz. of soap batter into a condiment bottle and color with 1 teaspoon of dispersed Hydrated Chrome Green. Plug the tip with your finger and then shake vigorously. Release your finger with the tip pointing away from your face and then set aside.
 FOUR: In two additional containers, pour off about 2 cups each. You should have about 4 cups left in the original container.
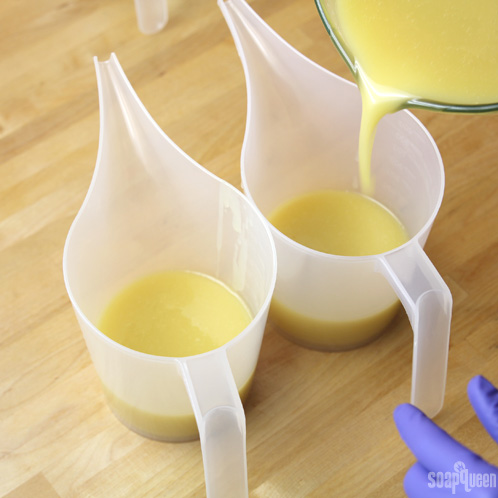 FIVE: Add the following colorants to the three containers:
- 2 teaspoons dispersed Super Pearly White in the original container.
- 3 teaspoons dispersed Merlot Sparkle Mica and 1/2 teaspoon Electric Bubblegum in one of the 2-cup containers.
- 3 teaspoons dispersed Super Pearly White and 1/4 teaspoon dispersed Activated Charcoal in the remaining 2-cup container.
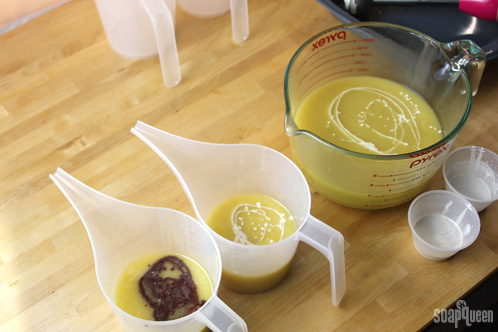
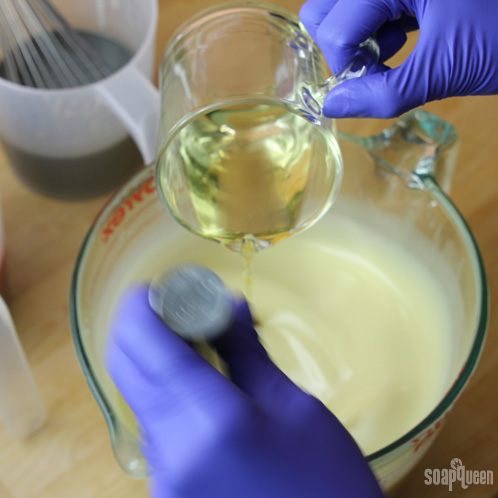
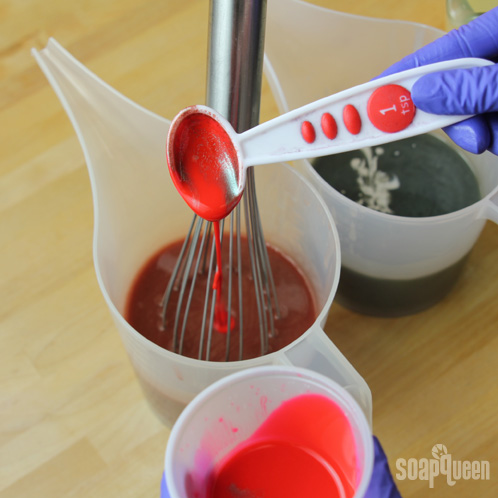 SIX: Using a wire whisk or spoon, split the fragrance equally among the 3 containers.
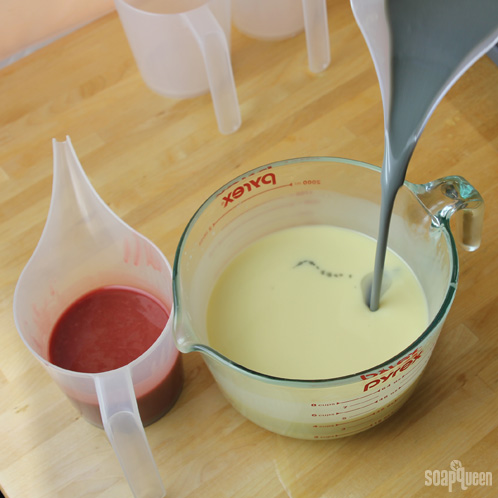
 SEVEN:For the in-the-pot swirl, start by pouring the grey colored soap into the Titanium Dioxide colored soap in 4 places: 12:00 o’clock, 4:00 o’clock, 8:00 o’clock, and center. Repeat with the Merlot Sparkle Mica. Pour from a high point so that the soap penetrates the entire depth of the soap in the pot, which will create a swirl throughout the soap.
 EIGHT: Using a spatula, chopstick or dowel, swirl the soap by running the tool through each of the entry points once. Only once! You want to swirl but not mix the soap.
 NINE: After you’ve swirled the soap, slowly pour the batter into the mold. We started pouring in the upper left hand corner and moved diagonally to the bottom right hand corner.

We’ve even got a video of this pour too!
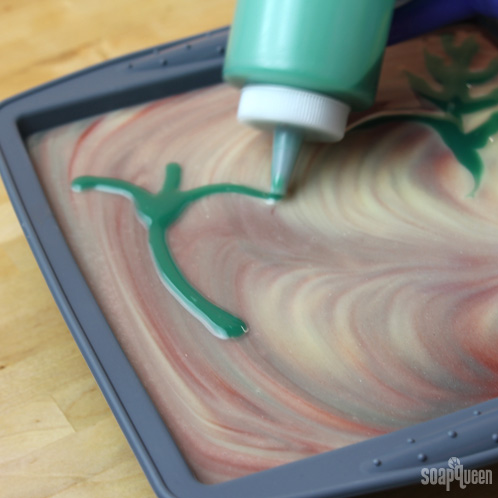
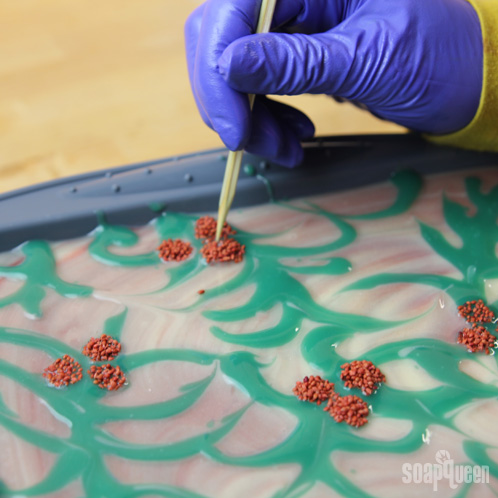
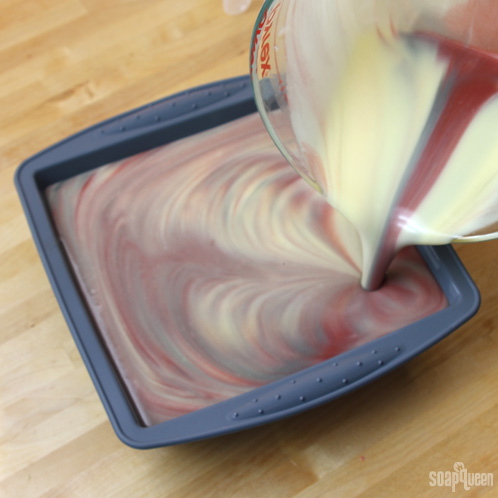 TEN: Now use the condiment bottle to “draw” holly leaf designs on the surface of the soap. We free-handed our designs, so have fun with this part!
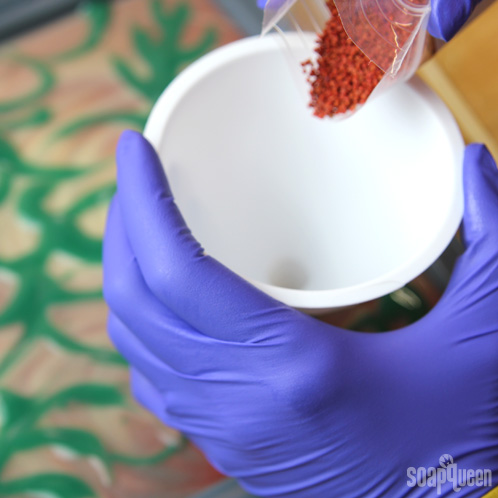
 ELEVEN: Once you’re satisfied with your leaves, pour the Cranberry Seeds as berries. In order to get little round berries that were relatively the same shape, we poured the seeds through an 8 oz. Funnel.
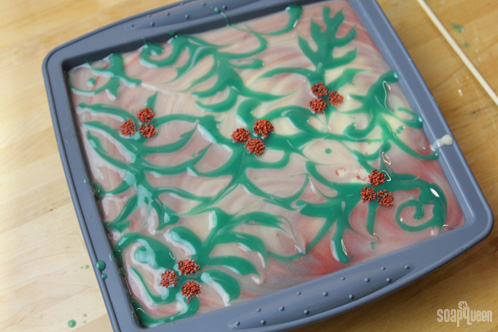 TWELVE: We recommend keeping a chopstick or pair of tweezers on hand to clean up any stray seeds. That will help you keep your “berries” looking like berries and not scattered bunches of seeds!
Spray the entire top with 91% Isopropyl Alcohol to help prevent soda ash. Cover and insulate for 24 hours and unmold after 3-4 days. Allow to cure for 4-6 weeks and enjoy!
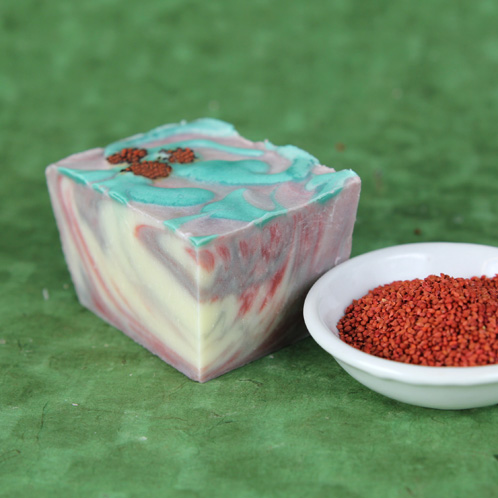 Bonus: Check out the cut of this soap below!
- Silicone Square Tray Mold
- 2 oz. Avocado Butter
- 8 oz. Coconut Oil
- 10 oz. Olive Oil
- 8 oz. Palm Oil
- 2 oz. Palm Kernel Flakes
- 6 oz. Rice Bran Oil
- 4 oz. Sweet Almond Oil
- 5.5 oz. Sodium Hydroxide
- 13.2 oz. distilled water
- Cranberry Seeds
- Hydrated Chrome Green
- Titanium Dioxide
- Merlot Sparkle Mica.
- Electric Bubblegum
- Super Pearly White
- Activated Charcoal
- 1.8 oz. Fresh Snow Fragrance Oil
- SAFETY FIRST: Suit up for safe handling practices! That means goggles, gloves and long sleeves. Make sure kids, pets, and other distractions and tripping hazards are out of the house or don’t have access to your soaping space. Always soap in a well-ventilated area.
- COLOR PREP: To ensure that the Titanium Dioxide blends smoothly into the soap batter, we recommend micronizing it before dispersing it in oil. Please note this is an optional tip but it does help with the titanium dioxide clumping in the soap =) To micronize colorant, simply use a coffee grinder to blend the colorant to break up any clumps of color and prevent streaks of white from showing in the final soap. We like to use a coffee grinder that has a removable, stainless steel mixing area for easy cleaning. Disperse 1 teaspoon all colorants except the Super Pearly White into 1 tablespoon of liquid oil (we like Sweet Almond or Sunflower). Make a double batch of the Super Pearly White by mixing two teaspoons of colorant into 2 tablespoons of oil. Prepping your colors in the beginning will allow you to work quickly and give you more time to work with your soap. Use the mini mixer to get all those clumps worked out smoothly.
- Slowly and carefully add the lye to the water, and stir until clear. Set aside to cool. If you’d like a harder bar of soap that lasts longer in the shower, you can add Sodium Lactate to the cooled lye water. Use 1 teaspoon of Sodium Lactate per pound of oils in the recipe.
- Begin by melting down the Palm Kernel Flakes in the microwave on 30 second bursts. Then, combine the melted Palm Kernel Flakes with the melted Avocado Butter, Coconut Oil, Olive Oil, Palm Oil, Rice Bran Oil and Sweet Almond Oil in a large glass container. Once the lye water and the oils have cooled to 130 degrees or below (and are ideally within 10 degrees of each other), add the lye water to the oils and stick blend until thin trace.
- Pour approximately 2 – 3 oz. of soap batter into a condiment bottle and color with 1 teaspoon of dispersed Hydrated Chrome Green. Plug the tip with your finger and then shake vigorously. Release your finger with the tip pointing away from your face and then set aside.
- In two additional containers, pour off about 2 cups each. You should have about 4 cups left in the original container.
- Add the following colorants to the three containers:
2 teaspoons dispersed Super Pearly White in the original container.
3 teaspoons dispersed Merlot Sparkle Mica and ½ teaspoon Electric Bubblegum in one of the 2-cup containers.
3 teaspoons dispersed Super Pearly White and ¼ teaspoon dispersed Activated Charcoal in the remaining 2-cup container. - Using a wire whisk or spoon, split the fragrance equally among the 3 containers.
- For the in-the-pot swirl, start by pouring the grey colored soap into the Titanium Dioxide colored soap in 4 places: 12:00 o’clock, 4:00 o’clock, 8:00 o’clock, and center. Repeat with the Merlot Sparkle Mica. Pour from a high point so that the soap penetrates the entire depth of the soap in the pot, which will create a swirl throughout the soap.
- Using a spatula, chopstick or dowel, swirl the soap by running the tool through each of the entry points once. Only once! You want to swirl but not mix the soap.
- After you’ve swirled the soap, slowly pour the batter into the mold. We started pouring in the upper left hand corner and moved diagonally to the bottom right hand corner.
- Now use the condiment bottle to “draw” holly leaf designs on the surface of the soap. We free-handed our designs, so have fun with this part!
- Once you’re satisfied with your leaves, pour the Cranberry Seeds as berries. In order to get little round berries that were relatively the same shape, we poured the seeds through an 8 oz. Funnel.
- We recommend keeping a chopstick or pair of tweezers on hand to clean up any stray seeds. That will help you keep your “berries” looking like berries and not scattered bunches of seeds!



Hey! Do you know if they make any plugins to assist with Search Engine Optimization?
I’m trying to get my blog to rank for some targeted keywords but I’m not seeing
very good results. If you know of any please share.
Kudos!
Hi there!
I’m sure there is, but unfortunately that is not my area of expertise! I would recommend doing a google search for plugins and see what you get 🙂
-Amanda with Bramble Berry
is that a silicone mold? did you have any bowling issues with that mold?
is it heavy duty?
Hi Julie!
This is our Glossy Silicone Square Tray Mold and we just love how it turned out. It doesn’t bow at all and works perfectly for cold process and melt & pour projects. =)
-Becky with Bramble Berry
Glossy Silicone Square Tray Mold: https://www.brambleberry.com/Glossy-Silicone-Square-Tray-Mold-P4752.aspx
Isn’t the water missing? Or am I missing something???
Hi Nancy!
Thanks for the eagle-eye on this tutorial. We’ve readjusted the blog post so that it includes the distilled water. We hope that you get a chance to make this recipe and if there are any fun photos you are able to get, we’d love to see them on Bramble Berry’s Facebook page. =)
Happy Soaping!
-Becky with Bramble Berry
https://www.facebook.com/BrambleBerry
Beautiful. Thank you for sharing:)
Hi Darlene!
We are so happy that you like this tutorial as much as we did. If you get a chance to try it out, let us know what you think. =)
-Becky with Bramble Berry
It seems yet another cold process tutorial is out. The one thing I never make. 🙁
Hi Leanna!
We hope you get a chance to try out cold process sometime, but in the meantime, be sure to check out all our other tutorials on things like melt & pour, lip products, lotions, scrubs and more!
Melt & Pour: http://www.soapqueen.com/category/bath-and-body-tutorials/melt-and-pour-soap/
Lip Products: http://www.soapqueen.com/category/bath-and-body-tutorials/lip-products/
Lotions: http://www.soapqueen.com/category/bath-and-body-tutorials/lip-products/
Scrubs: http://www.soapqueen.com/category/bath-and-body-tutorials/soaks-and-scrubs/
-Becky with Bramble Berry
Love it! and can’t wait to try it. Thanks as always for the GREAT Tutorial! 🙂
Good morning, Pamela!
We can’t wait for you to try this tutorial out either, be sure to share any soapy pictures that you get with us on Bramble Berry’s Facebook page. =)
Happy Soaping!
-Becky with Bramble Berry