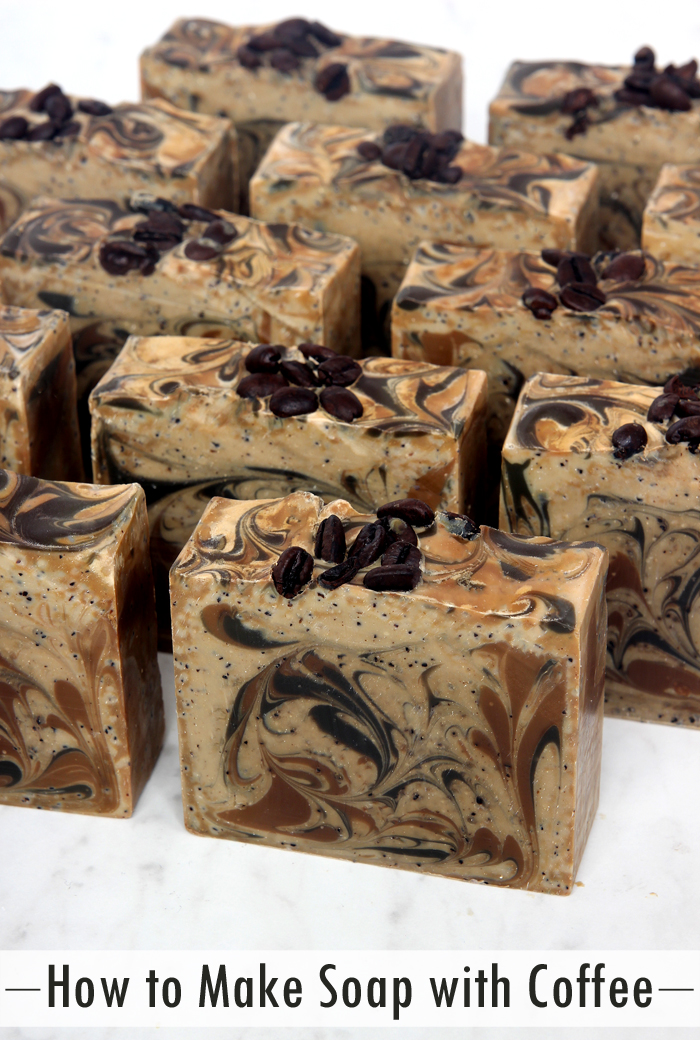
Here in the Pacific Northwest, we are known for our love of coffee. It’s not uncommon to have multiple Starbucks just blocks away from each other. There is also an abundant number of locally-owned coffee shops. If you love coffee as much as a Seattleite, making soap is a great way to include the ingredient in your products. In this coffee soap project, locally roasted coffee is used to really make these bars special. Using a local ingredient highlights the handmade aspect of your products.
Incorporating coffee into cold process soap is easier than you might think. The distilled water in cold process recipes can be swapped for plain coffee. The key is using distilled water to brew the coffee, and allowing the coffee to cool to room temperature before adding sodium hydroxide lye. Using coffee instead of water makes the soap batter quite dark, so keep that in mind when choosing the color palette. If you’re using plain brewed coffee, don’t worry about the soap overheating. Black coffee does not contain sugar.
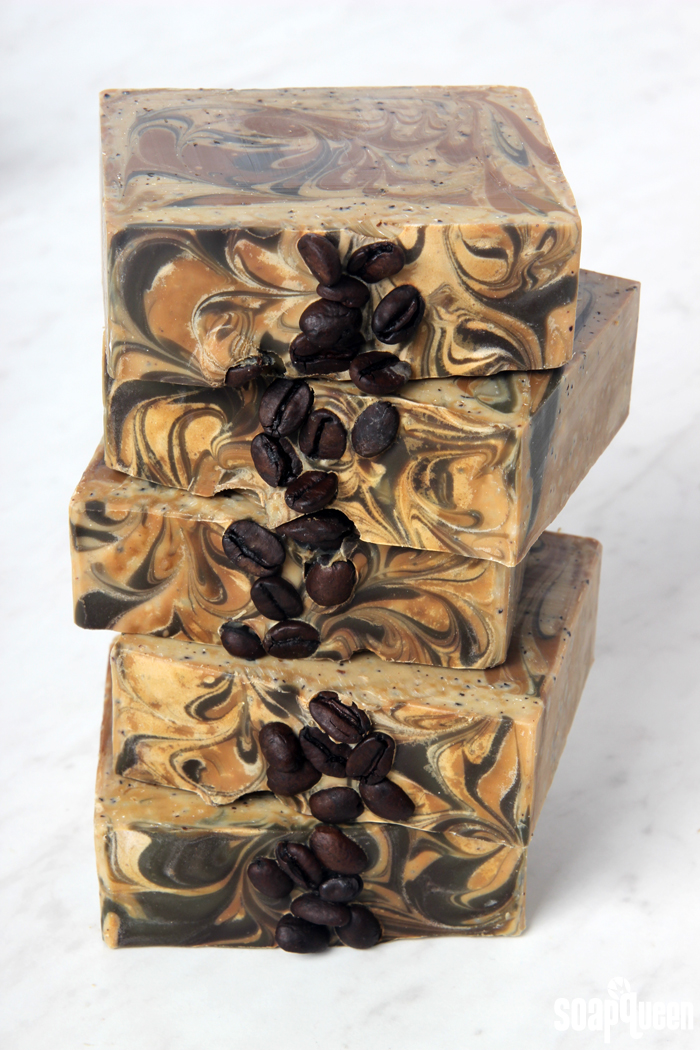
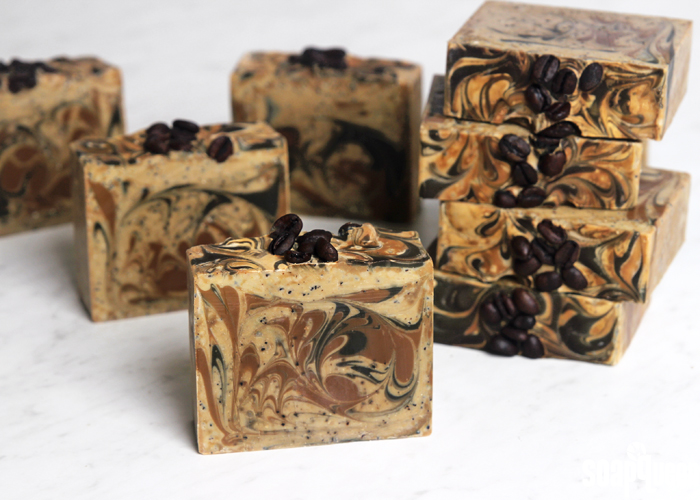
Using coffee instead of water does not give soap a coffee smell. In fact, when you mix lye with coffee it does not smell very pleasant. This is because the lye “scorches” the coffee, resulting in a noticeable odor. The smell of the coffee and lye solution is usually not noticeable in the final bar. This is especially true if you’re using a fragrance oil in your recipe. For this soap, Espresso Fragrance Oil gives the bars a rich, delicious scent. Espresso Fragrance Oil does discolor in cold process soap due to the vanillin content. Titanium dioxide combats that slightly, but you can notice some discoloration on the top of the soap in the photos above and below. Learn more about vanilla discoloration here.
This soap also contains used coffee grounds. It’s important to add used rather than fresh coffee grounds. Fresh coffee grounds may bleed in the soap. The bleeding doesn’t hurt the bars in any way, but it is a cosmetic issue. It’s also a great way to use up leftover coffee grounds!
What You’ll Need:
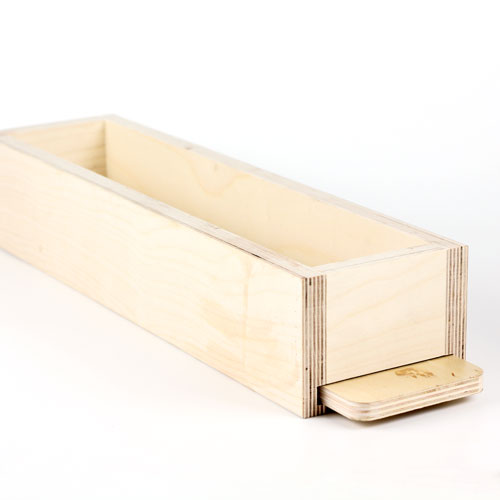
5 Pound Mold with Sliding Bottom
Silicone Liner for 5 lb Wood Mold
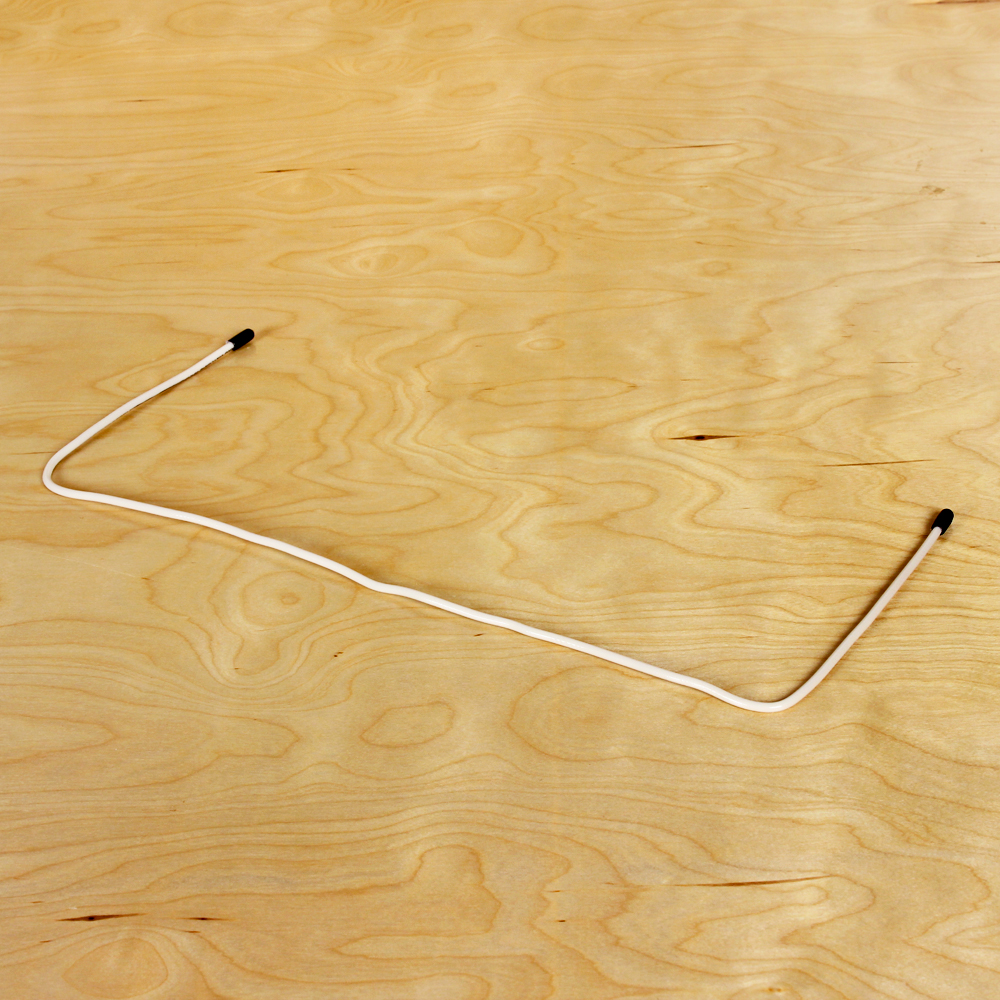
Hanger Swirl Tool
54 oz. Swirl Recipe Quick Mix
7. 5 oz. Sodium Hydroxide Lye
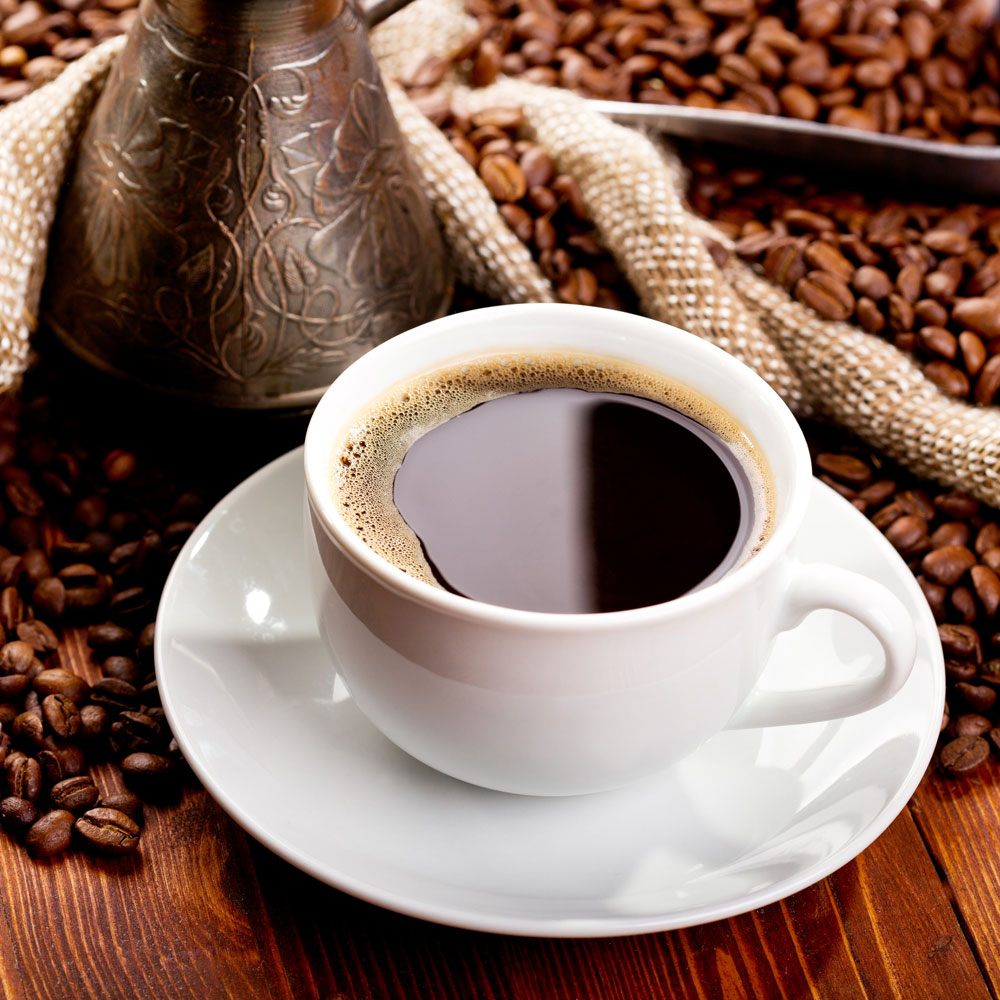
17.8 oz. Plain Coffee
3 oz. Espresso Fragrance Oil
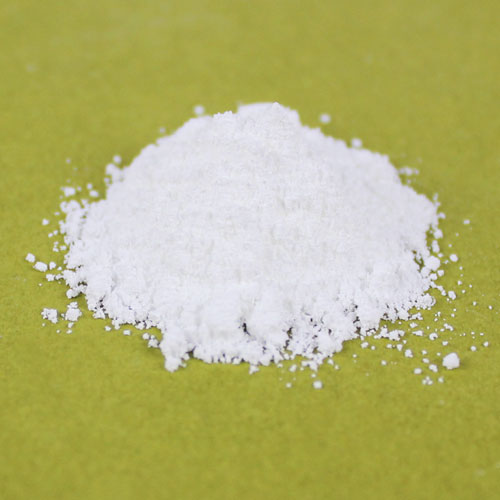
Titanium Dioxide Pigment
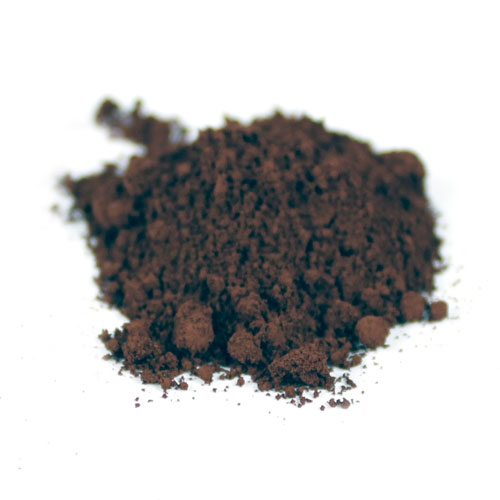
Brown Oxide Pigment
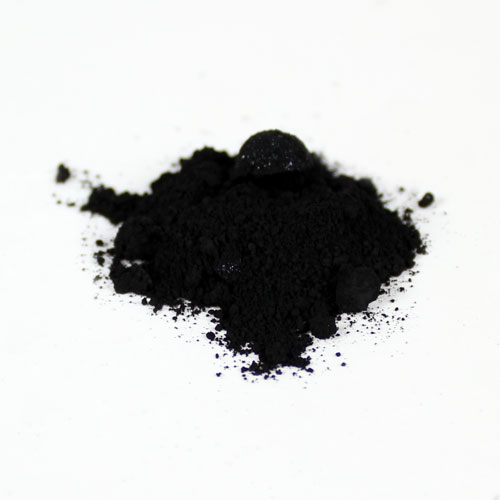
Black Oxide Pigment
2 Tbsp. Used Coffee Grounds
Whole Espresso Beans (for the top)

Click here to add everything you need for this project to your Bramble Berry shopping cart!
If you’ve never made Cold Process soap before, stop here! I highly recommend checking out our FREE four part SoapQueen.tv series on Cold Process Soapmaking, especially the episode on lye safety. And if you’d rather do some reading, Bramble Berry carries a wide range of books on the topic, including my newest book, Pure Soapmaking. You can also checkout the digital downloads for that instant gratification factor.
SAFETY FIRST: Suit up for safe handling practices! That means goggles, gloves and long sleeves. Make sure kids, pets, and other distractions and tripping hazards are out of the house or don’t have access to your soaping space. Always soap in a well-ventilated area.
COFFEE LYE PREP: First, we need to prep the lye solution. For this project, we are using coffee instead of distilled water. Brew the coffee using distilled water. Brew enough for the entire amount of liquid in your recipe, or brew less and supplement the coffee with distilled water. The strength of the coffee is up to you. The stronger the coffee, the darker your soap batter will be. In this recipe, we brewed enough coffee for the entire recipe and used a “normal” strength, which resulted in a rich, dark color. Remember to use distilled water for your coffee.
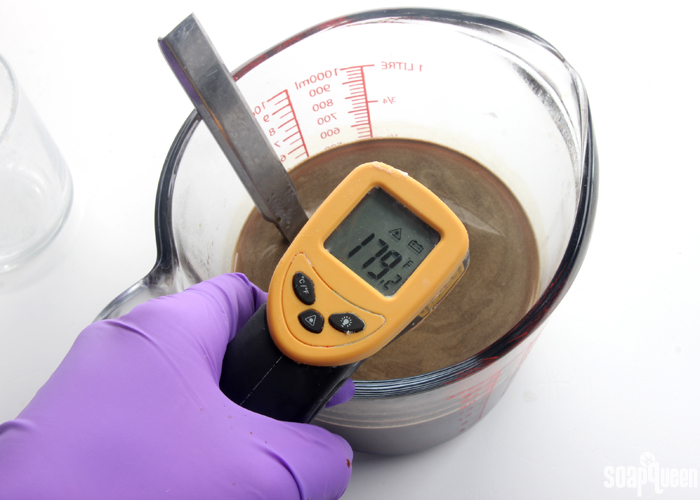
Measure out 17.8 ounces of coffee into the container you use to mix the lye solution. The coffee will be quite hot if freshly brewed and needs to cool to room temperature or below before adding the lye. The colder the coffee is when the lye is added, the colder it will be after the lye is added. If using room temperature coffee, the solution will reach temperatures of about 180 ° F, similar to adding lye to distilled water. If you want to use cold coffee, you can. The lye will take longer to dissolve because it won’t reach as high of a temperature.
Once your coffee is an appropriate temperature (room temperature or below), slowly add the sodium hydroxide lye to the coffee and gently stir until the lye flakes are fully dissolved. The solution will start to darken in color, and smell quite unpleasant. This is normal! Luckily, the fragrance oil covers up any unpleasant odors.
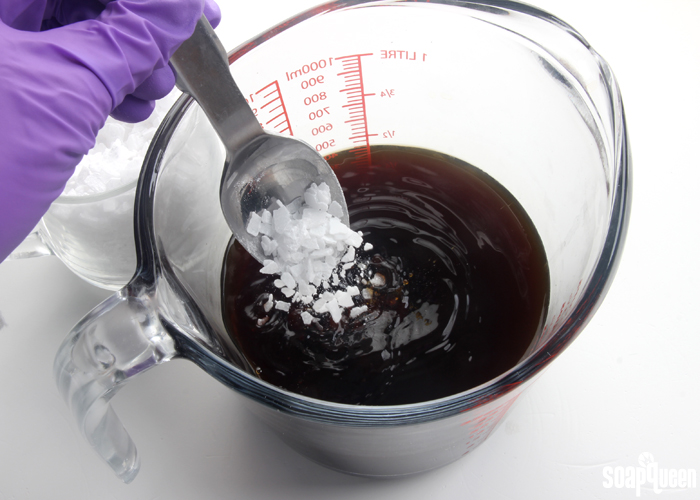
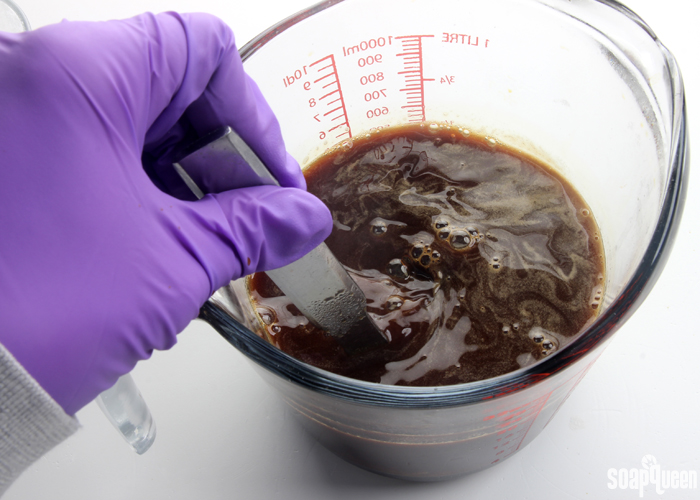
Your lye solution will become quite hot. Allow it to fully cool to about 130 ° F or cooler, depending on the temperature you like to soap at. I recommend allowing the container to cool slowly at room temperature, rather than placing the container in the fridge or freezer. The extreme difference in temperatures can crack a glass container. The lye solution will take about 2 hours to cool, depending on your room temperature. While the lye solution cools, prep your other ingredients and tools.
 COLOR PREP: To ensure that the titanium dioxide blends smoothly into the soap batter, we recommend micronizing it before dispersing it in oil. Please note this is an optional tip but it does help with the titanium dioxide clumping in the soap. =) To micronize colorant, simply use a coffee grinder to blend the colorant to break up any clumps of color and prevent streaks of white from showing in the final soap. We like to use a coffee grinder that has a removable, stainless steel mixing area for easy cleaning. Disperse 3 teaspoons of titanium dioxide into 2 tablespoons of lightweight liquid oil, like sweet almond oil or sunflower oil. In this recipe, we used a slightly more concentrated colorant-oil ratio to avoid adding too much extra oil. Then in separate containers, disperse 1/2 teaspoon of Black Oxide and Brown Oxide into 1/2 tablespoon lightweight liquid oil. Use the mini mixer to help break up any clumps. Set aside.
FRAGRANCE PREP: Measure 3 ounces of Espresso Fragrance Oil into a glass, fragrance oil safe container. Set aside.
TOOL PREP: Bend the Hanger Swirl Tool to fit lengthwise into the mold. Set aside.
ONE: Fully melt the entire bag of the Swirl Recipe Quick Mix until there is no cloudiness. Shake to mix and measure out 54 oz. Once the lye coffee solution and the oils have cooled to 130 degrees F or below (and are ideally within 10 degrees of each other), add the lye to the oils and stick blend until thin trace. If you’d like a harder bar of soap that releases faster from the mold, you can add sodium lactate to the cooled lye water. Use 1 teaspoon of sodium lactate per pound of oils in the recipe. For this recipe, you’d add about 3.5 teaspoons sodium lactate.
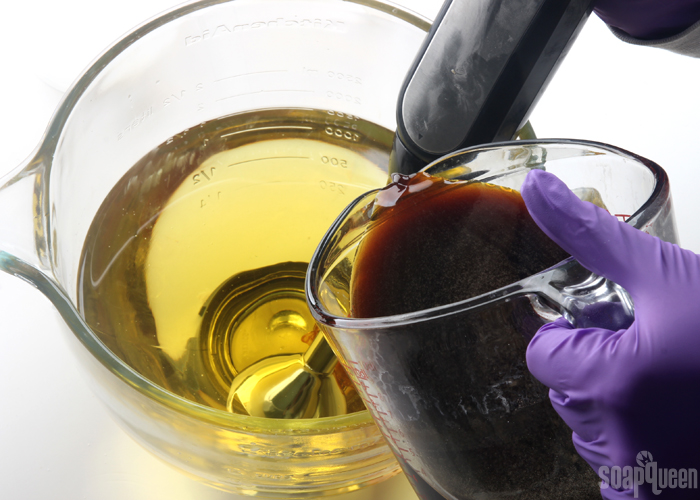
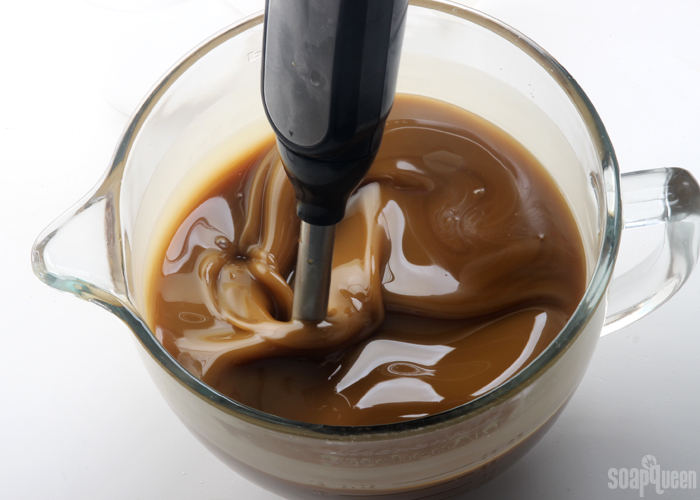 TWO: Once you have a thin trace, pour off 300 mL of soap into a separate container and 600 mL into another container.
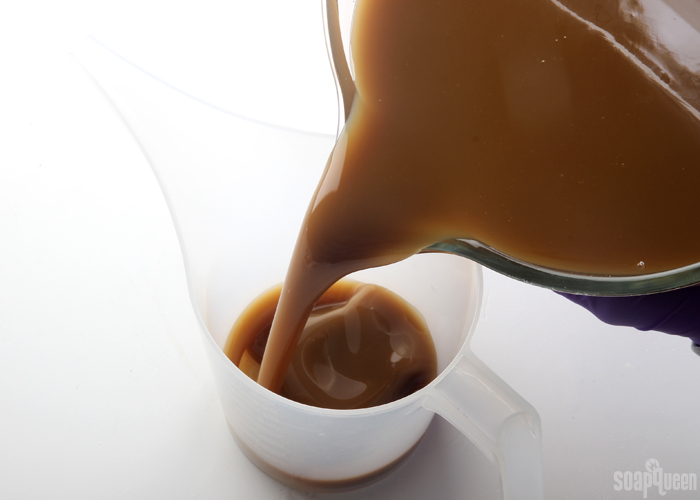 THREE: To the 300 mL of soap, add 1/4 tsp. dispersed Black Oxide. Then, add 1/2 tsp. dispersed Brown Oxide to the container with 600 mL of soap. Use a spoon or whisk to mix in the colorants.
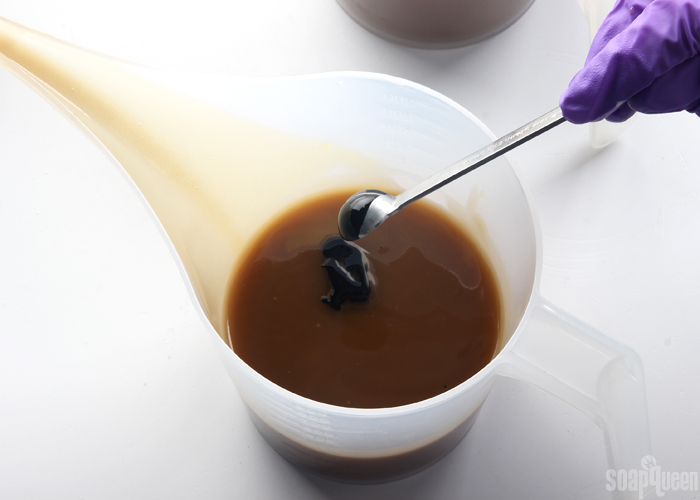 FOUR: To the large container of soap, add all the dispersed titanium dioxide. Use a whisk to mix in the colorant. Then pulse for a few seconds with the stick blender to help fully mix in the colorant. Add 2 tablespoons of used coffee grounds to the large container, and use a whisk to fully mix in.
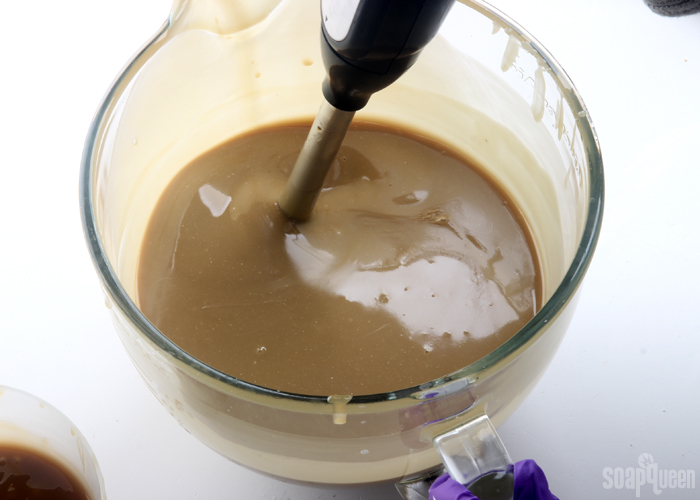
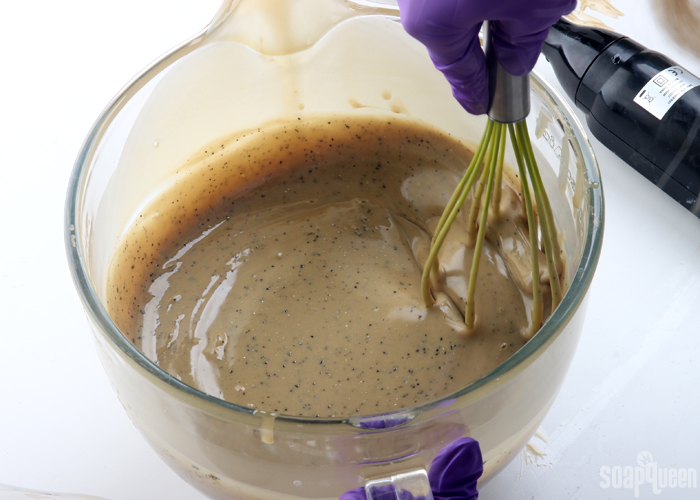 FIVE: Add the Espresso Fragrance Oil proportionately to each container of soap (it’s okay to eyeball it) and use a whisk to fully mix in the fragrance oil.
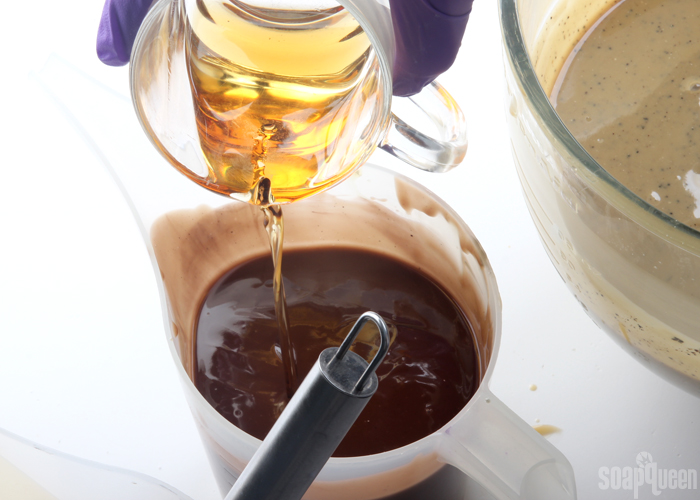 SIX: Pour some of the light soap into the mold – just enough to cover the bottom (about 1 inch).
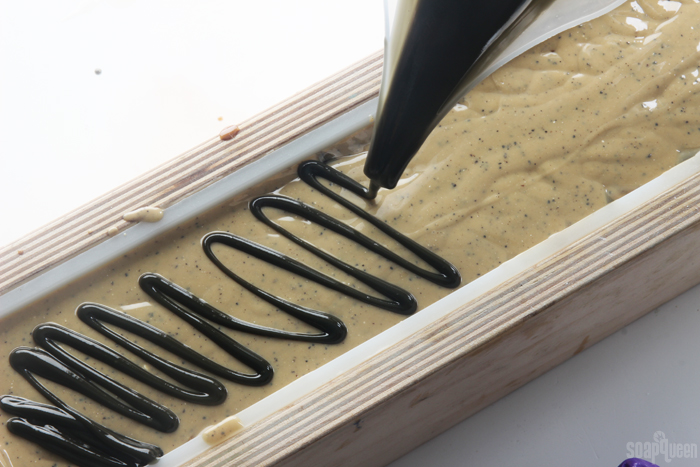
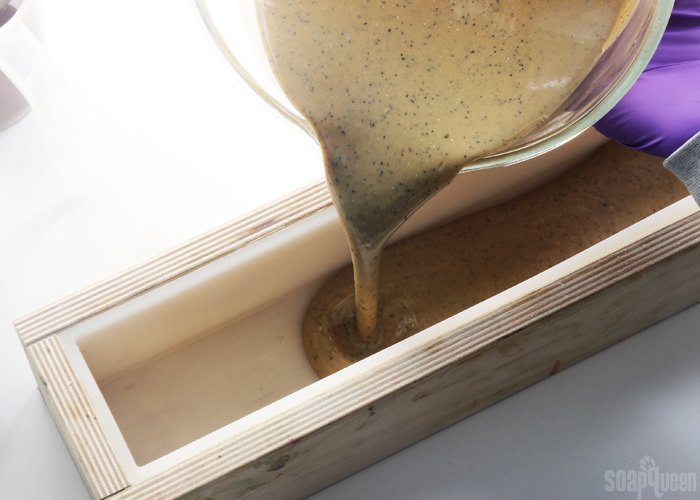 SEVEN: Holding the black soap several inches above the mold, pour a small and steady stream of black soap into the mold. Holding the container a few inches above the mold helps the black soap fall to the bottom of the mold. Pour the black soap all the way down the length of the mold. Don’t be afraid about pouring a straight line. Pouring an uneven line can make the swirl more interesting! Pour less black soap with each pass than brown and tan. A little bit of black soap goes a long way! You also need some black soap leftover at the end for the swirl.
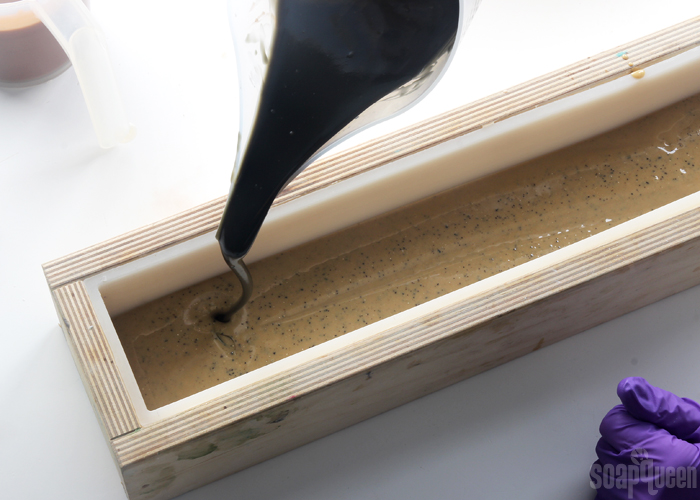 EIGHT: Pour more tan soap into the mold, followed by an imperfect line of the brown soap. Because you have more brown soap, pour a larger amount. Hold each layer several inches above the mold to help the colors break through. Don’t worry about being too exact during the pouring process.
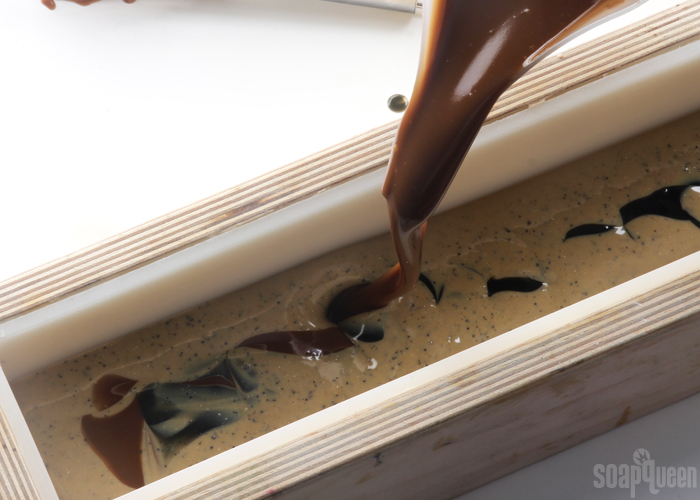
NINE: After pouring the brown soap, pour another line of tan soap into the mold, followed by more black. Continue this pattern (tan, black, tan, brown) until you have used up all the brown soap and have a small amount of tan and black soap left.
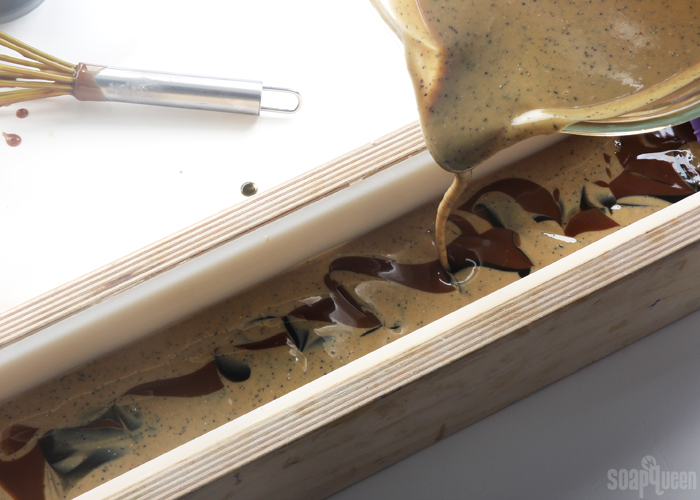 TEN: Give the mold a firm tap on the counter. Insert the Hanger Swirl Tool into one side of the mold, and begin making loops in the center of the mold with the tool. Continue the loop-de-loop motion at varying heights within the mold. This technique is not an exact science. I “looped” the Hanger Swirl Tool about 6-8 times within the mold. If you like more whispy swirls, feel free to do more loops! The swirling motion wasn’t quite a butterfly swirl (made famous by Zahida of Handmade in Florida) but was very similar! See Zahida’s video here to get a better idea of what the swirling motion looks like. Remove the Hanger Swirl Tool by pulling up and out along one side of the mold.
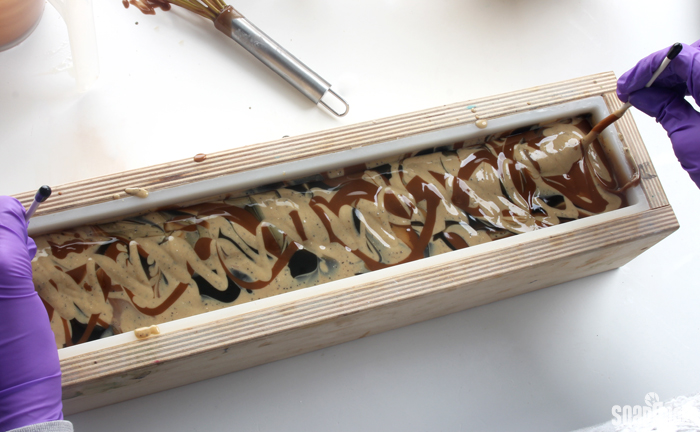
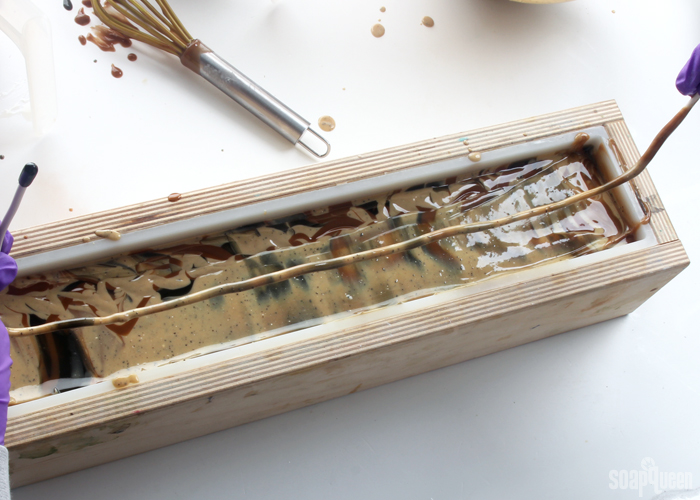 ELEVEN: Tap the mold on the counter to settle the soap and get rid of bubbles. Cover the entire top with the rest of the tan soap. Tap the mold on the counter again to settle the top layer.
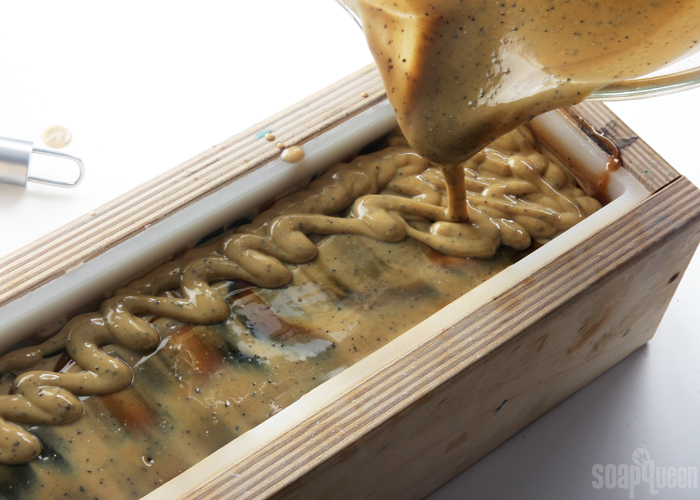 TWELVE: Drizzle a small amount of the black soap on top. Don’t worry too much about what this drizzle looks like, just make sure to leave a good amount of tan soap showing. It will give your swirls better definition.
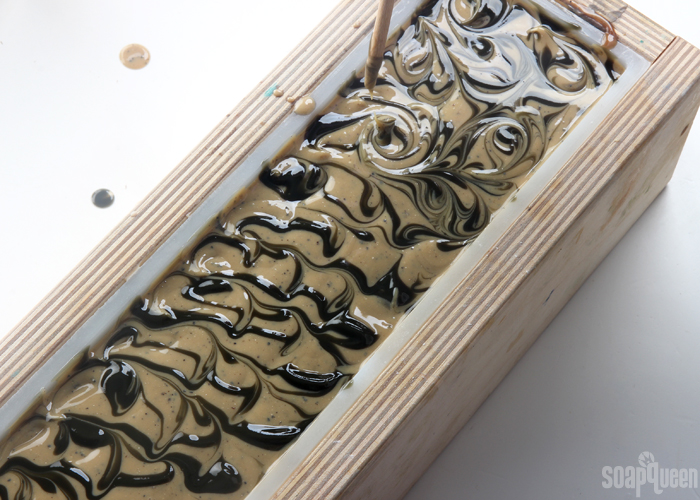
 THIRTEEN: Insert a dowel or chopstick into the very top of the soap. The swirl I used for this batch was not very exact and precise, so feel free to have fun with it! First, I made scallop-like motions from side to side, down the length of the mold. Then, create “loop-de-loop” patterns randomly. There really is no right or wrong way to do this, so have fun with it. Just make sure to not over-swirl, or the color differentiation will diminish.
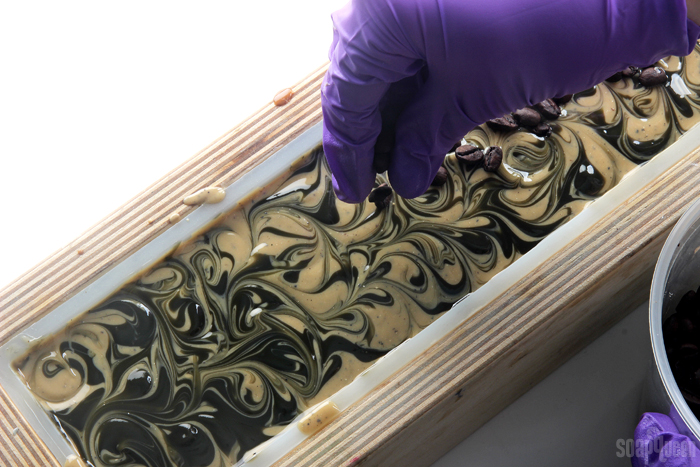
 FOURTEEN: Once you’re happy with the top, drop whole coffee beans in the center of the soap all the way down the mold. Gently press the beans into the soap to help them stick better once cut.
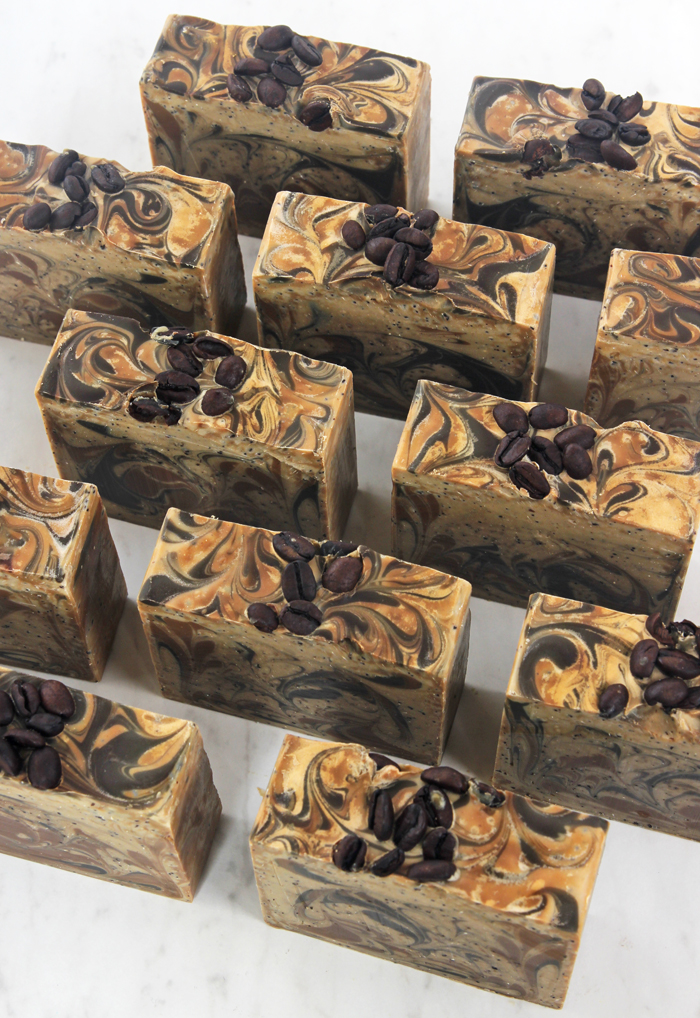
Spritz the soap with 99% isopropyl alcohol to prevent soda ash. Leave the soap uncovered, and allow it to harden for 2-3 days. Remove from the mold gently, and cut into bars. To avoid drag marks from the coffee beans, lay the loaf on its side and cut with a sharp non-serrated knife. I went ahead and used the Multi Bar Cutter to cut my batch, and found that the coffee beans did cause some unevenness and drag marks. I was able to smooth them out with a Soap Shaver. Allow the bars to cure for 4-6 weeks and enjoy!

- 5 Pound Mold with Sliding Bottom
- Silicone Liner for 5 lb Wood Mold
- Hanger Swirl Tool
- 54 oz. Swirl Recipe Quick Mix
- 7. 5 oz. Sodium Hydroxide Lye
- 17.8 oz. Plain Coffee
- 3 oz. Espresso Fragrance Oil
- Titanium Dioxide Pigment
- Brown Oxide Pigment
- Black Oxide Pigment
- 2 Tbsp. Used Coffee Grounds
- Whole Espresso Beans (for the top)
- COFFEE LYE PREP: First, we need to prep the lye solution. For this project, we are using coffee instead of distilled water. Brew the coffee using distilled water. Brew enough for the entire amount of liquid in your recipe, or brew less and supplement the coffee with distilled water. The strength of the coffee is up to you. The stronger the coffee, the darker your soap batter will be. In this recipe, we brewed enough coffee for the entire recipe and used a "normal" strength, which resulted in a rich, dark color. Remember to use distilled water for your coffee. Measure out 17.8 ounces of coffee into the container you use to mix the lye solution. The coffee will be quite hot if freshly brewed and needs to cool to room temperature or below before adding the lye. The colder the coffee is when the lye is added, the colder it will be after the lye is added. If using room temperature coffee, the solution will reach temperatures of about 180 ° F, similar to adding lye to distilled water. If you want to use cold coffee, you can. The lye will take longer to dissolve because it won't reach as high of a temperature. Once your coffee is an appropriate temperature (room temperature or below), slowly add the sodium hydroxide lye to the coffee and gently stir until the lye flakes are fully dissolved. The solution will start to darken in color, and smell quite unpleasant. This is normal! Luckily, the fragrance oil covers up any unpleasant odors. Your lye solution will become quite hot. Allow it to fully cool to about 130 ° F or cooler, depending on the temperature you like to soap at. I recommend allowing the container to cool slowly at room temperature, rather than placing the container in the fridge or freezer. The extreme difference in temperatures can crack a glass container. The lye solution will take about 2 hours to cool, depending on your room temperature. While the lye solution cools, prep your other ingredients and tools.
- Fully melt the entire bag of the Swirl Recipe Quick Mix until there is no cloudiness. Shake to mix and measure out 54 oz. Once the lye coffee solution and the oils have cooled to 130 degrees F or below (and are ideally within 10 degrees of each other), add the lye to the oils and stick blend until thin trace. If you’d like a harder bar of soap that releases faster from the mold, you can add sodium lactate to the cooled lye water. Use 1 teaspoon of sodium lactate per pound of oils in the recipe. For this recipe, you’d add about 3.5 teaspoons sodium lactate.
- Once you have a thin trace, pour off 300 mL of soap into a separate container and 600 mL into another container.
- To the 300 mL of soap, add ¼ tsp. dispersed Black Oxide. Then, add ½ tsp. dispersed Brown oxide to the container with 600 mL of soap. Use a spoon or whisk to mix in the colorants.
- To the large container of soap, add all the dispersed titanium dioxide. Use a whisk to mix in the colorant. Then pulse for a few seconds with the stick blender to help fully mix in the colorant. Add 2 tablespoons of used coffee grounds to the large container, and use a whisk to fully mix in.
- Add the Espresso Fragrance Oil proportionately to each container of soap (it’s okay to eyeball it) and use a whisk to fully mix in the fragrance oil.
- Pour some of the light soap into the mold – just enough to cover the bottom (about 1 inch).
- Holding the black soap several inches above the mold, pour a small and steady stream of black soap into the mold. Holding the container a few inches above the mold helps the black soap fall to the bottom of the mold. Pour the black soap all the way down the length of the mold. Don’t be afraid about pouring a straight line. Pouring an uneven line can make the swirl more interesting! Pour less black soap with each pass than brown and tan. A little bit of black soap goes a long way! You also need some black soap leftover at the end for the swirl.
- Pour more tan soap into the mold, followed by an imperfect line of the brown soap. Because you have more brown soap, pour a larger amount. Hold each layer several inches above to help the colors break through. Don’t worry about being to exact during the pouring process.
- After pouring the brown soap, pour another line of tan soap into the mold, followed by more black. Continue this pattern (tan, black, tan, brown) until you have used up all the brown soap and have a small amount of tan and black soap left.
- Give the mold a firm tap on the counter. Insert the Hanger Swirl Tool into one side of the mold, and begin making loops in the center of the mold with the tool. Continue the loop-de-loop motion at varying heights within the mold. This technique is not an exact science. I “looped” the Hanger Swirl Tool about 6-8 times within the mold. If you like more whispy swirls, feel free to do more loops! The swirling motion wasn’t quite a butterfly swirl (made famous by Zahida of Handmade in Florida) but was very similar! See Zahida’s video here to get a better idea of what the swirling motion looks like. Remove the Hanger Swirl Tool by pulling up and out along one side of the mold.
- Tap the mold on the counter to settle the soap and get rid of bubbles. Cover the entire top with the rest of the tan soap. Tap the mold on the counter again to settle the top layer.
- Drizzle a small amount of the black soap on top. Don’t worry too much about what this drizzle looks like, just make sure to leave a good amount of tan soap showing. It will give your swirls better definition.
- Insert a dowel or chopstick into the very top of the soap. The swirl I used for this batch was not very exact and precise, so feel free to have fun with it! First, I made scallop-like motions from side to side, down the length of the mold. Then, create “loop-de-loop” patterns randomly. There really is no right or wrong way to do this, so have fun with it. Just make sure to not over-swirl, or the color differentiation will diminish.
- Once you’re happy with the top, drop whole coffee beans in the center of the soap, all the way down the mold. Gently press the beans into the soap to help them stick better once cut.
- Spritz the soap with 99% isopropyl alcohol to prevent soda ash. Leave the soap uncovered, and allow it to harden for 2-3 days. Remove from the mold gently, and cut into bars. To avoid drag marks from the coffee beans, lay the loaf on its side and cut with a sharp unserrated knife. I went ahead and used the Multi Bar Cutter to cut my batch, and found that the coffee beans did cause some unevenness. I was able to smooth this out with a Soap Shaver. Allow the bars to cure for 4-6 weeks and enjoy!




Hey,
Thank you for coffee recipe, I really really like the way you explained it, Me and my family this coffee so i’m going to try this one in upcoming weekend where we set together once in a week so this will be amazing can you please tell me if i use persian saffron in it ? this will be perfect or not give me some suggestion
Thanks
Debra
Since it is a herb it will eventually go bad in your soap. In my opinion I don’t believe that any benefits you get from adding it would be worth the cost.
How do I convert this recipe to a 33 oz bag of Swirl Recipe Quick Mix?
You’ll need to resize the batch. You can use the lye calculator and fragrance calculator to determine the amount of lye and fragrance for your batch. This batch is made with a 5 percent superfat, so you will want to keep that the same. The lye calculator will also determine how much liquid to use, which is coffee in this case. I entered it quickly and it looks like 4.57 oz. of lye into 10.89 oz. of coffee.
You can add the additives and colorants slowly until you get the colors and texture you want.
This post explains how: https://www.soapqueen.com/bath-and-body-tutorials/tips-and-tricks/how-to-resize-cold-process-soap-recipes/
Lye Calculator: https://www.brambleberry.com/Pages/Lye-Calculator.aspx
Fragrance Calculator: https://www.brambleberry.com/Pages/Fragrance-Calculator.aspx
Does the temp of the oil and lye water have to be within 10 degree of each other? I made my coffee (didn’t use distilled water) and froze them, like in preparation for a milk soap. The team of the oils and lye coffee weren’t the same temp or within 10 degrees of each other. I didn’t see the iced coffee and lye getting much higher than 65 degrees. My oils were at 99. I didn’t feel I could wait for the lye water to get closer to 99 degrees.
I poured the lye coffee with sodium lactate into the oils, , added kaolin clay and fragrance at trace. I poured that into a loaf mold, covered with cardboard tent and towels. After about an hour, I checked. It didn’t seem to get warm like other soaps I’ve made.
I am fairly new to CP soap making and noticed the soap gets quite warm after pouring in the mold using other recipes. I am aware of “gel phase” and understand this is necessary??? I am confused about gel phase – so you WANT a gel phase? If yes, I don’t know of my coffe soap had gotten warm/hot enough. If my CP soap doesn’t have a gel phase, will it be a soft soap??? I was trying to get a hard soap.
I appreciate your help on this – is hot lye water and hot oil necessary? Is gel phase necessary? What about adding lye water at room temp added to melted oils which might be at a higher temp.
Thanks so much.
Febe
Gel phase isn’t necessary. Some people prefer it because it makes the colors brighter and usually helps the soap unmold more quickly. However, it doesn’t change the quality of the bar. Learn more about gel phase here: http://www.soapqueen.com/bath-and-body-tutorials/tips-and-tricks/gel-phase/
I would recommend trying to gel the soap and putting it in the fridge to see which way you prefer. Then, you can apply that to your future recipes.
This post has more information about how to force gel phase and how to prevent it: http://www.soapqueen.com/bath-and-body-tutorials/tips-and-tricks/when-to-insulate-handmade-soap/
You can use room temperature lye water, but it is a more advanced technique. The cool lye can cause the oils in the batch to solidify before they’re emulsified – it’s called false trace. Learn how to prevent it here: https://www.soapqueen.com/bath-and-body-tutorials/tips-and-tricks/spot-prevent-false-trace/
I have white clay, activated charcoal, and cocoa powder…could I use these instead of the pigments? Many thanks!
You can, although you will most likely have different results. The white clay may not lighten the batch as much as titianium dioxide, so you may need to use more. Cocoa powder and activated charcoal are not quite as saturated as brown and black oxide, so you may want to increase your usage rate of those as well.
Thank you! Looking forward to trying this recipe!
Just as a heads up to anyone trying this recipe, don’t use cold brew coffee grounds. I used cold brew grounds that had steeped for 24 hours and I still got a little bit of a halo around each coffee ground. Doesn’t ruin anything, just a different look.
Thanks for the tip Kate, that’s good to know.
Hello,
Just a note to thank you all for the support, ideas,and input, priceless!!! Re the above coffee soap recipe, do you really mean to leave it uncovered to cure???? This would be a first for me, but then again, I’m all of one month into soap making. Hate to blow a 5 pound batch because of the final step! Think I will substitute vanilla, cardomon, and clove EO’s in place of fragrance ……more chai than coffee.
Thanks for your help once again
We didn’t cover that soap to protect the top – a lid can squish the coffee beans. It can also cause the soap to heat up and darken because of the coffee.
Learn more about when to insulate soap here: http://www.soapqueen.com/bath-and-body-tutorials/tips-and-tricks/when-to-insulate-handmade-soap/
do you have a coffee recipe with melt and pour
We don’t, but our retail store has one on their blog. You can find that here: http://otionsoap.com/espresso-cream-melt-pour/
What are you wanting to add? I can give you some tips as well.
Can you break down in oz’s the swirl recipe mix for this recipes? I want to use my own oils. Thank you
Yes, you can find the percentages of that Quick Mix here: https://www.soapqueen.com/bath-and-body-tutorials/tips-and-tricks/sunday-night-spotlight-quick-mixes/
Thank you!!!!
Can a silicone mold be used? I don’t have the slide bottom box / liner.
Absolutely, a silicone mold will work well for this recipe. Learn how to resize recipes in this post: https://www.soapqueen.com/bath-and-body-tutorials/tips-and-tricks/how-to-resize-cold-process-soap-recipes/
Hello
I don’t have oils or pigments. Can I drop them? To give scent to the bars Can I add coffee powder (which is usually used to make coffee drink), and at what stage can they be added? Do you think they add benefits? What is the benefit of using brewed coffee instead of water? Thank you so much for the recipe
You can leave out the oils and pigments. The coffee grounds (powder) in this recipe don’t add scent, but they do exfoliate the skin. The coffee is used to color the soap and may give it a very subtle scent, but for a strong scent you’ll want to add a fragrance like Espresso Fragrance Oil: https://www.brambleberry.com/Espresso-Fragrance-Oil-P5889.aspx
Find out how much to add with our Fragrance Calculator: http://www.brambleberry.com/Pages/Fragrance-Calculator.aspx
You may like this coffee recipe, which is unscented and uncolored: https://www.soapqueen.com/bath-and-body-tutorials/simple-coffee-soap-diy/
Hi Kelsey
The recipe you have pointed seems great.
Should the coffee powder be used or can it be fresh? Coffee powder is the coffee beans that have been finely ground. After using the powder to make coffee it becomes like a paste… Do you think I could use the paste? Or just add the fresh powder after trace?
I would recommend adding the used coffee grounds the recipe calls for. If they’re fresh, they can bleed which creates discoloration in the bars.
Hello Kelsey
Can we use the soap making tools such as the electric mixer, spoon etc for other purposes after cleaning them with iced water? do you think it is safe to mix edible stuff with them?
Thank you very much
No, we don’t recommend using soaping tools for food. Lye and fragrance can get stuck in cracks or scratches in the tools, even with thorough washing. That means you can accidentally ingest them. It’s best to have a dedicated set of tools for making soap.
Hello Kelsey
I am making the swirl recipe quick mix using my own oils and plugging it into your online calculator. Your recipe calls for .1% vitamin E oil but vitamin E oil is not an option on the calculator. What is a suitable substitute for vitamin E? Or, how many ounces do I need to make 54 oz of the swirl recipe?
Vitamin E is an additive that is thought to extend the shelf life of the oil. It is an optional ingredient, so you can leave it out. If you’d like to add it, just multiply .001×54 ounces, which will give you .054 oz. You can add that right into your oil mixture.
Learn more about vitamin E oil here: https://www.soapqueen.com/bramble-berry-news/sunday-night-spotlight-vitamin-e-oil/
Thank you for sharing. 😀
I’m very interesting in this recipe I’ll try in next holiday. But I have some question. After coffee lye prep process done, coffee benefit still remain or not (temporarily reduce the appearance of cellulite / skin a firmer appearance / caffeine acid can significantly affect anti-inflammatory activity / skin wound healing , ETC.)
All of our recipes are intended for use as soap and cosmetics. If they were intended for use to change the function of the body or treat a disease, they would need to be tested and regulated by the FDA. Learn more about the difference between cosmetic and drug claims here: https://www.soapqueen.com/business/understanding-fda-cosmetic-vs-drug-claims/
I can tell you the coffee helps give the soap a warm brown color, and it’s also great from a marketing standpoint. 🙂
-Kelsey with Bramble Berry
Hi! Does Espresso fo changed drastically in CP soap? I made soap using my own recipe with 50 oz oil and used 3.15 oz of Espresso fo and the scent changed so much. 😣 I’m hoping the scent will return as it cures? Thank you!
The scent will definitely smell different in soap than it does out of bottle. I would recommend seeing what you think after 4-6 weeks of curing. The scent does continue to develop. 🙂
-Kelsey with Bramble Berry
Hi Kelsey!
You’re right! The scent is getting stronger! Thank you!
Oh good, glad to hear that! 🙂
-Kelsey with Bramble Berry
I am doing this recipe for the second time! Everyone loves this soap and recipe!! Thanks soapqueen!!
You’re welcome, so glad they’re loving this recipe! 🙂
-Kelsey with Bramble Berry
I made the soup last week and cut it yesterday. It is absolutely beautiful. The fragrance as fantastic as well. I only wish that I had added a bit more titanium to my base batter because the coffee must have been strong and so the darker swirls don’t show up as great as yours. Great tutorial
So glad your bars turned out well Angela! Next time, more titanium dioxide or making the coffee less strong can definitely help. 🙂
-Kelsey with Bramble Berry
Hi,
Can I use instant coffee instead of fresh coffee grounds in coffee lye prep? So that I can just dissolve the instant coffee powder in distilled water? I’m also thinking to infuse coffee in oils to make cp soap, should I use fresh coffee grounds for that?
Thank you.
Instant coffee should work just fine – you can make a small test batch just to be sure. You can add the lye at room temperature or cool it in the fridge overnight.
-Kelsey with Bramble Berry
I finally got around to making this, although I used my own recipe and FORGOT to add the hanger swirl. It still looks and SMELLS awesome. I love that espresso scent oil. It’s on youtube under theorgelmeister with no ads.
Glad you’re loving the Espresso, it’s one of our favorites too.
-Kelsey with Bramble Berry
How about making a drawing from the short end of the mold showing how the swirl is done with the hanger tool? That would be soooooo helpful! (also for the butterfly swirl as well!) Even in the videos it’s hard to tell exactly what’s going on. Slo-mo would be a good idea, too.
We will definitely keep that in mind Lynette, thank you for your suggestion. This site also has a really helpful diagram of how to do a butterfly swirl: http://www.soap-making-essentials.com/butterfly-swirl-soap.html
-Kelsey with Bramble Berry
I want to make a coffee bar that I can use as a shampoo bar. Can I use this recipe and just leave out the swirl mix and pigments? Will I have to recalculate anything?
Thanks,
Cindy
Hi Cindy! Are you wanting to use different oils instead of the Swirl Quick Mix?
-Kelsey with Bramble Berry
Over time will the color of this bar change? If so, will the colors still contrast with each other?
The soap bars in our lab have been curing for about a month now and still look the same as the pictures above. The titanium dioxide helps fight some of the discoloration so you can see the color contrast. We’ll try to get a picture added to the blog of the soap now so you can see. 🙂
-Kelsey with Bramble Berry
Thanks. I’m making this right now!!! Woo ho!
Have fun!
These look so awesome! Even my husband says he would love to have a bar! Looking at these makes me want to start doing cold process NOW.. lol.. I just can’t bring lye into our home with our curious little guy running around. Thank you greatly for posting a link to the melt and pour coffee soaps. That just may satisfy my urge for now.
You’re welcome Teri! The fragrance smells awesome, it’ll make your soaping space smell like a coffee house. 🙂
-Kelsey with Bramble Berry
Do you have a coffee melt and pour recipe???
We sure do! This melt and pour bar has coffee grounds and Espresso Fragrance Oil: https://www.brambleberry.com/Copy-of-Sample-Idea-Sheet-for-February-2015.aspx
-Kelsey with Bramble Berry
How long did you wait after you cut the bars to take the photos? I have found with vanilla that darkening will take several days at least and sometimes a few weeks before reaching full oxidation.
We waited about a week after the soap was cut to take these pictures. You can see the discoloration on top of the bars! We made the bars themselves about three weeks ago, and they still look like the pictures. They may get a bit darker over time, but you should still be able to see some nice contrast between the colors. 🙂
-Kelsey with Bramble Berry
Oh my gosh! Before this was posted, I had already ordered the espresso scent and can’t wait for it to get here next week so I can try this out! I am so grateful that you all posted in the past how we can use the percentages of the swirl mix to create a recipe with our individual oils. I ordered my first BIG buckets of Palm and Coconut (OK, all you experienced soapers – don’t roll your eyes – I know 35 pounds doesn’t sound like much to you all but it is a MASSIVE move up for me! LOL! :-)) I also have some KILLER coffee beans to add to this. They are an insanely intense caffeine bean so that I can’t make coffee with them without huge heartburn. But they are a GORGEOUS color, smell amazing, and in small amounts will look AWESOME on these bars!!! I love you all so much for being not only vendors – but such an inspiration and guide to beginners like myself and others!
You’re so welcome Sherry, thanks for your sweet comment! It means a lot to us. I can’t wait for you to try these bars, they smell so amazing. I made sure to take a few of these bars home so I can enjoy the espresso scent as soon as I step into the shower. 🙂
-Kelsey with Bramble Berry
A bright and beautiful soap, am not Into soap making before,fotunately Annie Marie want me to be d best woman in my life,i made Cloe and aloe spin swirl soap ,I got to a trace but overjoyous make me stir d soap more and more,suddenly d Lye and oils get separated and some form block pls enlighten me on this. Annie Marie I love you
The soap may need more mixing! How long did you stick blend the oil and lye? I can’t help you troubleshoot. 🙂
-Kelsey with Bramble Berry
This looks absolutely beautiful! Could you give a recipe using separate oils? ( in oz) I don’t prefer using the quick mixes. Thanks so much!
Absolutely! You can find the percentages for our Quick Mixes here: https://www.soapqueen.com/bath-and-body-tutorials/tips-and-tricks/sunday-night-spotlight-quick-mixes/
-Kelsey with Bramble Berry
Thank you!
Gorgeous soap! I’ve made hot process coffee soap with colored embeds in it and the coffee is more than unpleasant smelling, it STINKS. Fortunately, it doesn’t last long and it absolutely doesn’t smell like that in the final soap and my soap was unscented so try it and don’t let the stink scare you away.
Ha, it is a distinct smell that’s for sure! I was pretty surprised the first time I smelled it. I’m glad it goes away after the soap cures. 🙂
-Kelsey with Bramble Berry
You must have ESP – I was going to make some coffee soap this weekend! I have a coffee butter recipe that I like and I love the espresso FO.
Perfect timing! 🙂
-Kelsey with Bramble Berry