Don’t you just love a beautifully swirled soap? I love to see colors gently swirled together. The possibilities of colors and designs are endless. I have read about the Peacock Swirl. But I haven’t tried it. Frankly, I was a little intimidated.

After watching Amanda Griffin of Lovin Soap demonstrate how to make a Peacock Swirl, I am so ready to give it a try! Not that I’d want to leave the soap conference early so I can try the Peacock swirl, but I just might stay up until midnight on the night I get home so I can try this. Okay, not really. But I am going to try this soon!
The first component of a good peacock swirl is contrasting colors. It’s good to get your colors started before you start your soap. Amanda likes to use black, white and a couple of bright colors. In the demo, she used micas for the colors and activated charcoal for the black. She put about a teaspoon of each color into separate containers. Now on to the soap! One reason the Peacock Swirl scared me? Because my soap seems to come to trace so quickly. Another reason? I’m not sure when things are mixed well enough that I can begin to divide the soap into parts and still have time to mix in color and do a swirl. And have the soap trace properly and all that. Know what I mean?
Well, Amanda taught me — and the rest of the packed room — how to overcome those two fears.
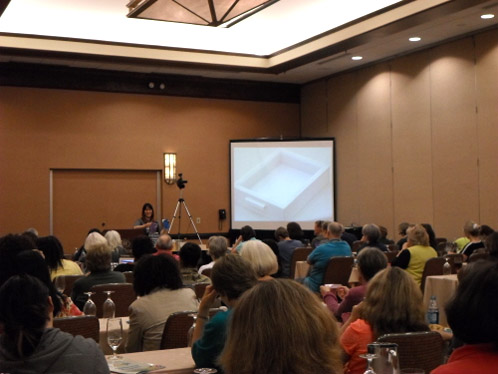
First, she shared a recipe with us. It’s a nice slow moving recipe with lots of olive oil. She also kept the temperatures of the oils and the lye mixture low temperatures help to slow trace. She suggest keeping temperatures between 90 and 115 degrees Fahrenheit. You know what would work great for a Peacock Swirl? Bramble Berry’s Swirl Quick Mix Oils. Everything is ready to go for you, except you mix the water and lye yourself. As always, Safety First! Goggles, Gloves and Sleeves!
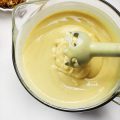
For Amanda’s demonstration,the water/lye mixture had already been made. Once it was added to the oils, Amanda talked about emulsion vs. trace. Emulsion happens ahead of trace. It’s when the lye mixture and oils are mixed together. But the mixture has not yet reached trace. So when you lift your blender up out of the emulsified mixture, it doesn’t leave any trails on top.
I have always been enamored with trace. Every time I make soap, I still say, “isn’t that amazing?” When trace begins. Usually I’m talking to myself, and I readily agree. “Yes, that’s amazing.” Now I think emulsion is pretty cool too. I’ll probably talk to myself about how cool it is too.
Amanda made it easy to know when emulsion is complete. Here’s a summary of how she demonstrated it. Combine your oils and lye mixture. Blend a bit with your stick blender. Let the mixture rest for a minute. If oil comes to the top, blend a bit more. Repeat that cycle if necessary. Once no more oil comes to the top, check to see that the color is consistent throughout. If there are some oily streaks throughout, blend some more. Just a bit. Once color is uniform and no more streaks or pools of oil show up, then emulsion has been reached.
If you go beyond emulsion, you may quickly find yourself at trace. And even though trace is amazing, trace will make it difficult to do a Peacock Swirl. And if you blend too long after you reach trace, you might burn out the motor on your stick blender. I have heard that people do that. Sometimes on their very first batch of cold process soap ever. Ahem. Moving along.
Once emulsion was complete, Amanda added about ¼ cup of soap batter To each container of colorant. She used a mini mixer to blend the colors. After the initial blending, she divided the soap evenly between the containers. Not the measure-it-out-on-a-scale kind of even, but the eyeballing-it kind of even.

Next she poured each color into its own plastic condiment bottle. Or you can use the squirt bottles sold at beauty supply places. You can pour straight from the containers, too, but a detailed peacock swirl is best done with small lines of soap.

Using one color at a time, Amanda made lines of soap lengthwise down the mold. (To be specific, Amanda used this birch mold from Bramble Berry. The tray mold does the best job of showing off the swirl.)
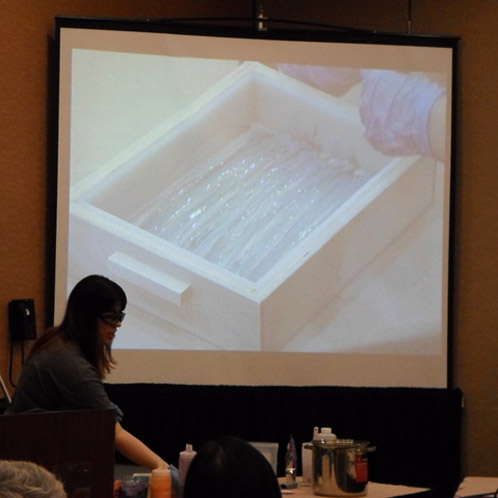
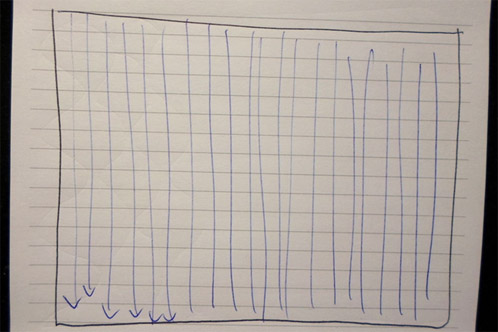
And guess what? Amanda let slip that Bramble Berry is working on a silicone liner (psst it’s here!) for the birch mold. What?! I am going to have to get one of those when they come out! All the soap lines went in the same direction. She made 6 or 7 lines of one color next to each other before moving on to the next color. They looked a bit like my drawing:
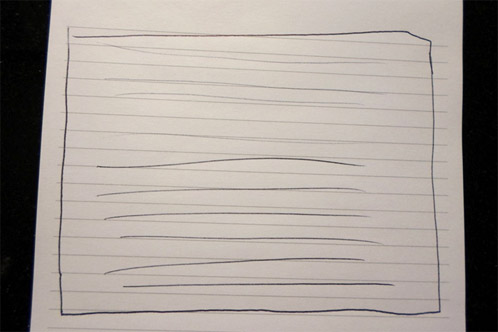
Amanda kept rotating colors, making lines in the same direction, until the soap was almost gone. She made sure to leave a bit of each color for the very top. The next step involves pulling sticks through the soap. This is done perpendicular to the lines that have already been made. So lines of soap go one way, and sticks are pulled through crossways. Amanda showed us how to make a tool out of roller picks. You can find them at the beauty supply store.
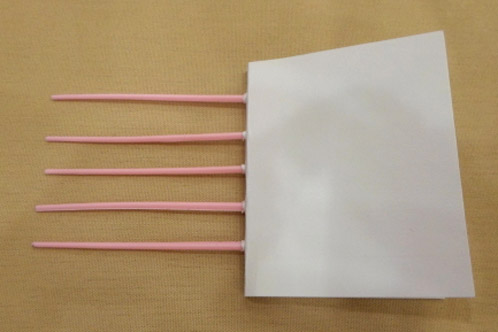
These are stuck through an index card.
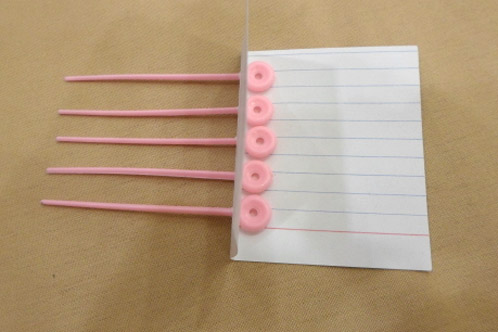
You can also put enough picks through a piece of cardboard to go at least halfway across the mold. Then it’s fewer swipes with the picks. She swiped in straight lines from top to bottom. Then she repeated the swipe from top to bottom until she made it all the way across the mold. The blue lines in my drawing are the lines made with the picks:
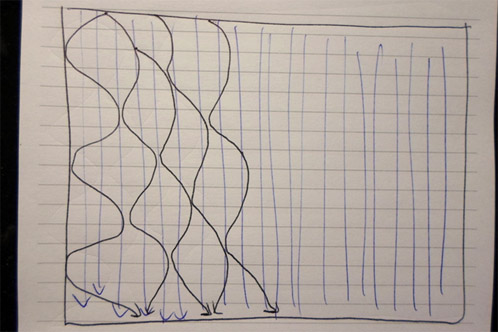
The last step is to make some S curves down the soap in the same direction as the swipes. Start with an S pattern top to bottom. You may want a drawing tool that’s a little thicker than the picks. Then move to the right and do a mirror image of the S pattern. Next, do an S pattern that starts at the first hump of the second S. Confused? Me too. Hopefully my picture will help a little:
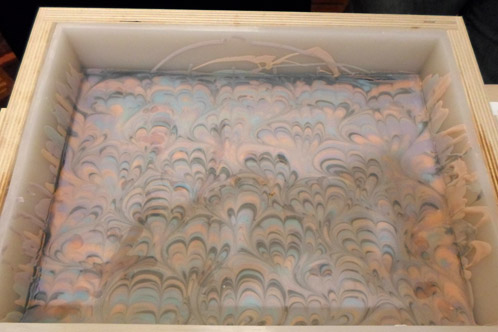
Once the swirling is complete, we wait until it’s time to unmold it, cut it and enjoy its beauty! Thanks, Amanda, for a wonderful and informative demonstration. I am no longer afraid of the Peacock Swirl! Below is a picture of the swirl in the Bramble Berry 18 Bar Unfinished Birch Wood Mold with the brand new silicone liner.
Interested in doing the Peacock Swirl yourself? Check out this Peacock Swirl Soap Kit on Bramble Berry!


Hi, beautiful soap and great instructions. One question though.
In the paragraph about filling the mold with the different colors it says, “Amanda kept rotating colors, making lines in the same direction, until the soap was almost gone. She made sure to leave a bit of each color for the very top. The next step involves pulling sticks through the soap.”
I did not see where the soap saved for the ‘very top’ was used. Reread it several times and still missed it.
Thanks for the help, as always,
Sarah
Hi, Sarah! In re-reading the post, I can see why that step is unclear. Amanda suggested leaving a little of each color for the top layer. What she meant is to try to have some of each color in the last pass of the lines you make across the top. All of the soap gets used in the lines before the pulling of the stick begins. Jean
Thanks, Jean!! Makes perfect sense. Cannot wait to try this. I have the Brambleberry 9 bar birch mold — perfect size for experimenting with this technique!
Sarah – I’ll be on the lookout for your peacock swirl experiment on the Bramble Berry Facebook page 🙂
Hi Sarah!
And, if you are a little confused about the process, you can always check out this Soap Queen TV episode that Anne-Marie put together:
http://www.soapqueen.com/bath-and-body-tutorials/cold-process-soap/peacock-swirl-in-cold-process-soap-video/
-Becky with Bramble Berry
Is Amanda’s recipe posted some where? I have most of the usual oils and butters and would love to have her recipe. I too have a fear of my soap tracing too fast.
I also have put the new silicone mold in my cart. I hope they make one for the 36 bar mold too.
Thanks for the great peacock swirl instructions. The soap looks great.
Hi, Nancy.
I hope you enjoy the new silicone mold. I can hardly wait to get mine.
Amanda’s email address is [email protected]
Maybe she will share the recipe.
Hi Nancy!
While we don’t have Amanda’s recipe, you can check out the one that Anne-Marie put together last year that I just adore.
http://www.soapqueen.com/bath-and-body-tutorials/cold-process-soap/peacock-swirl-in-cold-process-soap-video/
I hope this helps! =)
-Becky with Bramble Berry
Hey Bramble Berry! Thank you so much for letting me use the new liner during my peacock swirl demo. I ABSOLUTELY loved it! I wasn’t sure when it was going to be available but it looks like it’s here! Yippee! Jean, thank you for the wonderful write up. You did a great job!!!
Hey Amanda,
Thanks for trying out our new liner live in front of all of those Soapers! Your soap looks absolutely gorgeous, I wish I could have been there.
And yes, I love Jean’s post. She is hilarious and informative – wait until you read her post about Kevin Dunn’s class. 🙂
Thanks, Amanda. You did a wonderful job with the class, and I am excited to give the peacock swirl a try myself. Thanks for taking away my fear of the peacock swirl!!
Bravo!!!amazing!
Hi Olivia!
It was so much fun to read Jean’s experiences at the soap guild show and we can’t wait to hear more from her. Be sure to subscribe to the Soap Queen blog to keep up-to-date of the newest soapy happenings! =)
-Becky with Bramble Berry
looks like I am going to order again! I can’t wait to make this soap. I live in Maine and this is as close to a hands on class I can get. Thanks so much.
Annie – Doesn’t it look like fun? After you make it, I hope you’ll post pictures on the Bramble Berry Facebook page so we can all see!
Hi Annie!
You are just going to love the new silicone liner, it makes soaping in the 18-bar mold a breeze. Let us know how it works for you and if you get any pictures of your soap be sure to share them with us on Bramble Berry’s Facebook page. =)
https://www.facebook.com/BrambleBerry
Happy Soaping!
-Becky with Bramble Berry
The class was so informative. The silicone liner is here? Yippeeeee! And just in time for my next order from Bramble Berry. So excited!!
Hi Jean!
We were are so excited that our new silicone liner for the 18-bar mold is here! It is such an exciting new tool for soaping, and we can’t wait to hear the feedback from our customers. Enjoy!
-Becky with Bramble Berry
Silicone Liner for 18 Bar Mold: https://www.brambleberry.com/Silicone-Liner-for-18-Bar-Mold-P5639.aspx
Nice post Jean,and what an amazing teacher Amanda is.I really enjoyed her class-she’s a very easy going instructor-great job!
Thanks, Michele. It was a great class, and Amanda does a fantastic job explaining how to accomplish the swirl.
Good morning, Michele!
We all wish we were at the conference for this class as the soap turned out absolutely amazing. It was great that Jean got to go and experience the show for us and bring back lots of soapy pictures, class notes and advice! =)
-Becky with Bramble Berry