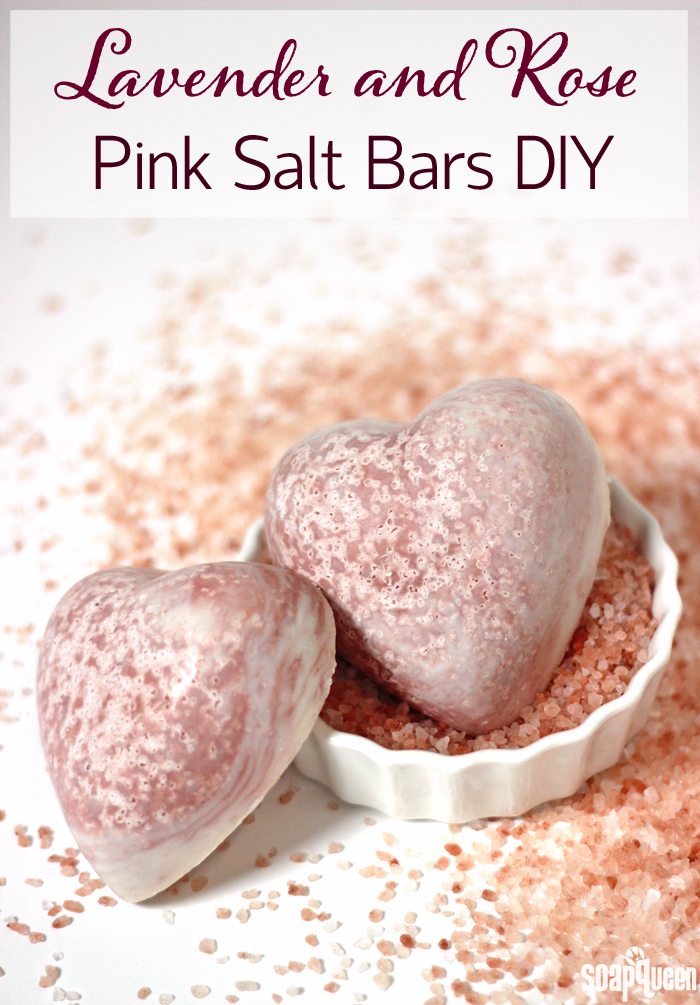
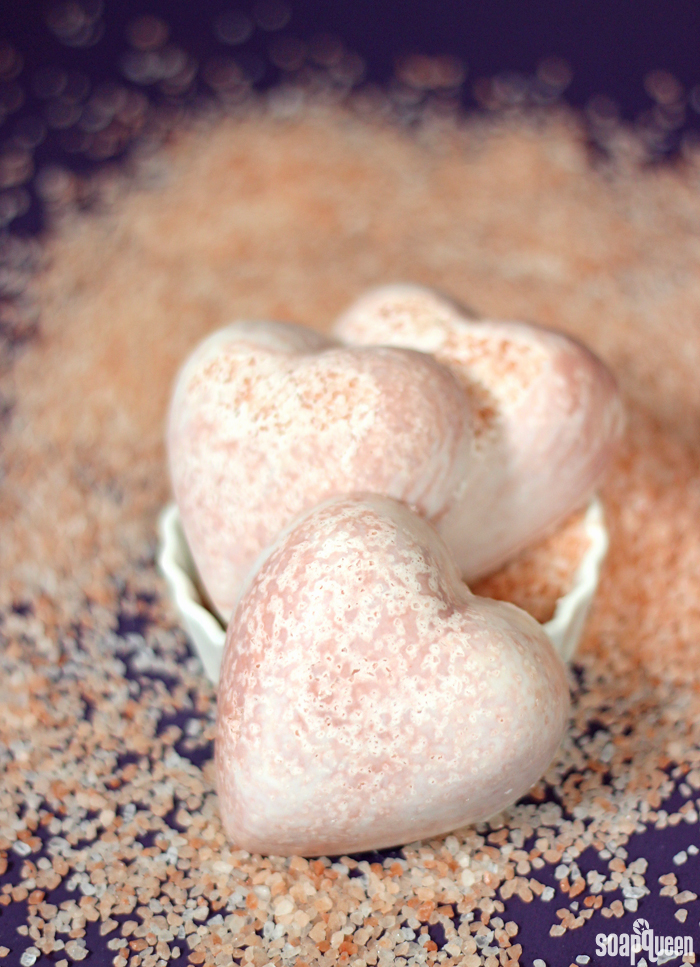
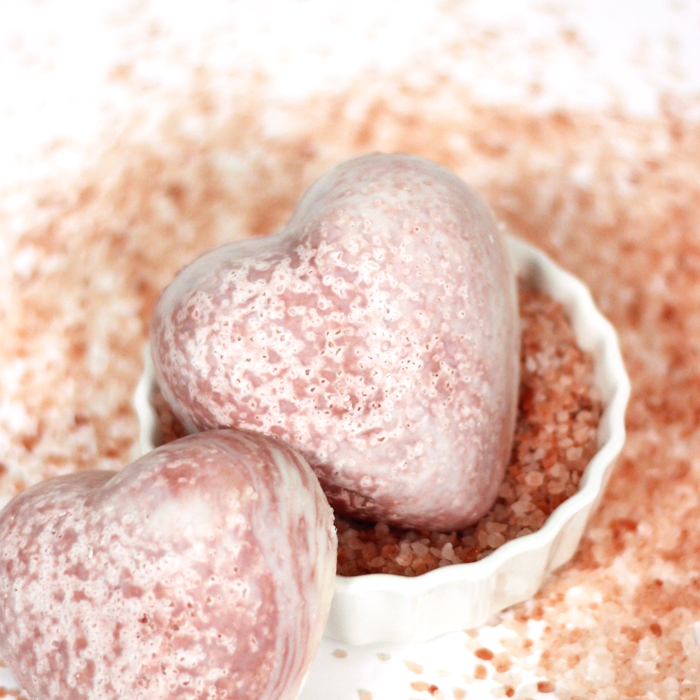
 2016 will be here soon, can you believe it? To say this year has flown by would be an understatement! If you’re a soapmaker you’re already thinking about cold process soap projects 4-6 weeks ahead. That timeline puts us right around Valentine’s Day, making this the ideal time to start making things inspired by love. These Lavender and Rose Pink Salt Bars are filled with ingredients that scream love: rose clay, Hungarian Lavender Essential Oil, pink sea salt and of course, a cute heart shaped mold.
If you’ve never heard of salt bars before, they are a very unique project. Interestingly, adding salt to cold process soap does not create a super scratchy bar. Instead, the salt creates a creamy and mild lather with very light exfoliation. The pink Himalayan salt used this recipe is well known for its stimulating and soothing properties. Of course the fact that it’s pink is a bonus as well. =) These bars are scented with luxurious Hungarian Lavender Essential Oil and colored with rose clay. These bars are perfect if you prefer natural cold process soap. If you’re looking for more salt bar recipes, check out the Pretty in Pink: Salty Cold Process Tutorial.
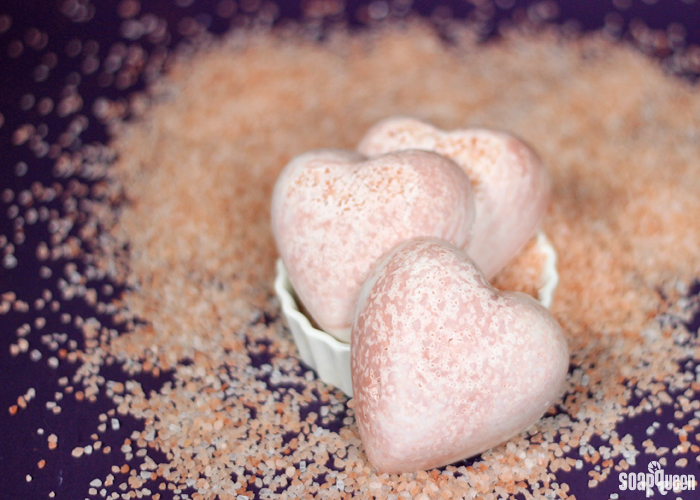
Adding salt to cold process soap inhibits lather. To combat this, a higher amount of coconut oil is used in this recipe than normal. Usually, I recommend using around 25-33% coconut oil in a recipe. To help boost the lather, I used 50% coconut oil. Some soapers go all the way up to 100% coconut oil when using salt in their soap. Don’t worry, they still feel great on the skin. In addition, salt bars are usually cut as soon as the soap is hard enough which can be as little as a few hours. The salt makes the soap harden up super quick! If you wait too long, the salt bars can be very crumbly once you cut into them. Because this project uses individual cavity molds, you don’t need to worry about cutting the bars.
What You’ll Need:
Simple Heart Mold (three molds)
10 oz. Coconut Oil (50%)
4 oz. Olive Oil (20%)
4 oz. Palm Oil (20%)
1.4 oz. Sweet Almond Oil (7%)
0.6 oz. Castor Oil (3%)
3 oz. Sodium Hydroxide Lye
6.6 oz. Distilled Water
0.9 oz. Hungarian Lavender Essential Oil
2 cups Pink Sea Salt, Small
Rose Clay
Titanium Dioxide

Click here to add everything you need for this project to your Bramble Berry shopping cart!
If you’ve never made Cold Process soap before, stop here! I highly recommend checking out our FREE four part SoapQueen.tv series on Cold Process Soapmaking, especially the episode on lye safety. And if you’d rather do some reading, Bramble Berry carries a wide range of books on the topic, including my newest book, Soap Crafting. You can also checkout the digital downloads for that instant gratification factor.
SAFETY FIRST: Suit up for safe handling practices! That means goggles, gloves and long sleeves. Make sure kids, pets, and other distractions and tripping hazards are out of the house or don’t have access to your soaping space. Always soap in a well-ventilated area.
FRAGRANCE PREP: Measure .9 ounces of the Hungarian Lavender Essential Oil in a glass, essential oil safe container. Set aside.
COLOR PREP: To ensure that the Titanium Dioxide blends smoothly into the soap batter, we recommend micronizing it before dispersing it in oil. Please note this is an optional tip but it does help with the titanium dioxide clumping in the soap. =) To micronize colorant, simply use a coffee grinder to blend the colorant to break up any clumps of color and prevent streaks of white from showing in the final soap. We like to use a coffee grinder that has a removable, stainless steel mixing area for easy cleaning. Then, disperse 1 teaspoon of the colorant into 1 tablespoon of sunflower or sweet almond oil (or any other liquid oil). Then in a separate container, add 2 teaspoons rose clay and mix together with 2 tablespoons of distilled water. Clays are best dispersed in water rather than oil, because of their ability to absorb moisture.
ONE: Slowly and carefully add the lye to the water and gently stir until the lye has fully dissolved and the liquid is clear. Set aside to cool.
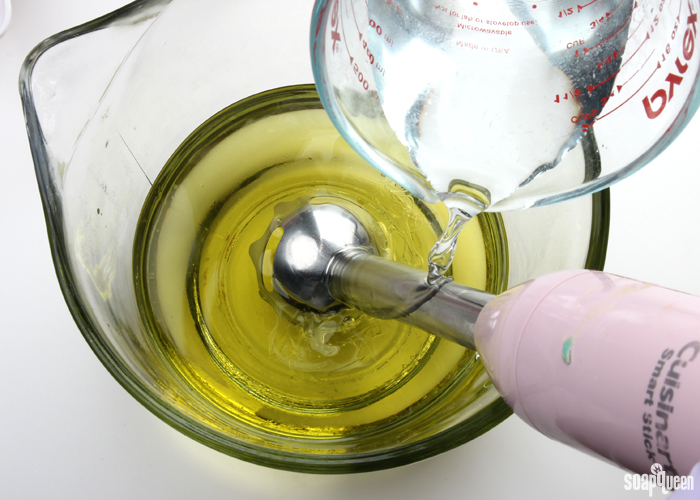
TWO: Melt and combine the coconut oil, olive oil, castor, sweet almond and palm oils (remember to fully melt then mix your entire container of palm oil before portioning). Once the lye water and the oils have cooled to 130 degrees or below (and are ideally within 10 degrees of each other), add the lye water to the oils and stick blend until thin trace. If you’d like a harder bar of soap that releases faster from the mold, you can add sodium lactate to the cooled lye water. Use 1 teaspoon of sodium lactate per pound of oils in the recipe. For this recipe, you’d add about 1 teaspoon sodium lactate.
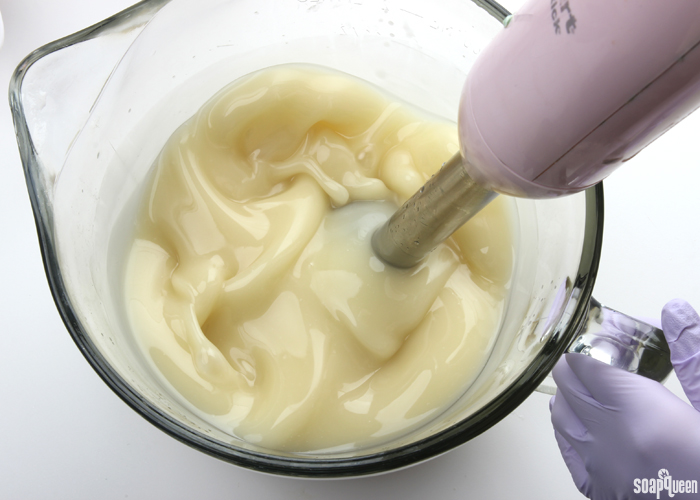 THREE: Once the batter has reached a thin trace, split off about 200 mL of the soap into a separate container. To this container, add 1 Tablespoon of the dispersed titanium dioxide and mix together with a whisk or spoon.
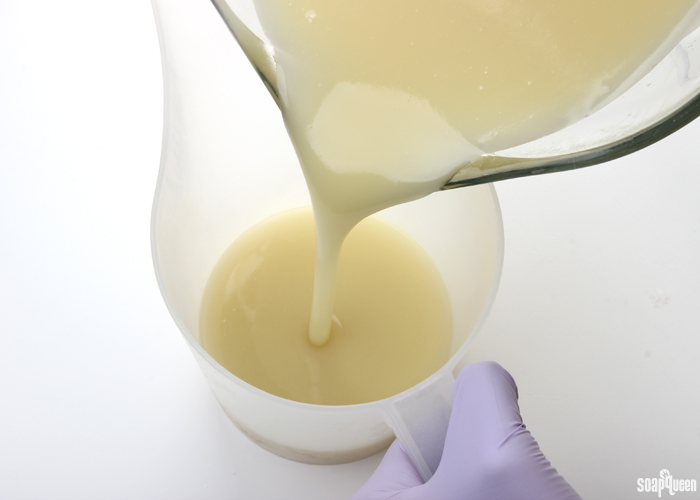 FOUR: To the other larger container of soap, add all the dispersed rose clay and mix together thoroughly with a spoon or whisk.
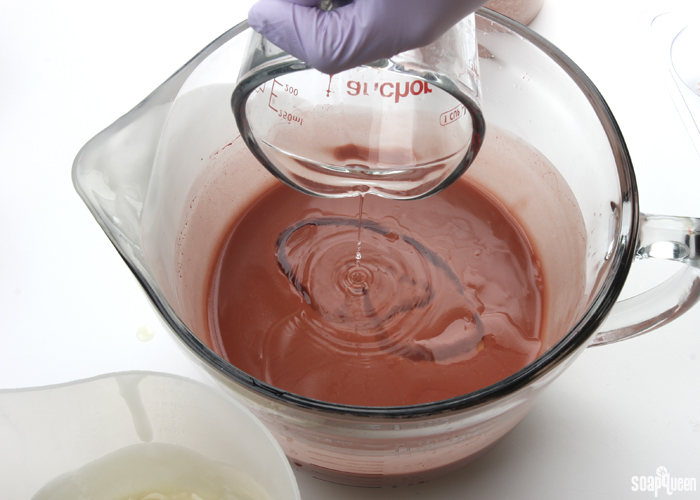
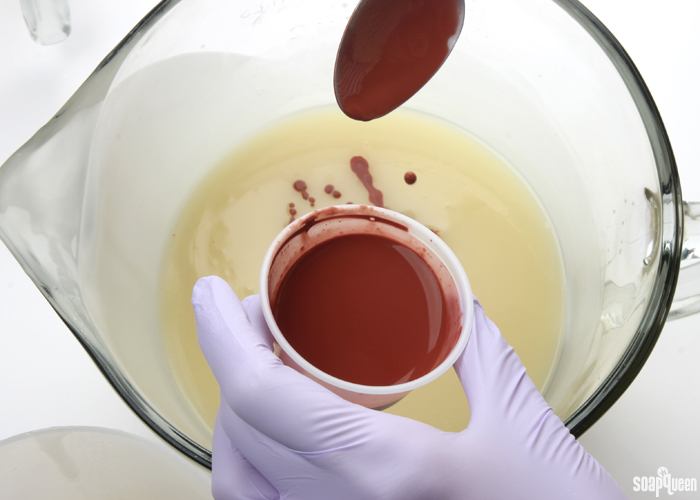 FIVE: Add the Hungarian Lavender Essential Oil to both containers proportionately; it’s okay to eyeball it! Use a whisk to thoroughly mix in the essential oil.
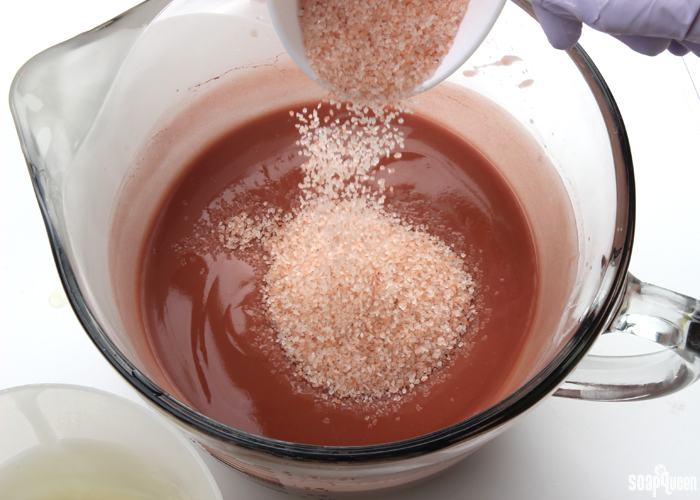
 SIX: Add 2 cups of the pink sea salt to the rose clay soap, and mix in with a whisk or spatula.
 SEVEN: Holding the white soap about six inches above the pot of rose clay soap, pour the white soap into various areas of bowl. Pouring from high above the bowl allows the white soap to break through to the bottom of the rose clay soap.
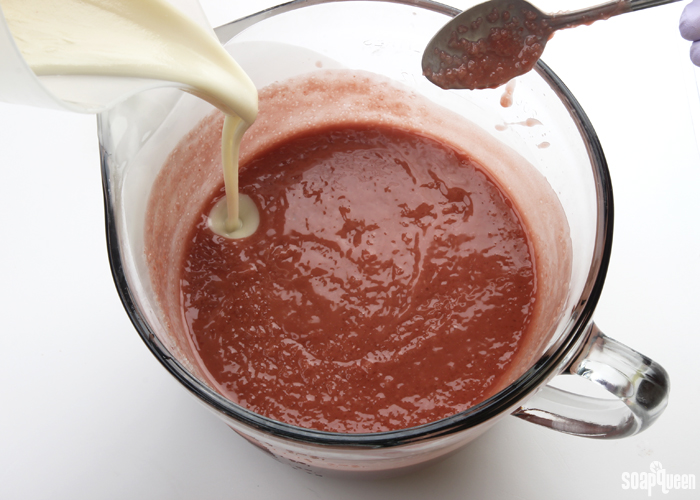
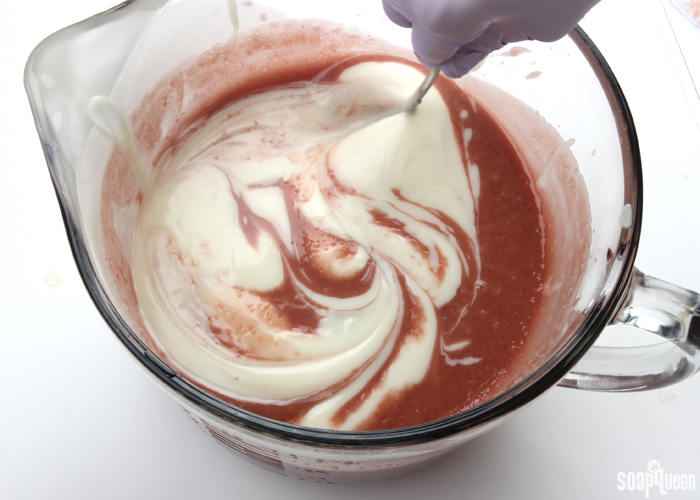
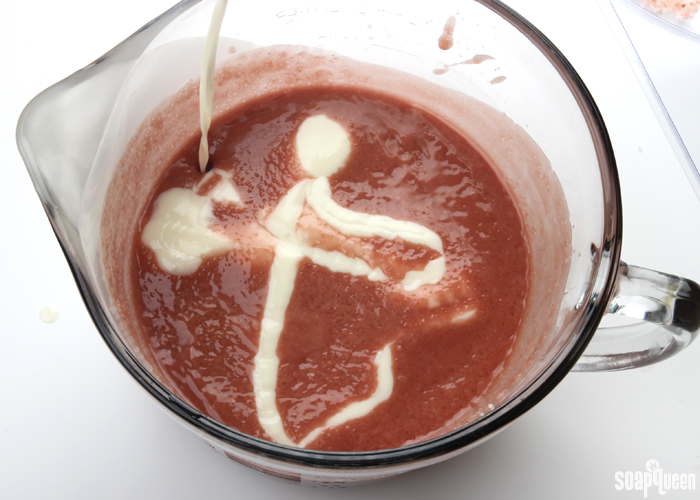 EIGHT: Using a spoon, chopstick or dowel, give the soap one stir to help swirl the colors slightly. Don’t stir too much, you don’t wan to completely mix them!
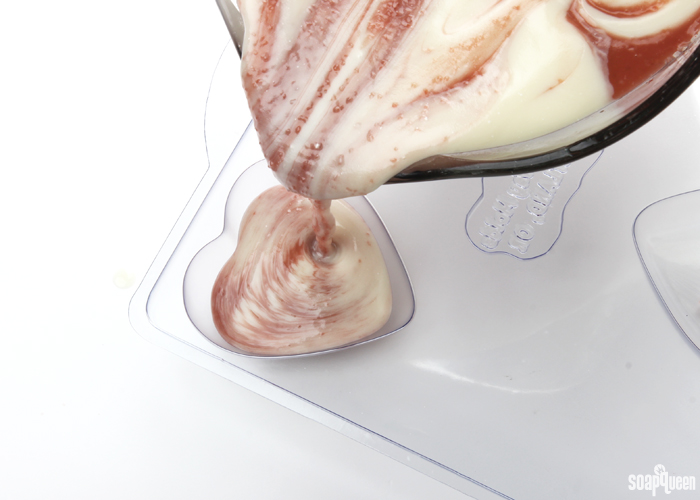
 NINE: Pour the soap into each heart cavity in all three molds until completely full. You’ll have nine bars total. Tap the mold on the counter to release bubbles and settle soap evenly in the mold.
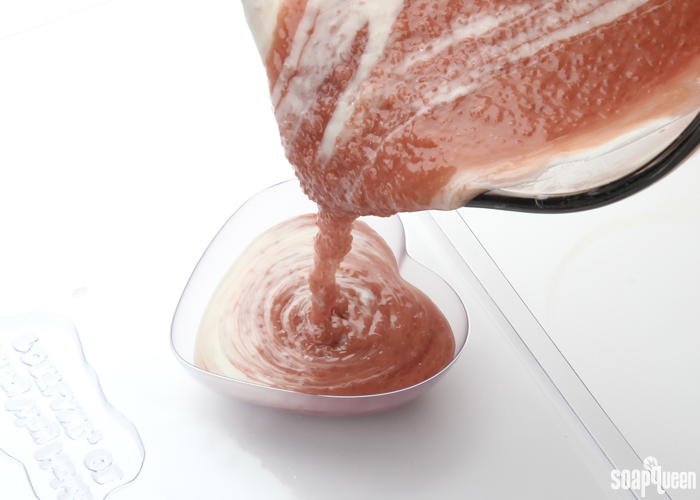 TEN: Spritz the top with 99% isopropyl alcohol to help avoid soda ash. Allow the soap to harden in the mold for 2-3 days. Allow to cure for 4-6 weeks and enjoy!
Have you ever made salt bars before? What did you think?
- Simple Heart Mold (three molds)
- 10 oz. Coconut Oil (50%)
- 4 oz. Olive Oil (20%)
- 4 oz. Palm Oil (20%)
- 1.4 oz. Sweet Almond Oil (7%)
- 0.6 oz. Castor Oil (3%)
- 3 oz. Sodium Hydroxide Lye
- 6.6 oz. Distilled Water
- 0.9 oz. Hungarian Lavender Essential Oil
- 2 cups Pink Sea Salt, Small
- Rose Clay
- Titanium Dioxide
- Slowly and carefully add the lye to the water and gently stir until the lye has fully dissolved and the liquid is clear. Set aside to cool.
- Melt and combine the coconut oil, olive oil, castor, sweet almond and palm oils (remember to fully melt then mix your entire container of palm oil before portioning). Once the lye water and the oils have cooled to 130 degrees or below (and are ideally within 10 degrees of each other), add the lye water to the oils and stick blend until thin trace. If you’d like a harder bar of soap that releases faster from the mold, you can add sodium lactate to the cooled lye water. Use 1 teaspoon of sodium lactate per pound of oils in the recipe. For this recipe, you’d add about 1 teaspoon sodium lactate.
- Once the batter has reached a thin trace, split off about 200 mL of the soap into a separate container. To this container, add 1 Tablespoon of the dispersed titanium dioxide and mix together with a whisk or spoon.
- To the other larger container of soap, add all the dispersed rose clay and mix together thoroughly with a spoon or whisk.
- Add the Hungarian Lavender Essential Oil to both containers proportionately; it’s okay to eyeball it! Use a whisk to thoroughly mix in the essential oil.
- Add 2 cups of the pink sea salt to the rose clay soap, and mix in with a whisk or spatula.
- Holding the white soap about six inches above the pot of rose clay soap, pour the white soap into various areas of bowl. Pouring from high above the bowl allows the white soap to break through to the bottom of the rose clay soap.
- Using a spoon, chopstick or dowel, give the soap one stir to help swirl the colors slightly. Don’t stir too much, you don’t wan to completely mix them!
- Pour the soap into each heart cavity in all three molds until completely full. You’ll have nine bars total. Tap the mold on the counter to release bubbles and settle soap evenly in the mold.
- Spritz the top with 99% isopropyl alcohol to help avoid soda ash. Allow the soap to harden in the mold for 2-3 days. Allow to cure for 4-6 weeks and enjoy!


So I brilliantly added three cups ( 2 lbs) of salt instead of two cups. Should I re batch it or hope for the best?
Thanks
How do the bars look now? More salt isn’t necessarily a bad thing! It may just make the bars a bit more firm and scrubby. 🙂
-Kelsey with Bramble Berry
Thanks for replying. They look ok, and are hardening up. Some bars crumbled a little as I took them out of the mold so they aren’t perfect. I’m sure my family and friends will like them. I used large salt crystals. Do most people use finer ground salt? I can’t wait to try it!
Oh good, glad to hear they turned out OK! We typically use smaller grained salt, but you can use larger crystals if you like. The larger the grains, the more scrubby the bars will be. 🙂
-Kelsey with Bramble Berry
Be careful with the large salt. I tested in myself and the soap scratched and broke the skin. All is not loss if that happens. They made great foot scrubs!
Absolutely, make sure to test the bars lightly on the skin before use. If they’re too scrubby for your skin, you can use them only on dry patches or break that soap up and embed it in another recipe.
-Kelsey with Bramble Berry
Hi, how many ounces are there in each heart mould?
There are three cavities in the mold. Each holds 3.5 oz. for a total of 10.5 ounces. 🙂
Simple Heart Mold: https://www.brambleberry.com/Simple-Heart-Mold-1-sheet-P3156.aspx
-Kelsey with Bramble Berry
Do you spray your molds at all? I am finding that they are sticking when I am trying to unmold them. I waited 1 day, then 5. Now I have left the rest in the molds hoping they won’t all stick.
Hmm, I’m not sure why that’s happening. Typically salt bars harden very quickly and should be ready to unmold after about 3 days. I would recommend waiting another couple days and trying again. It helps to pull at the sides of each cavity to break the airlock, then flip the mold and press gently on the back of the cavity with your thumbs. If they’re not wanting to come out, wait a few more days.
For your next batch, you can wipe the molds with a very thin layer of cyclomethicone. It’s a liquid silicone that will help them slide out easily. 🙂
Cyclomethicone: https://www.brambleberry.com/Cyclomethicone-P4560.aspx
-Kelsey with Bramble Berry
Hi, I had read that someone said that they put a towel over salt bars to absorb the water.( I used European spa salts so I’m hoping it does ok with them.) They said they change the towel daily while curing. Do you find you need to do this or would it help? I just made my first batch of salt bars after soaping for several years. I am excited to see the results. Thanks, Barb
Hi Barb!
We haven’t tried that but it may help absorb some of the excess moisture! My only worry is that the bars won’t be getting a lot of air, which can slow down the cure time. If you do use a towel, make sure to only cover the tops of the bars so they can still get air. You can also place silica packets or rice near the bars, or use a dehumidifier. That will help absorb some of that moisture. 🙂
Then, once the bars are cured, you can wrap them tightly with plastic wrap. Read more about packaging soap here: https://www.soapqueen.com/bath-and-body-tutorials/tips-and-tricks/5-ways-professional-soap/
-Kelsey with Bramble Berry
I have very dry skin, what oil can I add or substitute with this recipe?
I missed this comment Cat, I’m so sorry about that. While these bars feel nice on the skin, they’re more cleansing and will exfoliate because of the salt. We have some really nice moisturizing recipes you may like instead! I’ll link those below. 🙂
Favorite Cold Process Recipes: http://www.soapqueen.com/bath-and-body-tutorials/cold-process-soap/my-favorite-cold-process-recipes-2/
Pure Honey Cold Process Soap: https://www.soapqueen.com/bath-and-body-tutorials/pure-honey-cold-process-soap-tutorial/
Clover and Aloe Spin Swirl Soap: https://www.soapqueen.com/bath-and-body-tutorials/clover-aloe-spin-swirl-cold-process-soap/
-Kelsey with Bramble Berry
I made this today using my square molds from BB. Mine are not going to be swirled as these because I underestimated the size the final amount of soap would be. So please factor in the 2 cups of salt :).
Mine are going to all pink and some swirled.
The recipe is easy and as usual BB makes my soap look great even with a small container.
Thanks
That’s a great tip Debra! The salt does make these bars a bit heavier. I’m glad your soap turned out well. These bars feel really nice on the skin! 🙂
-Kelsey with Bramble Berry
This looks lovely! Before I start I would like to know the total weight please. It looks like you may have used 3 of the heart molds, total of 9 bars?
Thank you Lori! Also, we did use three molds to make a total of 9 bars. This recipe makes 29.6 ounces of soap. However, they will be a bit more heavy because of the salt. The three molds hold a total of 31.5 ounces, and this recipe fills them all to the rim. 🙂
-Kelsey with Bramble Berry
I made this recipe a few weeks ago, but the soap doesn’t have much of a lather. Is that normal for this recipe?
Hi Jackie!
The salt in this recipe does weigh the lather down a bit. The high amount of coconut oil helps add some bubbles, but the lather will be a bit more creamy rather than large and fluffy. That is normal. The lather feels really nice on the skin! 🙂
-Kelsey with Bramble Berry
I made my first salt bars a few weeks ago. I used sea salt (not Dead Sea or Epsom) and I noticed beads of water all over the bars. I put the bars in a plastic container so they wouldn’t absorb the moisture from the air, which helped, but I’m worried they might not fully cure. Any suggestions? Thanks!
Hi Melissa!
Salt bars will sweat – that’s normal. The salt draws moisture in from the air and forms the beads. To keep them a bit more dry, you can use a dehumidifier. You can also put some rice or silica packets in the plastic container to help absorb some of the moisture as well. The good news is the salt bars will cure and feel really nice on the skin even with the moisture! 🙂
-Kelsey with Bramble Berry
Hi Melissa and Kelsey! I just made my first batch of salt bars myself and had the same problem. I don’t have a dehumidifier and I didn’t want to use my rice for fear of waste and having to throw it out after use, so I used a desk fan and had it blowing on the salt bars. It worked like a charm. I hope this helps 🙂
A fan is a great idea as well Vivian! That helps keep the bars a bit more dry and prevents some of that sweating. Thanks for the awesome tip. 🙂
-Kelsey with Bramble Berry
I just made these but used a beautiful rose fragrance oil instead and some mauve mica. I can’t wait to unmould but thought I should wait for another day at least – I don’t want to though. Waiting for them to cure will be the hardest!!!
That sounds amazing! The rose fragrance and mauve goes perfectly with the heart shape. Also the nice thing about these bars is they harden really fast, so they will be ready to unmold in just a day or two! 🙂
-Kelsey with Bramble Berry
Wow, You weren’t kidding when you said they got crumbly and hard to cut after a few hours. Any ideas for what I should do with a batch of crumbles and half soap bars? You mentioned a scrub earlier, how would that work? I’m thinking that with the salt added it doesn’t make sense to rebatch or hot process hero it cause it would melt the salt? Or would it be worth trying? I was trying to make soap bars, so I’d like to end up with soap bars, but not if they are just going to be a crumbly mess. Thanks
Hi Julia!
Salt bars do harden very quickly! We recommend cutting them as soon as they harden, which can take as little as 1-2 hours.
For a scrub, you can break the pieces up until they’re fine, pop them in a jar and use it as a scrub! That’s a nice simple recipe. If you want some more moisturizing properties, you can add a touch of oil like avocado oil. You can also mix the pieces with Foaming Bath Butter for a fluffy texture. 🙂
Avocado oil: https://www.brambleberry.com/Avocado-Oil-P3198.aspx
Foaming Bath Butter: https://www.brambleberry.com/Foaming-Bath-Butter-P4955.aspx
Jars: https://www.brambleberry.com/Jars-C585.aspx
As for rebatch or the Hot Process Hero method, I’m not entirely sure what that soap would do. The salt would melt with those processes, and may give the soap an odd texture. I would recommend rebatching or hot processing a small portion of the soap to see how it acts!
You can also embed the pieces into a new cold process soap. That will give the soap nice exfoliation. 🙂
-Kelsey with Bramble Berry
How to Rebatch Soap: http://www.soapqueen.com/bath-and-body-tutorials/cold-process-soap/soap-queen-tv-presents-how-to-make-rebatch-soap-2/
Hot Process Hero: http://www.soapqueen.com/bath-and-body-tutorials/tips-and-tricks/hot-process-hero-2/
Mine also crumbled – is there a reason why? I made mine into bars – and just cut this morning – when I could handle them.
How long did you wait before cutting them? We recommend cutting them as soon as they harden, which can take as little as 1-2 hours. If they sit longer than that, they can crumble.
-Kelsey with Bramble Berry
My first soap with salt in it… I am really curious what it will be like. These 6 weeks curing time will feel like a lifetime.
I was wandering… when adding dry matter to your soap like oatmeal, you add additional water. Is this not needed when adding salt?
With kind reagdrs,
Annemieke
I’m excited for you to try the soap! It has a really unique feeling – creamy and scrubby. It feels really awesome on the skin. 🙂
When making salt bars, they will start to absorb the excess moisture and thicken the batter. It is similar to using clays! If you like, you can add a bit more water to slow that acceleration down a bit. It’s not something we’ve done a lot of testing with, so a small test batch would be helpful. We typically add a normal amount of water and plan for a more simple design. It also helps to move quickly when working with salt!
-Kelsey with Bramble Berry
Hi, I have already made the cold process soap with hymalayan pink salt as per recipee here (pretty in pink salty cold process) and it was really nice, however at some point when using it, it starts to break and crumble. Is it a normal situation for the soaps with the salt, how could it be avoided? Thank you!
Hi Gvantsa!
That’s a great question! Over time, salt bars can become crumbly – it is a normal situation with them. The good news is they still work great. If they crumble too much, you can take the pieces and embed them into another cold process recipe! You can also crumble the pieces and turn them into a luxurious scrub. 🙂
-Kelsey with Bramble Berry
Thank you Kesley for your reply and Happy New Year to you 🙂
You’re welcome! Happy New Year Gvantsa. 🙂
-Kelsey with Bramble Berry
I’m brazilian. Here we don’t find castor oil. I would like to know if I can substitute it to another oil? Thank you.
Hi Edivania!
Castor oil helps add great bubbles to soap, and there isn’t a direct replacement for it. However, the coconut oil in this recipe will add lathering properties to the soap! For future recipes, you can use coconut oil for lather. You can also use honey! It helps create a lovely, creamy lather. Learn more about working with honey here: http://www.soapqueen.com/bath-and-body-tutorials/tips-and-tricks/adding-honey-to-cold-process-soap-tips-tricks-recipe/
This post has more information on common soapmaking oils and how to use them in soap: http://www.soapqueen.com/bath-and-body-tutorials/tips-and-tricks/free-beginners-guide-to-soapmaking-common-soapmaking-oils/
And this post on substituting oils in cold process soap may be helpful for you as well: http://www.soapqueen.com/bath-and-body-tutorials/tips-and-tricks/how-to-substitute-oil-in-cold-process-recipes/
-Kelsey with Bramble Berry
I was wondering about the milk vs. water as well, however I would like to use coconut milk. I assume it would all work fine if I put my soap into the freezer for a few hours?
I think milk would be just fine, and would add some great silkiness! To keep the milk cool, I would recommend popping it in the freezer after it’s in the mold. But, make sure to check it after 15-20 minutes. Salt bars harden fast, so they may be ready to unmold by then. A small test batch would be super helpful too! 🙂
-Kelsey with Bramble Berry
Hi guys! I was wondering if you could tell me what the superfat % was for this soap 🙂 I was also wondering, I know you can replace the water with goat’s milk (or any other liquid) for any soap recipe, but I was wondering if you had any thoughts on if salt soaps turn out well with a milk base. Thank you!!
Hi Charlene!
Absolutely! The superfat of this recipe is 5%. Normally, with such a high coconut oil amount, we recommend a higher superfat. That’s because above 33% the coconut oil can be drying on the skin. However, the salt in this recipe makes the bars feel really nice and creamy. It’s actually kind of odd, I was surprised at how soft they were on the skin! It also gives the soap nice lather. 🙂
As far as the milk, I think that would work just fine! You can do 100% milk, or a combination of milk and water. It would add some nice creaminess to the bars. To keep the milk cool, you will want to pop it in the fridge or freezer afterward. Salt bars harden really quickly and can get crumbly, so don’t leave it in there too long! I would recommend checking it after 15-20 minutes to see how it’s doing. Keep a close eye on it! A small test batch would be really helpful as well.
Read more about working with milk in soap here: http://www.soapqueen.com/bath-and-body-tutorials/tips-and-tricks/how-to-add-lye-to-milk-for-cold-process-soap/
-Kelsey with Bramble Berry
Can pink sea salt be added to mp soaps as well?
Hi Sue!
It sure can! We have an awesome recipe that has Himalayan pink sea salt and Shea Melt and Pour. It feels amazing on the skin! You can find that recipe here: http://www.soapqueen.com/bath-and-body-tutorials/melt-and-pour-soap/home-spa-pink-salt-shea-bath-bar/
-Kelsey with Bramble Berry