If you’re a regular reader of the blog, you know cold process is my favorite method of soap making; it’s how I originally learned to make soap, and is my “first love.” But, there are multiple ways to create gorgeous soap, including hot process soap making. Hot process soaping is a fantastic (and quick!) method that results in a rustic style bar of soap.
The main difference between the cold process and hot process methods is temperature. In cold process, hot oils and lye are combined to initiate the saponification process. The soap is then set aside for several days to harden and set up. In hot process, hot oils and lye are combined to begin saponification, and then introduced to heat via a Crock Pot or double boiler. The additional heat speeds up the saponification process and “cooks” the soap before it goes into the mold. This cuts down dramatically on the wait time! Make sure when making hot process soap, that your recipe does not fill up the Crock Pot more than halfway. Hot process soap tends to expand, and you don’t want it overflowing!
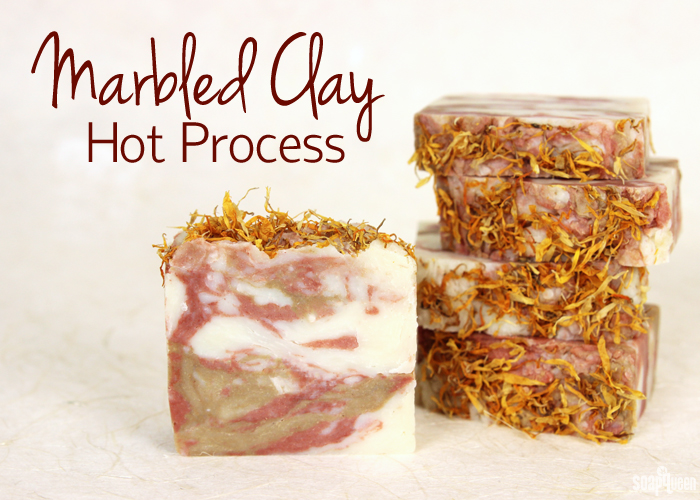
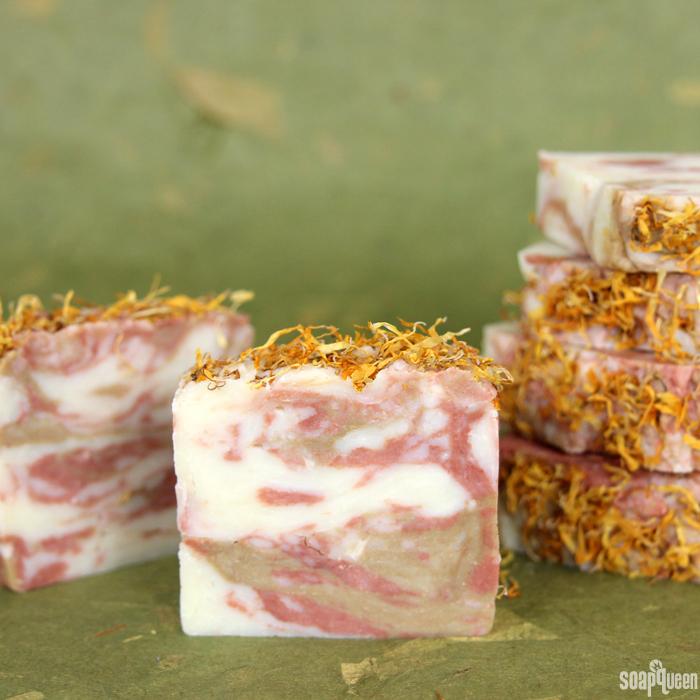
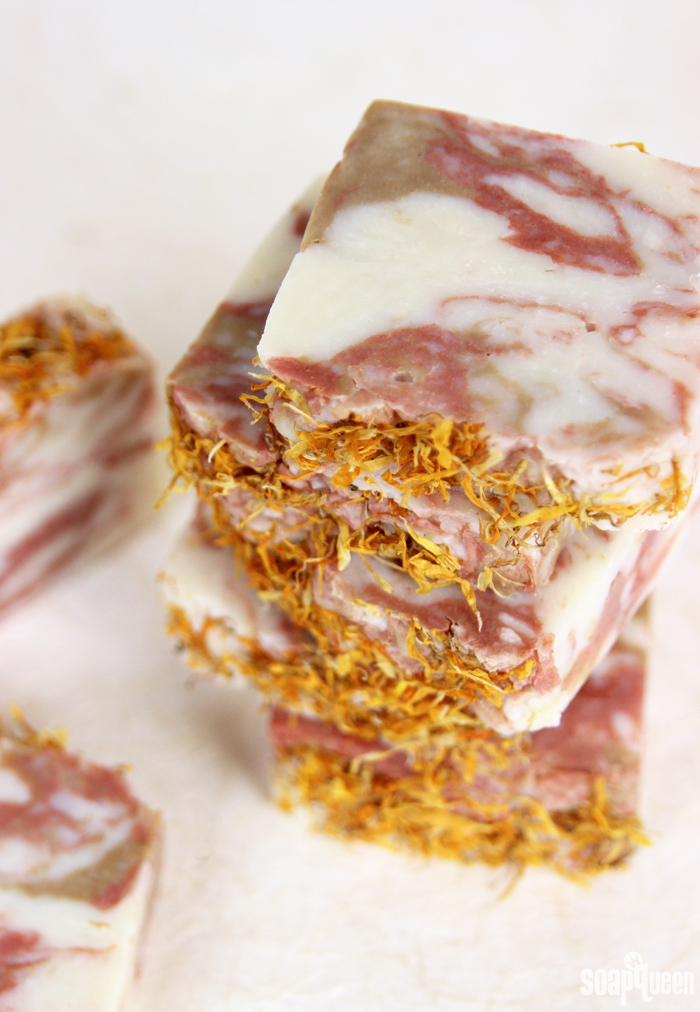
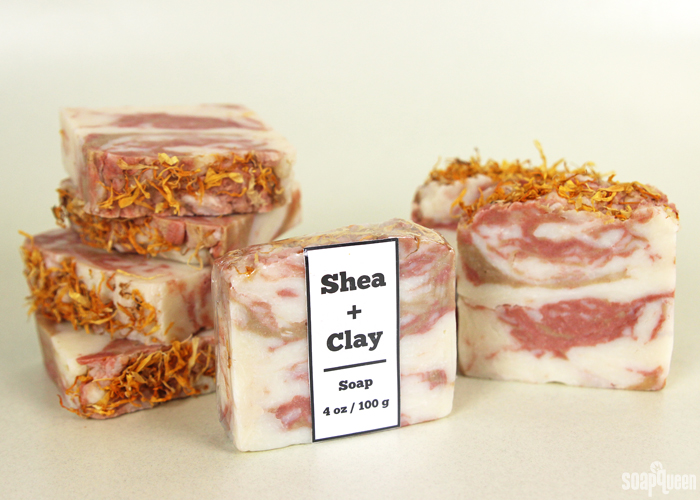
In this project, a Crock Pot is used to cook the soap but you can also use a double boiler. Natural red Brazilian and yellow silt clay give this soap a natural, marbled effect. Calendula petals are placed on top for additional flair.
What You’ll Need:
1.2 oz. Avocado Butter
2.3 oz. Avocado Oil
5.8 oz. Coconut Oil
6.9 oz. Olive Oil
5.8 oz. Palm Oil
1.2 oz. Shea Butter
.7 oz. Sodium Lactate
3.3 oz. Sodium Hydroxide Lye
7.7 oz. Distilled Water
.5 oz. Fresh Mango Fragrance Oil
.5 oz. Kumquat Fragrance Oil
Dark Red Brazilian Clay
Yellow Silt Clay
Marigold (Calendula) Petals
2 lb Wood Loaf Mold
Silicone Liner for 2 lb Wood Mold
Crock Pot
 Click here to add everything you need for this project to your Bramble Berry shopping cart!
COLOR PREP: Disperse 1 teaspoon red Brazilian clay into 1 tablespoon distilled water. Disperse 1 teaspoon yellow silt clay into 1 tablespoon distilled water. Use a mini mixer to disperse any clumps.
FRAGRANCE BLEND: In a glass container, combine .5 oz. of Fresh Mango Fragrance Oil and .5 oz. of Kumquat Fragrance Oil. Set aside.
SAFETY FIRST: Suit up for safe handling practices! Goggles, gloves, and long sleeves are your soap making uniform. Be sure that kids and pets are out of the house or unable to access your soaping space, and always soap in a well-ventilated area. Make sure the soap volume will not fill up more than half of your crock pot. If you have never made cold process soap before, I highly recommend you get a couple of basic recipes under your belt before trying out this tutorial. Check out this (free!) 4-part series on cold process soap making, especially the episode on lye safety.
ONE: Slowly and carefully add the lye to the water and gently stir until the lye has fully dissolved and the liquid is clear. Set aside to cool. Once cooled, add sodium lactate. Sodium lactate is used in hot process at 3% of the oil weight to help produce a smoother bar.
TWO: Melt and combine the palm and coconut oils. Add the shea butter, avocado butter to the warmed oils and still until melted. Add the olive, and avocado and stir to combine. Pour the oils into your Crock Pot’s pot. Slowly add the lye water to the oils.
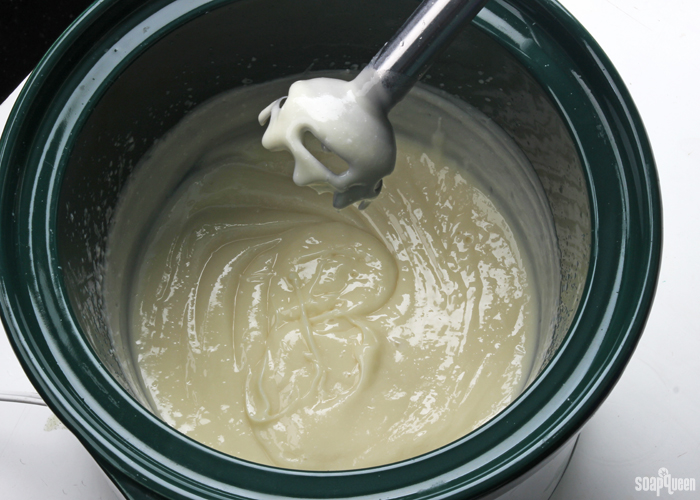
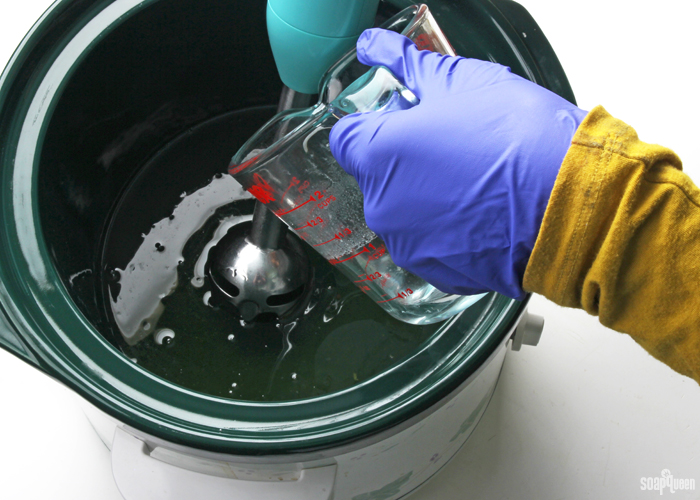 THREE: Mix with a stick blender until a thick trace is achieved.
FOUR: Put the lid on the Crock Pot and set it to low. After 15 minutes, check the soap to see the progress made. Starting from the outside, the texture and color of the soap will start to change. If the middle does not appear to be changing, stir the batch to ensure even cooking. Don’t be surprised if the soap starts to grow in volume. Do not leave your soap unattended in the first 30 minutes of cook time for this reason. If the soap gets too high in the pot, take the pot off heat and stir like crazy.
FIVE: The batch will be ready when it’s the texture of mashed potatoes. This may take another 15 minute session or even two or three more stir’n’waits. When you think it’s ready, use a pH strip to test the levels. It should be showing below a 10. Be sure not to overcook the soap; you don’t want too dry a texture for the next steps!
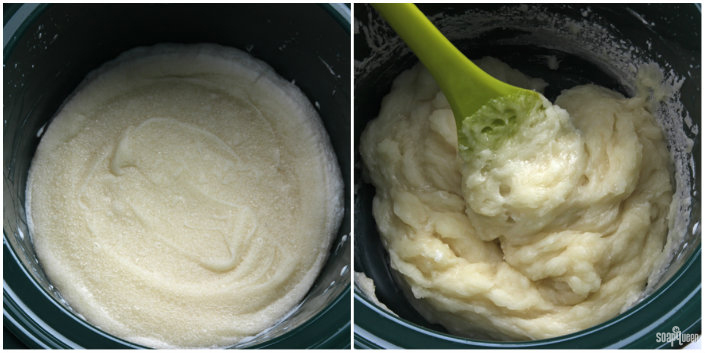 NOTE: The amount of time that the soap takes in the Crock Pot phase can depend on the size and shape of your Crock Pot. The flatter ones meant for roasts may go a bit quicker because the soap will be spread out thinner on the heated surface. Because this is a small batch of soap, you may find it will cook faster than larger batches. For our standard sized Crock Pot, the soap took 20 minutes to cook.
SIX: When the soap is ready, add the fragrance oil blend and mix well.
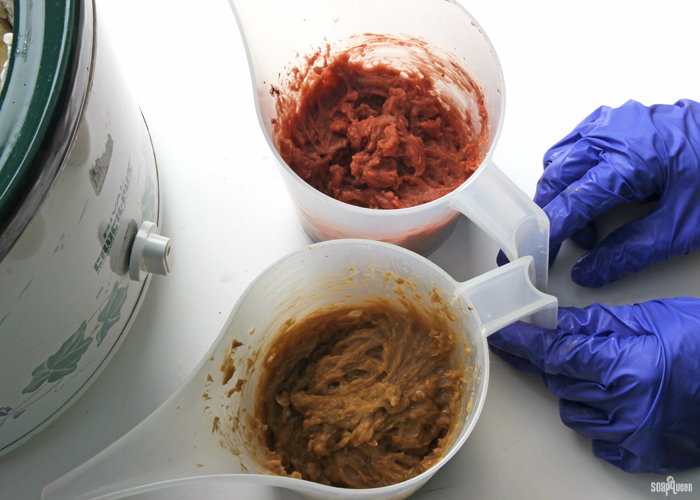
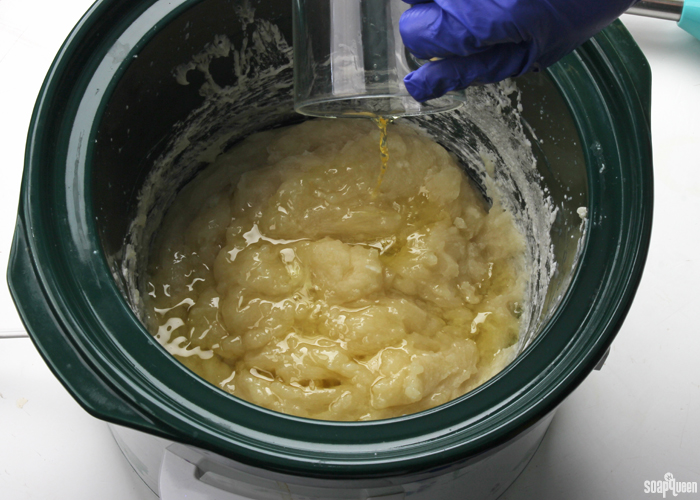 SEVEN: Split the soap into three even parts, leaving one part in the crock pot and transferring the other two into separate containers. Color one container with all the dispersed yellow silt clay, and the other with all the dispersed red Brazilian Clay. Stir in each of the colors well.
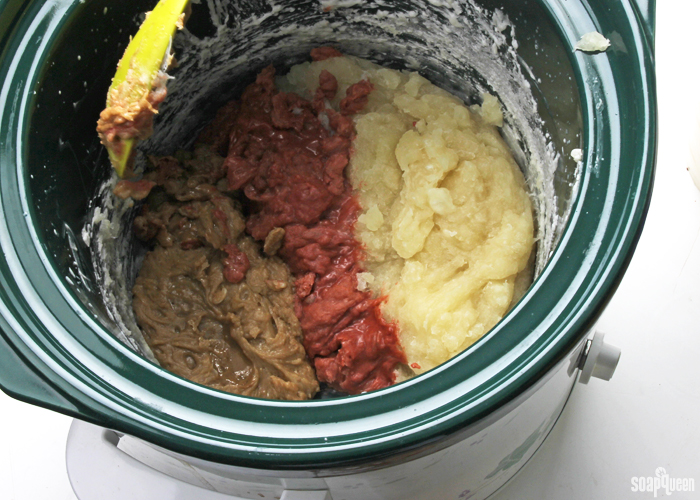
 EIGHT: Move all the uncolored soap still in the Crock Pot to one side of the pot. Spoon the red colored soap next to the uncolored soap. Spoon the yellow colored soap into the pot, next to the red soap.
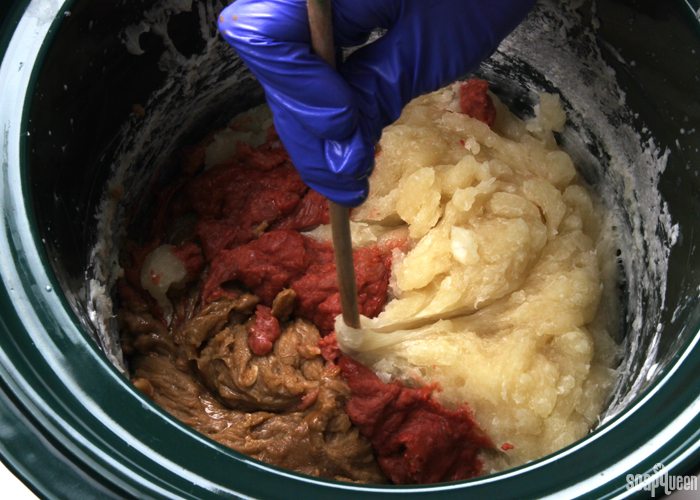
 NINE: Using a dowel or chopstick, swirl the three colors together by moving the swirling tool to one side of the Crock Pot to the other. Continue to swirl the colors together several times, until they are slightly combined.
 TEN: Using a large spoon, transfer the soap into the mold, tapping the mold down on the counter in between each scoop.
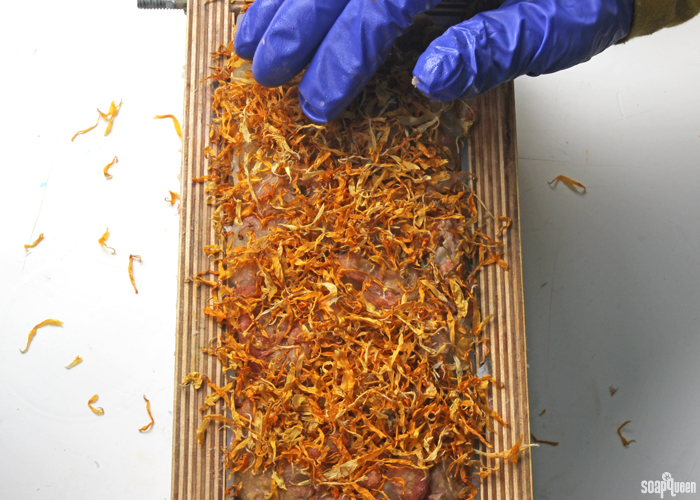
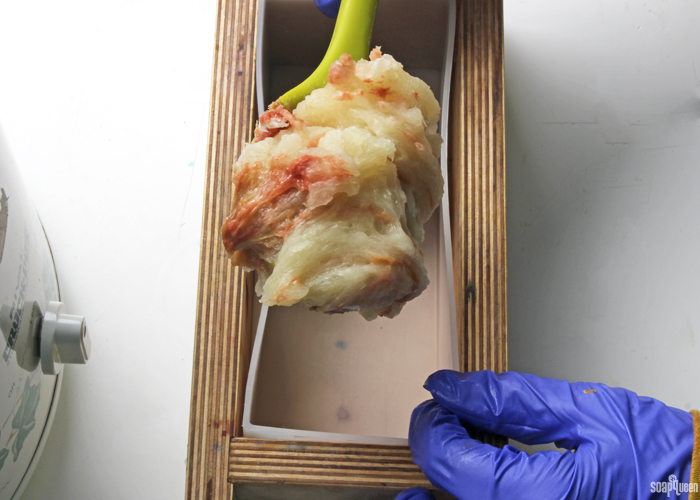 ELEVEN: Once all the soap has been transfered, cover the top with calendula petals and press gently into the soap to help adhere.
Do you prefer hot process, or cold process soap? I’m excited to share more hot process recipes with you! If you’d like to see more hot process techniques and recipes, check out the blog posts below =)
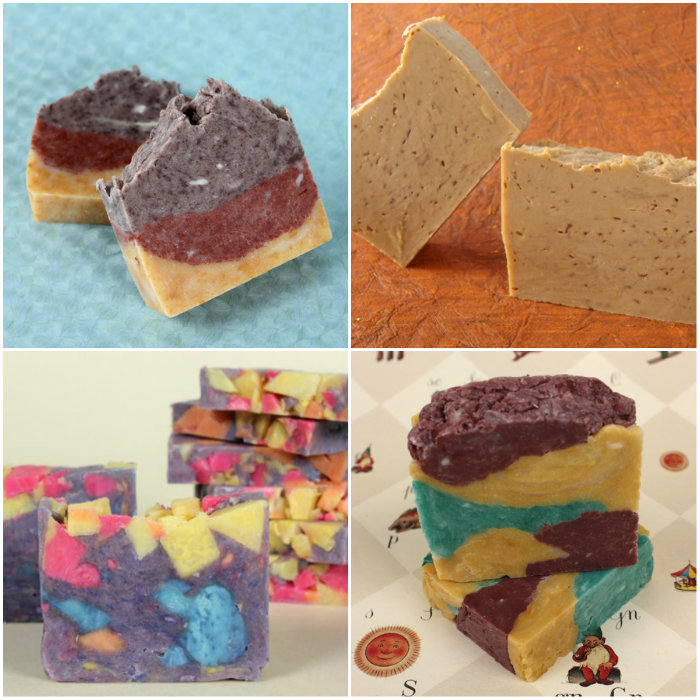 Top row: Hot Process Layers, Hot Process Hero
Bottom row: Black Cherry Bounces Back, Crock Pot Camo
- 1.2 oz. Avocado Butter
- 2.3 oz. Avocado Oil
- 5.8 oz. Coconut Oil
- 6.9 oz. Olive Oil
- 5.8 oz. Palm Oil
- 1.2 oz. Shea Butter
- 3.3 oz. Sodium Hydroxide Lye
- 7.7 oz. Distilled Water
- .7 oz. Sodium Lactate
- .5 oz. Fresh Mango Fragrance Oil
- .5 oz. Kumquat Fragrance Oil
- Dark Red Brazilian Clay
- Yellow Silt Clay
- Marigold (Calendula) Petals
- Disperse 1 teaspoon red Brazilian clay into 1 tablespoon distilled water. Disperse 1 teaspoon yellow silt clay into 1 tablespoon distilled water. Use a mini mixer to disperse any clumps.
- In a glass container, combine .5 oz. of Fresh Mango Fragrance Oil and .5 oz. of Kumquat Fragrance Oil. Set aside.
- Suit up for safe handling practices! Goggles, gloves, and long sleeves are your soap making uniform. Be sure that kids and pets are out of the house or unable to access your soaping space, and always soap in a well-ventilated area. Make sure the soap volume will not fill up more than half of your crock pot.
- Slowly and carefully add the lye to the water and gently stir until the lye has fully dissolved and the liquid is clear. Set aside to cool. Once cooled, add sodium lactate. Sodium lactate in hot process helps produce a smoother bar.
- Melt and combine the palm and coconut oils. Add the shea butter, avocado butter to the warmed oils and still until melted. Add the olive, and avocado and stir to combine. Pour the oils into your Crock Pot’s pot. Slowly add the lye water to the oils.
- Mix with a stick blender until a thick trace is achieved.
- Put the lid on the Crock Pot and set it to low. After 15 minutes, check the soap to see the progress made. Starting from the outside, the texture and color of the soap will start to change. If the middle does not appear to be changing, stir the batch to ensure even cooking. Don’t be surprised if the soap starts to grow in volume. Do not leave your soap unattended in the first 30 minutes of cook time for this reason. If the soap gets too high in the pot, take the pot off heat and stir like crazy.
- The batch will be ready when it’s the texture of mashed potatoes. This may take another 15 minute session or even two or three more stir’n’waits. When you think it’s ready, use a pH strip to test the levels. It should be showing below a 10. Be sure not to overcook the soap; you don’t want too dry a texture for the next steps! NOTE: The amount of time that the soap takes in the Crock Pot phase can depend on the size and shape of your Crock Pot. The flatter ones meant for roasts may go a bit quicker because the soap will be spread out thinner on the heated surface. Because this is a small batch of soap, you may find it will cook faster than larger batches. For our standard Crock Pot, the soap took 20 minutes to cook.
- When the soap is ready, add the fragrance oil blend and mix well.
- Split the soap into three even parts, leaving one part in the crock pot and transferring the other to into separate containers to add clays. Color one split batch with all the dispersed yellow silt clay, and the other with all the dispersed red Brazilian Clay. Stir in each of the colors well.
- Move all the uncolored soap still in the Crock Pot to one side of the pot. Spoon the red colored soap next to the uncolored soap. Spoon the yellow colored soap into the pot, next to the red soap.
- Using a dowel or chopstick, swirl the three colors together by moving the swirling tool to one side of the Crock Pot to the other. Continue to swirl the colors together several times, until they are slightly combined.
- Using a large spoon, transfer the soap into the mold, tapping the mold down on the counter in between each scoop.
- Once all the soap has been transferred, cover the top with calendula petals and press gently into the soap to help adhere.

Melt and pour soap base
175 gm sles
130 gm stearic acid
60 gm myrstic or lauric acid . any one not both
50 gm cocobetaine mild surfactant to reduce harshness of sles and or pH of sles. By adding cocobetaine it makes soap a lot glassy look transparency. Or instead of cocobetaine one can add SCI.
150 gm propylene glycol
100 gm glycerine
165 gm sorbitol.
Plz do note solvents PG, GLYCERINE AND SORBITOL are most preferred ratios. Depending on your climatic conditions you can reduce the ratios . if its a humidity area do reduce solvent ratios . otherwise your soap will sweat a lot and become soft. But naturally SLES will tend to sweat low.
Those who want natural transparent soap in place of sles add coconut oil and in place of cocobetaine add castor oil. Rest stearic and myristic or lauric is same.
But for sles procedure. Mix all pg, glycerine sorbitol , SLES and add 27 gm water and heat to 60 deg cel. And add stearic and myrstic or lauric. Let it melt and now add 60 gm naoh dissolved in 60 gm water. 50% solution lye.
Add 75 deg cel naoh lye to the above mixture in your crockpot. Now it will become molten. Let the molten substance dissolve comletely and become like liquid. Add 3 gm EDTA(chelating agent) after it completely become liquid add cocobetaine and stir properly and now add 10 gm TEA to reduce ph value. Cook for atleast 30 to 45 min. Switch off the crockpot. Let airbubbles reach top and then pour the liquid soap ini molds and njy.
The other procedure for oils is naoh 60gm and water 125 gm. And as usual hot process mix lye with oils and cook. After neutralize. I mean gel phase add PG, wait for 30 min and add GLYCERINE SORBITOL. Add TEA. EDTA ADD AT TRACE. OR TO GEL PHASE. NJY. HAPPY SOAPING.
Thanks for sharing your recipe Taruni! 🙂
-Kelsey with Bramble Berry
This recipe looks wonderful, I’ll have to try it. I’ve only used the M&P in the past and new at the hot process so I would love to see more recipes of the hot process soap making. Thank you
Absolutely, we’ll definitely keep that in mind for future tutorials! Thanks for the suggestion Sharon. I’ll link some more hot process recipes you may like below. 🙂
-Kelsey with Bramble Berry
Lavender and Lemongrass Hot Process Soap: https://www.soapqueen.com/bath-and-body-tutorials/lavender-lemongrass-hot-process-soap-on-soap-queen-tv/
Luck of Irish Hot Process Tutorial: https://www.soapqueen.com/bath-and-body-tutorials/cold-process-soap/luck-irish-hot-proces/
Oven Process Layers: https://www.soapqueen.com/bath-and-body-tutorials/cold-process-soap/hot-process-series-oven-process-layers/
Crock Pot Camo: https://www.soapqueen.com/bath-and-body-tutorials/cold-process-soap/hot-process-series-crock-pot-camo/
Hi! Can I use 2 teaspoons of sea clay mixed into 2 tablespoons of water and add when the soap is done, and then mold….( using the clay for the skin benefits and not so much for color) and also can you use the liquid color drops like from craft store for color…or basically any liquid color drops for the hot process soaps? Thanks in advance! Love this recipe!!
I meant to say instead of the other clays mentioned in the recipe. Kind of tweaking the recipe and replacing the two clays with the sea clay. And then as I mentioned maybe using liqiud color drops for some added color. I only have some from craft store on hand and was wondering if they could be successfully used in hot process? Thanks
You can definitely add sea clay to this recipe if you like! You can add that to the soap right at the end and swirl it in the Crock-Pot rather than splitting it off and coloring the different containers. That will make it nice and simple. 🙂
Sea clay: https://www.brambleberry.com/Sea-Clay-P4961.aspx
Also, you’ll want to check the liquid colors to make sure they’re made for soap. If not, they may morph, fade or bleed in the bars. Colors made specifically for soap work best!
Read more about coloring soap here: http://www.soapqueen.com/bath-and-body-tutorials/tips-and-tricks/talk-it-out-tuesday-colorants/
-Kelsey with Bramble Berry
I am so excited! I just tried this and it is my very first hot process soap! Instead of the yellow silt I used orange 10x eo to fragrance that section of soap. I hope it turns out!
That’s awesome, Orange 10X Essential Oil smells so awesome. If you get a picture of the soap, we’d love to see it on our Facebook page. 🙂
Bramble Berry Facebook page: https://www.facebook.com/BrambleBerry/
-Kelsey with Bramble Berry
Hello Soap Queen!
I have a question on this soap on how do you make your soap so white and do you have any recommend amount of additive to use in the HP soap?
Thank you <3
Hi Anne!
There are several things you can do to make your soap whiter! The first is oil choice. Choosing oils with neutral colors helps lighten the soap. For instance, coconut oil, palm oil, sweet almond oil, etc. If the soap has a lot of olive oil, which has a greenish yelllow hue, can make the batter quite yellow. Adding less olive oil helps. Read more about that in the How to Get Vibrant Colors in Soap post: http://www.soapqueen.com/bath-and-body-tutorials/tips-and-tricks/how-to-get-vibrant-colors-in-soap/
Another way to whiten the soap is using titanium dioxide. It’s a powder colorant that helps lighten soap! To use it, we recommend mixing at a rate of 1 tsp. of colorant to 1 Tbsp. of a lightweight liquid oil, like sweet almond oil. If you have a larger batch, you may need to mix 2 tsp. into 2 Tbsp., or 3 into 3. Then, add the dispersed color 1 teaspoon at a time until you get a white color you like. 🙂
Learn more about titanium dioxide here: http://www.soapqueen.com/bath-and-body-tutorials/tips-and-tricks/sunday-night-spotlight-titanium-dioxide/
-Kelsey with Bramble Berry
hi! when you calculate HP soap are you adding a sodium lactate to the CP recipe you use or do you substitute part of sodium hydroxide? i would like to alter one of my CP recipes and try to make the same one but with HP method (to see difference) 😉 just don’t know if to simply add (and how much) or if to substitute part 😀 i do work in grams, not in oz 😉
Hi Karol!
Sodium lactate is an additive that helps harden cold process soap and make hot process soap smoother. It doesn’t help turn the recipe into soap.
Sodium hydroxide lye, on the other hand, is necessary to turn the recipe into soap. It chemically reacts with the oils and turns into soap through a process called saponification. Read more about that chemical reaction here: http://www.soapqueen.com/bath-and-body-tutorials/cold-process-soap/using-the-bramble-berry-lye-calculator-2/
So, I would recommend using the same amount of lye for cold process soap. As for the sodium lactate, that is an optional additive. We love it because it helps the soap pop out of the mold faster! You can add 1 teaspoon per pound of oils to your cooled lye water. Read more in the Sunday Night Spotlight: Sodium Lactate: http://www.soapqueen.com/bramble-berry-news/sunday-night-spotlight-sodium-lactate/
Hope that helps! If you have any other questions let me know. 🙂
-Kelsey with Bramble Berry
Hi – I recently saw a picture of “stick blend hot process” soap on Instagram where the person pointed out no crockpot or cooking was needed. Have you here of this technique? Any idea where I could find more information about it?
Thanks for you help – as ALWAYS!
Terry
Hi Terry!
We’ve heard a little bit about it! From what I understand, all the ingredients are hot and then you stick blend for quite awhile to force the soap through gel phase as you mix.
We haven’t tested the technique out, but you may be able to find out more on our Teach Soap Forum! Some of the soapers there may have given the technique a try. 🙂
Teachsoap.com/forum
-Kelsey with Bramble Berry
Hello,
I am a beginner, I mostly use Hot process because I use Essential oils, and I think they wouldn’t hold in CP. CP seems really cool though and has its advantages, I have checked a lot of you CP tutorials, they are a great source of information, I will try CP very soon. But if you could add more HP tutorial, I will be watching them for sure.
By the way, I would like to find a way to do M&P soap without Propylene glycol and sorbitol, any idea about replacement ingredients?
Thank you
Hi Ginny!
Thanks so much for your suggestion! We have been trying out more hot process recipes, so that’s something we’re planning to do more on the blog. We also have a hot process video for SoapQueen.tv that is coming out in the future. 🙂
Some essential oils, like citrus essential oils, tend to fade in cold and hot process. There are several tips and tricks to help though! Learn more in the How to Prevent Scent Fading in Soap post: http://www.soapqueen.com/bath-and-body-tutorials/tips-and-tricks/how-to-prevent-scent-fading-in-soap/
We have tried to make transparent soap several times, and haven’t found a formula we love yet. Also, the recipes we have tried contain sorbitol. However, you can read more about ingredients and how to make transparent soap in this book: https://www.brambleberry.com/Making-Transparent-Soap-1-Book-P3732.aspx
-Kelsey with Bramble Berry
Hi there! I’m wondering if you’ve ever tried using one of those crockpot liners when making Hot Process soap in the crockpot? I only have one crockpot, and I thought maybe I could use one of those liners when making HP soap to prevent the scents and colors soaking in.
Hi Carly!
We haven’t used one of those liners, so I’m not entirely sure how it would work! You’ll want to make sure the liner is a sturdy material like silicone, otherwise it may not make it through the soapmaking process.
With soapmaking, we recommend having one Crock Pot for soaping and one for food. My worry is that with a liner, some soap may still find its way to the pot. The fragrance oil or lye can get into the tiny scratches in the Crock Pot, even with the best washing. Having two different Crock Pots ensures you don’t ingest any soaping ingredients. 🙂
-Kelsey with Bramble Berry
I am a beginner and wanted to try my hand at hot process soaping after making a few batches of cold process. Check a local thrift store, Goodwill or Salvation Army for a used Crock Pot. I just got one from my local Goodwill for $9. Good luck!
That’s actually where I got my soaping Crock-Pot too! Great tip Amber, thanks for sharing. 🙂
-Kelsey with Bramble Berry
I make hot process and my own MP soap base. So if you cook a little longer pass the “mashed potato” phase to the point were it looks kind of like “Vaseline” or “applesauce” you can add in glycerin and alcohol (I use grain alcohol). Let it cook a little longer until it looks like hot MP, them pour in to a mold.
That is an awesome tip Christi, thank you for sharing! That way the soap stays nice and fluid. 🙂
-Kelsey with Bramble Berry
Liquid glycerin: https://www.brambleberry.com/Glycerin-Liquid-P5965.aspx
Hi. I don’t have any sodium lactate. Can I leave that out? How can I achieve smoother HP soap bar without sodium lactate? I am using a silicone loaf mould.
Hi Ira!
I’m not entirely sure! If you’re making cold process soap and don’t have sodium lactate, you can use a salt water solution to help harden it up. To make the solution, mix 1 teaspoon of regular table salt into 1 ounce (by weight) of warm distilled water. Stir until the salt is fully dissolved. We recommend 1 teaspoon of salt in 1 ounce of water per pound of soap. Make sure to discount the salt water solution from your liquid amount.
However, I’m not sure if that will help make hot process soap smoother! I would recommend making a small test batch with the salt water solution and seeing if it works for you. 🙂
-Kelsey with Bramble Berry
Sunday Night Spotlight: Sodium Lactate: http://www.soapqueen.com/bramble-berry-news/sunday-night-spotlight-sodium-lactate/
I just wanted to chime in on this one, if no one minds. I make all kinds of soaps, finding that each process has its own benefits…so I more or less choose my method based on what I am trying to accomplish. But, as far as an effective substitute for sodium lactate to increase hardness, smoothness, etc., you can use yogurt (I prefer the ‘whole-fat’ types because of its skin-loving benefits of the fat itself – greek yogurt works amazingly well). I use about 0.5 oz. ppo. When my soap reaches the ‘mashed potato’ stage, I turn my crock pot off and remove my crock from the unit to prevent it from continuing to heat up any more (from any residual heat from the elements). I allow it to sit for about 5 minutes or so to cool slightly, then I add my yogurt and any superfats, blending well to fully incorporate. Waiting for it to cool down some helps prevent any scorching of the sugars from the milk product. I allow my soap to rest about 5-10 minutes longer to reduce temperature further (to a point below the flashpoint of my fragrance or essential oils) and then mold it all up!
PS. This ‘technique’ is a great way to add other milk-type additives to your soap without having the ‘browning’ that comes from adding it at the beginning of the cooking process.
I hope this helps.
-Heather
That’s a great tip Heather, thank you so much for sharing! That will be really helpful for people looking for sodium lactate alternatives. 🙂
-Kelsey with Bramble Berry
Does HP soap need to be covered after its been poured in the mould?
Hi Veronica!
It does not need to be covered! Soap is covered to keep it warm and help it go through gel phase. Gel phase is when the soap gets really hot and gelatinous. It gives the soap a slightly translucent look, and helps the colors pop. Read more about that here: http://www.soapqueen.com/bath-and-body-tutorials/tips-and-tricks/gel-phase/
In hot process soap, cooking the soap is actually making it go through gel phase. You know the soap is done when it gets a gelatinous texture and shows a 10 on pH strips. That means the soap doesn’t need any extra insulation when it’s in the mold because it’s already gone through gel phase. 🙂
-Kelsey with Bramble Berry
Could you please direct me in buying a crock pot that will take 54 ozs. of oils for Hot Processed Soap. I am a cold process maker and need soaps faster sometime. I have only made a 21 ozs recipe as I have a small crock pot. My cold process molds are for 54 ozs.
Please recommend a commercial grade crock pot that you use.
Great recipe. Thank You.
Always buy my fragrance oils from you, they are fantastic! Wish you had a place on the East Coast for faster shipping!
Hi Frances!
So glad you like our fragrance oils! For this recipe and a 50 ounce St. Patrick’s Day hot process recipe we made recently, we used a 6 quart Crock Pot. You want the mixture to only fill up half of the pot in case it poofs up during cooking. With a 6 quart Crock Pot, we had plenty of room. 🙂
-Kelsey with Bramble Berry
Luck of the Irish Hot Process Soap: http://www.soapqueen.com/bath-and-body-tutorials/cold-process-soap/luck-irish-hot-proces/
I made this for my first attempt at hot process. I was amazed at how easy it was. I scented it with your Arabian Spice. Everyone loves it!
Hi Fran!
That’s so awesome, I’m so glad you like the recipe! Arabian Spice Fragrance Oil is a nice addition – spicy and sweet. 🙂
Arabian Spice Fragrance Oil: https://www.brambleberry.com/Arabian-Spice-Fragrance-Oil-P3926.aspx
-Kelsey with Bramble Berry
I work almost exclusively with hot process (in a tiny crockpot, I only make about 1/2 lb batches at a time) and would love to see more HP recipes. I’d say I’m still in my beginners’ experimental phase of seeing how it all works, but feeling more confident about branching into other parts of soapmaking (like making my bars pretty and adding fragrance! lol). The visual texture of HP reminds me of granite-like stone that you just don’t (can’t?) get with CP and I love it.
Quesitons: When it’s time to go in the mold, I usually have cavity molds like silicone muffin pans – but the poured side is almost always a mess. A little like the lumpiness at the top of the Crock Pot Camo bar, but messier than that. Once the cook is done, I swear I work fast, but it doesn’t seem fast enough to get a smooth top! Am I waiting too long to mold it? Or does the mini-batch mean it’s just always going to cool quicker, resulting in that jagged top layer? Are there ways I can stylize my bars to make this a feature, not a bug?
Hi Katenik!
Thanks so much for your suggestion! Also, so glad you like the recipe. 🙂
Because hot process soap sets up fast, it can get a lumpy top as you’re working with it. I would recommend having a piece of plastic wrap handy. Once that soap is in the mold, lay the plastic wrap over the soap use your hand (careful, it’s hot!) to smooth it out. You can also use a spatula to help even out that top a little. 🙂
-Kelsey with Bramble Berry
For anyone struggling with the lumpy texture of Hot Process soap, look for “Fluid Hot Process Soap” on YouTube. It’s as easy to pour as CP soap, and very workable!
Kel in PA
Love the recipe ! I am new to soaping , and am starting with CP recipes .. Can this recipe be converted yo CP ? If so how
Thanks
Hi Suzi!
Absolutely! I would recommend stick blending this recipe to thin trace. Then, split it into three separate containers. Color one with the dark red Brazilian clay and one with the yellow silt clay. Stir well, add your fragrance and stir again.
To get the swirl, you can do an in-the-pot swirl! Pour one color at 12 o’clock and 6 o’clock, then one at 3 o’clock and 9 o’clock. Swirl once with a chopstick and pour into the bowl. You can see that technique demonstrated in the In The Pot Swirl Cold Process video on Soap Queen TV: http://www.soapqueen.com/bath-and-body-tutorials/cold-process-soap/pot-swirl-cold-process-soap-queen-tv/
-Kelsey with Bramble Berry
I’ve wanted to try hot process but didn’t want to mess with the oven. This looks like a fun one to try. What setting should the crock pot be on? Low, high? Do you still wait the 6 weeks for the soap to cure, or because of the hot process is the wait time less? I also had the same thought about the temp at which to add the fragrance. I bought a dedicated crock pot to make liquid soap, I’ll have to give this a try.
Hi Michael!
So glad you like the recipe!
We cooked this soap on the low setting. Also, because this process speeds up saponification, the soap is technically ready to use once it’s cooled and cut. However, we like to wait 4 weeks. That helps any excess water evaporate and makes those bars last longer.
We recommend adding the fragrance and color once the soap is done cooking and is beginning to cool.
Have fun trying this process out! It’s a lot of fun to make. 🙂
-Kelsey with Bramble Berry
I do most of my soaps HP but use my oven….didn’t have much luck with the crock pot…going to try doing the color mix in the pot now I have your tutorial.
Hi Margaret!
That’s awesome! Let us know how it turns out. 🙂
-Kelsey with Bramble Berry
I’d love more hot process lessons! Really enjoyed this one. I’ve never thought of swirling colors in the pot this way. You’re pictures are most helpful. How about a recipe without palm oil. Thanks so much for all the inspiration.
Hi Sheila!
So glad you like the recipe Sheila! Also, thanks so much for the suggestion. We will definitely look into palm-free hot process recipes. We also have some awesome palm-free cold process recipes you may like. They can definitely be used in the hot process method. 🙂
Palm Free In the Pot Swirl: http://www.soapqueen.com/bath-and-body-tutorials/cold-process-soap/a-palm-free-in-the-pot-swirl/
Palm Free Vertical Twist Tutorial: http://www.soapqueen.com/bath-and-body-tutorials/cold-process-soap/a-palm-free-in-the-pot-swirl/
Easy Cold Process Soap Rocks: http://www.soapqueen.com/bath-and-body-tutorials/cold-process-soap/easy-cold-process-soap-rocks-palm-free/
-Kelsey with Bramble Berry
Does the soap need to cool a bit before adding the fragrance? I haven’t done much HP, but find it difficult to work if it gets much below 160 degrees. Will an EO or FO burn off if the temperature of the soap is lower than the soap’s temperature?
Hi Jennifer!
We added the fragrance when the soap was still warm and it still smells nice and strong! We’ve added low flashpoint fragrances to our hot process recipes with great results. Some hot process soapers say that scent can fade with low flashpoint oils. To be on the safe side, you may want to use fragrance oils with a high flashpoint. 🙂
-Kelsey with Bramble Berry