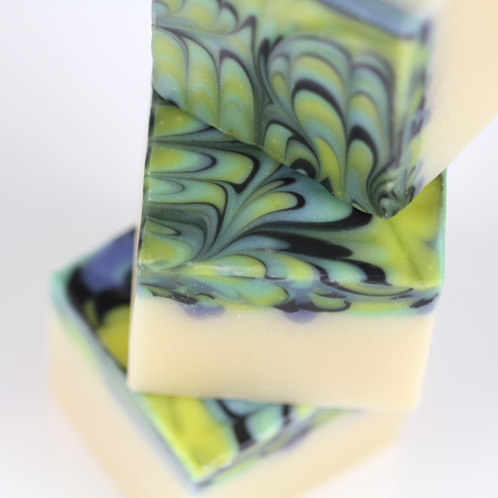
I’m no stranger to making multiple batches of soap and perfecting recipes and techniques. It’s just part of soaping! However, the Peacock Swirl technique set a new record for me — we tried this recipe at least 6 times, resulting in more than 40 pounds of soap! Some of our batches didn’t quite make it, some of them allowed us to experiment with exciting new color palettes and some of them, after many attempts and several hours, actually turned out quite beautifully. This was all in the name of perfecting these awesome swirl tools, which makes creating the beautiful technique a breeze.
What You’ll Need:
20 oz. Coconut Oil
28 oz. Olive Oil
24 oz. Palm Oil
8 oz. Rice Bran Oil
11.2 Sodium Hydroxide
26.4 oz. distilled water
18-Bar Unfinished Birchwood Mold with Silicone Liner
Fragrance Blend of:
3.2 oz. Kumquat and 2 oz. Ginger Ale
Click here to add everything you need for this project to your Bramble Berry shopping cart!
Don’t want to make the oil blend from scratch? Consider purchasing our Swirl Quick Mix for this recipe. You’ll save time weighing and blending the oils while still getting the same great swirly result!
If you’ve never made Cold Process soap before, stop here! I highly recommend checking out our FREE four part SoapQueen.tv series on Cold Process Soapmaking, especially the episode on lye safety. And if you’d rather do some reading, Bramble Berry carries a wide range of books on the topic, including my newest book, Soap Crafting. You can also checkout the digital downloads for that instant gratification factor.
SAFETY FIRST: Suit up for safe handling practices! That means goggles, gloves and long sleeves. Make sure kids, pets, and other distractions and tripping hazards are out of the house or don’t have access to your soaping space. Always soap in a well-ventilated area.
COLOR PREP: Disperse 1 teaspoon of each pigment into 1 tablespoon of liquid oil (we like Sweet Almond or Sunflower). Prepping your colors in the beginning will allow you to work quickly and give you more time to work with your soap. Use the mini mixer to get all those clumps worked out smoothly.
FRAGRANCE PREP: In a glass container, combine the Kumquat and Ginger Ale Fragrance Oils. Give the mixture a good stir, and then set it aside.
TOOLS: This is the debut tutorial for two brand new soaping tools: the Comb Swirl Tool and the Easy Swirl Tool. You’ll use them in steps seven and eight to create the beautiful Peacock Swirl in just two motions. If you decide to order the new tools, please note that they will arrive fully assembled and ready for use in our 18 Bar Birchwood Mold. If you’d like to use them in a smaller mold, or rearrange the screws to create a different pattern, you can easily disassemble the whole tool and configure it to your specifications. Each tool is lovingly handcrafted in our Bellingham, Wash. warehouse, and just like all handmade items variations between products are normal.
ONE: Slowly and carefully add the lye to the water, and stir until clear. Set aside to cool. If you’d like a harder bar of soap that lasts longer in the shower, you can add Sodium Lactate to the cooled lye water. Use 1 teaspoon of Sodium Lactate per pound of oils in the recipe.
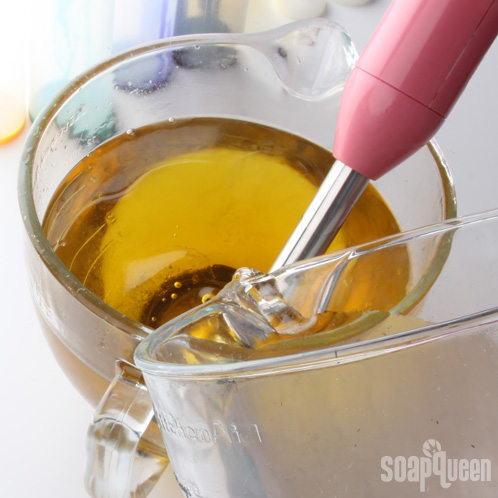
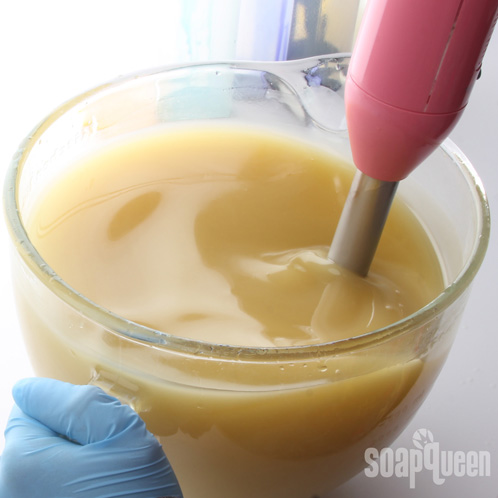
TWO: Melt and combine the Coconut, Olive, Palm and Rice Bran oils in a large glass container. Once the lye water and the oils have cooled to 130 degrees or below (and are ideally within 10 degrees of each other), add the lye water to the oils and stick blend until thin trace.
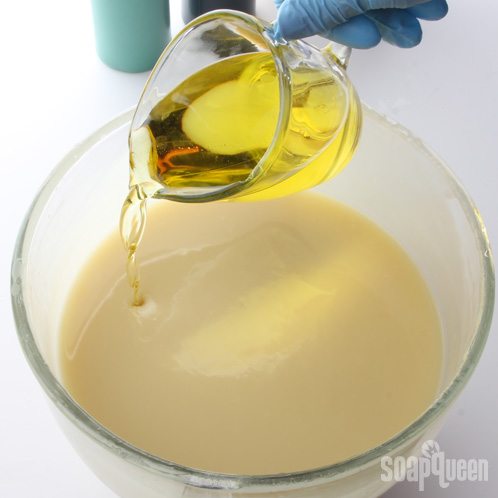
THREE: Once the batter has reached a thin trace, use a spatula or whisk to incorporate the fragrance blend.
FOUR: Fill four condiment bottles roughly two-thirds of the way full. Mix one colorant per bottle in the following measurements: 1 teaspoon disperse Fizzy Lemonade with 1/2 teaspoon Titanium Dioxide; 1 teaspsoon dispersed Aqua Peal with 1 teaspoon Titanium Dioxide; 1 teaspoon Ultramarine Blue with 1/2 teaspoon Titanium Dioxide; and 1 teaspoon Black Oxide. Securely fasten the cap, plug the opening with your finger and shake vigorously, releasing the tip away from your face.
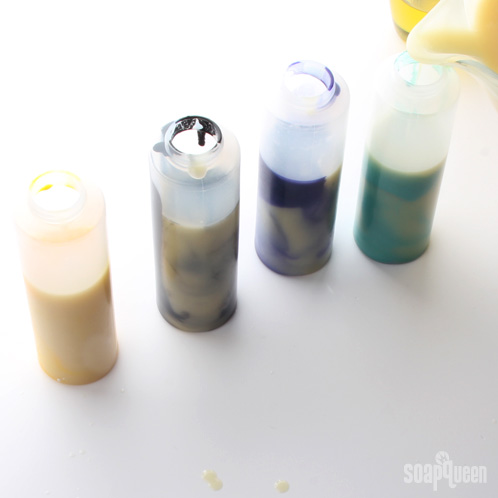
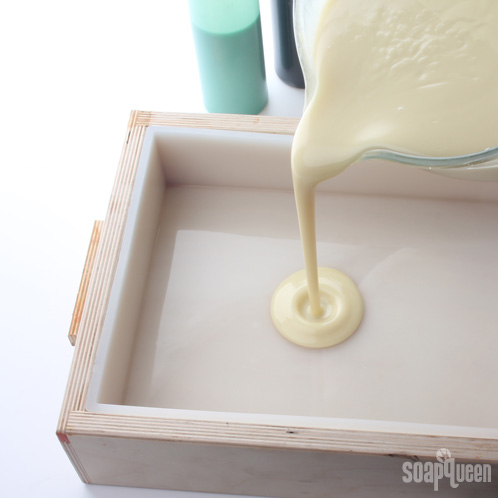
FIVE: Pour the remaining batter into the mold. Tamp the mold several times on the table to ensure even coverage and disperse bubbles.
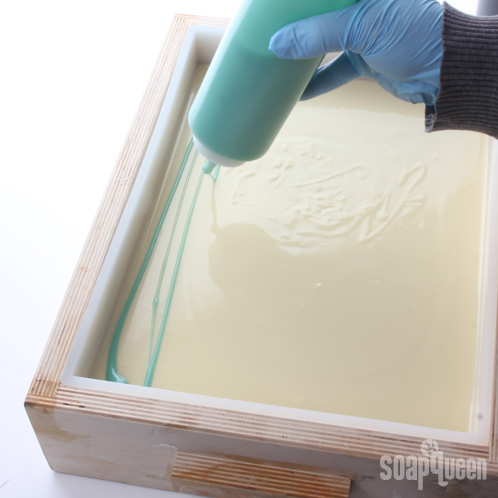
SIX: Now take your squirt bottles and pour thin, horizontal lines across the length of the mold until you reach the bottom. Repeat this process with the other colors, methodically layering one on top of the other in the same order and pattern. Do this until you’ve emptied all the colored squirt bottles.
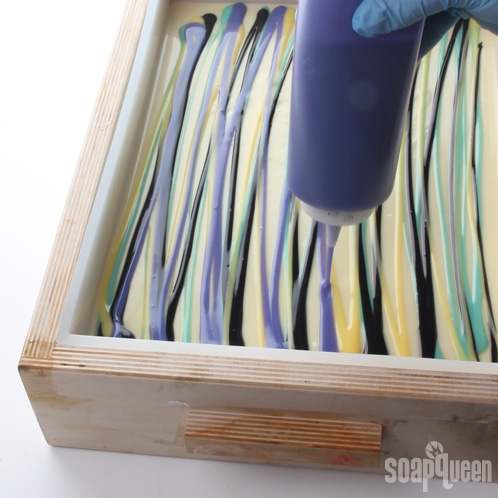
SEVEN: Once you’ve layered all the colors, insert the Comb Swirl Tool at the top of the soap and slowly drag it downward. When you reach the end, pull it straight up and out of the soap so as not to ruin the pattern.
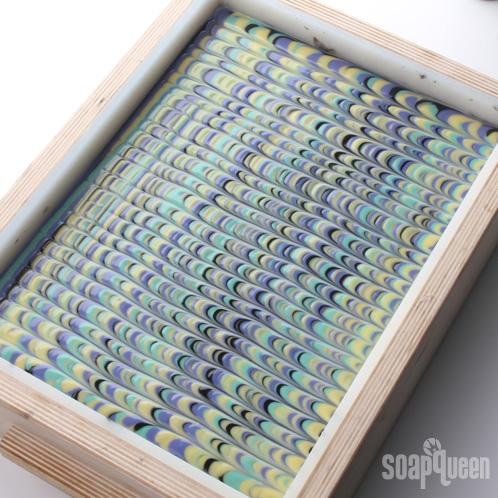
EIGHT: Now insert the Easy Swirl Tool into the soap. Be sure to drag it in the same direction you drug the Comb Swirl Tool. Gently move the tool from side to side, working your way down to the end of the mold. Take care to move the tool in a smooth, fluid motion. Ideally you should end up with rounded S curves that run down the length of the mold.
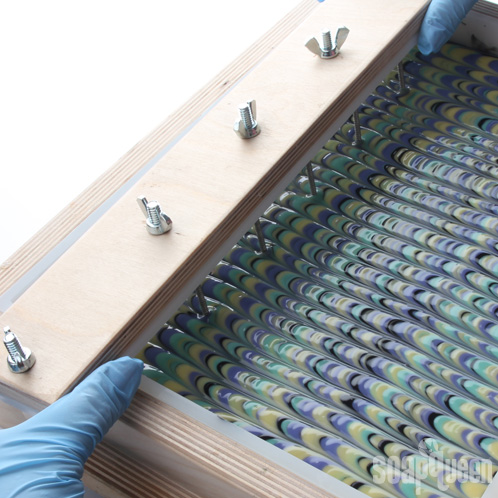
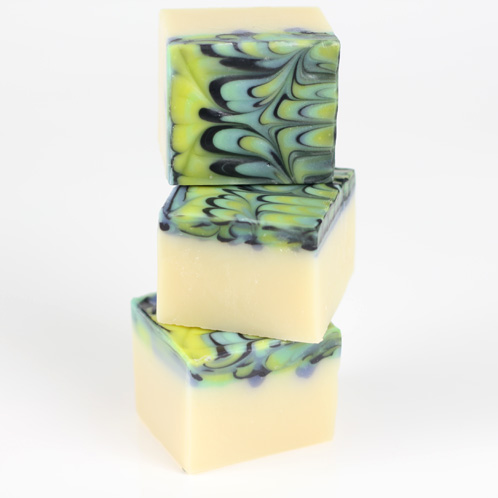
Spray the entire top with 91 or 99% Isopropyl Alcohol to reduce soda ash. Cover and insulate for 24 hours and unmold after 3-4 days, and allow to cure for 4-6 weeks. Enjoy your beautifully swirled Peacock Soap!

I will be attempting this one as soon as my 18 bar mold arrives! Couple of questions. How much do the individual bars of soap end up weighing once de-molded and what are the dimensions? Just curious if the shrink wrap will be able to fit it. If using the quick mix swirl recipe, how much oil should I use? Thanks for the great guide!
Jenner
Hi Jenner!
The dimensions and weight of the finished bars depend on how you cut them! We gave away most of these bars to local organizations, otherwise I would measure them for you. Typically, our bars weigh around 4-5 ounces.
The great news is we can send you one of our Shrink Wrap Soap Bands for you to try on your soap! That way you know if they will fit before buying a pack. To request that sample, email [email protected] within one business hour of placing your order. They will get that request added for you. 🙂
Shrink Wrap Soap Bands: https://www.brambleberry.com/Shrink-Wrap-Soap-Bands-200-wraps-P4975.aspx
To find out how much Swirl Recipe Quick Mix to use, you can use the Lye Calculator on the product page! The 18 Bar Unfinished Birchwood Mold holds about 6 pounds, or 96 ounces, of soap. To find out how many oils to use is a bit of guesswork. I started out with 75 ounces at a 5% superfat. That gave me 110 ounces, so I entered 65 ounces in the “Resize Batch” box. That gave me 95.5 ounces of soap total. 🙂
Swirl Recipe Quick Mix: https://www.brambleberry.com/Swirl-Recipe-Quick-Mix-P5526.aspx
18 Bar Unfinished Birchwood Mold: https://www.brambleberry.com/18-Bar-Unfinished-Birchwood-Mold-P5168.aspx
-Kelsey with Bramble Berry
Do you allow the soap comb tool to touch the bottom of the batch or do you have to keep it suspended to where the multi-colored soap is as you drag it through? Thanks!
Hi Lisa!
For this recipe, we only inserted the tool about 1/4 inch into the soap. That way, the swirl pattern was concentrated on top of the soap. 🙂
-Kelsey with Bramble Berry
I made this soap last night in my brand new 18 bar mold : ) and it came out great,I pretty much followed all directions except I included avocado oil and a bit of castor oil. I loved the smell of the kumquat f.o and ginger ale f.o mixed together.
That is so great to hear! I am very happy about that 🙂 We’d love to see photos on the Facebook page!
Bramble Berry Facebook: https://www.facebook.com/BrambleBerry
Hi,
First thank you for your wonderful site. It’s so informative. I’ve spend hours here.
I’m going to give this a try and was wondering if it would be okay to sub shea butter or avocado oil in place of the Rice Bran Oil? I have these on hand and ran it through the lye calculator.
Thanks a bunch!
Lisa
Hi Lisa!
I’m so glad you’re enjoying the blog! If you wanted to switch out the Rice Bran Oil, you could use either Shea Butter or Avocado Oil. I would recommend using the Avocado Oil because it has more similar properties to Rice Bran Oil. Avocado Oil can be used at 20% or less in recipes, as stated in this blog post 🙂
Guide to Common Soap Making Oils: http://www.soapqueen.com/bath-and-body-tutorials/tips-and-tricks/free-beginners-guide-to-soapmaking-common-soapmaking-oils/
I definitely recommend running the recipe through the lye calculator (like you’ve already done) to make sure you have the correct amount of water and oil.
If you get photos of your finished soap, we would love to see them on our Facebook page!
https://www.facebook.com/BrambleBerry
-Amanda with Bramble Berry
Thanks Amanda for pointing out the Guide to Common Soap Making Oils. I did exchange the Rice Bran Oil with the Avocado Oil. Ran it through the calculator and it came out beautifully!
I did however make a big booboo. It was finished and looked beautiful! I made the mistake of trying to cover it with saran wrap :((((( The saran sucked to top and when I pulled it off it ran together! Live and learn! This is the third batch of soap I’ve made and I learn something every time! hahaha!
I have a question about removing it from the mold and cutting. How long do you wait? I thought you cover it and wait 24 hrs. then unmold and cut. I noticed with your Sunshine soap you said wait a minimum of three day before you unmold. I’m confused. Thank you for all this great info. Who knew I would love this so much?!
Hi Lisa!
I’m glad the substitution worked well for you. Oh no! I did that with my first melt and pour project I did…you definitely learn something with each and every batch! I hope you were able to save it, or make it into something you are happy with 🙂
I’m so glad you’ve been enjoying soaping, it’s addicting isn’t it? 😉 We recommend covering and insulating for 24 hours, then waiting another 3-4 days to unmold your soap. That way it’s plenty hard and easy to remove!
If you get photos of your projects, we would love to see photos on our Facebook page!
https://www.facebook.com/BrambleBerry
-Amanda with Bramble Berry
I was wondering if there is a video using the swirl tools. I bought but not really sure how I am supposed to be using. I cant find directions online anywhere either unless I missed it. A clear demo would be great.
Hi Becky!
If you are looking for a video showing how to use the swirl tools, you may find this video helpful! They are very simply to use, simply drag them through your mold, adding movement if you’d like to achieve different looks.
Make Perfect Peacock Swirl Cold Process Soap:
http://www.soapqueen.com/bath-and-body-tutorials/cold-process-soap/make-prefect-peacock-swirl-cold-process-soap/
-Amanda with Bramble Berry
Oh one more thing Amanda. How does a premixed bags of oils affect the recipe,
or any other recipe for that matter. I mean the lye vs oils aspect!
Thanks!
Valerie
Hi Valerie!
On the product information page for each mix, and you can enter the amount of oils you are working with, and it will calculate the correct amount of water and lye for you :). This way you always end up using the right proportions.
Each mix is a blend of specific oils, blended together to achieve different results. Our Lots of Lather Quick Mix for example, is a blend of oils that result in bar of soap that gives lots of bubbles! The Swirl Quick Mix is perfect for recipes with intricate patterns or designed because it does not trace quickly.
Swirl Recipe Quick Mix:
https://www.brambleberry.com/Swirl-Recipe-Quick-Mix-P5526.aspx
Lots of Lather Quick Mix: https://www.brambleberry.com/Lots-of-Lather-Quick-Mix-P5524.aspx
I hope this answers your question 🙂
-Amanda with Bramble Berry
Hi there,
I’m wondering what size bowls I’ll need to have on hand for this recipe, as I’m getting equipped for the first time with all my tools to start cold processing!…I’m a little nervous, I must admit. I’m afraid to ruin a batch and basicly though out a couple hundred dollars! I’m not yet familiar with the yield that the melted oils and lye water will give me. How do I calculate it?
In addition, I’ve been making M & P soaps for about 2 months now, and watching video after video on cold processing for about 2 weeks now. I feel ready to jump in and try this recipe!…am I crazy, or can I do it if I have an extra set of hands to help me?
Regards,
Valerie
Hi Valerie!
I’m so happy to hear you are ready to give cold process soaping a try! It can be a little scary at first, much like driving a car, but it only gets easier! I would recommend having a two large glass containers, one for your water and lye, and the other for your oils. The 2 and 5 Quart Glass Mixing Bowls work great for this!
2 Quart Glass Mixing Bowl:
https://www.brambleberry.com/2-Quart-Glass-Mixing-Bowl-P5789.aspx
5 Quart Glass Mixing Bowl: https://www.brambleberry.com/5-Quart-Glass-Mixing-Bowl-with-Lid-P5606.aspx
Then of course this recipe does require squeeze bottles, so you will want those ready as well!
Squeeze Bottles:
https://www.brambleberry.com/Squeeze-Bottle-P5800.aspx
You’re definitely not crazy, but when doing cold process for the first times, having an extra hand is extremely helpful! This is a more advanced recipe, but if you’d like to go for it, I say go for it!
You may find these recipes a little bit easier to start, they require our quick mixes which are extremely handy because that way you don’t need to measure out your oils. One less step to worry about!
Sunset Ombre Soap Tutorial: http://www.soapqueen.com/bath-and-body-tutorials/cold-process-soap/business-in-a-box-sunset-ombre-soap/
Waves of the Sea Cold Process Tutorial:
http://www.soapqueen.com/bath-and-body-tutorials/cold-process-soap/waves-of-the-sea-cold-process-tutorial/
I hope this helps Valerie! If you get photos of your project, I would love to see it on our Facebook page!
-Amanda with Bramble Berry
Thank you so much for your time Amanda.
I’ll definitely post some pics! =)
Hi there! Could this effect be achieved with rebatch soap? I haven’t tried rebatch or cold process yet and I was going to try a rebatch before I get into cold process, but this soap is just SO pretty. So far I’ve only done melt and pour so I’m a bit intimidated.
Hi Kim!
So glad you liked this post, and want to give this design a try! Unfortunately this design can not be made with rebatch soap because rebatch tends to be thick. For a design like this, you need a fairly thin trace to be able to squirt the colors out of the bottles, and slide the swirl tool through the soap.
If you are fairly new to cold process and interested in making rebatch soap, here are a few tutorials you may find helpful.
Rebatch Soap Kit Tutorial:
http://www.soapqueen.com/bath-and-body-tutorials/cold-process-soap/rebatch-soap-kit/
Soap Queen Tv Presents: How to Make Rebatch Soap: http://www.soapqueen.com/bath-and-body-tutorials/cold-process-soap/soap-queen-tv-presents-how-to-make-rebatch-soap-2/
Rebatch Double Boiler Method:http://www.soapqueen.com/bath-and-body-tutorials/rebatch-double-boiler-method-2/
If you are wanting to try cold process, here is a cold process beginners guide, as well as a good tutorial to start with!
Beginners Guide to Cold Process:
http://www.soapqueen.com/bath-and-body-tutorials/cold-process-soap/free-beginners-guide-to-soapmaking-cold-process/
http://www.soapqueen.com/bath-and-body-tutorials/cold-process-soap/free-beginners-guide-to-soapmaking-cold-process/
Sunset Ombre Soap Tutorial: http://www.soapqueen.com/bath-and-body-tutorials/cold-process-soap/business-in-a-box-sunset-ombre-soap/
I hope this helps! We would love to see the soap you make on our Facebook page!
-Amanda with Bramble Berry
Finally got a chance to use my swirl tools today! I have been swirling soap with a single stainless rod for years now, so this comb tool is really, really cool! I followed your directions exactly and the only thing that I goofed up was while I was dragging the comb I lowered it a bit too far for just a split second and it smudged a portion of my soap, but overall I am happy for the first attempt.
I have a couple of pics….
Hi Judi!
We are just so happy you have gotten a chance to play around with the new swirling tools — they are our favorites! We’d love for you to share those photos with us on Bramble Berry’s Facebook page. =)
https://www.facebook.com/BrambleBerry
Happy Soaping!
-Becky with Bramble Berry
I noticed in this recipe you used Black Oxide. Other recipes use activated charcoal.
Why one or the other?
Is one a truer black?
Do you need less amounts of one or the other to get a truer black?
Thank you for the clarification.
Hi Sly!
It is a personal choice to use either the Activated Charcoal or the Black Oxide for this type of design. If you want your recipe to be more natural with a lighter black, I’d definitely go with the Activated Charcoal. If you want the true darker black that you see above, I’d go with the Black Oxide. I hope that this helps!
Black Oxide Pigment: https://www.brambleberry.com/Black-Oxide-Pigment-P4044.aspx
Activated Charcoal: https://www.brambleberry.com/Activated-Charcoal-P4956.aspx
-Becky with Bramble Berry
P.S. If you click on the links above, you can actually see both the colorants in a cold process batch of soap!
Thanks for the clarification Becky!
I love when you have a photo of a soap sample in some of your colorants, FO’s & EO’s. They are right when they say a picture is worth a thousand words!
Hi Sly!
We are so happy to hear that the pictures have been helping. Have you decided which colorant you are going to go with yet? We’d love to see photos of your final peacock swirl if you have a chance to share them with us! =)
-Becky with Bramble Berry
https://www.facebook.com/BrambleBerry
Thanks for the great tutorial!! I had great fun soaping today!!
Good morning, Lindsay!
That is such a stunning soap, you did a great job! Thank you so much for sharing it with us. What did you end up scenting it with? 🙂
-Becky with Bramble Berry
Looks awesome! What is the size of your condiment bottles? Do you offer them for sale?
Hi Veronika!
The condiment bottles you see in this tutorial hold about 12 ounces of soap. We do not sell them at this time, but you can find them as your local restaurant supply store! I hope this helps. 🙂
-Becky with Bramble Berry
Hi,
fyi – black oxide missing from list of ingredients.
Sorry had to mention……
But my real message is that I am buying this tools set ASAP! This soap design is marvelous! Can’t wait to try it out!
Good catch, Candy. It’s been added to the ingredient list and the kit button 🙂 If you try the Peacock Swirl using the tools, we’d love to hear how it turns out!
-Kirsten with Bramble Berry
So how do I get the soap out of the squeeze bottle? More than half thickened too much too poor. Any hints would be appreciated.
Hi Kim!
If your soap got a bit thick in your bottle, the easiest way to clean it out would be to wash it in hot, soapy water as soon as possible. Using a grease-cutting dish soap like Dawn will also help. =)
-Becky with Bramble Berry
I cannot WAIT to try this! I ordered my kit last night and started planning all the fragrances and color combinations I want to use. I have been largely unsuccessful doing the peacock swirl on my own, which makes this even more exciting!
Hi Deirdre!
There are so many fun combos that you can do for the Peacock Swirl and we’d love to hear how yours turned out. If you were able to get any photos, you can share them with us on Bramble Berry’s Facebook page. =)
-Becky with Bramble Berry
https://www.facebook.com/BrambleBerry
Beautiful! I think that I’m going to try something like this a.s.a.p. 🙂
Hi Aneta!
We can’t wait for you to try this recipe out. If you get any fun photos, we’d love for you to share them with us on Bramble Berry’s Facebook page. =)
Happy Soaping!
-Becky with Bramble Berry
https://www.facebook.com/BrambleBerry
Wow! That looks beautiful.
Hi Marleny!
Thanks for stopping by and checking out Thursday’s Tutorial. If you get a chance to make it, we’d love to hear how it turned out for you. =)
Happy Soaping!
-Becky with Bramble Berry
Wow, that looks so beautiful! I’m only a beginner soapmaker but this gives me something to aspire to 🙂
Good morning, Kelly!
You can do it! If you ever have any questions about soapcrafting, don’t hesitate to ask — we are here to help you out! =) And, if you get any fun photos of your products, we’d love for you to share them with us on Bramble Berry’s Facebook page.
Happy Soaping!
-Becky with Bramble Berry
https://www.facebook.com/BrambleBerry
Oh man! I’m hooked! Have to try this again this weekend! Say, can you give me some hints on how to keep the top of the soap bright and clear like you show in the pics? No matter what recipe I use, the top of my flat mold soaps tend to get a grainy ashy or faded look to the colors. Your help is always greatly appreciated!
@ Susan, if you spray the tops of your soaps with isopropyl alcohol it will cut down on the appearance of soda ash (that faded grayish/white look) Just spray on before covering and insulating soap.
Thanks Lindsey, I’ve tried that but still am getting a faded look. Is that normal?
Hi Susan!
If you are still getting soda ash, you can switch up your recipe a bit by decreasing the water amount by (at max) 10%, working at a working at slightly lower superfat, or including .5% melted beeswax at thin trace. =)
-Becky with Bramble Berry
Hi Susan!
From your description, it looks like your soaps are getting what we call soda ash, which is completely harmless, but can obscure the fun designs that you are creating.It is a whitish-grey substance that can appear on parts of the soap exposed to air, and usually appears within the first 24 hours.
The best way to prevent soda ash in your soaps is to spritz the tops of your soaps liberally with 991% Isopropyl Alcohol before you “put it to bed”. If it still persists, you can actually wash it right off with a bit of cold tap water and an old nylon.
I hope that this helps! =)
-Becky with Bramble Berry